
You want to hang a mirror on your wall, but the thought of drilling holes or messing with complicated tools makes you hesitate. What if there was an easy, damage-free way to get your mirror perfectly in place?
Imagine transforming your room with a simple step that adds light and style instantly. In this guide, you’ll discover practical, foolproof methods to stick a mirror to your wall securely—no stress, no mess. Keep reading, and you’ll learn exactly how to make your walls shine with your favorite mirror, hassle-free.

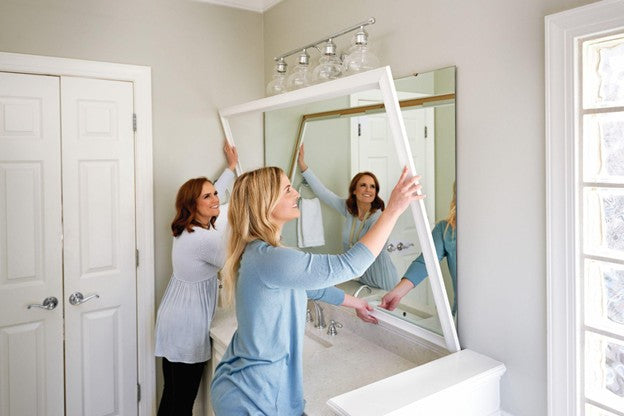
Credit: hellohomegirl.com
Choose The Right Mirror
Choosing the right mirror is crucial before sticking it to a wall. The mirror must fit your space and style perfectly. Consider size, weight, and frame to ensure it looks good and stays secure. A well-chosen mirror enhances your room’s light and decor.
Select Mirror Size And Weight
Measure the wall space carefully. Choose a mirror size that balances well with the room. Large mirrors brighten rooms and create a sense of space. Small mirrors work best in tight spots or as accents. Consider the weight; heavy mirrors need stronger wall anchors or adhesive. Lightweight mirrors are easier to hang and safer for most walls.
Pick Frame Style
Frame style affects the mirror’s look and how it fits your decor. Simple frames suit modern or minimalist rooms. Ornate frames add charm to traditional spaces. Thin frames keep the focus on reflection. Thick frames create a bold statement. Materials matter too—wood, metal, or plastic each bring a unique feel.
Prepare The Wall Surface
Clean the wall thoroughly to remove dust, grease, and dirt. Ensure the surface is dry and smooth for better mirror adhesion. Use sandpaper lightly on rough spots to create an even base.
Sticking a mirror to a wall may seem straightforward, but the process begins well before the actual mounting. Preparing the wall surface is crucial to ensure the mirror adheres properly and stays secure over time. A well-prepared wall minimizes the risk of the mirror falling or becoming misaligned. Let’s dive into the essential steps to prepare your wall for a flawless mirror installation.Clean The Wall
Before applying any adhesive, it’s important to have a clean wall. Dust, grease, or dirt can hinder the adhesive’s effectiveness, leading to a wobbly or unstuck mirror. Use a damp cloth with mild soap to wipe down the wall, removing any debris. Allow the wall to dry completely. A damp surface can weaken adhesion, so ensure it’s moisture-free. Do you remember the last time you tried sticking something to a dirty surface? It probably didn’t hold for long. Cleaning might seem basic, but it makes all the difference.Check For Flatness
A flat wall ensures better adhesion and prevents awkward angles. Run your hand across the wall to feel for any bumps or uneven spots. You can also use a straightedge or a level to check for flatness. If you find imperfections, consider sanding them down or filling them with a wall filler. A smooth surface is less likely to cause stress on the mirror, reducing the chance of cracks or breaks. Have you ever tried placing a mirror on a bumpy wall? It can look crooked, no matter how you adjust it. Ensuring flatness will save you from this common frustration. By carefully preparing your wall, you’ll set the stage for a successful mirror installation. The effort you invest upfront will pay off with a securely mounted mirror that enhances your space.Gather Necessary Tools And Materials
Before you start sticking a mirror to your wall, gathering the right tools and materials is crucial. Having everything ready makes the process smooth and helps avoid frustrating interruptions. Think about what kind of wall you have and the mirror’s size, as these factors affect your choices.
Adhesives And Mounting Options
Choosing the right adhesive or mounting option depends on your wall type and mirror weight. Heavy mirrors need strong, reliable adhesives like construction adhesive or mirror mastic. For lighter mirrors, double-sided mounting tape or adhesive strips can work well.
Consider using mirror clips or brackets if you want extra security. These provide mechanical support and reduce the risk of damage. Have a look at your mirror’s frame and backside—some come with hooks or wire that might be easier to use than glue.
- Construction adhesive:Best for heavy mirrors on drywall or plaster.
- Mirror mastic:Special glue designed for mirrors that won’t damage the reflective backing.
- Double-sided mounting tape:Ideal for small, lightweight mirrors.
- Mirror clips or brackets:Provide sturdy mechanical support.
Safety Gear
Safety is often overlooked but extremely important when handling mirrors. You should have gloves to protect your hands from sharp edges and broken glass. Safety goggles shield your eyes from dust or accidental chips.
If you’re drilling into the wall, ear protection can save you from loud noises. A dust mask is useful if you’re working with drywall or plaster to avoid inhaling particles. Preparing these safety items shows respect for your own well-being and keeps the project trouble-free.

Credit: www.amazon.com
Mark The Placement
Marking the placement is a key step before sticking a mirror to the wall. It ensures the mirror hangs straight and fits perfectly in your chosen spot. Taking time to mark correctly avoids mistakes and saves effort later. Use simple tools and be precise for the best results.
Measure And Level
Start by measuring the wall space where the mirror will go. Use a tape measure to find the center point. Check the mirror’s width and height. Mark the center on the wall lightly with a pencil.
Next, use a level to draw a straight horizontal line at the height you want. This line will guide the mirror’s top or bottom edge. Double-check the line to make sure it is perfectly straight. A crooked line will make the mirror look off.
Create Guide Marks
Hold the mirror against the wall, aligning it with the center mark and level line. Use a pencil to make small marks at each corner of the mirror. These marks show exactly where the edges will sit.
If your mirror has mounting brackets, mark their positions too. These guide marks help place hooks or adhesive strips accurately. Remove the mirror carefully after marking. Your wall is now ready for the next step.
Apply Adhesive Correctly
Applying adhesive correctly is essential to keep your mirror secure on the wall. The right technique prevents the mirror from falling or causing damage. Careful preparation and application ensure a strong, lasting hold.
Use Suitable Glue Or Tape
Choose glue or tape made for mirrors and walls. Silicone-based adhesives work well for glass and provide strong bonds. Double-sided mounting tape made for heavy objects also holds mirrors firmly.
Check the product label to confirm it supports mirror weight and wall type. Avoid regular glue or tape, as they may fail quickly or damage surfaces.
Apply Evenly
Spread the adhesive evenly across the mirror’s back. Avoid thick blobs that take longer to dry or cause uneven mounting. Use a caulking gun for silicone glue to create a smooth bead.
For tape, apply strips in a grid or frame pattern. Press firmly to remove air pockets and ensure full contact. This balance stops the mirror from slipping or tilting after installation.
Mount The Mirror
Mounting a mirror on the wall requires care and attention. Proper placement ensures it stays secure and looks great. This section covers how to position and press the mirror correctly for a strong hold.
Position Carefully
Hold the mirror against the wall at the desired spot. Use a level tool to check it is straight. Mark the edges lightly with a pencil. Confirm the mirror fits well and aligns with nearby decor.
Take your time. A small shift can affect the final look. Avoid rushing this step to prevent mistakes.
Press Firmly
Apply even pressure across the mirror surface. Press it firmly against the wall to ensure good contact. Hold it steady for at least 30 seconds. This helps the adhesive or mounting tape stick properly.
Check the edges and corners especially. Make sure they do not lift away from the wall. For larger mirrors, press in sections to secure the entire surface well.
Secure And Let Dry
Securing your mirror properly after sticking it to the wall is crucial for safety and durability. Rushing this step can cause the mirror to fall or the adhesive to fail. Taking time to support and let the adhesive cure ensures a strong, lasting hold.
Use Temporary Supports
After placing the mirror on the wall, use temporary supports to hold it firmly in place. You can use painter’s tape, wooden braces, or even soft blocks to prevent any movement.
These supports help maintain pressure on the adhesive, allowing it to bond effectively. Have you ever tried sticking something without holding it steady? You know how quickly it can slip or fall.
Make sure the supports don’t damage the mirror’s surface. Soft materials like foam or felt pads work well as buffers.
Allow Adequate Curing Time
Patience is key here. The adhesive needs time to fully cure, which can range from a few hours to 24 hours depending on the product you use.
Check the packaging for exact drying times and resist the urge to remove supports too soon. Even if the mirror feels stuck, the bond might not be strong enough yet.
Think of curing time like baking a cake—you wouldn’t take it out early, right? Let the adhesive set completely to avoid future accidents.

Credit: www.amazon.com
Final Touches
After attaching the mirror to the wall, final touches ensure it stays secure and looks perfect. These small steps improve safety and enhance the mirror’s appearance. Taking time for these details prevents future problems.
Clean Mirror Surface
Dust and fingerprints can dull the mirror’s shine. Use a soft cloth and glass cleaner. Wipe gently to avoid streaks or scratches. Clean surfaces make the mirror look fresh and bright. Check edges for smudges or adhesive marks. Remove any residue carefully for a neat finish.
Inspect For Stability
Check if the mirror feels firmly attached. Gently press on different areas to test hold. No movement means the adhesive works well. If the mirror shifts, add more support or reapply adhesive. A stable mirror prevents accidents and damage. Safety is key for any wall-mounted item.
Frequently Asked Questions
What’s The Best Adhesive For Sticking A Mirror To The Wall?
Use heavy-duty mirror adhesive or construction glue. These adhesives ensure strong, durable bonds without damaging the mirror or wall. Avoid regular glue as it may not support the mirror’s weight safely.
How Do I Prepare The Wall Before Mounting A Mirror?
Clean the wall surface thoroughly to remove dust and grease. Ensure the wall is dry and smooth for better adhesion. Patch any holes or cracks to create an even surface before sticking the mirror.
Can I Hang A Mirror Without Drilling Holes?
Yes, use strong mirror adhesive or double-sided mounting tape designed for mirrors. This method avoids wall damage but is best for lightweight mirrors only. For heavier mirrors, drilling is safer and more secure.
How Long Does Mirror Adhesive Take To Set?
Mirror adhesive typically takes 24 to 48 hours to fully cure. Avoid moving or stressing the mirror during this period. Follow the manufacturer’s instructions for the best results and maximum hold strength.
Conclusion
Sticking a mirror to the wall can be simple and safe. Choose the right adhesive for your wall type. Clean the surface well before starting. Press the mirror firmly and hold it in place. Give enough time for the glue to dry.
This helps prevent falls and damage. With careful steps, your mirror will stay secure. Enjoy your space with a new, stylish look. Small effort, big difference!


