
Want to add a magical touch to your room with fairy lights but unsure how to stick them to the wall without damaging it? You’re in the right place.
Whether you’re decorating for a party, creating a cozy nook, or just brightening up your space, the way you hang your fairy lights can make all the difference. You’ll discover simple, effective methods to attach your lights securely and beautifully—no mess, no hassle.
Keep reading to transform your walls and bring your space to life with ease!

Credit: sparkle.lighting
Choosing The Right Fairy Lights
Choosing the right fairy lights can make all the difference in how your space looks and feels. The type of lights you pick affects not only the ease of installation but also the ambiance and functionality of your setup. Think about where you want to hang them, how long you want the strands to be, and whether you need durability for outdoor use.
Battery Vs. Plug-in Lights
Battery-powered fairy lights offer great flexibility. You can place them anywhere without worrying about outlets, which is perfect for creating cozy corners or decorating shelves. However, you will need to check and replace batteries regularly to keep them glowing.
Plug-in lights, on the other hand, provide continuous power without interruptions. They’re ideal for long-term displays or areas near power sockets. But, you’ll need to manage cords carefully to avoid messy tangles or safety hazards.
Length And Brightness Options
Fairy lights come in various lengths, from short 5-foot strands to 50 feet or more. Choose a length that fits your wall space without needing excessive trimming or extension cables. Too short, and you might end up with empty spots; too long, and you’ll have excess wires to manage.
Brightness varies too—some lights offer a soft, warm glow, while others shine brightly enough to light up a room. Decide whether you want subtle mood lighting or something more vibrant. Dimmable options give you flexibility to adjust the glow anytime.
Weatherproof Features
If you plan to use fairy lights outdoors, weatherproofing is a must. Look for lights labeled as waterproof or weather-resistant to withstand rain, wind, and temperature changes. Without this protection, your lights may fail quickly, ruining your display and costing you more in replacements.
Even indoors, some areas like bathrooms or kitchens benefit from weatherproof lights due to humidity. Don’t overlook this detail if your fairy lights will face moisture or dust.
Preparing The Wall Surface
Before attaching fairy lights to your wall, preparing the surface is crucial for a secure and lasting hold. A clean, dry, and suitable wall can make all the difference between lights that stay put and those that fall down unexpectedly. Taking the time to prepare your wall ensures your decoration looks great and saves you from constant re-fixing.
Cleaning And Drying Tips
Start by wiping the wall with a damp cloth to remove dust and dirt. Dust particles might seem harmless, but they weaken the adhesive’s grip on the surface.
Use a mild soap solution if the wall has grease or sticky spots, then rinse with clean water. After cleaning, allow the wall to dry completely—any moisture can cause the adhesive to fail.
Have you ever noticed your lights falling a day after you put them up? It’s often because the wall wasn’t dry enough. Taking a few extra minutes to dry the wall fully can save you time and frustration later.
Selecting Suitable Wall Types
Not all walls are equal when it comes to sticking fairy lights. Smooth, painted drywall or plaster walls usually offer the best surface for adhesive hooks or tape.
Brick, textured, or wallpapered walls can be tricky. The uneven surfaces make it harder for adhesives to stick well. In these cases, consider using command hooks or clips designed for rough surfaces.
Think about the material of your wall before you start. Are you working with wood paneling, concrete, or tiles? Each requires a slightly different approach or product to hold your lights securely without damage.
Damage-free Mounting Methods
Fairy lights can transform any space into a magical haven. Sticking them to your wall doesn’t have to cause damage. Here are some methods to hang them without leaving marks.
Using Removable Hooks And Clips
Removable hooks and clips are great for hanging lights. They leave no residue when removed. Choose a spot on your wall. Clean it with a damp cloth. Allow it to dry completely. Place the hook or clip where you want the lights. Press firmly to ensure a strong hold. Now, hang your fairy lights on the hooks. Adjust them as needed for the perfect look.
Command Strips And Adhesive Tapes
Command strips work well for lightweight fairy lights. They are easy to apply. First, clean the wall area with rubbing alcohol. This removes any dust. Peel the backing off the strip. Stick it to the wall. Press firmly for a few seconds. Attach your lights to the strip. For heavier lights, use stronger adhesive tapes. Make sure the tape is suitable for walls. Test a small area first. This avoids potential damage.
Decorative Washi Tape Tricks
Washi tape offers a colorful way to hang lights. It adds a decorative touch. Choose tapes that match your room’s theme. Cut small pieces of tape. Use them to stick the light wire to the wall. Ensure the tape is secure. You can create patterns with the tape. This adds a unique design element. Washi tape is easy to remove. It won’t damage paint or wallpaper.

Credit: sparkle.lighting
Creative Layout Ideas
Creative layout ideas can transform fairy lights into stunning wall art. They add charm and personality to any room. Experimenting with different designs helps create unique atmospheres. Here are some inspiring ways to arrange your fairy lights on the wall.
Straight Lines And Patterns
Straight lines give a neat and modern look. Align lights horizontally or vertically for a clean effect. Patterns like zigzags or grids add interest without clutter. Use tape or small hooks to keep lines straight. These layouts suit minimalist or contemporary spaces well.
Shapes And Words
Form simple shapes like hearts, stars, or circles with the lights. Shapes create focal points and add a playful vibe. Spell out short words or initials for a personal touch. Use removable adhesive hooks to shape the wire precisely. This idea works well for bedrooms or cozy corners.
Layering With Other Decor
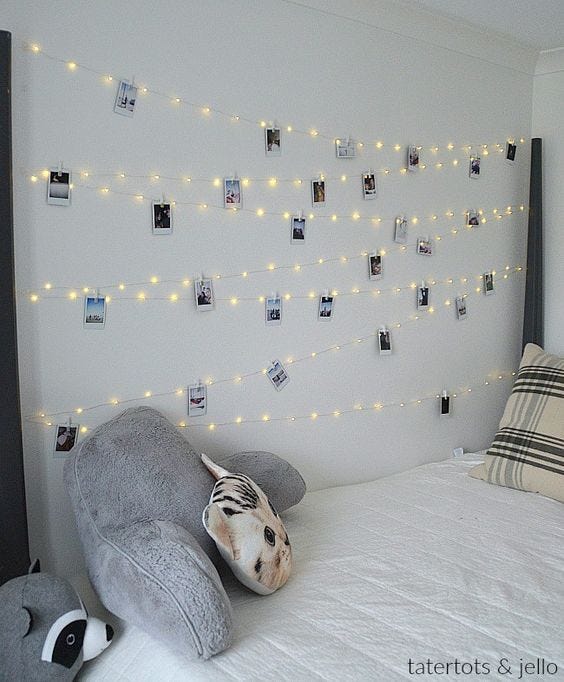
Combine fairy lights with photos, posters, or plants. Wrap lights around frames or hang them behind translucent curtains. Layering creates depth and a warm, inviting mood. Attach lights gently using clips or clear hooks to avoid damage. This style suits eclectic and boho interiors perfectly.
Maintaining And Removing Lights
Maintaining your fairy lights properly not only extends their life but also keeps your walls safe from damage. Removing them carefully can save you time and effort when redecorating or storing. Let’s look at how you can keep your lights in great shape and remove them without hassle.
Safe Removal Techniques
Peeling fairy lights off the wall too quickly can pull paint or wallpaper. Instead, gently lift the tape or adhesive from one corner and slowly pull it back at a low angle. If you feel resistance, warm the adhesive with a hairdryer for a few seconds to soften it.
For lights attached with hooks or clips, remove the clips first before pulling the string. This prevents the wires from bending or breaking. Always unplug the lights before handling them to avoid any electrical issues.
Storage Tips For Reuse
After removing, don’t just toss the lights into a box. Wrap the string around a piece of cardboard or a spool to avoid tangling. Label the storage container clearly so you can find them easily next time.
- Keep the lights in a cool, dry place to prevent moisture damage.
- Store batteries separately if your lights are battery-powered.
- Use small zip bags to store any extra hooks or adhesive strips.
Troubleshooting Common Issues
If some lights don’t turn on, check the bulbs for looseness or damage first. Replacing a single broken bulb can often fix the entire strand. If the problem persists, inspect the wiring for frays or cuts.
Sometimes adhesive strips lose their stickiness. Try cleaning the wall surface and the tape back with rubbing alcohol before reapplying. Have you noticed certain spots where your lights fall off repeatedly? It might be time to switch to stronger mounting options like removable hooks.

Credit: www.koopower.com
Frequently Asked Questions
How Do I Stick Fairy Lights Without Damaging Walls?
Use removable adhesive hooks, clear tape, or command strips. These options hold lights firmly and peel off without wall damage. Avoid nails or staples that can leave holes or marks on paint or wallpaper.
What Is The Best Adhesive For Fairy Lights On Walls?
Clear mounting tape or command strips work best. They provide strong hold and are easy to remove. Avoid using glue or sticky tapes that can leave residue or damage the wall surface.
Can I Use Nails Or Pins To Hang Fairy Lights?
Nails and pins can damage walls and leave holes. It is better to use adhesive hooks or clips designed for wall use. These options are safer and won’t ruin paint or drywall.
How Do I Prevent Fairy Lights From Falling Off Walls?
Ensure the surface is clean and dry before applying hooks or tape. Press firmly and allow adhesive to set for a few hours. Avoid hanging heavy light strands on weak adhesives to prevent falling.
Conclusion
Sticking fairy lights to the wall can brighten any space quickly. Use the right tools and choose a safe spot for your lights. Take your time to place each light carefully and evenly. This way, your decoration will look neat and last longer.
Enjoy the warm and cozy feeling fairy lights bring to your room. Small steps create a big difference in your home’s look. Now, your walls can shine beautifully every night.


