
Are you wondering how to stick a mirror on your wall without any hassle? Whether you want to add a stylish touch to your room or create the illusion of more space, hanging a mirror the right way makes all the difference.
You might worry about damaging your walls or having the mirror fall down, but don’t worry—this guide will show you simple, effective steps to get it done safely and securely. Keep reading, and you’ll learn easy tips that anyone can follow to make your mirror stay put perfectly.

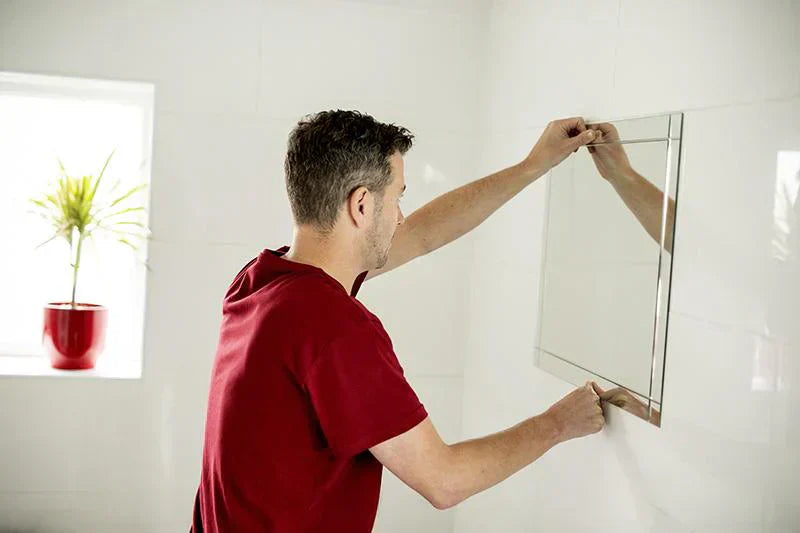
Credit: schoolhouse.com
Choosing The Right Mirror
Choosing the right mirror is key to a perfect wall display. It affects the room’s look and how easy it is to hang. The mirror should fit the space and suit the wall type. Think about size, shape, and weight before buying. Also, decide on a framed or frameless style. These choices make a big difference in your final result.
Selecting The Size And Shape
Pick a mirror size that matches your wall space. Large mirrors open up small rooms visually. Small mirrors fit well in tight spots or groupings. Shapes add style and character.
- Round mirrors soften sharp room corners.
- Square or rectangular mirrors look classic and neat.
- Unusual shapes create artistic focus points.
Match the shape to your room’s mood and furniture style.
Considering Mirror Weight
The mirror’s weight affects how you attach it. Heavy mirrors need strong anchors or brackets. Light mirrors can use adhesive strips or hooks. Check your wall material for support limits.
- Drywall may require special anchors for heavy mirrors.
- Brick or concrete walls hold weight better but need drill tools.
- Glass or tile walls need gentle fixing methods to avoid damage.
Framed Vs Frameless Mirrors
Frames add style and protect mirror edges. Frameless mirrors offer a clean, modern look. Consider the room’s design before choosing.
- Framed mirrors suit traditional or rustic decor.
- Frameless mirrors fit minimalist and contemporary spaces.
- Frames add extra weight; plan the hanging method carefully.
Both types have unique advantages. Pick one that matches your taste and wall strength.
Preparing The Wall Surface
Clean the wall thoroughly to remove dust, grease, and dirt for better adhesion. Ensure the surface is dry and smooth before applying any glue or tape. Rough or uneven walls may cause the mirror to fall.
Preparing the Wall Surface Before you stick a mirror on the wall, the first step is to prepare the wall surface properly. This ensures that your mirror adheres well and stays put. A little preparation goes a long way in preventing mishaps later.Cleaning The Wall
Start by cleaning the wall thoroughly. Use a mild detergent mixed with warm water to wipe away any dust or grease. A clean surface ensures the adhesive sticks better, giving your mirror a firm hold. You might be surprised at how much dust can accumulate on walls, even if they look clean at first glance.Checking For Moisture And Damage
After cleaning, check the wall for any signs of moisture or damage. Moist walls can weaken adhesive strength, so make sure everything is dry. If you spot any cracks or holes, fill them in using wall putty. This small step can save you from unexpected surprises like your mirror suddenly falling due to a weak spot on the wall.Smoothing Uneven Areas
Before you proceed, ensure the wall surface is smooth. Uneven walls can prevent mirrors from sticking properly, leading to gaps or even cracks. Use sandpaper to smooth any rough spots. It’s a simple task, but it makes a huge difference in the final result. Have you ever touched a wall and felt those annoying little bumps? Sanding them down will make your mirror look professionally installed. Taking the time to prepare the wall surface might seem tedious, but it’s crucial. Do you really want to risk your mirror falling and breaking? By following these steps, you set the stage for a long-lasting, beautiful mirror installation.Gathering Necessary Tools And Materials
Before sticking a mirror on the wall, gather all necessary tools and materials. This preparation ensures a smooth and safe installation process. Knowing what to use helps avoid mistakes and saves time. Focus on the right adhesives, mounting hardware, and safety gear. Also, have measuring tools ready for precise placement.
Adhesives And Mounting Tapes
Choose strong adhesives or mounting tapes designed for mirrors. These options provide firm support without damaging the wall. Look for:
- Double-sided mounting tape with high weight capacity
- Mirror adhesive glue that dries clear
- Specialized mirror mounting strips
Check product labels for weight limits and wall compatibility.
Mounting Hardware Options
Select hardware based on mirror size and wall type. Common options include:
- D-rings for hanging with hooks
- Mirror clips to hold the edges
- French cleats for heavy mirrors
- Wall anchors for drywall support
Pick hardware that matches your mirror’s weight and style.
Safety Gear And Measuring Tools
Protect yourself and ensure accuracy with proper gear. Essential items are:
- Safety glasses to shield your eyes
- Gloves to protect your hands
- Measuring tape or ruler for exact placement
- Level tool to keep the mirror straight
- Pencil to mark wall spots
Use these tools to avoid accidents and get perfect results.
Marking The Placement
Marking the placement of your mirror is a key step to ensure it hangs straight and looks great. Taking the time to plan the exact spot avoids mistakes and keeps your wall damage-free. Careful marking helps you align the mirror perfectly with other decor and room features.
Use simple tools and techniques to find the best position. Accurate marking makes the whole sticking process smooth and successful. Let’s explore how to measure and use guides for perfect placement.
Measuring And Leveling
Start by measuring the wall space where the mirror will go. Use a tape measure to find the center point. Mark this spot lightly with a pencil.
Check the height to match other furniture or decorations. Keep the mirror at eye level for most people.
Use a level tool to ensure horizontal and vertical alignment. Hold the level against the wall and adjust until the bubble is centered.
Draw light lines as guides for your mirror edges. These lines will help you place the mirror straight without guesswork.
Using Templates Or Guides
Create a paper template of your mirror shape and size. Cut out the shape from cardboard or paper.
Hold the template on the wall to test different positions. This helps visualize the final look without sticking anything.
Use painter’s tape to fix the template temporarily. Step back and check if the placement feels right.
Mark the corners or edges of the template lightly with a pencil. Remove the template and use these marks for exact mirror placement.
Applying Adhesive Correctly
Applying adhesive correctly is key to hanging a mirror safely and securely. The right technique ensures the mirror stays fixed without damage to the wall or mirror surface. Proper application also prevents the mirror from falling over time.
Using the right adhesive and applying it properly creates a strong bond. It avoids air bubbles and uneven spots that weaken the hold. Patience and careful work deliver the best results.
Types Of Adhesives For Mirrors
- Mirror adhesive: Specially made for mirrors, prevents damage to the reflective surface.
- Construction adhesive: Strong and durable, ideal for heavier mirrors.
- Silicone adhesive: Flexible and water-resistant, good for bathrooms.
- Double-sided mirror tape: Easy to use for small and lightweight mirrors.
Applying Adhesive On Mirror And Wall
Clean both the mirror back and wall surface thoroughly. Remove dust, grease, and moisture for better adhesion.
Apply the adhesive evenly on the mirror’s back. Use a zigzag or dot pattern for good coverage.
Press the mirror firmly against the wall. Hold it in place to secure contact between surfaces.
Curing Time And Conditions
Allow the adhesive to dry fully before moving or adjusting the mirror. This time varies by product.
Keep the area dry and avoid touching the mirror during curing. Temperature affects drying speed.
Check the manufacturer’s instructions for exact curing times. Patience ensures a lasting hold.

Credit: ledmirrorworld.co.uk
Mounting The Mirror Safely
Mounting a mirror safely on the wall prevents damage and accidents. Careful preparation and correct technique keep the mirror secure. Follow these tips to ensure your mirror stays in place without issues.
Positioning The Mirror
Choose the right spot on the wall. Clean the surface to remove dust and grease. Use a level to align the mirror straight. Mark the outline lightly with a pencil for guidance.
Pressing And Securing
Apply the adhesive evenly on the mirror back. Press the mirror firmly against the wall. Hold it in place for at least a minute. Check that the entire surface touches the wall.
Using Support While Drying
Place temporary supports like brackets or heavy books under the mirror. Keep the supports until the adhesive fully dries. Avoid moving or touching the mirror during this time. This ensures strong, lasting attachment to the wall.
Alternative Mounting Methods
Alternative mounting methods offer practical ways to hang your mirror without relying on adhesive alone. These options provide extra security and can be more suitable for heavier or irregularly shaped mirrors. Choosing the right method depends on your wall type, mirror size, and personal preference.
Using Mirror Clips And Brackets
Mirror clips and brackets give your mirror a stable hold by securing it directly to the wall. These small hardware pieces are easy to install and come in various styles to match your decor.
To use them, first mark where the clips will sit around the mirror’s edges. Then, drill holes and attach the clips or brackets firmly to the wall. Slide the mirror into place and tighten any screws to lock it in.
This method works well for bathroom mirrors or larger decorative pieces that need extra support. Have you noticed how clips can sometimes add a subtle frame effect, enhancing the mirror’s look?
Hanging With Wire Or Hooks
Wire or hooks give you flexibility in positioning your mirror and make it easier to adjust its height. Attach a strong wire across the back of the mirror frame, making sure it’s tight and secure.
Use wall hooks or picture hangers that can support your mirror’s weight. Hang the wire on the hooks, check the mirror’s balance, and adjust as needed.
This method suits framed mirrors well and can save wall space since the mirror hangs slightly off the surface. Have you tried this and found it easier to level your mirror compared to fixed brackets?

Credit: inmyownstyle.com
Preventing Damage And Ensuring Longevity
Sticking a mirror on your wall is not just about placement but also about protecting your investment over time. Damage prevention and ensuring longevity go hand in hand, especially with delicate items like mirrors. Taking simple yet effective precautions can save you from costly repairs or replacements later.
Avoiding Excess Weight And Stress
Mirrors can be surprisingly heavy, and putting too much weight on the adhesive can cause it to fail. You need to check the mirror’s weight and choose an adhesive strong enough to hold it securely. Thin or oversized mirrors require extra support, so consider using additional mounting points or a frame to distribute the weight evenly.
Have you ever noticed a mirror slowly peeling off the wall? That’s often due to uneven stress on the adhesive. Avoid placing the mirror in spots where it might get bumped or jostled frequently, like busy hallways or near doors.
Maintaining Adhesive Strength
Adhesives lose their grip over time, especially in environments with fluctuating temperatures or humidity. Keep your mirror away from direct sunlight and damp areas like bathrooms unless the adhesive is specifically designed for those conditions.
Before sticking the mirror, clean the wall surface thoroughly to remove dust, grease, or moisture—this helps the adhesive bond better. Press the mirror firmly against the wall for a few minutes to ensure a solid seal. Re-check the bond after a week and reinforce if necessary.
Cleaning And Care Tips
How you clean your mirror affects both its appearance and the adhesive’s longevity. Avoid harsh chemicals or abrasive materials that can seep behind the mirror and weaken the adhesive. Use a soft cloth with mild soap and water instead.
Regularly inspect the edges of the mirror for any signs of loosening or moisture buildup. Catching small issues early lets you fix them before bigger problems arise. Your mirror can stay beautiful and firmly in place if you give it just a little ongoing care.
Frequently Asked Questions
What Materials Are Best To Stick A Mirror On The Wall?
Use strong adhesives like mirror glue, double-sided tape, or mounting strips. Ensure the wall is clean and dry for better adhesion. Avoid nails or screws to prevent mirror damage.
How To Prepare The Wall Before Sticking A Mirror?
Clean the wall thoroughly to remove dust and grease. Use a damp cloth and mild detergent if needed. Let the wall dry completely before applying adhesive or tape.
Can I Stick A Heavy Mirror Without Drilling Holes?
Yes, use heavy-duty mirror adhesive or strong mounting strips. Ensure the adhesive supports the mirror’s weight. Follow manufacturer instructions for safety and secure attachment.
How Long Should Adhesive Dry Before Hanging A Mirror?
Allow adhesive to cure for at least 24 hours. This ensures a strong and secure bond between the mirror and wall. Avoid moving the mirror during this time.
Conclusion
Sticking a mirror on the wall is simple with the right steps. Choose a clean, dry surface and use strong adhesive tape or glue. Press the mirror firmly and hold it for a few minutes. Check that it is level and secure before letting go.
This method keeps your mirror safe and your wall damage-free. Try these tips to brighten your room easily and quickly. You’ll enjoy the new look without stress or mess.


