
Have you ever looked at a glued mirror on your wall and wondered how to remove it without causing damage? Taking down a mirror that’s firmly stuck can feel tricky and even risky.
But don’t worry—you’re about to learn simple, effective steps to safely get that mirror off your wall. Whether you want to replace it or just need to move it, this guide will help you handle the job with confidence and ease.
Keep reading to discover the tools and techniques that make mirror removal straightforward and stress-free.

Credit: www.angi.com
Tools Needed
Removing a glued mirror from the wall needs the right tools. Using proper tools makes the job safer and easier. Some tools are common in most homes. Others are special and may need to be bought or rented.
Common Household Items
- Hairdryer or heat gun to soften glue
- Plastic putty knife or credit card to slide under mirror
- Fishing line or strong wire to cut through adhesive
- Gloves to protect your hands
- Old towels or blankets to catch falling glass
- Masking tape to secure edges and prevent cracks
Specialized Tools
- Mirror removal tool kits with suction cups
- Adhesive remover chemicals safe for walls and mirrors
- Utility knife for trimming glue edges carefully
- Protective goggles to shield eyes from glass shards
- Putty scraper with flexible blade for gentle prying
- Heat gun with adjustable temperature control
Safety Precautions
Protect your eyes and hands by wearing safety goggles and gloves before removing a glued mirror. Work slowly to avoid breaking the glass and causing injury. Ensure the area is well-ventilated if using adhesive remover.
When removing a glued mirror from a wall, safety is the top priority. Mirrors can be heavy and their glass edges are sharp. Taking proper precautions can prevent injuries and damage.Protective Gear
Wearing the right protective gear is essential. Use safety goggles to shield your eyes from glass shards. Gloves are important for protecting your hands. Choose sturdy gloves that cover your wrists. Wear long-sleeved clothing to guard against cuts. This will help avoid injuries from sharp edges.Work Area Setup
Prepare your work area before starting. Clear the space around the mirror. Remove any furniture or items that may obstruct your work. Lay down a drop cloth or tarp on the floor. This will catch any falling debris and protect your floor. Make sure you have plenty of light. Good lighting helps you see what you’re doing. Keep a first aid kit nearby in case of accidents.Preparing The Mirror
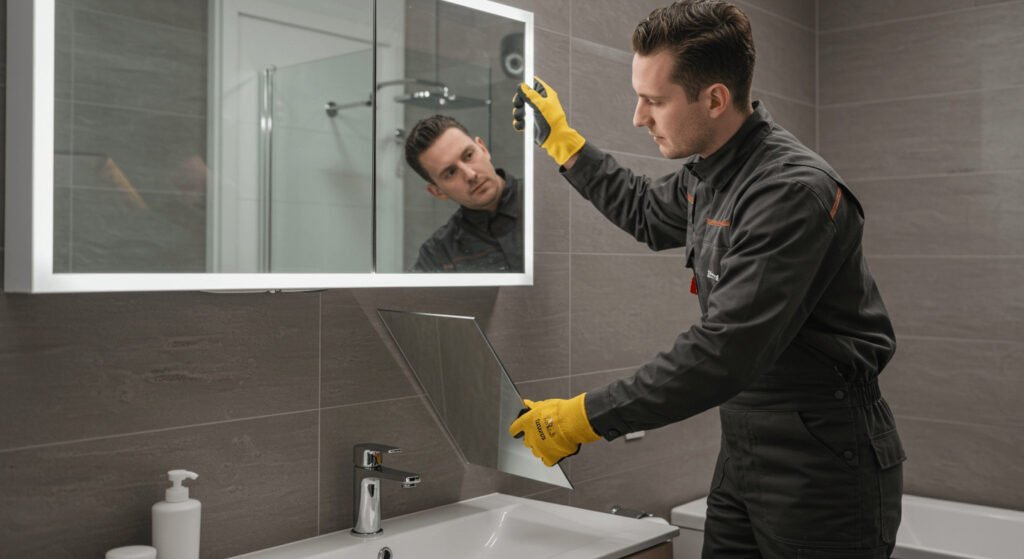
Preparing the mirror is the key first step before removal. Careful preparation prevents damage to the glass and wall. It also makes the process safer and easier. Taking time now saves effort later.
Cleaning Edges
Start by cleaning the edges of the mirror. Dust and dirt can hide the glue. Use a soft cloth and mild cleaner. Wipe gently to avoid scratches. Clean edges help you see where the adhesive is. This makes the next step more precise.
Loosening Adhesive
Loosening the glue softens its hold on the wall. Use warm water or a gentle adhesive remover. Apply carefully along the edges with a sponge or cloth. Let it sit for a few minutes to work. This weakens the glue without harming the mirror or paint.
Heat Application Techniques
Heat application techniques are one of the most effective ways to soften the adhesive holding a glued mirror to your wall. By warming the glue, you reduce its strength, making it easier to remove the mirror without damage. Choosing the right tool and using it safely can save you time and frustration.
Using A Hairdryer
A hairdryer is a convenient and gentle option for applying heat to the adhesive. Hold the hairdryer a few inches away from the mirror’s edges and move it slowly to warm the glue evenly. The heat softens the glue, allowing you to gently pry the mirror off with a plastic scraper or putty knife.
Be patient and avoid overheating one spot to prevent cracking the glass. If you notice the mirror getting too hot to touch, pause and let it cool slightly before continuing. Have you ever tried this technique and found certain glue types respond better to heat?
Using A Heat Gun
A heat gun delivers more intense heat than a hairdryer, making it suitable for stronger adhesives. Keep the heat gun moving constantly over the glued areas to avoid concentrated heat that might damage the mirror or wall. Use the lowest effective temperature setting to gently warm the glue.
Heat guns require careful handling—wear heat-resistant gloves and protect nearby surfaces. If you’re facing stubborn glue, this tool often speeds up the process, but how do you balance powerful heat with the risk of damage? Testing on a small hidden area first can prevent surprises.
Cutting Through The Adhesive
Cutting through the adhesive is a key step in safely removing a glued mirror from your wall. It requires patience and the right tools to avoid damaging both the mirror and the wall surface. If you rush or use improper techniques, you could end up with cracks or a bigger mess to clean up.
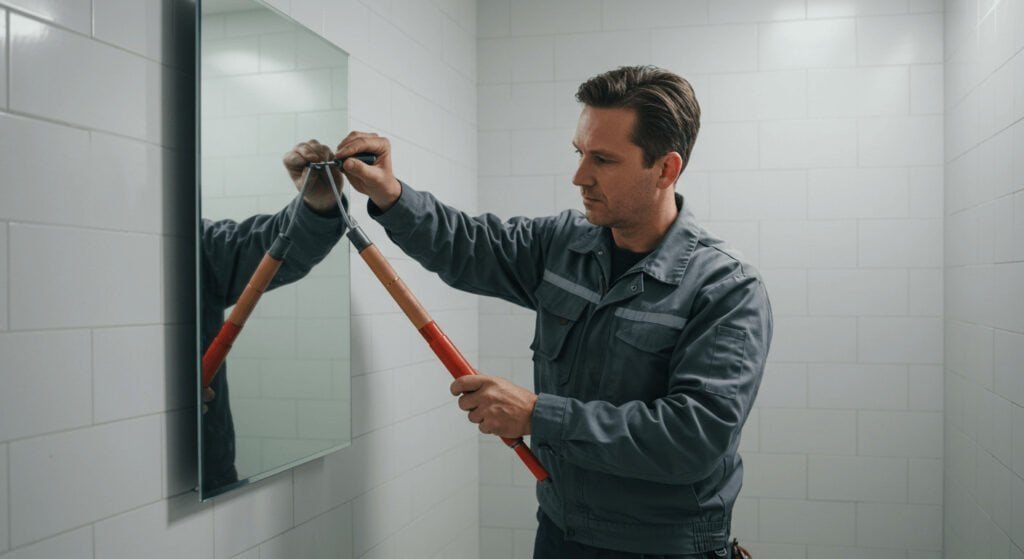
Using Fishing Line Or Wire
Fishing line or thin wire is surprisingly effective for slicing through the glue holding your mirror in place. Slide the line gently behind the mirror’s edge and use a back-and-forth sawing motion to cut through the adhesive.
This method lets you control the pressure and minimizes the risk of the mirror cracking. You might feel some resistance, so don’t force it too hard. Instead, patiently work the line deeper to gradually loosen the glue.
Have you tried using fishing line for tasks like this before? It’s a simple tool that often gets overlooked but can save you a lot of trouble.
Using A Putty Knife
A putty knife is another handy tool for cutting through adhesive. Choose a flexible one with a thin blade to gently pry between the mirror and the wall.
Insert the knife carefully and wiggle it side to side to break the glue’s grip. Be cautious not to push too hard or you might damage the wall or chip the mirror edges.
This technique works best after loosening the adhesive with a bit of heat or solvent. It gives you the leverage to separate the mirror without excessive force.
Removing The Mirror
Removing a glued mirror from the wall requires care and patience. The goal is to avoid damage to both the wall and the mirror. Use gentle techniques to loosen the mirror without breaking it. Safety is key during this delicate process.
Gentle Prying Methods
Start by softening the glue around the mirror edges. Use a hairdryer or heat gun on low heat. Warm the glue for several minutes to make it flexible.
Insert a thin, flexible tool like a plastic putty knife or painter’s tool between the mirror and the wall. Do not use metal tools that can scratch or break the glass.
Gently wiggle the tool back and forth to create a gap. Work slowly around the edges to prevent cracks. Avoid forcing the mirror off.
- Apply steady, light pressure
- Move the tool little by little
- Stop if you feel resistance
Lifting Safely
Once the mirror starts to loosen, prepare to lift it carefully. Have a helper hold the mirror if it is large or heavy. Use both hands to support the mirror evenly.
Lift the mirror straight away from the wall. Avoid twisting or bending it. Place it on a soft surface like a blanket or foam to prevent damage.
If the mirror remains stuck, repeat heating and prying gently. Patience reduces risks of injury or damage.
Cleaning Residual Adhesive
After removing a glued mirror from the wall, sticky residue often remains. Cleaning this adhesive is vital for a smooth, clean surface. Removing leftover glue prevents damage and prepares the wall for repainting or new decor. Use simple tools and safe products to clear the adhesive effectively.
Using Solvents
Solvents soften the glue, making it easier to remove. Choose a solvent safe for your wall type, such as rubbing alcohol, vinegar, or commercial adhesive remover.
- Apply a small amount of solvent on a cloth.
- Press the cloth gently onto the sticky area for a few minutes.
- Rub the residue in circular motions until it loosens.
- Wipe the area with a clean, damp cloth to remove solvent traces.
Always test solvents on a small, hidden patch first. This prevents wall damage or discoloration.
Scraping Techniques
Scraping removes thick or hardened glue pieces. Use tools carefully to avoid wall scratches.
- Use a plastic scraper or putty knife for gentle removal.
- Hold the scraper at a low angle to the wall.
- Push the tool slowly under the glue edges.
- Lift and peel the adhesive off the surface.
- Repeat until most residue is gone.
For stubborn spots, soften the glue with a solvent before scraping. Avoid metal tools on delicate surfaces to prevent marks.

Credit: www.youtube.com
Repairing Wall Damage
Removing a glued mirror often leaves marks or holes on the wall. Repairing these damages helps restore the wall’s smooth surface. It also prepares the area for painting or new decorations. Proper repair keeps your wall looking fresh and clean.
Filling Holes
Start by cleaning loose debris from holes or cracks. Use a putty knife to apply spackling paste or wall filler. Press the filler firmly into the holes. Smooth the surface to match the wall level. Let the filler dry completely before moving on.
Sanding And Painting
Once the filler is dry, sand the area gently. Use fine-grit sandpaper to create a smooth finish. Remove dust with a soft cloth or brush. Choose paint that matches the wall color. Apply paint evenly with a brush or roller. Allow the paint to dry fully for a flawless look.
Preventing Future Damage
Preventing damage when removing a glued mirror from the wall starts long before you even lift the mirror. Choosing the right materials and installing them correctly can save you from frustration and costly repairs later. Let’s look at how the right adhesive and proper installation techniques protect your walls and mirrors.
Choosing The Right Adhesive
Not all adhesives are created equal. Using the wrong glue can lead to stubborn residue or even wall damage when you remove the mirror. You want an adhesive that holds well but also allows for clean removal.
Look for adhesives labeled as “mirror-safe” or specifically designed for glass and wall surfaces. These adhesives often have a balance of strong bonding and flexibility. For instance, silicone-based adhesives tend to peel off without leaving marks, unlike heavy-duty construction glue.
Have you ever struggled to remove a mirror only to find chunks of drywall stuck to it? That’s usually because the adhesive was too strong or not suitable for the surface. Choosing the right glue can prevent this common problem.
Proper Installation Tips
How you install the mirror matters just as much as the adhesive you use. Start with a clean, dry wall surface free of dust or grease. This ensures the adhesive sticks properly and reduces the risk of the mirror slipping or falling.
Another tip is to apply the adhesive evenly and avoid overusing it. Too much glue doesn’t mean a stronger hold—it just makes removal harder. Spread the adhesive in small dots or strips to create a secure but removable bond.
Use a level to position your mirror accurately before the adhesive sets. This way, you avoid the temptation to forcefully adjust or remove it soon after installation, which can damage both the mirror and wall.
Have you noticed how small mistakes during installation cause bigger headaches later? Taking the time to prepare properly can save you effort and money down the road.
Credit: bfymirror.com
Frequently Asked Questions
How Do I Safely Remove A Glued Mirror From The Wall?
To safely remove a glued mirror, gently slide a thin wire or putty knife behind it. Slowly work the adhesive loose to avoid breakage. Take your time and wear protective gloves to prevent injury.
What Tools Are Needed To Take Off A Glued Mirror?
Essential tools include a thin wire or putty knife, gloves, safety goggles, and adhesive remover. These help you safely loosen and remove the glued mirror without damage.
How To Prevent Wall Damage When Removing A Glued Mirror?
Work slowly and carefully to avoid pulling the wall surface. Use adhesive remover to soften glue and gently pry the mirror. Cover the wall with a drop cloth to catch debris.
Can Heat Help Remove A Glued Mirror From The Wall?
Yes, applying gentle heat with a hairdryer softens the adhesive. This makes it easier to slide a wire or knife behind the mirror. Avoid high heat to prevent glass damage.
Conclusion
Removing a glued mirror takes patience and care. Use gentle tools and slow movements. Protect your wall and avoid damage. Clean off leftover glue with mild solutions. Take breaks if needed to stay safe. You can do it without stress or rush.
This method saves your wall and mirror. Keep these tips in mind for best results.


