
Are your string lights suddenly not working and you’re not sure why? Before you toss them out or buy new ones, there’s a simple fix you might be missing.
Knowing how to tell if your string light fuse is blown can save you time, money, and frustration. You’ll discover easy ways to check your fuse and get your lights shining bright again. Keep reading—your next step to fixing those lights is just ahead.
Credit: www.angi.com
Signs Of A Blown Fuse
Identifying a blown fuse in your string lights is essential to quickly restore their glow. Recognizing the signs early can save you time and prevent unnecessary replacements. Let’s look at clear indicators that your string light fuse needs attention.
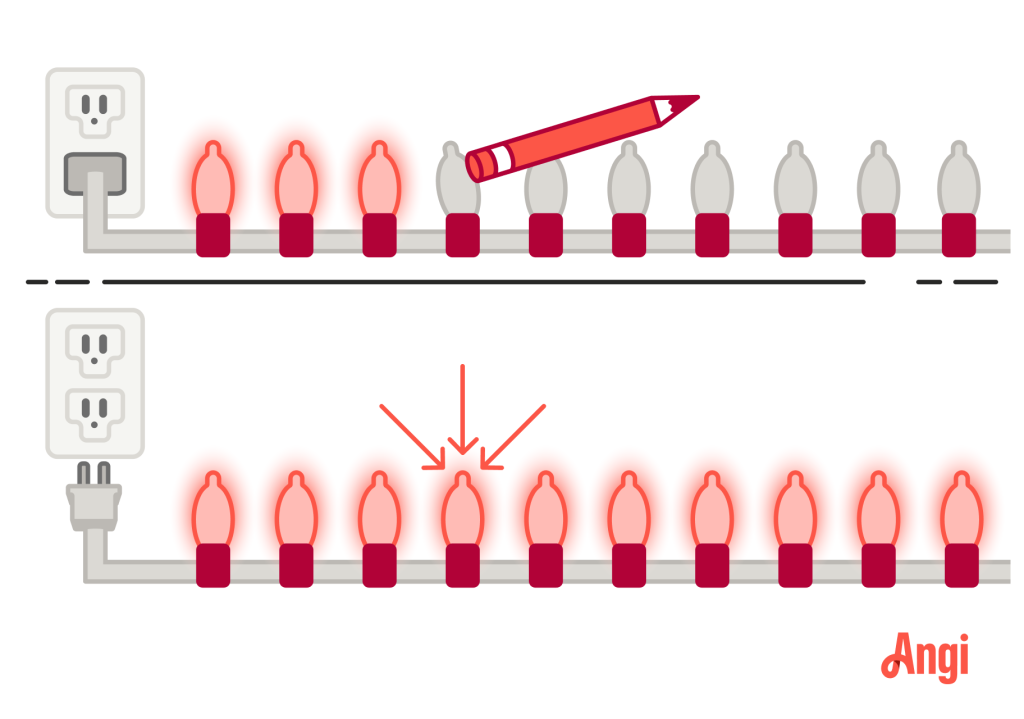
Lights Not Turning On
If your entire string of lights fails to power up, the fuse might be the culprit. This is often the first and most obvious sign. Before checking the fuse, ensure the outlet and plug are working properly—if those are fine, the fuse is likely blown.
Have you ever plugged in your lights, only to find them completely dark? That sudden blackout usually points to a fuse issue rather than a bulb problem. It’s a simple check that can save you from buying new lights unnecessarily.
Partial Lighting Issues
Sometimes, only a section of your string lights will light up while the rest stays dark. This uneven lighting can indicate a fuse that is partially damaged or failing. It might also mean the fuse is still intact, but close to blowing.
Notice if some bulbs flicker or don’t light at all while others glow brightly. This inconsistency is a practical clue that your fuse may be struggling. Addressing this early helps avoid a full lighting failure during your next event or decoration.
Burnt Smell Or Visible Damage
A burnt or smoky smell near the plug or fuse compartment is a strong warning sign. It suggests the fuse has overheated or blown. Inspect the fuse casing for any black marks, melted plastic, or discoloration.
Have you ever caught a faint burning smell around your lights? Don’t ignore it. This sensory alert often means the fuse or wiring is damaged and needs immediate replacement to avoid hazards.
Tools Needed For Testing
Testing a string light fuse requires a few simple tools. Having the right tools makes checking the fuse quick and easy. These tools help you find out if the fuse is blown or still good.
Gather these tools before you start the testing process. They ensure accurate results and help you fix the problem faster.
Multimeter Or Test Light
A multimeter measures electrical current and voltage. It shows if the fuse allows electricity to pass through. A test light is a simpler tool that lights up when electricity flows. Both tools help you test the fuse without guesswork.
Replacement Fuses
Keep spare fuses handy. If the fuse is blown, you can replace it right away. Match the replacement fuse with the original to avoid damage. Using the correct fuse keeps your string lights safe.
Screwdriver Or Fuse Access Tool
You need a screwdriver or a special fuse access tool. These tools help open the fuse holder. Some string lights have small compartments where the fuse sits. Using the right tool makes opening the fuse cover easy and safe.
Locating The Fuse
The fuse for string lights is usually inside the plug or near the power source. Carefully open the fuse holder to check the small glass fuse inside. A broken or darkened fuse glass indicates it is blown and needs replacement.
Locating the fuse in your string lights can be a bit like finding the needle in a haystack, but it doesn’t have to be. Whether you’re untangling holiday lights or checking patio decorations, knowing where to look is half the battle. Once you know the usual spots and how to access them, you’re well on your way to a brighter day.Common Fuse Locations
String light fuses are often hiding in plain sight. The most common location is within the plug itself. Typically, you’ll find a small compartment on the side of the plug that houses the fuse. Another potential spot is a fuse holder attached to the cord, usually not far from the plug. This is less common but worth checking if you can’t find it in the plug. Don’t forget to consult the manufacturer’s instructions, as they might have specific guidance on where the fuse is located.Accessing The Fuse Holder
Accessing the fuse holder is usually straightforward once you know where it is. If the fuse is inside the plug, look for a sliding or hinged door on the side. Use a small screwdriver or even your fingernail to gently open it. For an in-line fuse holder, you may need to unscrew or snap open the compartment. Take care not to damage the cord or holder while doing so. Remember to disconnect the string lights from the power source before accessing the fuse holder to ensure your safety. Have you ever had a surprise when opening a fuse holder? Share your experience in the comments!Testing The Fuse
Testing the fuse in string lights helps identify if the fuse is blown or still working. It ensures safety and saves time by pinpointing the problem quickly. Several simple tools and methods allow you to check the fuse without much effort.
Using A Multimeter
A multimeter measures electrical continuity to test the fuse condition. Set the multimeter to the continuity or resistance mode. Remove the fuse from the string light carefully. Place the multimeter probes on each end of the fuse.
If the multimeter beeps or shows zero resistance, the fuse is good. If it shows no reading or infinite resistance, the fuse is blown and needs replacement.
Using A Test Light
A test light is a simple tool that checks for electricity flow. Connect the test light clip to a power source. Touch the test light probe to each end of the fuse. A glowing light means the fuse is intact and working.
No light indicates a broken fuse. This method is quick and does not require removing the fuse from the string light.
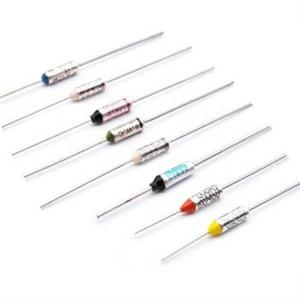
Visual Inspection
Visual inspection is the easiest way to check a fuse. Remove the fuse from the string light carefully. Hold it up to a bright light source. Look for a broken filament or dark, burnt marks inside the fuse glass.
Any visible damage means the fuse is blown. If the filament looks intact and clear, the fuse is likely good. This method works best in good lighting conditions.
Replacing The Fuse
Replacing the fuse in your string lights is a straightforward task that can save you from buying a whole new set. Knowing how to do it correctly ensures your lights shine brightly again without risk. Let’s look at what you need and how to handle the process safely.
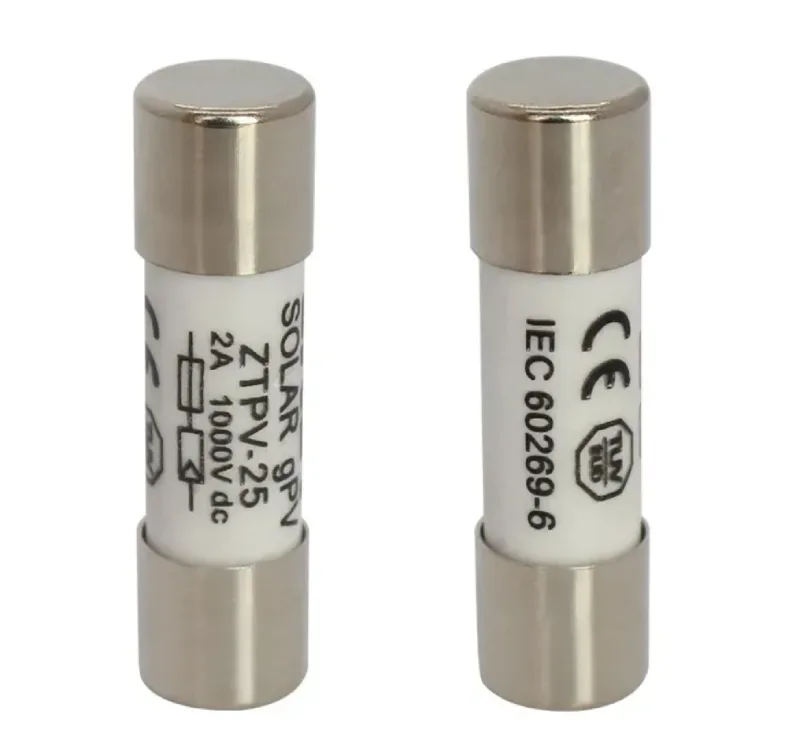
Choosing The Right Fuse
Your string lights usually come with a small fuse located in the plug. Choosing the wrong fuse can cause damage or even be dangerous.
- Check the packaging or manual:It often states the fuse rating needed, like 3A or 5A.
- Match the type:Use the same type of fuse, such as slow-blow or fast-blow, depending on your light’s requirements.
- Avoid guessing:A fuse with a higher rating can let too much current flow, risking fire or damage.
Have you ever replaced a fuse with the wrong one and noticed strange flickering? That’s a clear sign to double-check the specifications next time.
Step-by-step Replacement
Start by unplugging your string lights from the power source. This is crucial to avoid electric shock.
Next, open the fuse compartment, usually found on the plug’s back or side. Use a small screwdriver or your fingernail to carefully lift the cover.
Remove the blown fuse by gently sliding or pulling it out. Compare it with your new fuse to make sure they match perfectly.
- Insert the new fuse in the same orientation as the old one.
- Close the fuse compartment securely.
- Plug your lights back in and test if they work.
If the lights still don’t turn on, the problem might be elsewhere, but replacing the fuse is a good first step.
Safety Tips
Always unplug string lights before handling the fuse or any electrical part. This simple step prevents accidents.
Use insulated tools to avoid accidental shocks. Even small sparks can cause injuries.
Never bypass the fuse or use tape to hold it in place. The fuse is a safety device designed to protect you and your home.
Have you checked your fuse compartment lately? Keeping it clean and dry helps avoid corrosion, which can cause failure.
Credit: viox.com
Preventing Future Fuse Blows
Preventing future fuse blows is essential for keeping your string lights shining bright without interruption. It’s not just about fixing the problem after it happens but taking smart steps to avoid the hassle entirely. Let’s look at some practical ways you can protect your lights and enjoy them longer.
Avoid Overloading Strings
One common cause of fuse blows is overloading the string of lights by connecting too many sets together. Each string has a maximum number of sets that it can safely handle, usually listed on the packaging or instructions.
Ask yourself: Are you plugging in more strings than recommended? If yes, reduce the number immediately. Overloading creates excess current flow, which forces the fuse to blow to protect the circuit.
Instead, spread your lights across multiple outlets or circuits. This simple habit prevents electrical stress and keeps your fuse intact.
Proper Storage And Handling
How you store and handle your string lights affects their lifespan and fuse health. Tangled lights often pull or damage wires, increasing the chance of shorts that blow fuses.
Store your lights carefully by wrapping them around a spool or using a dedicated reel. Avoid sharp bends and keep them in a dry, cool place to prevent corrosion or insulation damage.
You might not realize it, but rough handling during setup or takedown can loosen connections inside the bulbs or fuse holder. Gentle treatment saves your fuse and lights from unexpected failures.
Regular Maintenance Checks
Don’t wait for your lights to stop working before checking them. Regular inspections catch small problems before they cause fuse blows.
Look for frayed wires, loose bulbs, and corrosion around the fuse holder. Replace any damaged bulbs or wiring immediately to keep the current flow steady and safe.
Ask yourself: When did you last check your string lights? Make it a habit before every holiday or event. Consistent maintenance keeps your fuse from being the weak link in your lighting setup.
Credit: www.apogeeweb.net
Frequently Asked Questions
How Can I Check If My String Light Fuse Is Blown?
To check if the fuse is blown, remove it from the string light. Inspect for a broken filament or discoloration. Use a multimeter to test for continuity. If there’s no continuity, the fuse is blown and needs replacement.
What Causes A String Light Fuse To Blow?
A string light fuse usually blows due to electrical overload or short circuits. Faulty wiring, damaged bulbs, or using too many lights on one circuit can also cause the fuse to blow for safety reasons.
Can I Replace A Blown Fuse In String Lights Myself?
Yes, you can replace a blown fuse yourself. First, locate the fuse holder, usually near the plug. Remove the old fuse carefully and replace it with the exact type and rating specified by the manufacturer.
How Do I Prevent My String Light Fuse From Blowing Again?
Avoid overloading the string lights by not connecting too many sets together. Use lights within the recommended wattage and check for damaged wires or bulbs regularly to prevent fuse issues and ensure safety.
Conclusion
Checking a string light fuse is simple and saves time. Find the fuse inside the plug or battery pack. Look for signs like a broken wire or blackened glass. Use a tester or replace the fuse to see if lights work again.
Fixing a blown fuse keeps your lights bright and safe. Remember, always unplug before checking fuses. Now, you can easily spot a blown fuse and enjoy your string lights without worry.


