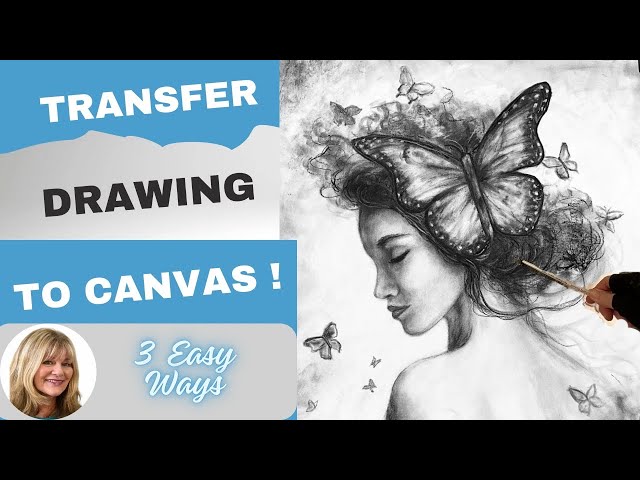
Do you have beautiful pictures that deserve more than just sitting on your phone or computer? Imagine turning those special moments into stunning canvas art that brightens your space and sparks conversations.
Transferring your pictures to canvas is easier than you think, and it can give your photos a whole new life. In this guide, you’ll discover simple steps to create personalized canvas prints that showcase your memories in a unique and lasting way.
Ready to transform your pictures into eye-catching wall art? Let’s dive in!
Choosing The Right Photo
Choosing a clear and high-quality photo ensures the best results on canvas. Bright images with good contrast transfer colors well and look sharp. Selecting a meaningful picture adds personal value to your artwork.
Choosing the Right Photo Transferring pictures to canvas can create beautiful art. The photo you choose plays a crucial role in this process. It determines the final look and feel of your canvas art. A well-chosen photo can capture attention and evoke emotions. So, selecting the right photo is essential.Selecting High-quality Images
High-quality images ensure a clear and vibrant canvas. Blurry or pixelated photos will not translate well. Use photos with sharp details and rich colors. Natural light enhances the quality of images. Photos taken in daylight usually work best.Considering Image Resolution
Image resolution affects the canvas print’s clarity. Higher resolution means better detail. For large canvases, aim for at least 300 DPI (dots per inch). This ensures the image remains clear when enlarged. Check your photo’s resolution before printing.Picking Suitable Subjects
The subject of your photo impacts the canvas’s appeal. Choose subjects that convey emotion or tell a story. Landscapes, portraits, and abstract scenes work well. Consider the room’s theme where the canvas will hang. This helps in selecting harmonious subjects.Preparing Your Image
Preparing your image is a crucial step before transferring it to canvas. It sets the foundation for how your final artwork will look. Taking time to carefully edit, resize, and convert your photo ensures the best quality and a smooth printing process.
Editing And Enhancing Photos
Start by adjusting the brightness, contrast, and saturation to make your image pop. Sometimes, a small tweak to shadows or highlights can bring out details you didn’t notice before.
Remove any distractions or blemishes that could detract from the main subject. You want your canvas to showcase the best version of your photo, not flaws or unwanted background elements.
Have you ever seen a printed canvas where the colors looked dull or washed out? That usually happens because the photo wasn’t enhanced properly beforehand.
Resizing For Canvas Dimensions
Your image needs to match the exact dimensions of your canvas to avoid stretching or pixelation. Check the canvas size and set your photo’s resolution accordingly, ideally at 300 dpi for sharpness.
Keep in mind the aspect ratio; cropping might be necessary to fit the canvas shape without distorting the image. Zooming in too much can cause loss of quality, so balance size with clarity.
If you’re unsure, try printing a small test version first to see how details hold up at the chosen size.
Converting To Suitable File Formats
Saving your photo in the right file format affects how well the printer reads your image. JPEGs are common but can lose quality due to compression, so consider using PNG or TIFF for better results.
Make sure your file is in RGB color mode, as most printing services prefer this for accurate color reproduction. Double-check the file size too; extremely large files might cause issues during upload or printing.
Have you encountered issues where your uploaded photo looked different after printing? Often, it’s a file format or color mode problem that’s easy to fix beforehand.
Selecting Canvas Material
Choosing the right canvas material is key to ensuring your pictures transfer beautifully and last long. The texture, size, and type of canvas you pick affect not only the look but also how well your image holds up over time. Knowing the differences helps you avoid surprises and get the best results for your project.
Types Of Canvas Fabrics
Canvas comes in several fabric types, each with its own feel and performance. Cotton canvas is soft and affordable, making it popular for beginners and casual projects. Linen canvas, on the other hand, offers a smoother surface and greater durability but costs more.
Think about your image’s detail and the final use. If you want vivid colors and crisp lines, linen might be worth the extra investment. Cotton works well for rustic or textured effects, adding character to your picture.
Canvas Sizes And Thickness
The size of your canvas should match the picture’s dimensions to avoid unwanted cropping or stretching. Thickness, or weight, also matters—thicker canvases hold paint or transfer mediums better and resist warping over time.
Standard canvas thickness ranges from 7 mils (thin) to 20 mils (thicker). If you plan to frame your picture or hang it as is, consider a medium to thick canvas for stability. How large is your image, and where will it be displayed? These questions help narrow your choices.
Choosing Pre-stretched Vs. Roll Canvas
Pre-stretched canvas comes ready to use on a wooden frame, saving you time and effort. It’s ideal if you want a quick setup or don’t have tools for stretching. Plus, pre-stretched canvases often come primed and sealed, which can improve image transfer.
Roll canvas offers flexibility—you can cut it to any size and stretch it yourself. This option is great if you have custom dimensions or want full control over tension. However, stretching takes practice and equipment, so ask yourself if you’re ready for the extra step.
Which option fits your workflow and project needs better? Your choice can impact the ease and final look of your picture transfer.

Credit: fixthephoto.com
Methods To Transfer Photos
Transferring photos to canvas creates unique, personalized art. Several easy methods let you achieve this at home or in a studio. Each technique offers different textures and finishes. Choose the one that fits your style and supplies.
Using Photo Transfer Paper
Photo transfer paper is special paper that carries your image. Print your photo on this paper using an inkjet printer. Then, place the paper face down on the canvas. Use a hot iron to press the image onto the surface. Peel the paper away carefully. The picture stays on the canvas with vibrant colors.
This method is quick and good for beginners. It works well for simple designs and small projects.
Gel Medium Transfer Technique
The gel medium method uses a clear acrylic gel. Spread a thin layer of gel on the canvas. Place a printed photo face down into the gel. Let it dry completely, usually overnight. Then, dampen the paper and gently rub it away. The ink stays embedded in the gel on the canvas.
This technique creates a soft, vintage look. It is ideal for artistic effects and textured finishes.
Direct Printing On Canvas
Direct printing uses printers made for canvas material. Upload your photo to the printer’s software. The machine prints the image directly onto the canvas surface. This produces sharp and colorful results. No extra steps are needed after printing.
Direct printing is perfect for professional-quality prints. It suits large photos and gallery displays.
Step-by-step Transfer Process
Transferring pictures to canvas can transform your favorite photos into stunning wall art. The process might seem tricky at first, but breaking it down makes it manageable and even enjoyable. Here’s a detailed look at how you can achieve a flawless image transfer with materials you likely have at home.
Gathering Supplies
Start by collecting all the necessary materials. You will need:
- A canvas (pre-stretched or a canvas board)
- Your printed image (laser prints work best)
- Transfer medium (like gel medium or Mod Podge)
- A brush or sponge for applying the medium
- A burnishing tool (a credit card or spoon works well)
- Water and a soft cloth or sponge
- Scissors (optional for trimming your image)
Having everything ready before you start prevents interruptions and helps you focus on the creative part. Have you ever started a project only to realize you’re missing an essential item? Avoid that frustration by preparing carefully.
Applying Transfer Medium
Begin by applying a thin, even layer of your transfer medium directly onto the printed side of your image. Make sure the coverage is smooth; thick patches might cause uneven transfer.
Use a brush or sponge to spread the medium gently but thoroughly. Don’t rush—taking time here ensures the image adheres well to the canvas.
Positioning And Pressing The Image
Carefully place your image face down on the canvas where you want it. Be precise because repositioning after contact can smudge the transfer.
Now, use your burnishing tool or a spoon to firmly press over the entire image. Apply consistent pressure to avoid air bubbles and ensure the medium bonds the image to the canvas.
Ask yourself: Have you applied enough pressure? Sometimes pushing a bit harder makes a big difference.
Drying And Removing Backing
Allow the canvas and image to dry completely—this could take several hours or overnight. Patience here is key to a clean result.
Once dry, moisten the paper backing with a damp cloth or sponge. Gently rub the paper away with your fingers or a soft cloth. Take your time; aggressive rubbing might remove parts of the transferred image.
Does your image look clear and smooth after this? If not, a little more careful rubbing might reveal hidden details.
Finishing Touches
Adding the finishing touches to your picture transferred onto canvas is where your project truly comes alive. This final stage not only protects your artwork but also enhances its visual appeal. Paying close attention here ensures your canvas looks professional and lasts for years to come.
Sealing The Canvas
Sealing your canvas is crucial to protect the image from dust, dirt, and moisture. You can use a clear acrylic sealer spray or a brush-on varnish depending on your preference. I once skipped sealing, thinking the image was safe, but noticed fading after a few months—don’t make the same mistake.
Apply the sealer in thin, even coats, allowing each layer to dry completely before adding the next. This builds a strong barrier without dulling your picture’s vibrancy.
Adding Protective Coatings
Consider adding a protective coating designed specifically for canvases to guard against UV damage and scratches. Matte, satin, or glossy finishes can change how your image reflects light, so choose one that complements your style.
Using a UV-resistant coating is especially important if your canvas will hang in a sunny spot. This simple step extends your artwork’s life and keeps colors vivid longer.
Framing And Display Options
Framing your canvas can give it a polished, gallery-quality look. Floating frames are popular because they create a sense of depth without covering the edges of your canvas.
If you prefer a minimalist approach, mounting the canvas directly on the wall using sturdy hooks works well. Think about where you want to display your work—will it need extra protection in a busy area or a spot with indirect light?
- Wooden frames for a classic feel
- Metal frames for a modern touch
- No frame for a clean, contemporary look
Which display option suits your space and style? Your choice can change how viewers experience your artwork.
Common Mistakes To Avoid
Transferring pictures to canvas can create beautiful art. Avoiding common mistakes saves time and frustration. Careful steps improve the final result and keep your picture clear.
Preventing Image Distortion
Stretching the canvas too much can distort the image. Keep the canvas flat and steady during transfer. Choose the right size image for your canvas. Avoid resizing the image too much. Use gentle pressure to keep details sharp and clear.
Avoiding Air Bubbles
Air bubbles create uneven spots and ruin the picture. Smooth the picture slowly from the center outward. Use a soft cloth or squeegee to press out air pockets. Work in small sections to catch bubbles early. Make sure the surface is clean and dry before starting.
Handling Transfer Failures
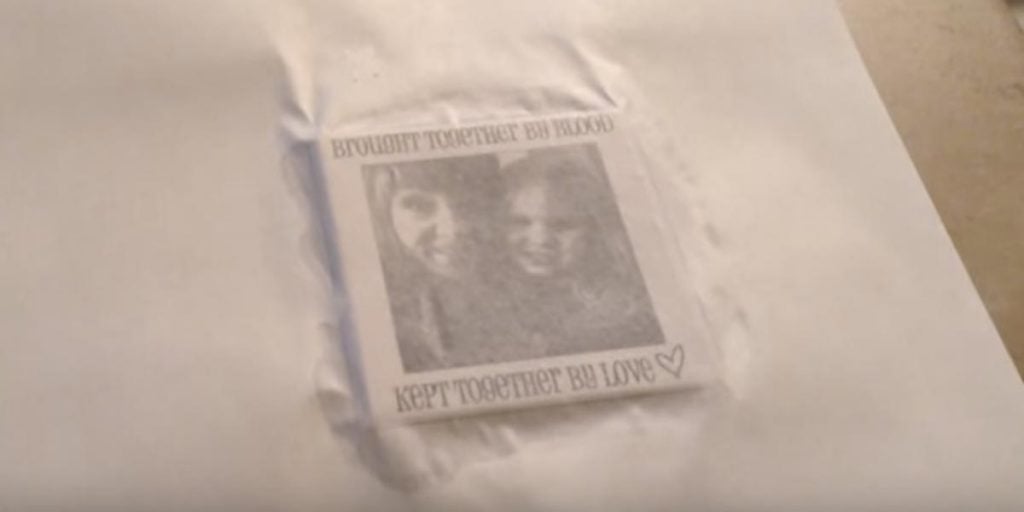
Transfer failures happen when the picture does not stick well. Check the transfer medium is applied evenly and not too thick. Let the transfer dry completely before peeling the backing. Peel slowly and carefully to avoid tearing the image. Practice on scrap material before working on your final canvas.
Credit: diyjoy.com
Creative Ideas For Canvas Art
Transforming your photos into canvas art offers endless creative possibilities. You can personalize your space with unique designs. Experiment with styles to make your canvas stand out. These ideas help you explore different ways to enhance your pictures on canvas.
Collage And Mixed Media
Create a collage by combining multiple photos on one canvas. Layer pictures with different sizes for a dynamic look. Add elements like magazine cutouts, fabrics, or small objects. Mixed media adds depth and interest to your artwork. This approach turns simple photos into striking compositions.
Incorporating Text And Graphics
Include meaningful quotes or words alongside your photos. Use simple fonts that complement the image style. Add basic graphics like shapes or icons to highlight themes. Text and graphics can tell a story or convey a mood. This mix makes your canvas both visual and expressive.
Customizing With Paint And Texture
Enhance your canvas by painting around or over parts of the photo. Use acrylics or watercolors for soft or bold effects. Apply texture with materials like modeling paste or fabric pieces. Textured canvases add a tactile dimension to your art. This method turns photos into vibrant, hands-on creations.

Credit: www.youtube.com
Frequently Asked Questions
How Do I Transfer Pictures To Canvas At Home?
You can transfer pictures using gel medium or heat transfer methods. Print your photo on regular paper, apply gel medium to canvas, place the image face down, and let it dry. Then, gently rub off the paper to reveal the picture on canvas.
What Materials Are Needed For Picture-to-canvas Transfer?
You need a printed photo, a canvas, gel medium or transfer paper, a brush, and a burnishing tool. These materials help you transfer the image smoothly and achieve a professional look on your canvas.
Can I Use Any Photo For Canvas Transfer?
Yes, but high-contrast and simple images work best. Avoid low-resolution or overly detailed photos. Clear, bold pictures transfer better and produce sharper, more vibrant results on canvas.
Is There A Difference Between Gel And Heat Transfer?
Yes, gel medium uses a chemical process to embed the photo, while heat transfer uses heat to transfer ink. Gel transfer is more common for DIY projects and offers more control over the final image.
Conclusion
Transferring pictures to canvas is simple and fun. Choose a clear photo and prepare your materials carefully. Follow the steps with patience and care. You can create beautiful, personalized art for your home. This process saves money and lets you express creativity.
Try different methods to find what works best. Enjoy turning your favorite pictures into lasting memories on canvas. Give it a go and see the results yourself!