
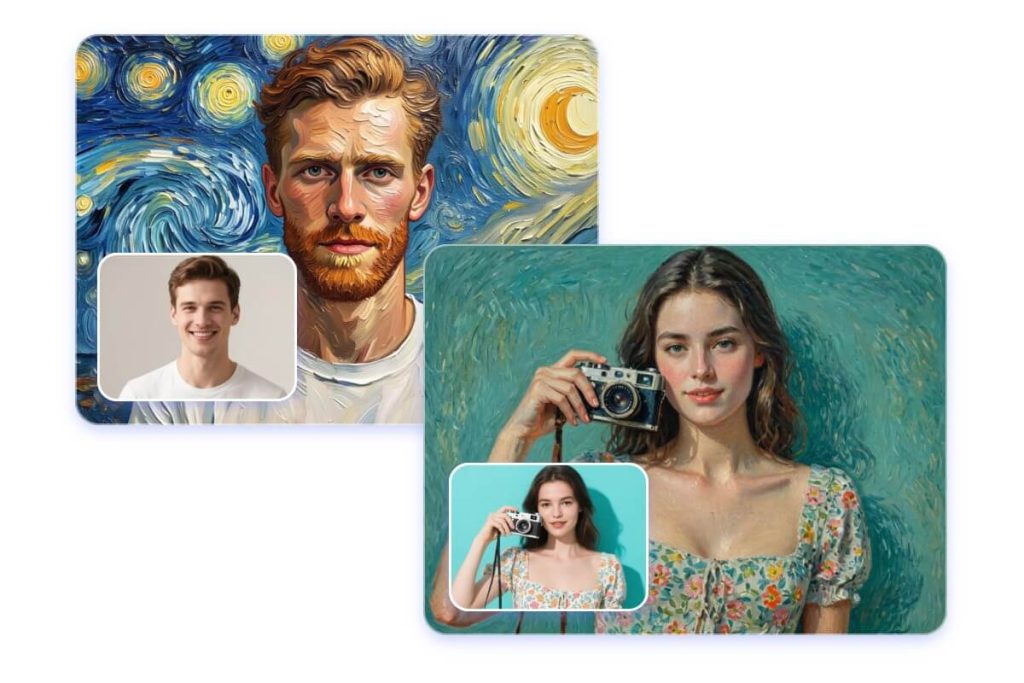
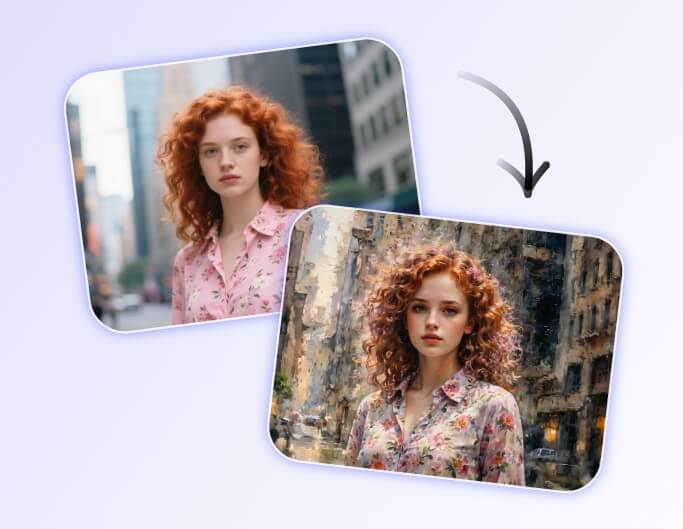
Have you ever looked at a photo and wished you could turn it into a stunning piece of art? Imagine seeing your favorite picture transformed into a beautiful canvas that brightens up your room and captures attention.
Turning a picture into a canvas is easier than you think, and it can add a personal touch to your space or make a perfect gift. You’ll discover simple, step-by-step tips to create your own canvas masterpiece. Ready to bring your memories to life in a whole new way?
Let’s get started!
Choosing The Right Photo
Choosing a clear, high-quality photo ensures your canvas looks sharp and vibrant. Select images with good lighting and simple backgrounds for the best results.
Choosing the Right Photo Turning a picture into a canvas can be a rewarding experience. The right photo is crucial. It sets the tone for your canvas. Choose wisely to ensure your canvas stands out. Here are some tips to help you make the best choice.Selecting High-quality Images
Pick images that are sharp and clear. Blurry images won’t work well. High-quality images ensure better prints. Check for good lighting in the photo. It should have balanced colors and clear details.Considering Image Resolution
Resolution matters for canvas prints. A higher resolution means better quality. Aim for at least 300 DPI for a sharp canvas. Avoid images with low resolution; they may look pixelated.Picking Photos With Strong Composition
Composition affects the visual appeal. Choose photos with clear subjects. Ensure the subject is well-placed in the frame. Good composition draws the eye and keeps interest. Rule of thirds can be a helpful guide. These tips will help you select the perfect photo for your canvas.Preparing The Image
Preparing your image is a crucial step before turning it into a canvas. The quality and appearance of the final canvas depend heavily on how well you prepare the photo. Small tweaks here can make a big difference in the overall impact of your artwork.
Editing For Color And Contrast
Adjusting color and contrast brings your image to life. If your picture looks dull or washed out, increase the contrast slightly to add depth. Boosting colors can make details pop, but be careful not to overdo it—too much saturation can look unnatural.
Think about the mood you want to set. Do you want warm tones that feel cozy or cooler shades that are calming? Simple changes like these help your canvas tell the story you want.
Cropping And Resizing
Not every part of your photo needs to be on the canvas. Cropping helps you focus on the most important elements. Cut out distractions and zoom in on the subject to create a stronger composition.
Resizing ensures your image fits the canvas perfectly. Check the resolution—images that are too small will look blurry when enlarged. A good rule is to use a photo with at least 150 DPI (dots per inch) for clear, sharp prints.
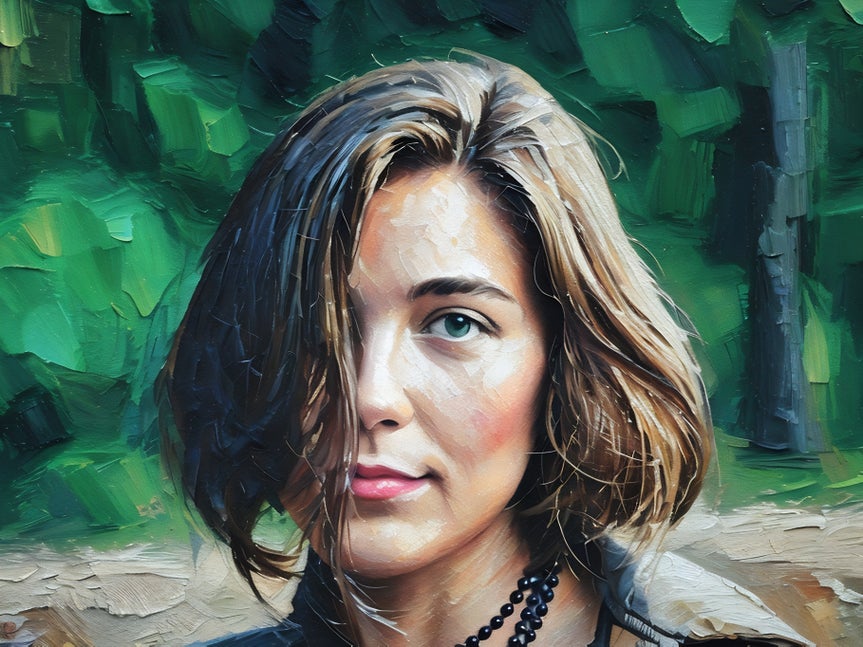
Applying Filters And Effects
Filters can add personality to your image. A black-and-white filter can give a timeless feel, while a soft blur effect might add a dreamy touch. But use filters sparingly; they should enhance, not overpower.
Try different effects to see what matches your space or the vibe you want. Sometimes, a subtle vignette or slight sharpening can make your canvas stand out without looking over-edited.
Printing Options
Printing your picture on canvas requires choices that affect the final look. These choices include the type of canvas material, the size of the print, and the printing service you select. Each factor plays a key role in the quality and durability of your canvas art.
Choosing Canvas Material
The canvas material impacts the texture and color vibrancy of your print. Cotton canvas offers a natural feel and great color depth. Polyester canvas is smoother and resists moisture well. Mixed materials combine benefits of both types for balanced quality. Consider the texture that fits your style and where you will hang the canvas.
Selecting Print Size
Pick a size that matches your space and image resolution. Small prints work well for desks or shelves. Medium sizes suit living rooms and bedrooms. Large prints create a bold statement on big walls. Check your picture resolution to avoid blurry prints when enlarging. Measure your wall area before deciding on size.
Comparing Printing Services
Printing services vary in price, quality, and delivery speed. Some offer custom framing and mounting options. Others provide proofing to preview your canvas before printing. Look for services that use high-quality inks for lasting color. Read reviews to find reliable and affordable options. Local shops may offer faster service but online printers often have better prices.

Credit: www.whataportrait.com
Stretching The Canvas
Stretching the canvas is a crucial step in turning your picture into a stunning piece of wall art. It transforms a simple print into a professional-looking canvas that’s ready to display. Getting the stretch right ensures your image stays smooth and vibrant, without wrinkles or sagging.
Tools Needed For Stretching
- Canvas stretcher bars:These wooden bars form the frame to stretch your canvas over.
- Staple gun:A heavy-duty staple gun helps secure the canvas tightly.
- Canvas pliers:These special pliers grip the canvas firmly to pull it tight.
- Measuring tape:Ensures your canvas is centered and evenly stretched.
- Scissors or utility knife:To trim excess canvas after stretching.
Step-by-step Stretching Guide
Start by assembling your stretcher bars to create a sturdy frame. Lay your printed canvas face down on a clean surface, then place the frame on top, aligning it carefully.
Use the canvas pliers to grip one side of the canvas and pull it tight over the bar. Staple the canvas at the center of that side, then move to the opposite side, repeating the process. This keeps tension balanced and prevents warping.
Work your way around the frame, stapling the canvas every few inches. Always pull the fabric tight before stapling, but avoid overstretching to prevent distortion. Fold the corners neatly and staple them securely.
Common Stretching Mistakes To Avoid
- Uneven tension:Pulling one side more than the other causes wrinkles and distorts your image.
- Skipping corner folds:Poor corner folding leads to bulky, uneven edges that don’t look professional.
- Using the wrong staples:Staples that are too short won’t hold well, while too long staples can damage the stretcher bars.
- Not trimming excess canvas:Excess fabric can get in the way and cause bumps when framing.
Have you ever struggled to get your canvas perfectly flat? Paying attention to these details makes a big difference and saves you from frustration. Your picture deserves the best presentation, and stretching the canvas properly is the key.
Finishing Touches
Finishing touches can transform your canvas from a simple print to a true piece of art. These final steps protect your work, enhance its appearance, and help it fit perfectly in your space. Paying close attention now means your canvas will look stunning and last longer.
Adding Protective Coatings
Applying a protective coating shields your canvas from dust, moisture, and fading. You can choose from varnishes like matte, glossy, or satin finishes depending on the look you want. A glossy varnish makes colors pop, while matte reduces glare—think about where your canvas will hang.
Use a soft brush or spray for even coverage. Let each layer dry completely before adding another to avoid streaks. This extra step may seem small, but it can keep your image vibrant for years.
Framing Vs. Gallery Wrap
Deciding between framing your canvas or opting for a gallery wrap changes the final presentation. Gallery wraps stretch the image around the edges of the frame, giving a modern, frameless look. This works well if you want a clean, minimalist style.
Frames add a classic touch and protect the edges from damage. Consider the room’s decor—wood frames add warmth, while metal frames offer a sleek vibe. Which style fits your taste and space better?
Hanging And Display Tips
How you hang your canvas affects both its safety and visual impact. Use sturdy hooks and anchors that match the wall type to prevent accidents. Measure carefully to keep your canvas at eye level for the best viewing experience.
Think about lighting too—natural light can enhance colors but may cause fading over time. Position your canvas where it can be admired without direct sunlight, or use soft artificial lighting. Have you thought about rotating your art periodically to keep your space fresh?
Credit: www.fotor.com
Alternative Methods
Looking beyond traditional canvas printing can open up exciting ways to transform your pictures into stunning wall art. Alternative methods let you get hands-on, add unique textures, and even print right at home. These approaches might surprise you with how simple and creative the process can be.
Using Diy Transfer Techniques
Have you tried transferring images onto canvas using household items? DIY transfer methods like using gel medium or iron-on transfers let you imprint your picture without expensive equipment. You simply print your image on regular paper, apply a gel medium to the canvas, place the paper face down, and gently rub away the paper once dry.
This technique creates a vintage, textured look that feels personal and handmade. Experiment with different papers and transfer mediums to see what results you like best. What textures and effects could make your picture truly unique?
Digital Canvas Printing At Home
If you own a high-quality inkjet printer, you can print directly on canvas sheets designed for home use. These sheets often come with a coating that holds ink well and prevents smudging. This method gives you more control over the size and finish without waiting for professional services.
Make sure to use pigment-based inks for durability. Have you considered how printing at home could let you tweak colors and details instantly? It’s a great way to test different looks before committing to a larger piece.
Creative Mixed Media Approaches
Mixing your photo with paint, fabric, or other materials can turn a simple image into a vibrant piece of art. You might paint over certain areas, add stitching, or glue small objects onto the canvas for depth. This technique invites you to play and personalize every inch of your picture.
Think about which elements reflect your style or the mood you want to create. Could adding unexpected materials bring new life to a familiar photo? These mixed media canvases often become conversation starters and unique keepsakes.
Credit: www.befunky.com
Frequently Asked Questions
How Do I Choose The Best Photo For Canvas Printing?
Choose high-resolution photos with good lighting and clear focus. Images with vibrant colors and minimal background distractions work best. Portraits, landscapes, and memorable moments make excellent canvas prints. Ensure the photo is large enough to avoid pixelation when enlarged on canvas.
What Materials Are Used For Printing Pictures On Canvas?
Canvas prints use cotton or polyester fabric stretched over wooden frames. Specialized inkjet printers apply fade-resistant, UV-protected inks. This combination ensures durable, vibrant images that last for years. The texture of the canvas also adds a classic artistic feel to the picture.
How Do I Prepare My Picture For Canvas Printing?
Crop and edit your photo to enhance colors and contrast. Use photo editing software to adjust brightness, sharpness, and remove blemishes. Save the image in a high-resolution format like TIFF or PNG. This preparation ensures the best print quality on canvas.
What Are The Common Sizes For Canvas Prints?
Popular canvas sizes range from 8×10 inches to 24×36 inches. Choose a size based on your wall space and photo resolution. Larger prints make bold statements, while smaller ones fit cozy areas. Always match size with image quality to prevent blurriness.
Conclusion
Turning a picture into a canvas adds a personal touch to any space. It brings memories to life in a new way. The process is simple and fun to try. Choose a good photo, pick the right size, and follow easy steps.
A canvas print lasts longer than paper prints. It also looks great on walls or shelves. Enjoy creating your own unique art with just a photo. This small change can brighten up any room instantly. Give it a try and see the difference yourself!


