
Uploading a picture to Canvas might seem tricky at first, but it’s actually quick and simple once you know the steps. Whether you want to share an image for a class project or add a personal touch to your assignments, this guide will walk you through the process clearly and easily.
By the end, you’ll feel confident and ready to upload your pictures without any hassle. Keep reading, and you’ll discover how to make your Canvas submissions stand out effortlessly.

Credit: shopsavvy.com
Preparing Your Picture
Choose a clear, well-lit photo to upload. Ensure the file is saved in a common format like JPG or PNG. Resize the image if needed for faster uploading and better display on Canvas.
Preparing your picture for uploading to Canvas is an essential step that ensures your image appears exactly as you envision. It’s not just about having a pretty photo; it’s about making sure that your picture is in the right format, size, and quality. This process might seem simple, but small details can make a significant difference in how your image is displayed and perceived.Choosing The Right File Format
Selecting the appropriate file format is crucial. JPEG is ideal for photographs because it compresses without losing too much quality, making it perfect for most scenarios. PNG, on the other hand, is excellent for images requiring transparency or when you want to maintain higher quality. Consider what your image needs to convey and choose accordingly.Optimizing Image Size And Quality
Image size impacts loading times and quality. A large file might slow down Canvas, while a too-small image can appear pixelated. Aim for a balance: resize your image to the dimensions required by Canvas. Use tools like Photoshop or free online resizers to adjust size without sacrificing quality. Remember, sharper images grab attention and keep viewers engaged.Naming Your File Properly
A well-named file makes your image easy to find and manage. Use descriptive names that reflect the content or purpose of the image. Instead of “IMG_1234,” opt for “sunset_over_lake.jpg.” This simple habit can streamline your workflow and prevent confusion. Plus, organized files make for a smoother, more efficient upload process. Taking the time to prepare your picture properly can enhance your overall Canvas experience. Have you ever struggled with an image that just wouldn’t upload correctly? Share your thoughts or tips in the comments below!Accessing Canvas
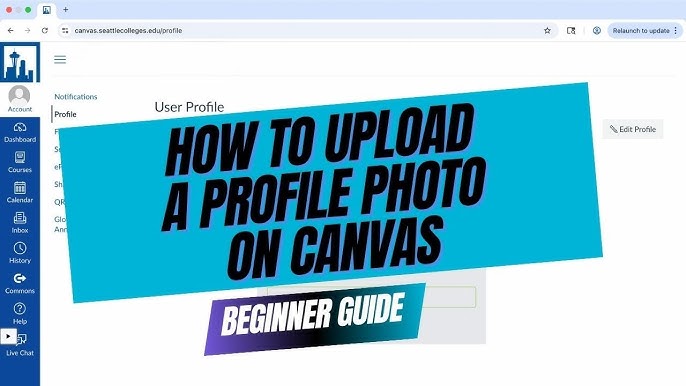
Accessing Canvas is the first step to upload a picture. You must enter your account and find the right course. The process is simple and quick. Follow the clear instructions below to get started without trouble.
Logging Into Your Account
Open your web browser and go to the Canvas login page. Enter your username and password carefully. Use the credentials given by your school or institution. Click the “Login” button to access your dashboard. If you forget your password, use the “Forgot Password” link to reset it.
Navigating To The Desired Course
After login, you will see your Canvas dashboard. It shows all your active courses in a list or grid format. Find the course where you want to upload the picture. Click the course name to open its main page. This page contains all course materials and tools you will use.
Uploading The Picture
Uploading a picture to Canvas is simple and quick. You can add images to your course content in several easy ways. Each method fits different needs and preferences.
Choose the best way to upload your picture and enhance your course materials.
Using The Rich Content Editor
The Rich Content Editor lets you add pictures directly into your text. Open the editor in any Canvas page or assignment.
- Click the image icon in the toolbar.
- Select “Upload Image” from the menu.
- Browse your computer and pick the picture.
- Adjust the size and alignment if needed.
- Save your changes to display the image.
This method places the image exactly where you want it in your content.
Drag And Drop Method
Drag and drop is the fastest way to add pictures. Open the Canvas page or assignment editor.
- Locate your picture on your computer.
- Click and hold the image file.
- Drag it into the Canvas editor window.
- Release the mouse to drop the file.
- Canvas uploads and inserts the image instantly.
No extra clicks needed. The image appears where you drop it.
Uploading Via Files Section
You can upload pictures through the Files section in Canvas. This stores images for reuse across your course.
- Go to the “Files” tab in your Canvas course.
- Click the “Upload” button.
- Select the picture from your device.
- Wait for the upload to finish.
- Use the image link or insert it via the Rich Content Editor.
This way keeps your pictures organized and easy to find later.

Credit: www.youtube.com
Adjusting And Positioning
Adjusting and positioning your picture on Canvas is key for a polished look. Proper adjustments ensure the image fits well and complements your design. Positioning helps draw attention to important parts of the picture.
Careful resizing and alignment make your content clear and engaging. Adding alt text improves accessibility for all users. Each step contributes to a better user experience and a professional appearance.
Resizing The Image
Resize the image to fit your Canvas space perfectly. Drag the corners of the image box to scale it up or down. Hold the Shift key while dragging to keep the image’s proportions. Avoid stretching the picture, which can make it look blurry or distorted.
Use the toolbar options for precise size control. Enter exact width and height values if needed. Keep the image size balanced with other elements on the page.
Aligning And Placing Correctly
Place your image where it best supports your content. Use Canvas grid lines to align the picture evenly. Centering the image creates focus, while left or right alignment suits text layouts.
Use the drag-and-drop feature to move the image smoothly. Snap-to-grid helps keep it straight and tidy. Check spacing around the image for a clean look.
Adding Alt Text For Accessibility
Alt text describes the image for people using screen readers. It also helps search engines understand your picture’s content. Write clear and simple descriptions that explain the image’s purpose.
Keep alt text short but informative. Avoid repeating information already in the text. This small step makes your Canvas content friendly to all users.
Saving And Previewing
Saving and previewing your uploaded picture on Canvas ensures your work is secure and looks perfect. This process helps avoid losing changes and confirms that the image appears as expected. Knowing how to save and preview effectively improves your overall experience.
Saving Your Changes
After uploading a picture, always save your changes immediately. Canvas usually has a save button at the top or bottom of the page. Click it to store your work safely.
Saving frequently protects against accidental data loss. It also updates your course or page with the new image. Never leave the page without saving first.
Previewing The Uploaded Picture
Previewing lets you see how the picture looks to others. Canvas provides a preview option near the save button or in the content editor.
Use preview to check the image size, position, and quality. This helps ensure your picture fits well and looks clear. Adjust if needed before finalizing your content.
Troubleshooting Upload Issues
Uploading a picture to Canvas usually works smoothly. Sometimes, upload issues can block your progress. Troubleshooting helps fix these problems fast. Understanding common errors and how to solve them saves time and stress.
Common Upload Errors
Uploads can fail for many reasons. Often, error messages show up like:
- File size too large
- Unsupported file format
- Network connection lost
- Upload timeout
These errors interrupt your upload. Recognizing them helps you act quickly.
Fixing File Compatibility Problems
Canvas supports common image files like JPG, PNG, and GIF. Using other formats may cause issues. Check your file type before uploading.
Resize large images to reduce file size. Tools like Paint or online compressors work well. Keep file size under 10MB for best results.
Rename your file to simple letters and numbers. Avoid special characters or spaces. This can prevent upload errors.
Contacting Support When Needed
Problems persist despite your efforts? Reach out to Canvas support. Provide details such as:
- Error messages you see
- Your device and browser type
- Steps you tried to fix the issue
Support teams can offer tailored help. They may spot issues you missed. Don’t hesitate to ask for assistance.

Credit: at.csudh.edu
Frequently Asked Questions
How Do I Upload A Picture To Canvas?
To upload a picture to Canvas, log in and open your course. Navigate to the “Files” or “Modules” section. Click “Upload” and select your image file. Once uploaded, you can insert it into pages, assignments, or discussions easily.
What Image Formats Does Canvas Support?
Canvas supports common image formats such as JPEG, PNG, GIF, and BMP. Ensure your picture is in one of these formats before uploading. This guarantees compatibility and smooth display within your course materials or assignments.
Can I Resize Pictures After Uploading In Canvas?
Yes, Canvas allows you to resize images after uploading. Use the image editing tools within the Rich Content Editor. Simply click the image and drag the corners to adjust size as needed for better presentation.
Is There A File Size Limit For Uploading Pictures?
Yes, Canvas typically limits file uploads to 500 MB, which is sufficient for most images. Large files may take longer to upload or fail. Compress your image if it exceeds the size limit to ensure successful upload.
Conclusion
Uploading a picture to Canvas is quick and simple. Just follow the steps carefully. Choose the right file from your device. Make sure the image fits your assignment or project. Double-check the upload before submitting. Practice makes it easier each time.
Now, you can share your work with confidence. Keep exploring Canvas features to improve your skills.


