
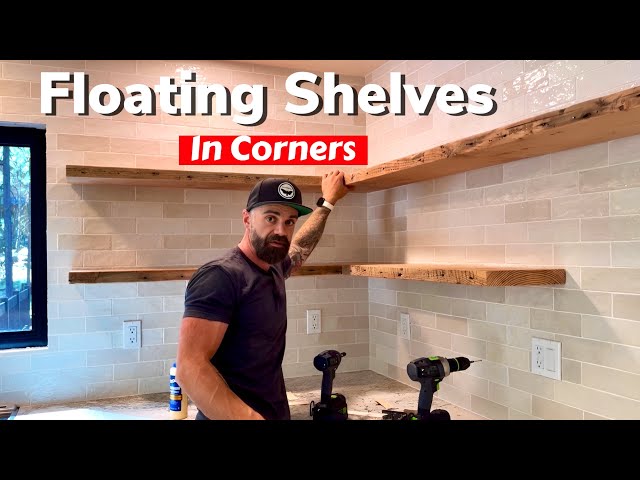
Are you ready to give your space a fresh, stylish upgrade? Floating shelves are the perfect way to add storage and style without bulky furniture.
But the tricky part is making sure they stay securely on your wall. If you’ve ever wondered how to attach floating shelves so they look great and hold your favorite items safely, you’re in the right place. Keep reading, and you’ll discover simple, step-by-step tips that anyone can follow—no special tools or skills needed.
Let’s get started and transform your walls into a beautiful, functional display!
Choosing The Right Shelves
Choosing the right floating shelves is key to a successful wall display. The perfect shelf balances style, strength, and function. Your choice depends on room design and what you want to hold. Consider materials, shapes, and weight limits carefully. Picking wisely ensures safety and enhances your space.
Materials And Styles
Floating shelves come in many materials. Wood offers a warm, natural look. Metal shelves bring a modern, sleek feel. Glass shelves add lightness and elegance. Each material suits different room styles and uses.
Styles vary from simple planks to intricate designs. Think about the room’s theme. Minimalist spaces fit plain, clean lines. Rustic rooms benefit from rough, textured wood. Decorative brackets or hidden supports affect the shelf’s look too.
Weight Capacity Considerations
Every shelf has a weight limit. Consider what you plan to place on the shelf. Light items like picture frames need less support. Heavy objects like books or plants require strong shelves.
Check the shelf’s maximum weight rating before buying. Wall type matters too. Drywall holds less weight than solid wood or brick walls. Use proper anchors and hardware to secure the shelves safely.

Credit: www.create-enjoy.com
Tools And Materials Needed
Attaching floating shelves to a wall requires the right tools and materials for a secure fit. Using proper equipment makes the job easier and safer. Prepare everything before starting to avoid interruptions.
Choose tools that help measure, drill, and level accurately. Pick hardware that supports the shelf’s weight and matches the wall type. Quality materials ensure the shelf stays stable over time.
Essential Tools
- Measuring tape – for precise measurements
- Level – to keep shelves straight
- Drill with bits – to make holes in the wall
- Screwdriver – to tighten screws securely
- Stud finder – to locate wall studs
- Pencil – to mark drilling spots
- Hammer – for anchors, if needed
Recommended Hardware
- Wall anchors – for drywall or hollow walls
- Heavy-duty screws – to hold shelf brackets
- Floating shelf brackets – designed to hide supports
- Toggle bolts – for extra support in weak walls
- Plastic or metal anchors – depending on wall type
Preparing The Wall
Clear the wall surface and remove any dust or dirt for better shelf adhesion. Locate studs using a stud finder to ensure strong support. Mark the spots carefully before drilling holes for secure floating shelf installation.
Preparing the wall for your floating shelves is a crucial step to ensure they not only look great but stay securely in place. It’s all about setting the right foundation, much like crafting the perfect recipe. Skipping this stage could lead to wobbly shelves or worse—falling decor.Finding Studs
Finding studs in your wall is your first task. They are the hidden heroes, giving your shelves the sturdy support they need. Use a stud finder, an affordable tool that saves time and prevents guesswork. As you glide it across the wall, watch for signals indicating a stud’s location. If you don’t have a stud finder, gently tap the wall and listen for a solid sound, signaling a stud. Trust me, relying on drywall alone is a recipe for disaster.Marking Shelf Placement
Once you’ve found your studs, it’s time to mark where you want your shelves to hang. Grab a pencil and a level to ensure precision. Remember, the height should be functional and aesthetic. Think about what you’ll place on the shelves. Books? Knick-knacks? Ensure there’s enough space between the shelves for taller items. A helpful tip is to use painter’s tape to visualize the placement before making any permanent marks. Does your room have a focal point? Align your shelves accordingly to enhance visual appeal. Engaging in this step not only adds to the functionality but also elevates the room’s overall ambiance.
Credit: www.youtube.com
Installing Wall Brackets
Installing wall brackets is a crucial step for floating shelves. These brackets hold the shelves firmly against the wall. Proper installation ensures the shelves stay level and secure, supporting the weight of your items.
Use the correct tools and hardware for strong support. Measure carefully to place brackets evenly. The wall type affects the installation process and hardware choice.
Drilling Pilot Holes
Mark the bracket positions on the wall. Use a level to keep marks straight. Choose a drill bit slightly smaller than the wall anchors or screws.
Drill pilot holes at the marked spots. Drill slowly and keep the drill straight. Pilot holes prevent the wall from cracking and make screw insertion easier.
Securing Brackets To Wall
Insert wall anchors into the pilot holes if needed. Align the bracket holes with the pilot holes. Use screws that fit the bracket and anchors.
Tighten screws with a screwdriver or drill. Ensure brackets are flush and stable against the wall. Double-check the bracket level before fully tightening screws.
Mounting The Floating Shelf
Mounting a floating shelf might seem straightforward, but precision is key to making it both sturdy and visually appealing. You want to ensure the shelf aligns perfectly and is securely fastened to hold your items safely. Let’s focus on the crucial steps of aligning the shelf and securing it to the brackets.
Aligning The Shelf
Start by carefully positioning your floating shelf on the wall brackets. Check if the shelf is level using a spirit level; even a slight tilt can affect the overall look and stability.
Take a moment to step back and see if the shelf sits flush against the wall without gaps. Adjust it gently until it fits snugly. Have you ever noticed how a tiny misalignment can make a whole room feel off? Paying close attention here saves you from that.
Securing The Shelf To Brackets
Once aligned, it’s time to fasten the shelf securely to the brackets. Most floating shelves come with screws or set screws that fit into holes on the brackets.
Use a screwdriver or drill to tighten these screws firmly, but avoid overtightening as it could damage the shelf or wall. Double-check the stability by gently pressing down or placing some weight on the shelf.
Have you ever had a shelf come loose after a few days? Properly securing the shelf right away prevents that annoying problem and keeps your display safe and steady.
Final Adjustments
After mounting floating shelves, final adjustments ensure a clean, secure finish. These tweaks make shelves look professional and hold items safely. Pay attention to small details for the best results.
Leveling The Shelf
Check the shelf with a spirit level. Place it on top of the shelf surface. The bubble should sit in the center. Adjust the shelf slightly if it tilts left or right.
Use a small shim behind the bracket if needed. Shims help fix minor unevenness on the wall. Tighten screws carefully after leveling. Confirm the shelf stays level after tightening.
Checking Stability
Press gently on the shelf to test strength. It should not wobble or move under pressure. Add more support if the shelf feels loose.
Check that brackets are firmly anchored in the wall. Use a screwdriver to tighten any loose screws. Make sure weight is evenly distributed on the shelf.
Safety Tips
Ensuring safety while attaching floating shelves to your wall is crucial. Shelves can hold valuable or heavy items, and any mistake might cause damage or injury. Paying attention to safety tips not only protects your belongings but also gives you peace of mind.
Handling Heavy Loads
Always check the weight limit of your floating shelves before placing anything on them. Overloading shelves can cause them to detach and fall. Use wall anchors designed for heavy loads to increase stability.
Think about the type of wall you have—drywall, plaster, or concrete—as this affects how much weight your shelves can hold. If you’re unsure, test the shelf with lighter items first. Would you risk placing your favorite book collection on a shaky shelf?
Distribute weight evenly across the shelf. Avoid putting all heavy items in one spot. This simple step prevents unnecessary strain on the brackets and wall.
Regular Maintenance
Check your shelves periodically for any signs of loosening or damage. Tighten screws and brackets as needed to keep shelves secure. This small effort can prevent accidents before they happen.
Look out for cracks in the wall around the shelf or any bending in the brackets. These are warning signs that your shelf might be struggling. How often do you inspect your shelves to catch these issues early?
Dust and clean your shelves regularly to avoid buildup that can hide problems. Keeping your shelves in good shape extends their lifespan and keeps your space safe.

Credit: chill-house.co.uk
Frequently Asked Questions
How Do You Securely Attach Floating Shelves To Drywall?
Use wall anchors or toggle bolts for strong support. Locate wall studs and drill pilot holes. Attach shelf brackets firmly to ensure stability and prevent sagging.
What Tools Are Needed To Install Floating Shelves?
You need a drill, level, screwdriver, stud finder, measuring tape, and wall anchors. These tools ensure precise, secure, and easy shelf installation.
Can Floating Shelves Hold Heavy Items Safely?
Yes, if properly installed into wall studs or with strong anchors. Always check the shelf weight capacity and avoid overloading for safety.
How Do You Find Studs For Mounting Floating Shelves?
Use a stud finder to locate studs behind the drywall. Mark the stud locations to ensure secure shelf mounting and avoid weak spots.
Conclusion
Attaching floating shelves to your wall is simple with the right steps. Choose strong anchors and measure carefully for a secure fit. Use a level to keep shelves straight and avoid damage. Take your time and follow instructions closely. These shelves can add style and storage to any room.
Enjoy your new space and the neat look floating shelves create. Keep practicing to improve your skills and confidence. Small projects like this make a big difference at home.


