
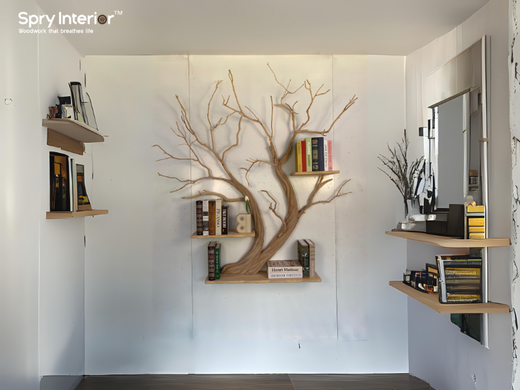
Are you looking to add more storage or style to your space without spending a fortune? Building shelves on a wall is one of the easiest and most effective ways to do just that.
Imagine having a place to neatly display your favorite books, plants, or keepsakes — all within your reach and perfectly suited to your room. In this guide, you’ll discover simple steps to create sturdy, attractive shelves that fit your space and your style.
Ready to transform your walls and organize your life? Let’s get started.
Choosing The Right Shelves
Choosing the right shelves can make or break your wall storage project. It’s not just about looks—it’s about durability, functionality, and how well the shelves fit your space and needs. Taking time to understand your options saves you from costly mistakes and frustration down the road.
Types Of Shelves
There are several types of shelves to consider, each with its own strengths. Floating shelves offer a clean, modern look without visible brackets. Corner shelves maximize unused spaces and add character. Traditional bracket shelves provide strong support and come in many styles.
Think about how you’ll use the shelves. Are they for display, heavy storage, or both? Your choice impacts both design and installation.
Materials And Finishes
Wood shelves bring warmth and can be stained or painted to match your decor. Metal shelves offer a sleek, industrial feel and handle weight well. Glass shelves create an airy vibe but require careful placement to avoid damage.
Finish matters too. A smooth, sealed finish protects wood from moisture and scratches. Matte finishes hide fingerprints better than glossy ones. Consider your lifestyle: do you need something kid-proof or easy to clean?
Size And Weight Considerations
Measure your wall space carefully before choosing shelf size. Oversized shelves can overwhelm a room, while undersized ones may not serve their purpose. Depth matters—too shallow, and items might fall off; too deep, and the shelf could look bulky.
Weight is crucial. What will you put on the shelves? Heavy books require sturdier materials and brackets. Light décor can work with delicate shelves. Always check the weight limits to avoid accidents.

Credit: www.youtube.com
Tools And Materials Needed
Before you start building shelves on your wall, gathering the right tools and materials is key. Using proper equipment not only makes the task easier but also ensures your shelves are sturdy and safe. Let’s break down what you’ll need to get the job done efficiently.
Essential Tools
- Drill:A cordless drill is ideal for making holes and driving screws quickly. It saves you time and effort compared to manual screwdrivers.
- Level:Ensures your shelves are perfectly horizontal. Even a slight tilt can make your shelf look off and cause items to slide off.
- Stud Finder:Helps locate wall studs, which provide the strongest support for your shelves. Skipping this can lead to weak shelving that might fall.
- Measuring Tape:Accurate measurements prevent mistakes and wasted materials. It’s a simple tool that makes a big difference.
- Screwdriver Set:Sometimes you’ll need different sizes or types of screwdrivers, so having a set ready is helpful.
- Pencil:For marking drill points and measurements. Clear markings guide your work and reduce errors.
Hardware And Fasteners
- Screws:Use screws designed for wood or drywall, depending on your wall type. Length matters – too short won’t hold, too long can damage wires inside the wall.
- Wall Anchors:Necessary if you can’t secure your shelves directly into studs. They expand inside the wall for better grip.
- Brackets or Shelf Supports:Choose brackets that match the weight and style of your shelves. Metal brackets offer strong support for heavy items.
- Wood Boards:Select boards that fit your intended shelf size and style. Pine and plywood are popular choices for beginners.
Safety Gear
- Safety Glasses:Protect your eyes from dust and debris when drilling or sanding.
- Dust Mask:Prevents inhalation of fine particles, especially if you’re sanding wood or drilling into drywall.
- Work Gloves:Shield your hands from splinters, sharp edges, and accidental scrapes.
- Ear Protection:Useful if you’re working with loud power tools for extended periods.
Have you ever started a project only to realize you’re missing a crucial tool halfway through? Taking time to prepare your toolkit can save you frustration and keep your work smooth. What’s one tool you think is often overlooked but makes a big difference in shelf building?
Preparing The Wall
Clear the wall of any nails, screws, or debris to ensure a smooth surface. Use a stud finder to locate the wall studs for strong shelf support. Mark these spots clearly before drilling.
Preparing the Wall Before you dive into the fun part of building and decorating your shelves, take a moment to prepare your wall. This step is crucial for ensuring your shelves are sturdy and well-aligned. You wouldn’t want your treasured books or collectibles crashing down due to poor preparation, right? Let’s set a solid foundation for your shelving project.Finding Studs
The first thing you’ll need to do is locate the wall studs. These are the wooden beams behind your drywall, providing the necessary support for your shelves. Use a stud finder to detect these hidden supports. If you don’t have a stud finder, knock on the wall and listen for a solid sound. Studs are usually spaced about 16 to 24 inches apart. Finding and marking these will ensure your shelves have the strength they need.Marking Shelf Placement
Once you’ve found the studs, decide where you want your shelves to be. Use a pencil and a level to draw a straight line on the wall. This line will guide you during installation. Consider the height and spacing of your shelves. Will you be placing large items, like vases, or smaller books? Adjust your plans accordingly for optimal placement.Checking For Obstacles
Before drilling any holes, double-check the wall for hidden obstacles. Electrical wires and pipes can be lurking behind your chosen spot. You wouldn’t want to accidentally drill into one, causing a bigger home repair project. Use a wire and pipe detector to ensure the area is clear. This small step can save you a lot of potential headaches and expenses.Installing Shelf Brackets
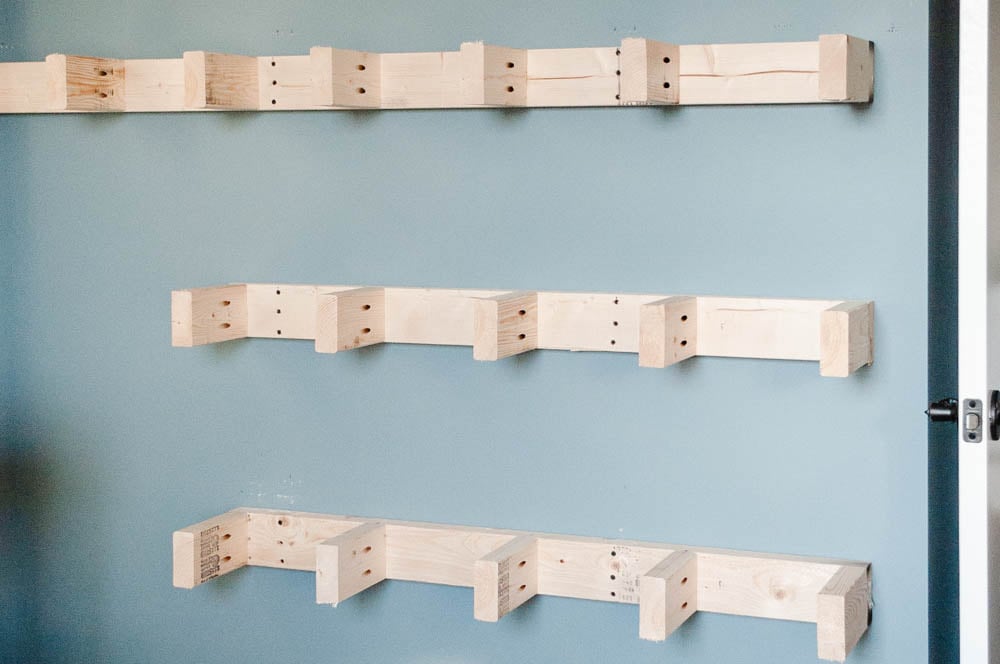
Installing shelf brackets correctly is key to ensuring your shelves are sturdy and level. This process requires attention to detail and a bit of patience, but the result is a reliable support system for your shelf boards. Let’s look at how to make sure your brackets are perfectly positioned and firmly attached to the wall.
Measuring And Aligning
Start by deciding the height and width where your shelves will sit. Use a tape measure to mark the exact spots for each bracket on the wall. Double-check these marks with a level to keep everything perfectly horizontal.
Don’t rush this step—misaligned brackets can make your shelf tilt or look uneven. Imagine the frustration of placing your favorite books only to watch them slide off because the bracket was off by half an inch!
Drilling Pilot Holes
Before attaching the brackets, drill pilot holes at the marked spots. These smaller holes guide the screws and prevent the wall from cracking. If you’re drilling into drywall, make sure to use anchors for extra hold.
Think about the weight your shelves will carry. Would you trust a shelf holding heavy tools without secure anchors? Neither should you. Taking the time to drill pilot holes improves stability and safety.
Securing Brackets
Now, align the brackets with the pilot holes and screw them tightly into place. Use a power drill or screwdriver, ensuring the screws go in straight and firm. Check the bracket again with a level before moving to the next one.
Feel the difference when your brackets are solidly secured—no wobbling or shifting. This step turns your careful measurements into a dependable foundation for your shelf.
Attaching The Shelves
Attaching the shelves to the wall is an important part of your project. Proper attachment ensures your shelves stay strong and stable. Follow these simple steps to get your shelves ready and mounted securely.
Cutting Shelves To Size
Measure the space where the shelf will go. Mark the shelf board with a pencil. Use a saw to cut along the marked line. Cut slowly for a clean edge. Check the size by placing the shelf on the brackets.
Sanding And Finishing
Sand the cut edges to smooth rough spots. Use fine-grit sandpaper for best results. Wipe away dust with a clean cloth. Apply paint, stain, or sealant to protect the wood. Let the finish dry completely before mounting.
Mounting Shelves On Brackets
Place the shelf on the wall brackets carefully. Align the shelf so it sits evenly. Use screws to attach the shelf to the brackets. Tighten screws without splitting the wood. Double-check the shelf is level and secure before use.

Credit: www.smorhome.com
Styling And Organizing
Styling and organizing shelves transforms bare walls into attractive, functional spaces. Thoughtful arrangement highlights your personality and keeps items easy to find. Good styling balances decoration with practical storage.
Decorative Ideas
Use a mix of items to create visual interest. Combine books with plants for a fresh touch. Add small artwork or photo frames for a personal feel. Use vases or candles to introduce color and texture. Group objects in odd numbers for natural appeal. Leave some space to avoid cluttered looks.
Storage Tips
Choose containers that fit the shelf size and style. Use baskets or boxes to hide small items. Arrange frequently used items within easy reach. Stack books vertically and horizontally for variety. Label containers for easy identification. Keep heavy objects on lower shelves for safety.
Maintaining Your Shelves
Dust shelves regularly to keep them clean and fresh. Check for loose screws or brackets to ensure stability. Rearrange items seasonally to keep the look new. Avoid overloading shelves to prevent damage. Wipe surfaces with a damp cloth for gentle cleaning. Inspect shelves for wear and repair as needed.
Troubleshooting Common Issues
Building shelves on a wall is rewarding but can bring some challenges. Troubleshooting common issues helps keep your project on track. Understanding problems early saves time and effort. Below are tips for common shelf-building problems and how to fix them effectively.
Dealing With Uneven Walls
Uneven walls make shelf installation tricky. Shelves may not sit flat or look crooked. Use a level to check wall flatness before mounting.
Fill small gaps with shims or wooden wedges. Place shims behind the bracket or shelf for support. Sand down any high spots on the wall for better contact.
For large uneven areas, consider using floating shelves with adjustable brackets. These adapt to the wall’s shape and keep shelves stable.
Fixing Loose Brackets
Loose brackets cause shelves to wobble or fall. Check if screws are tight and anchored into studs. Drywall anchors can fail if overloaded.
Remove loose screws and replace them with longer ones for a better grip. Use wall anchors rated for the shelf’s weight. Tighten all screws firmly but avoid overtightening.
Inspect brackets for damage. Bent or cracked brackets should be replaced to ensure shelf safety.
Handling Heavy Loads
Heavy items need strong support. Choose brackets made for heavy loads. Metal or reinforced brackets work best.
Mount brackets directly into wall studs, not just drywall. Use a stud finder to locate studs easily. Space brackets closer together to distribute weight evenly.
Consider adding a center support bracket for extra strength. Avoid overloading shelves beyond their capacity to prevent damage or accidents.
Credit: www.christeneholderhome.com
Frequently Asked Questions
How Do I Find Studs For Wall Shelves?
Use a stud finder to locate wooden studs behind drywall. Mark stud positions with a pencil. Anchoring shelves to studs ensures strong support and stability.
What Tools Do I Need To Build Wall Shelves?
Basic tools include a drill, level, measuring tape, screwdriver, and stud finder. You may also need brackets, screws, anchors, and a saw for cutting wood.
How Much Weight Can Wall Shelves Hold?
Weight capacity depends on shelf material, bracket strength, and wall type. Properly anchored shelves on studs can hold 30 to 50 pounds or more safely.
Can I Install Shelves On Drywall Without Studs?
Yes, use heavy-duty wall anchors or toggle bolts designed for drywall. However, these hold less weight than stud-mounted shelves, so limit the load accordingly.
Conclusion
Building shelves on a wall adds space and style to any room. Follow the steps carefully for a strong, safe shelf. Use the right tools and materials to ensure success. Take your time to measure and level each piece. Enjoy organizing books, plants, or decorations once done.
Shelves help keep your space neat and look great too. Try building your own shelves for a simple home upgrade.


