
Are you looking to transform your walls without spending a fortune? Making homemade 3D wall panels is a simple and creative way to add depth and style to any room.
Imagine turning a plain wall into a stunning focal point that catches everyone’s eye. In this guide, you’ll discover easy steps and affordable materials to create your own 3D wall panels. By the end, you’ll have everything you need to give your space a fresh, modern look that reflects your personality.
Ready to start? Let’s dive in and make your walls come alive!
Choosing Materials
Choosing the right materials is key to making effective homemade 3D wall panels. The material affects the panel’s look, durability, and ease of installation. It also impacts the overall cost and the tools needed for the project. Select materials that suit your skill level and the room where the panels will go.
Popular Material Options
- Foam Boards:Lightweight and easy to cut. Great for beginners.
- Wood:Offers a natural look. Requires more tools and skill.
- Cardboard:Affordable and eco-friendly. Best for temporary or low-cost panels.
- Plaster:Creates a smooth, durable finish. Needs molds and drying time.
- MDF (Medium-Density Fiberboard):Smooth surface for painting. Heavier and more solid.
Tools Needed
- Utility knife or craft knife for cutting foam or cardboard.
- Jigsaw or hand saw for cutting wood or MDF.
- Measuring tape and ruler for precise cuts.
- Adhesive like glue or nails depending on material.
- Sandpaper for smoothing edges and surfaces.
- Paint brushes or rollers for finishing touches.
Safety Precautions
- Wear gloves to protect hands from cuts and splinters.
- Use a dust mask when sanding wood or MDF.
- Work in a well-ventilated area, especially with glue or paint.
- Keep sharp tools away from children and pets.
- Take breaks to avoid fatigue and mistakes.

Credit: www.youtube.com
Design Planning
Design planning is the first key to making homemade 3D wall panels. It sets the stage for a smooth and successful project. Good planning helps to visualize the final look and avoid mistakes. It also saves time and materials.
Focus on selecting patterns that match your style. Measure your wall space carefully to fit the panels perfectly. Create templates to guide the cutting and assembling process. Each step builds a strong foundation for your wall art.
Selecting Patterns
Choose patterns that suit your room’s theme and size. Simple geometric shapes work well for beginners. Floral or abstract designs add more character. Think about the texture and depth you want. Patterns should be easy to replicate with your tools. Sketch a few ideas on paper before deciding.
Measuring Wall Space
Measure the wall height and width accurately. Use a tape measure and write down the numbers. Check for any obstacles like switches or outlets. Plan around these to avoid cutting errors. Divide the wall into sections to estimate how many panels you need. Precise measurements ensure a neat fit and balanced look.
Creating Templates
Templates are essential for consistent panel shapes. Use cardboard or thick paper for durability. Draw your chosen pattern on the template material. Cut out the shape carefully with scissors or a craft knife. Test the template on a small wall section. Adjust if needed before cutting the final panels. Templates save time and reduce waste.
Cutting And Shaping Panels
Cut panels carefully using a saw to match your design size. Shape edges smoothly with sandpaper for a neat finish. This creates the base for your 3D wall panel.
Creating homemade 3D wall panels can transform any space. The process of cutting and shaping these panels is crucial. It ensures a perfect fit and a stunning result. With the right techniques, you can achieve professional-looking panels.Cutting Techniques
Using the right tools makes cutting easier. A utility knife or a jigsaw works best. Ensure your blade is sharp for clean cuts. Measure twice before cutting to avoid mistakes. Mark your cutting lines with a pencil for accuracy.Shaping Tips
Shaping gives your panels a unique look. Use sandpaper to round edges and corners. A router can create detailed designs and textures. Experiment with different shapes for variety. Keep designs simple for a modern look.Sanding And Smoothing
Sanding removes rough edges. Start with coarse sandpaper. Gradually move to finer grits for a smooth finish. Use a sanding block for even pressure. Wipe the surface with a damp cloth to remove dust. A smooth panel enhances the final appearance.
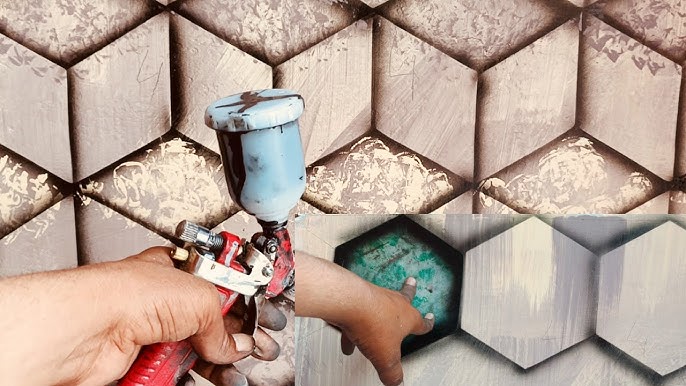
Credit: www.youtube.com
Painting And Finishing
Painting and finishing your homemade 3D wall panels is where your creation truly comes to life. This stage not only enhances the visual appeal but also protects the surface, ensuring longevity. How you approach painting and finishing can drastically change the final look and feel of your panels.
Choosing Paint Types
Picking the right paint type depends on the material of your 3D wall panel and the look you want. Latex paint offers vibrant colors and easy cleanup, making it a popular choice for most walls. If your panels are made of wood or MDF, oil-based paints provide a durable finish but require more drying time and ventilation.
Consider satin or semi-gloss finishes for a subtle shine that highlights the panel’s texture. Matte finishes can hide imperfections but might make the design less striking. Ask yourself: do you want your wall panels to stand out or blend softly with your room?
Applying Primer And Paint
Primer is essential to create a smooth base and improve paint adhesion. It helps prevent peeling and uneven color. Use a brush or roller to apply a thin, even coat of primer and let it dry completely before painting.
When applying paint, use multiple thin coats rather than one thick layer. This approach avoids drips and allows for better coverage. Don’t rush—allow each coat to dry fully, and lightly sand between coats if needed for a flawless finish.
Adding Protective Coating
After painting, a protective coating can shield your panels from scratches, moisture, and dirt. Polyurethane is a strong option for high-traffic areas, available in gloss, semi-gloss, or matte finishes. For a more natural look, consider a clear wax or varnish that enhances the texture without overpowering the paint.
Applying this layer requires patience—use a clean brush and thin coats, letting each dry thoroughly. Have you thought about how much wear and tear your panels will face? This step can save you from frequent touch-ups down the road.
Installation Process
The installation process of homemade 3D wall panels can seem daunting at first, but it becomes manageable with the right approach and preparation. Each stage plays a crucial role in achieving a smooth and durable finish. Let’s dive into how you can prepare your wall, mount the panels securely, and seal everything perfectly for a professional look.
Preparing The Wall
Start by cleaning your wall thoroughly. Dust, grease, and uneven surfaces can prevent the panels from sticking properly. Use a damp cloth to wipe down the area and let it dry completely before moving on.
Check for any cracks or holes and fill them with spackle or wall filler. Sand the area smooth once dry. A flat, even surface ensures your panels will sit flush without gaps or bumps.
Think about the layout before you start fixing the panels. Measure your wall carefully and mark guidelines with a pencil and level. This step helps keep everything straight and aligned.
Mounting Panels
Choose the best adhesive based on your panel material and wall type—construction adhesive or strong double-sided tape often works well. Apply the adhesive evenly to the back of each panel to avoid lumps.
- Press the panel firmly against the wall, holding it in place for at least 30 seconds.
- Use a level to check alignment as you go.
- If your panels are heavy, consider using finishing nails or screws for extra support.
Don’t rush through this part. If panels aren’t mounted securely, they can peel off later. Take your time to ensure each panel is perfectly placed.
Sealing Gaps And Edges
After the panels are mounted, inspect the seams and edges for any visible gaps. These small spaces can collect dust and ruin the overall look.
Use caulk or a flexible sealant to fill in these gaps. Apply it smoothly with a caulking gun or your finger for a clean finish. Wipe away any excess immediately to avoid mess.
Sealing also protects the edges from moisture and damage, extending the life of your panels. Imagine how much better your wall will look without any visible cracks or separations.
Have you noticed any tricky spots on your wall that might need extra care during sealing? Address those first to avoid surprises later.
Maintenance And Care
Maintaining homemade 3D wall panels helps keep their beauty and strength. Proper care ensures they last longer and stay fresh. Small steps in cleaning and fixing can protect your walls from damage.
Cleaning Tips
Dust the panels regularly using a soft cloth or duster. Avoid harsh chemicals that may damage the surface. Use mild soap mixed with water for gentle cleaning. Wipe gently with a damp cloth and dry immediately. Prevent water from soaking into the panels to avoid warping.
Repairing Damages
Check panels often for cracks or chips. Use wood filler or putty to fill small holes or cracks. Sand the repaired area smoothly once dry. Paint over repairs to match the panel color. Replace panels that have severe damage to keep the look uniform.
Long-term Durability
Keep panels away from direct sunlight to prevent fading. Control room humidity to avoid swelling or shrinking. Apply a protective sealant to add extra strength. Inspect panels yearly to catch issues early. Regular care helps panels stay sturdy and attractive for years.
Creative Ideas
Creative ideas bring life to homemade 3D wall panels. They turn simple panels into eye-catching art pieces. Experimenting with colors, textures, and lighting changes the room’s mood. Thoughtful design blends panels with your home style. These tips make your wall panels stand out.
Combining Colors And Textures
Mix bright and neutral colors for balance. Use soft and rough textures together for interest. Paint some panels while leaving others natural. Try matte and glossy finishes side by side. This contrast creates depth and draws attention. Use color to highlight specific wall sections. Textures add a tactile feel and visual variety.
Lighting Effects
Light changes how 3D panels look. Place LED strips behind panels for a glowing effect. Use spotlights to cast shadows and highlight shapes. Soft lighting creates a cozy atmosphere. Bright lights make panels bold and striking. Experiment with different angles and colors of light. Lighting turns walls into dynamic displays.
Incorporating With Decor
Match panel colors with furniture and rugs. Place wall art or plants near panels for a layered look. Use panels as a backdrop for shelves or mirrors. Coordinate panel shapes with room themes, like geometric or natural. Panels can frame a TV or fireplace. Blend panels with decor for a unified style. This creates a polished, stylish space.
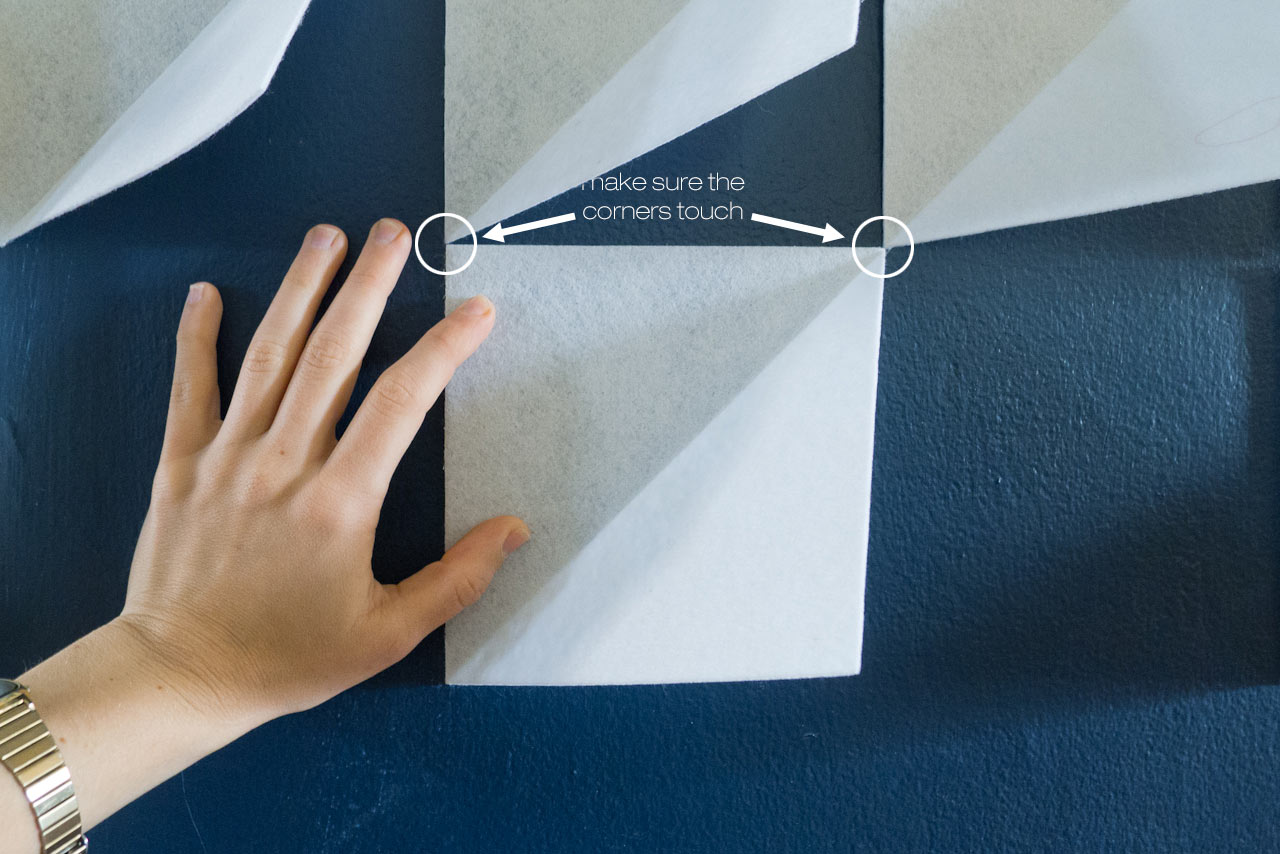
Credit: design-milk.com
Frequently Asked Questions
What Materials Are Needed For Homemade 3d Wall Panels?
You need materials like MDF boards, glue, paint, sandpaper, and a saw. These are affordable and easy to find at hardware stores. Additional tools may include a measuring tape and a pencil for accuracy.
How Do You Create Patterns On 3d Wall Panels?
Use stencils or freehand designs to carve or paint patterns. You can also use molds or textured rollers for unique effects. Consistency in design ensures a professional look.
Can I Install 3d Wall Panels Myself?
Yes, installation is simple with adhesive or nails. Prepare the wall surface properly before mounting. Follow safety guidelines and use a level for even placement.
How Do I Maintain Homemade 3d Wall Panels?
Dust regularly with a soft cloth or vacuum brush. Avoid harsh chemicals that may damage paint or surface. Touch up paint as needed to keep panels looking fresh.
Conclusion
Creating homemade 3D wall panels adds charm to any room. It saves money and lets you personalize your space. The steps are simple and fun to follow. Use basic tools and materials you can find easily. Take your time and enjoy the process.
Soon, your walls will look fresh and unique. Try different designs to match your style. This project brings creativity right into your home. Give it a shot and see the difference yourself.


