
Are you looking to transform your walls from plain to stunning without spending a fortune? Making your own 3D wall panels might be the perfect project for you.
Imagine adding depth, style, and a unique touch to any room—all with materials you can handle yourself. You’ll discover simple steps and insider tips that make creating eye-catching 3D wall panels easier than you think. Ready to give your space a fresh, modern look that turns heads?
Let’s dive in and get started!
Materials Needed
Before you start crafting your own 3D wall panels, gathering the right materials is crucial. The quality and type of materials you choose will affect both the look and durability of your finished panels. Let’s break down what you’ll need to bring your wall design to life.
Choosing The Right Panel Material
Your choice of panel material shapes the entire project. Common options include MDF (medium-density fiberboard), PVC, and gypsum. MDF is affordable and easy to paint, making it perfect for beginners. PVC panels are lightweight, water-resistant, and great for bathrooms or kitchens. Gypsum offers a smooth finish and fire resistance but can be heavier and more fragile.
Think about where you want to install the panels. Will they face moisture or heavy wear? This impacts which material suits your space best. Have you considered the texture or design style you want? Some materials allow for intricate patterns, while others are better for simple, bold shapes.
Essential Tools And Supplies
Getting the right tools simplifies your work and improves your results. Basic tools include a saw (jigsaw or circular saw), measuring tape, level, and pencil for marking. A drill with screws will help secure panels firmly to the wall.
Don’t forget sandpaper or a sanding block to smooth edges and surfaces. Paint or primer might be needed depending on your material choice. You’ll also want strong adhesive or mounting tape if you prefer not to use screws.
- Measuring tape:Ensures precise cuts and placement.
- Saw:Jigsaw works well for curves; circular saw for straight lines.
- Drill and screws:For secure panel attachment.
- Sandpaper:Smooths rough edges and preps surfaces for painting.
- Adhesive or mounting tape:Alternative to screws for less permanent installation.
- Paint and primer:To customize your panels’ color and finish.
Have you checked your toolbox lately? Sometimes missing one small tool can slow you down. Gathering everything beforehand saves frustration and keeps your project moving smoothly.
Credit: www.craftivaart.com
Design Ideas
Design ideas shape how your 3D wall panels will look and feel. Choosing the right style can change a room’s mood and make a bold statement. Creativity plays a key role in picking patterns and colors. Explore options that match your space and personality.
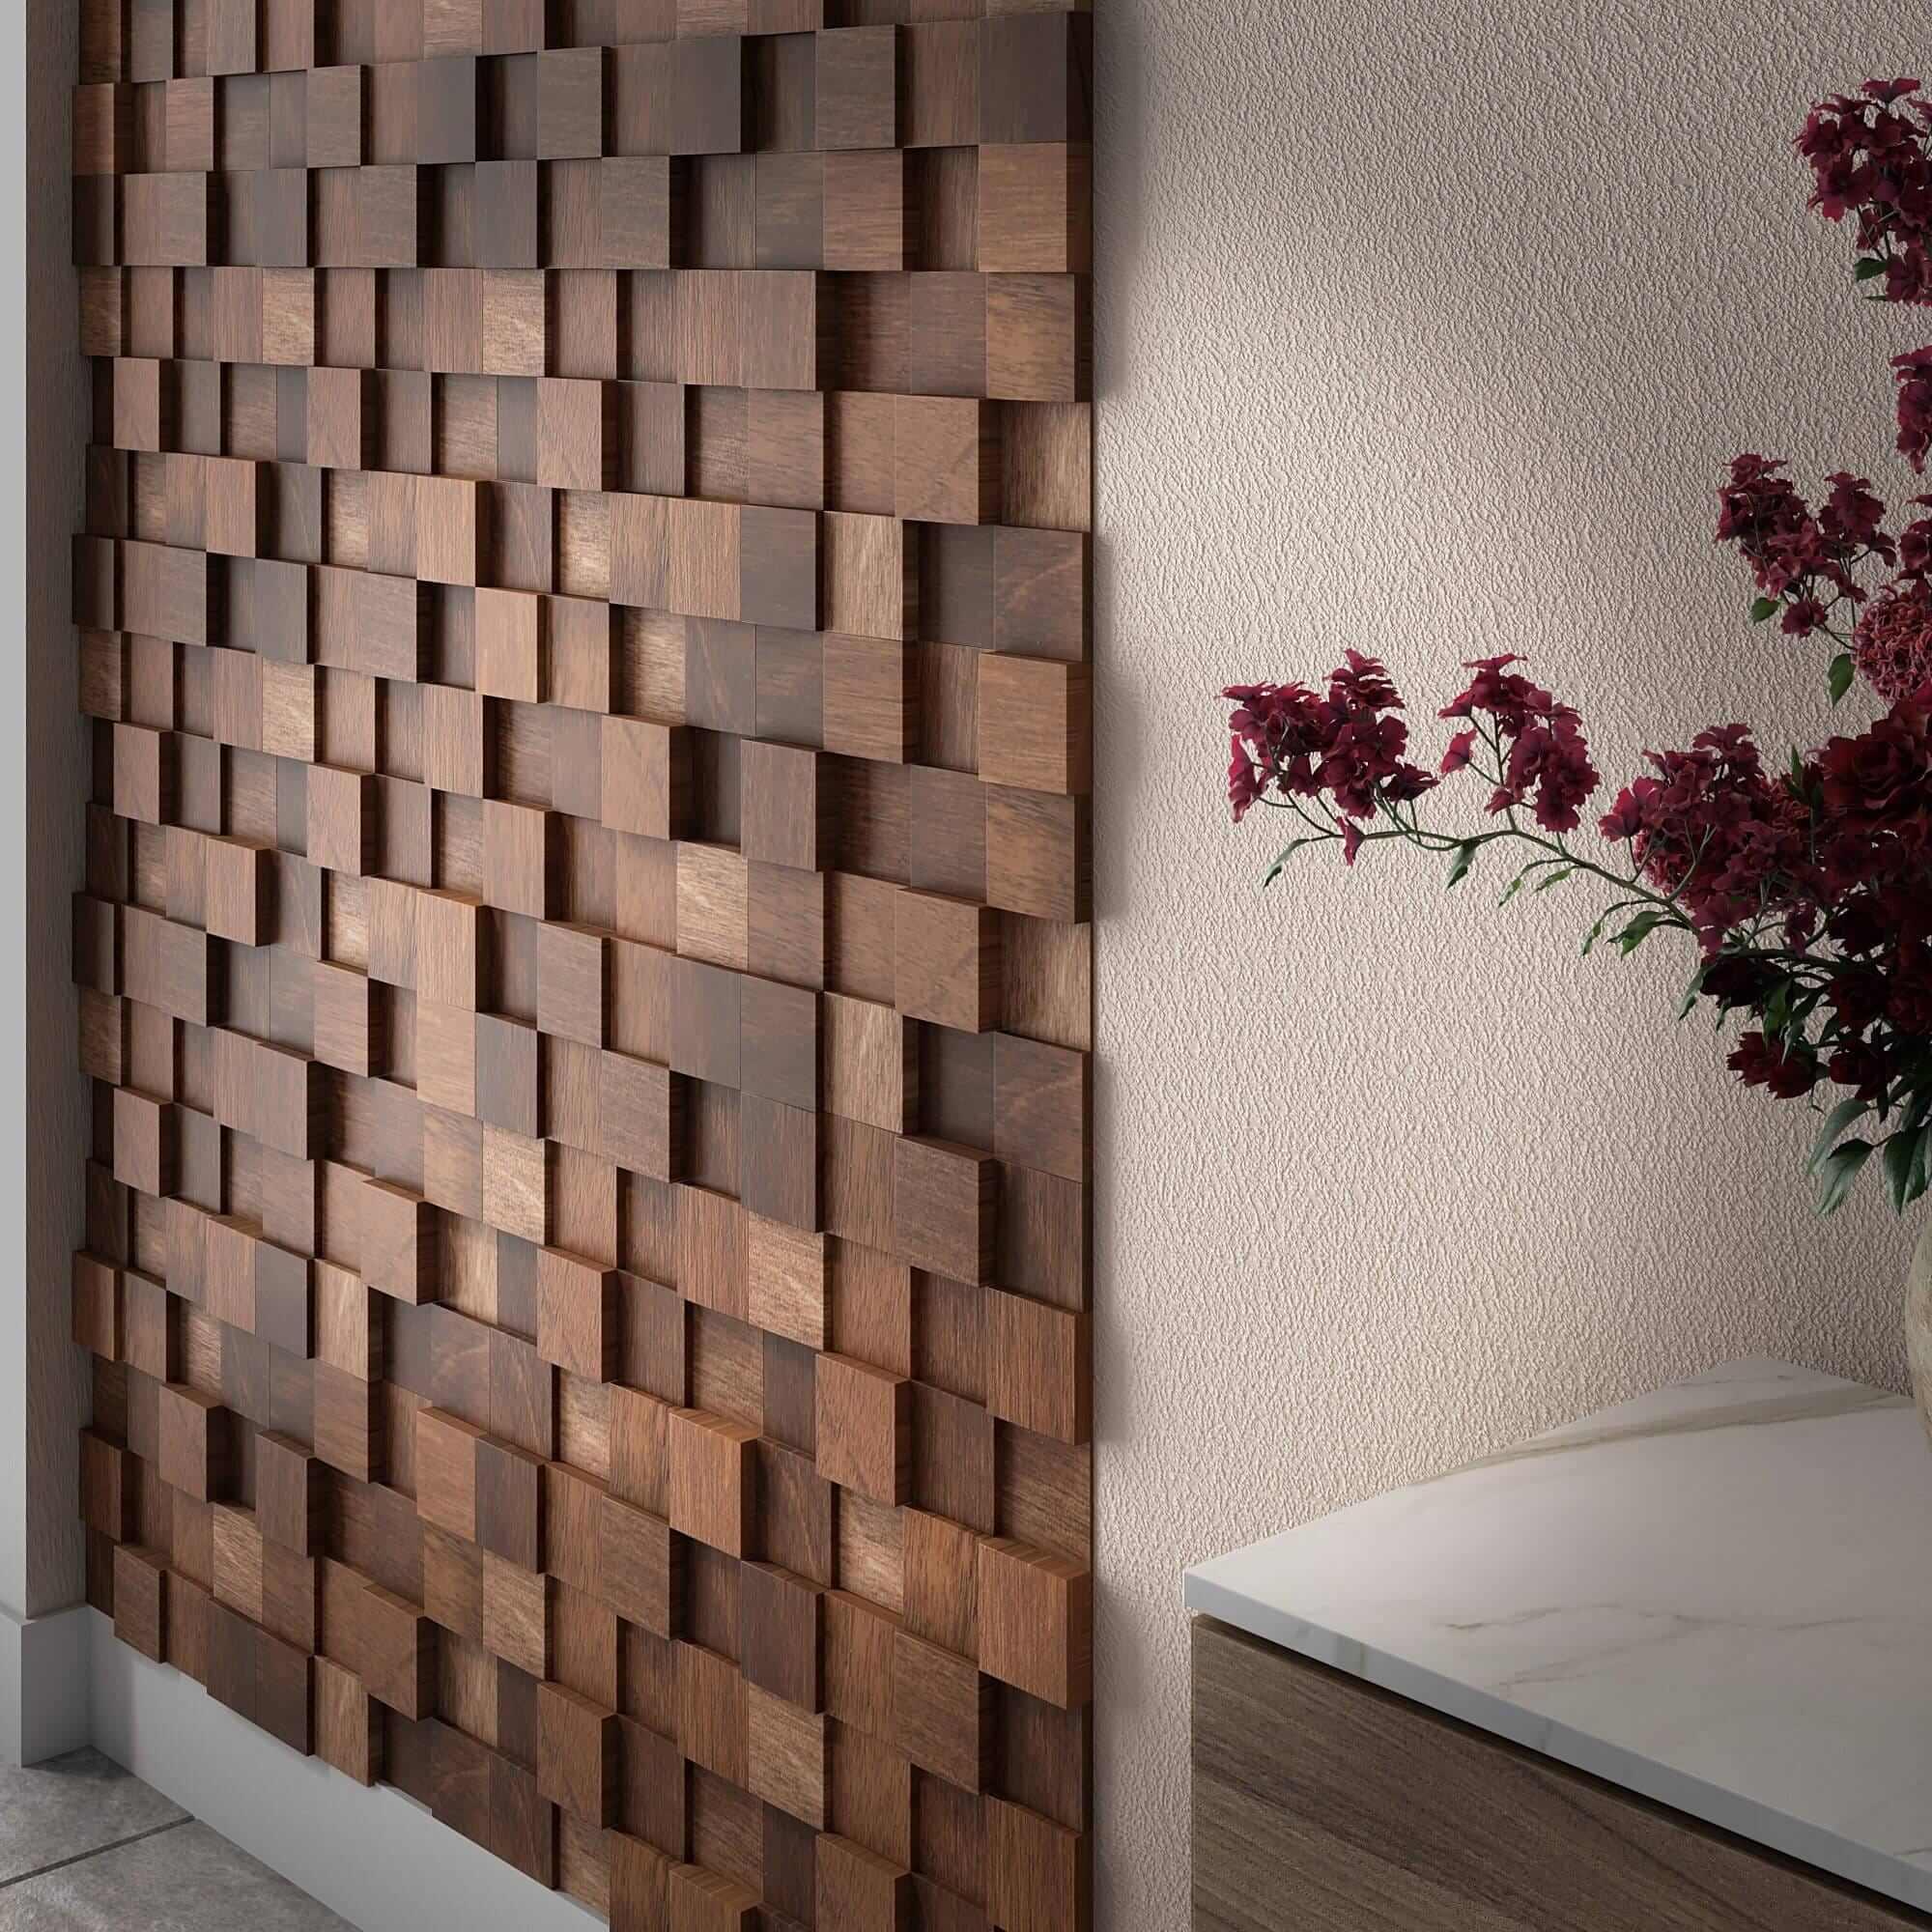
Popular 3d Patterns
Many 3D wall panel patterns fit various tastes and rooms. Geometric shapes like hexagons, triangles, and cubes add modern flair. Wave and ripple designs create a soft, flowing look. Floral and leaf motifs bring nature indoors with subtle texture. Abstract forms offer unique, artistic vibes. Popular patterns include:
- Geometric grids
- Honeycomb shapes
- Waves and ripples
- Leaf and floral designs
- Abstract curves and lines
Pick patterns that suit your room’s style and size. Bold, large shapes work well in big spaces. Small, detailed designs fit cozy rooms better.
Customizing Your Panels
Personalizing 3D panels makes your walls truly unique. Paint panels in colors that match your decor or create contrast. Use metallic or matte finishes for different looks. Mix and match patterns for a creative wall art effect. Add lighting to highlight the textures and shadows.
Try these ideas for customization:
- Choose colors that reflect your style
- Combine different patterns on one wall
- Apply textured paint for extra depth
- Install LED strips behind panels for glow
- Use eco-friendly materials for a green touch
Customized panels bring personality and warmth to any room. Experiment with ideas to find what fits best.
Preparation Steps
Gather all materials and tools needed for making 3D wall panels before starting. Clear the workspace to ensure safety and ease of movement. Measure the wall area carefully to plan the panel layout accurately.
To create stunning 3D wall panels, start with proper preparation. This sets the foundation for a smooth installation process. Follow these key steps for accurate and efficient results.Measuring Your Wall
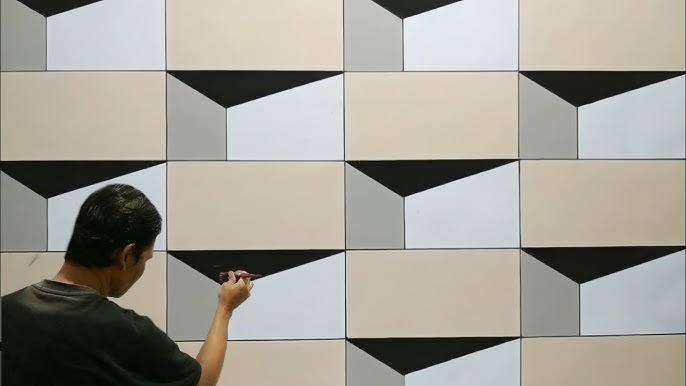
Begin by measuring the wall area. Use a measuring tape for accuracy. Write down the height and width. This helps determine the number of panels needed. Consider any obstacles like windows or doors. These features may affect panel placement. Double-check your measurements to avoid errors.Cutting And Shaping Panels
Use your measurements to cut the panels. Choose materials like MDF or PVC. These are easy to work with. Use a saw for straight lines. Sand edges for a smooth finish. Shape panels if needed. Curved designs may require additional tools. Ensure all panels are uniform for a seamless look. These steps ensure your 3D wall panels fit perfectly. Accurate measurements and careful cutting lead to a professional appearance.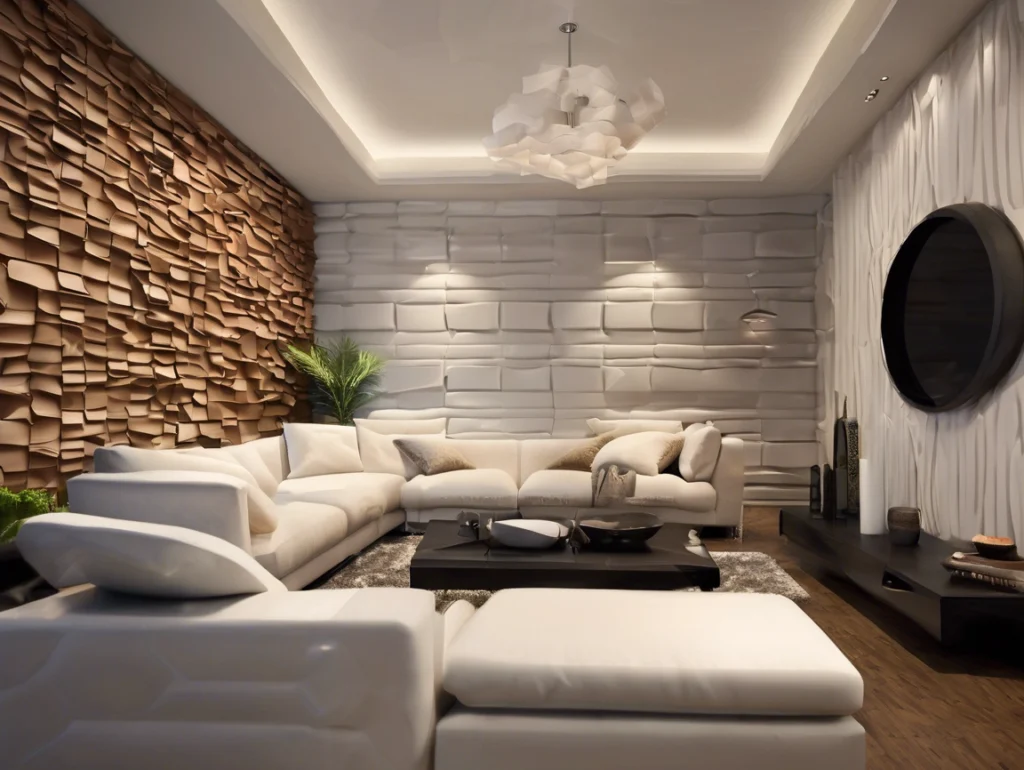
Credit: witopdecor.com
Installation Process
The installation process of 3D wall panels transforms plain walls into stunning features. It requires careful preparation and precise execution. Proper installation ensures durability and a professional look. Follow the steps below to install your panels with confidence.
Wall Surface Preparation
Clean the wall thoroughly to remove dust and dirt. Smooth out any bumps or holes using filler or sandpaper. Ensure the surface is dry before starting installation. Mark the wall with a level to keep panels straight. Clear the area for easy movement and access.
Attaching Panels Securely
Choose the right adhesive or screws based on panel material. Apply adhesive evenly on the back of each panel. Press panels firmly against the wall for good contact. Use a level to check alignment continuously. Leave a small gap between panels for expansion if needed.
Finishing Touches
Fill gaps with caulk or paint to blend panels seamlessly. Sand edges lightly if rough or uneven. Clean the surface of dust or excess adhesive. Apply paint or sealant to protect panels and enhance appearance. Step back and admire your new wall design.
Painting And Sealing
Painting and sealing 3D wall panels protect them and enhance their look. Proper finishing makes panels last longer and resist damage. This step also highlights the panel’s texture and design. Choosing the right paint and sealant ensures a smooth, durable finish.
Choosing Paint Types
Select paint based on the panel material and room use. Latex paint works well for most surfaces. It dries fast and cleans easily with water. Acrylic paint offers strong color and good durability. Avoid oil-based paints for lightweight or porous panels. Consider matte, satin, or glossy finishes depending on your style. Matte hides imperfections. Glossy reflects light and adds shine.
Applying Paint And Sealant
Start with a clean, dry panel surface. Use a primer if the panels are porous or bare wood. Apply paint with a brush or roller for even coverage. Thin layers prevent drips and clumps. Allow paint to dry fully before adding another coat. After painting, seal with a clear coat to protect the surface. Use water-based polyurethane or acrylic sealant for easy cleanup. Apply sealant in thin layers, letting each dry completely. This seals paint and adds a protective shield against wear and moisture.
Maintenance Tips
Keeping your 3D wall panels looking fresh and new doesn’t have to be a chore. Regular upkeep can extend their life and keep your walls stunning. Here are some practical tips to help you maintain your panels with ease.
Cleaning Your Panels
Dust and dirt can settle into the grooves of your 3D panels, dulling their appearance. Use a soft, dry cloth or a microfiber duster to gently wipe the surface weekly. If you notice stubborn spots, dampen the cloth slightly with water—avoid harsh chemicals that might damage the material.
For deeper cleaning, a mild soap solution works wonders. Dip a sponge in the solution, wring it out well, and softly scrub the panels. Have you tried using a handheld vacuum with a brush attachment? It’s a quick way to reach into textured areas without scratching.
Repairing Damages
Even with careful handling, bumps or scratches can happen. Small cracks or chips can be fixed using a matching filler or putty made for the panel material. After applying, smooth it out with a putty knife and let it dry completely before painting over.
If a panel gets loose, reattach it with the original adhesive or a strong construction glue. Keep a spare panel or two from your original batch—you never know when you’ll need a perfect match. Have you ever patched up a damaged wall panel and noticed it blended so well no one could tell? That’s the kind of fix that keeps your space looking professional.
Cost And Time Estimates
Estimating the cost and time for making 3D wall panels helps you plan well. Knowing these details saves surprises during the project. It also keeps your budget and schedule on track.
Budgeting For Materials
Materials vary in price based on type and quality. Foam panels cost less than wood or metal options. Paint, adhesive, and tools add to the total expense.
- Foam panels: $20 to $50 per sheet
- Wood panels: $40 to $100 per sheet
- Paint and adhesive: $30 to $60
- Tools (if needed): $20 to $50
Buying in bulk often lowers the price. Planning how many panels you need avoids waste and extra costs.
Project Timeline
Time depends on the panel type and your experience level. Simple foam panels take less time than detailed wood carvings.
- Design and measurements: 1-2 hours
- Cutting and shaping panels: 3-6 hours
- Assembly and mounting: 2-4 hours
- Painting and finishing: 2-3 hours
Expect the whole project to last 1 to 3 days. Taking breaks improves quality and reduces mistakes.

Credit: www.youtube.com
Frequently Asked Questions
What Materials Are Needed For Diy 3d Wall Panels?
You need lightweight materials like PVC, MDF, or foam. Also, gather tools such as a saw, adhesive, paint, and a measuring tape. These materials are easy to cut and shape, making them ideal for creating custom 3D wall panels.
How Do I Prepare The Wall Surface For Panels?
Clean the wall thoroughly and repair any holes or cracks. Ensure the surface is dry and smooth for better adhesion. Priming the wall helps the panels stick firmly and last longer.
Can I Paint 3d Wall Panels After Installation?
Yes, you can paint panels to match your decor. Use acrylic or latex paint for best results. Painting enhances the texture and depth of the panels, adding a personalized touch to your walls.
How Do I Attach 3d Panels To The Wall?
Use strong construction adhesive or double-sided mounting tape. For heavier panels, consider nails or screws for extra support. Proper attachment ensures the panels stay secure and safe over time.
Conclusion
Creating your own 3D wall panels adds style to any room. The process is simple and fun to try. Choose the materials you like and follow the steps carefully. Paint or decorate the panels to match your space. These panels make walls look interesting and unique.
Enjoy the satisfaction of a handmade project. Your room will feel fresh and inviting. Start your DIY project today and see the difference.


