
Are you looking to add a personal touch to your walls without spending a fortune? Making wall decor stickers at home is easier than you think.
Imagine turning your favorite designs, quotes, or patterns into beautiful stickers that brighten up your space. In this guide, you’ll discover simple steps to create your own unique wall stickers using materials you likely already have. Whether you want to refresh your room or create a thoughtful gift, these DIY stickers will give your walls a fresh, creative look.
Keep reading to find out how you can bring your walls to life with your own handmade decor!
Materials Needed
Gathering the right materials is the first step to creating stunning wall decor stickers at home. Choosing the proper supplies not only makes the process easier but also ensures your stickers look professional and last long. Let’s break down what you need to bring your wall art ideas to life.
Paper Options
Your choice of paper affects both the look and durability of your stickers. Sticker paper is the most straightforward option; it comes with a sticky back ready to peel and stick. For a glossy finish, pick glossy sticker paper, and for a matte, choose matte sticker paper.
Want something more durable? Try printable vinyl sheets. They handle moisture better and stick firmly to walls without curling. If you want to get creative, you can even use clear decal paper for transparent effects.
Adhesives And Tools
Even with the right paper, having the right adhesive can make or break your project. If your paper isn’t self-adhesive, a good spray adhesive or glue stick designed for crafts works well. Make sure your glue dries clear to avoid messy edges.
Other essential tools include a craft knife or scissors for precise cutting, a cutting mat to protect surfaces, and a ruler for straight lines. A squeegee or old credit card helps smooth out air bubbles when applying the stickers.
Design Supplies
Designing your stickers needs the right supplies too. You can use a computer and printer for detailed or colorful designs. Alternatively, markers, colored pencils, or paint allow you to add personal touches by hand.
Don’t forget software like Canva or Photoshop if you want to create or edit digital designs. Having tracing paper or stencils can be handy if you prefer drawing by hand but want clean shapes.
Choosing Designs
Choosing the right design for your wall decor stickers sets the tone for your space. The design should match your style and the room’s mood. Simple ideas can create a strong impact. Personalized artwork makes your space unique. Stencils help achieve clean and consistent shapes. Explore these options to find the perfect design for your home project.
Simple Shapes
Simple shapes like circles, triangles, and squares work well for beginners. They are easy to cut and apply. These shapes fit many styles, from modern to classic. Use bold colors or patterns to make them stand out. Simple shapes also allow you to create patterns or arrangements on your wall. This style suits any room and adds a clean look.
Custom Artwork
Custom artwork brings personality to your wall decor. You can draw your own designs or use digital tools. This option lets you express creativity and make something unique. Simple sketches or detailed drawings work well. Print your artwork on sticker paper for easy use. Custom designs can reflect your hobbies, favorite quotes, or themes.
Using Stencils
Stencils help create precise and repeatable designs. They are perfect for patterns or complex shapes. You can buy ready-made stencils or make your own from cardboard. Place the stencil on the sticker paper and cut around it carefully. Stencils save time and reduce mistakes. Use them to add details that look professional and neat.
Preparing The Design
Choose a simple design that fits your space and style. Draw or print it clearly on paper. Ensure the lines are bold and easy to cut out.
Creating wall decor stickers at home is a fun activity. It allows you to personalize your space. The first step is preparing the design. This involves selecting a theme, color, and style. A well-thought-out design ensures that your stickers look professional.Sketching And Drawing
Start with a simple sketch. Use a pencil and paper. Draw your ideas roughly. Focus on shapes and patterns. Keep your design simple. Complex designs can be hard to cut. Use bold lines for clarity. This helps in the next stages.Digital Design Tools
Use digital tools to refine your sketch. Try software like Adobe Illustrator. These tools offer precision. Digital designs are easy to edit. You can adjust colors and sizes. This ensures your design is perfect. Save your work as a digital file.Printing Your Design
Choose the right paper for printing. Use sticker paper for best results. Ensure your printer settings are correct. Print a test page first. This helps avoid mistakes. Once satisfied, print your final design. Cut out the stickers carefully. Use scissors or a craft knife. Now your design is ready to decorate your walls.
Credit: www.amazon.ca
Cutting And Shaping Stickers
Cutting and shaping your wall decor stickers is where your design truly takes form. This step demands precision and patience, but it also offers a chance to add a unique touch to each piece. Whether you prefer a hands-on approach or rely on tools, shaping your stickers can be both practical and creative.
Hand Cutting Techniques
Using scissors or small snippers gives you full control over the shape of your stickers. It’s a straightforward way to start if you want to experiment without investing in tools. Keep your scissors sharp and steady your paper on a flat surface to avoid jagged edges.
Try cutting simple shapes first to build confidence. You might find that slight imperfections add charm and character to your wall decor. Have you noticed how freehand cuts can make your stickers feel more personal?
Using Craft Knives
Craft knives, like X-Acto knives, help achieve sharper and more intricate cuts than scissors. Use a cutting mat underneath to protect your work surface and maintain clean lines. This tool is perfect for detailed designs, such as letters or delicate patterns.
Be sure to replace dull blades regularly, or your cuts will tear the sticker material. Holding the knife at a consistent angle improves accuracy and reduces mistakes. Are you ready to try crafting precision shapes that scissors can’t handle?
Cutting Machines
Cutting machines like Cricut or Silhouette bring professional-level precision to your home projects. These devices use digital designs to cut stickers flawlessly, saving you time and effort. You can upload your own designs or choose from a wide library available online.
While the initial investment is higher, the consistency and speed make cutting machines a favorite for frequent crafters. They also allow you to experiment with complex shapes that are difficult to cut by hand. Could a cutting machine be the game-changer for your sticker projects?
Applying Adhesive
Applying adhesive is a key step in making wall decor stickers at home. It ensures the stickers stay firmly on the wall without peeling off. Choosing the right adhesive and applying it correctly helps your design last longer and look neat. Different adhesives suit different surfaces and sticker materials. Explore simple ways to stick your creations with confidence.
Choosing The Right Glue
Select glue based on the sticker material and wall surface. White craft glue works for paper stickers on smooth walls. For vinyl or plastic stickers, use strong adhesives like rubber cement or spray adhesive. Avoid glue that leaves marks or damages paint. Test a small area first to check how well the glue holds and if it affects the wall.
Using Transfer Tape
Transfer tape helps move stickers without damage. Place the tape over your design and press firmly. Peel the backing paper away, leaving the sticker on the tape. Position the tape on the wall and smooth it down to stick the design. Slowly remove the transfer tape, leaving the sticker in place. This method keeps shapes intact and makes placement easy.
Peel And Stick Methods
Peel and stick stickers have adhesive ready on the back. Just peel off the protective layer and press the sticker on the wall. These are great for quick application and easy removal. Use a flat tool or your fingers to smooth out air bubbles. This method works well for paper, vinyl, and plastic stickers on clean, dry surfaces.
Attaching Stickers To Walls
Attaching wall decor stickers properly ensures they look great and last long. The process is simple but requires care. Preparing the wall, placing the stickers, and smoothing them are key steps. Follow these tips for a perfect finish.
Preparing The Wall Surface
Clean the wall thoroughly to remove dust and dirt. Use a damp cloth and mild soap if needed. Let the wall dry completely before applying stickers. Avoid textured or rough walls, as stickers may not stick well. A smooth, dry surface gives the best results.
Positioning The Stickers
Plan the sticker layout before peeling the backing. Hold the sticker against the wall to check placement. Use a pencil to mark light guidelines if needed. Peel the backing carefully without touching the adhesive. Start applying from the top or one edge for better control.
Smoothing And Securing
Use a flat tool like a credit card to smooth the sticker. Press from the center outwards to remove air bubbles. Apply even pressure over the entire sticker surface. Check edges for lifting and press firmly to secure. Wait a few hours before touching or cleaning the stickers.
Maintenance Tips
Keeping your wall decor stickers in good shape is important. Proper care helps them last longer and look fresh. Follow simple maintenance tips to protect your stickers from damage.
Cleaning Around Stickers
Use a soft, dry cloth to clean near the stickers. Avoid wet cloths or harsh chemicals. Gently dust the wall and sticker edges. This prevents dirt buildup and keeps the colors bright.
Removing Stickers Safely
Warm the sticker with a hairdryer to loosen the adhesive. Peel slowly from one corner. Pull gently to avoid tearing or wall damage. Use a mild adhesive remover if residue stays behind.
Repairing Damaged Stickers
Small tears can be fixed with clear tape on the back side. For edges peeling off, apply a small amount of craft glue. Press firmly and hold until dry. Replace stickers that are beyond repair to maintain a neat look.

Credit: www.walldecorplusmore.com
Creative Ideas
Creative ideas bring life to your wall decor stickers. They make your space unique and personal. Experimenting with different styles and materials can turn simple stickers into art. Think beyond plain shapes and colors. Explore themes, textures, and seasonal vibes to create eye-catching designs.
Themed Wall Collages
Choose a theme to guide your sticker designs. Nature, travel, or abstract art work well. Cut out related images and shapes from paper or vinyl. Arrange them on your wall to tell a story or set a mood. Use different sizes and colors for balance and interest. Themed collages create a strong, cohesive look.
Mixing Materials
Combine materials for texture and depth. Use paper, fabric, felt, or cork alongside vinyl stickers. Glue or tape these materials to create layered effects. Add simple elements like buttons or ribbons for extra charm. Mixing materials makes your wall decor tactile and inviting. It also adds a handmade feel to your stickers.
Seasonal Decor
Change your wall stickers with the seasons. Create designs for spring flowers, summer beaches, autumn leaves, or winter snowflakes. Use colors and shapes that match each season’s mood. Swap out stickers easily by using removable adhesive. Seasonal decor keeps your room fresh and festive all year round.

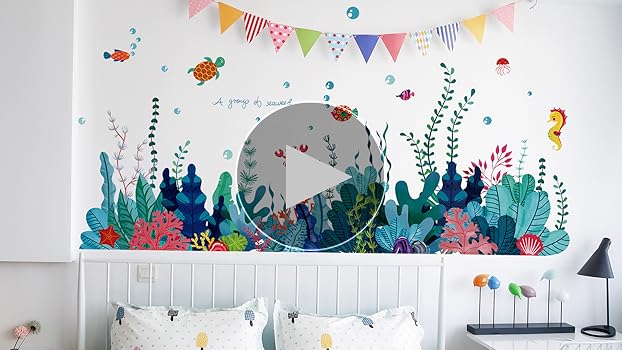
Credit: www.temu.com
Frequently Asked Questions
What Materials Do I Need To Make Wall Decor Stickers?
To make wall decor stickers, you’ll need adhesive paper, printer, scissors, and design templates. Optional tools include a cutting machine and laminating sheets for durability.
How Do I Create Custom Designs For Wall Stickers?
Use graphic design software like Canva or Adobe Illustrator. Choose shapes, colors, and patterns that fit your decor style. Save designs in high resolution for clear printing.
Can I Remove Homemade Wall Stickers Without Damage?
Yes, carefully peel stickers off slowly. Use a hairdryer to warm adhesive if needed. This prevents paint or wallpaper damage and keeps walls clean.
How Long Do Homemade Wall Decor Stickers Last?
Properly made stickers last several months to years. Their longevity depends on adhesive quality, wall surface, and environmental conditions like humidity and sunlight.
Conclusion
Making wall decor stickers at home is simple and fun. You only need a few supplies and some creativity. Personalize your space with designs you love. Try different shapes and colors to fit your style. This project saves money and gives your walls a fresh look.
Enjoy the process and your unique decorations. Start today and see how easy it can be!


