
Are you looking to transform your space quickly and easily? Wall art stickers are a simple way to add personality and style to any room without the hassle of paint or nails.
But how do you apply them so they look perfect and last long? You’ll discover step-by-step tips to help you place your wall art stickers smoothly and avoid common mistakes. Keep reading, and you’ll soon have walls that truly reflect your style with minimal effort.
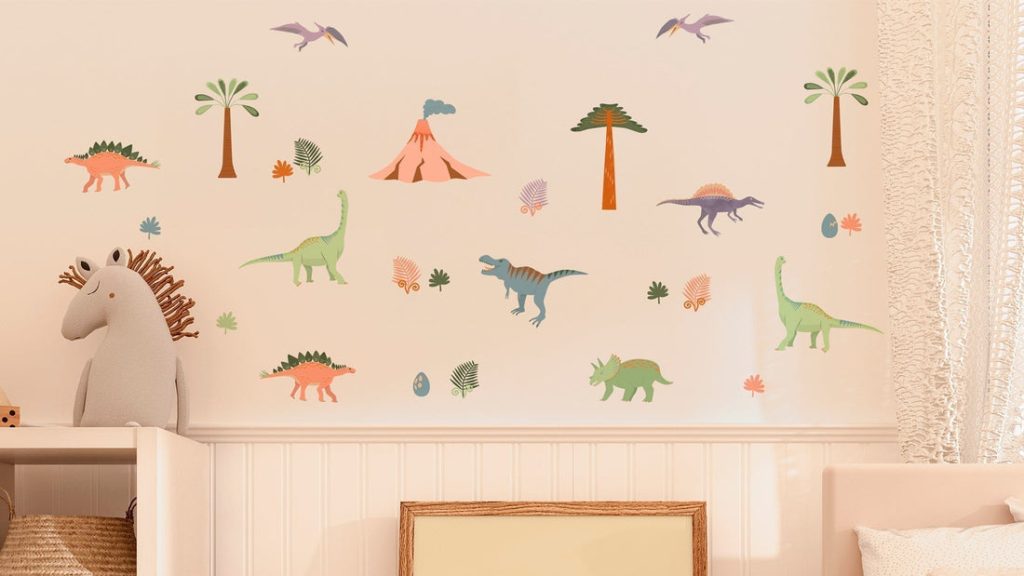
Credit: www.amazon.ca
Choosing The Right Wall Art Stickers
Choosing the right wall art stickers is key to making your space truly reflect your style and mood. The options out there can feel overwhelming, but focusing on what fits your room and personal taste simplifies the process. Think about the atmosphere you want to create and how the sticker will complement your existing décor.
Types Of Wall Stickers
Wall stickers come in various forms, each suited for different looks and needs. Vinyl stickers are popular for their durability and easy removal, making them great for renters or seasonal updates. Fabric stickers offer a textured, soft finish that adds warmth to the room, while chalkboard stickers let you write and draw, perfect for kids’ rooms or creative spaces.
Have you considered whether you want a large mural to cover a whole wall or small decals to accent furniture and corners? Smaller stickers are perfect for subtle touches, while large ones create bold statements. Your choice depends on how much impact you want the art to have.
Selecting Designs For Your Space
Pick designs that speak to your personality and fit the room’s function. For instance, calming landscapes or soft florals work well in bedrooms, while geometric shapes or abstract art might energize a living room. Think about colors too—do you want the sticker to blend in or stand out against your wall color?
Consider the size and scale of your room. A large, intricate design can overwhelm a small space, making it feel cramped. You want the sticker to enhance your room, not take over it.
Material Considerations
The material of your wall sticker affects both its look and longevity. Vinyl stickers are waterproof and wipeable, ideal for kitchens and bathrooms. Fabric stickers, while less durable in humid areas, offer a unique texture that vinyl can’t match.
Also, check if the sticker leaves residue when removed, especially if you like changing your décor often. Some materials peel cleanly, while others might require extra effort to remove. How often do you plan to update your wall art? This can guide your material choice.

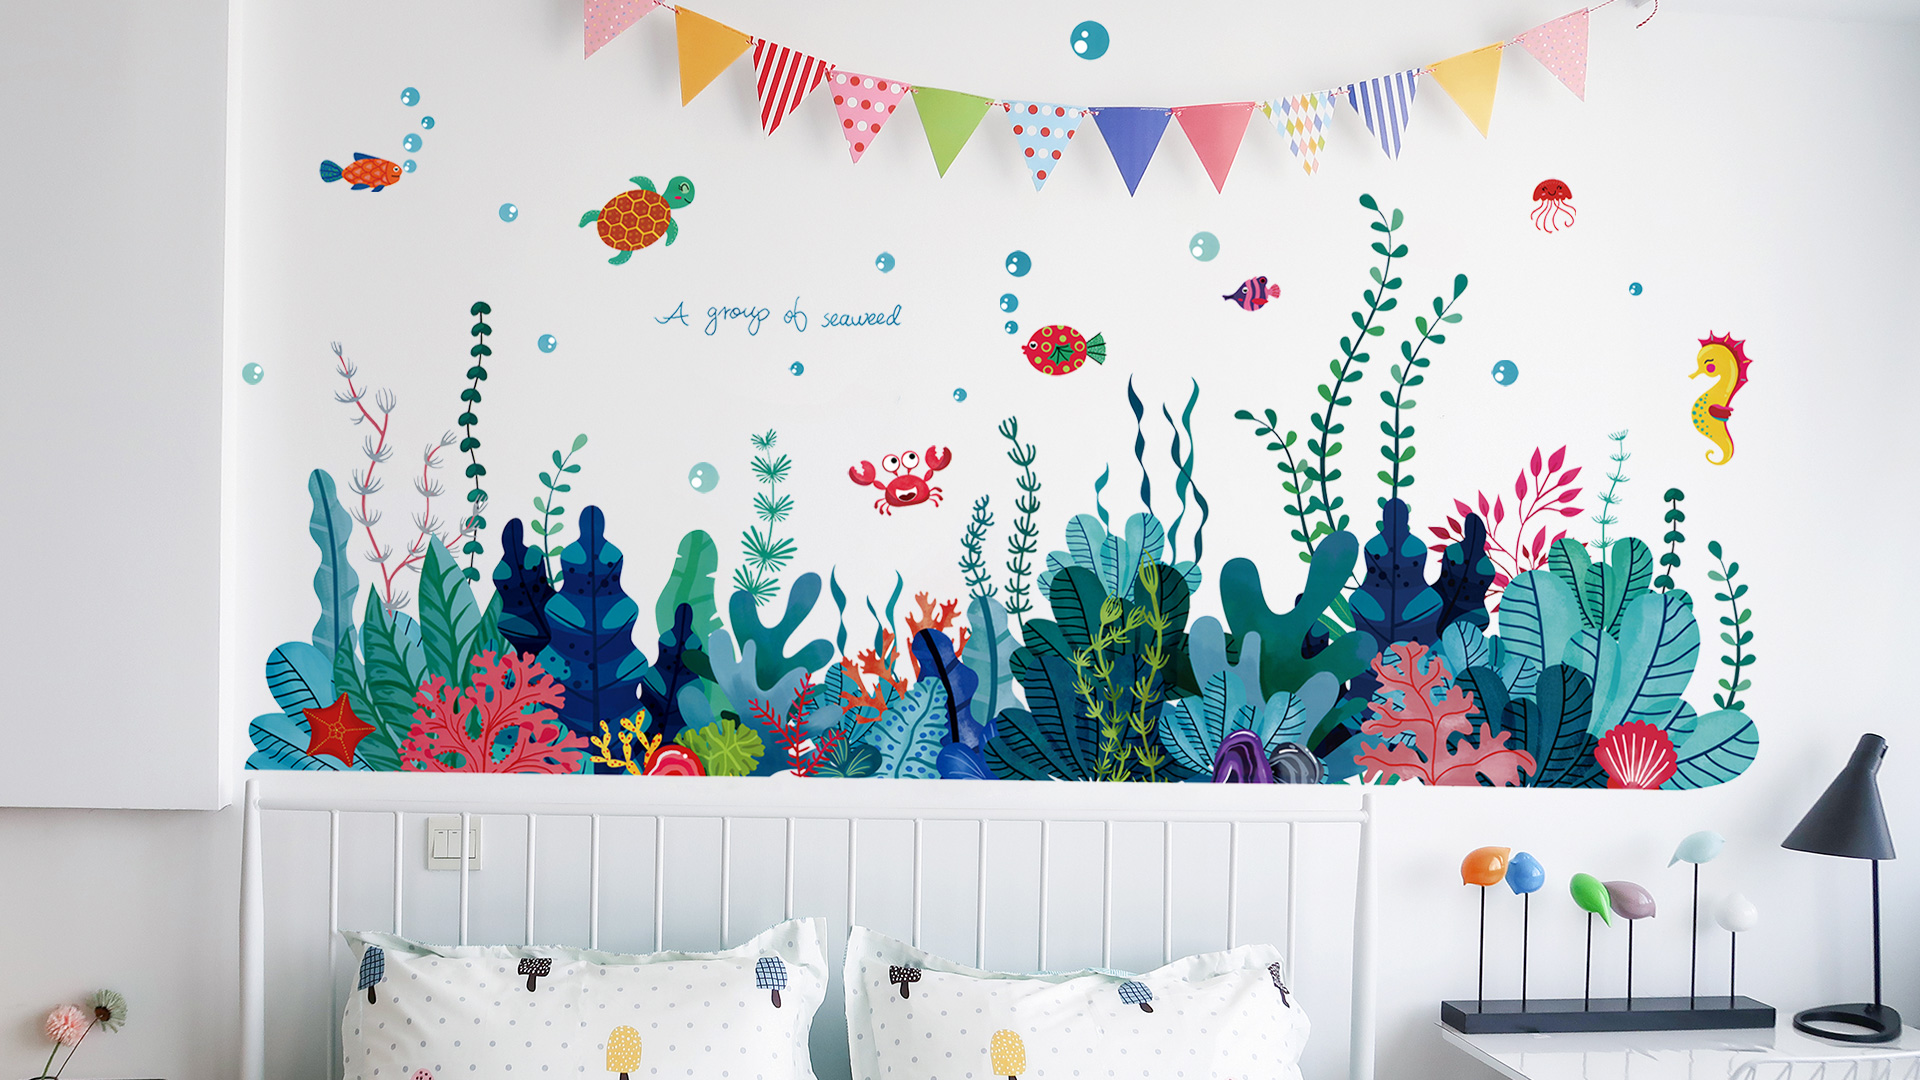
Credit: www.cbc.ca
Preparing Your Wall Surface
Clean, dry walls ensure stickers stick well and last longer. Remove dust and dirt using a soft cloth before applying. Smooth surfaces prevent bubbles and wrinkles for a neat finish.
Preparing your wall surface is the secret sauce to ensuring your wall art stickers look stunning and last longer. A well-prepared wall can make all the difference between stickers that peel off within days and those that stand the test of time. Let’s dive into the essential steps to get your wall ready for its new decorative addition.Cleaning And Drying The Wall
Start with a clean slate. Dust, dirt, and grease can affect how well your stickers adhere. Use a mild soap solution and a soft cloth to wipe down the wall. Once clean, make sure it’s completely dry. Moisture can weaken the adhesive, leading to a disappointing result. Allow the wall to air dry or use a towel to speed up the process.Repairing Imperfections
Inspect your wall for any imperfections. Small cracks or holes can create uneven surfaces that might ruin the look of your stickers. Fill these imperfections with spackle or wall filler. Sand the area gently once it’s dry for a smooth finish. This step ensures your stickers have a perfect, even surface to stick to.Choosing The Best Wall For Stickers
Not every wall is sticker-friendly. Consider the texture and paint type of the wall. Smooth, non-textured walls are ideal, as textured surfaces might not hold the stickers well. Think about the room’s environment too. High humidity areas like bathrooms might not be the best choice unless the stickers are moisture-resistant. Choose a spot where your stickers can shine without environmental hindrance.Gathering Necessary Tools
Before applying wall art stickers, gather all necessary tools. Having everything ready helps the process go smoothly. It reduces mistakes and makes the application faster.
What You’ll Need
- Wall art stickers of your choice
- Clean, dry cloth to wipe the wall
- Measuring tape or ruler for accurate placement
- Scissors to trim any excess sticker
- Squeegee or credit card to smooth out bubbles
- Step stool or ladder for high areas
Optional Tools For Precision
- Painter’s tape to mark sticker position
- Level tool to keep stickers straight
- Pin or needle to pop small air bubbles
- Spray bottle with water for repositioning
Step-by-step Application Process
Applying wall art stickers might seem simple, but doing it right makes a huge difference in the final look. Taking your time and following a clear process helps avoid wrinkles, bubbles, or misalignment. Let’s walk through a smooth, step-by-step way to get your wall art looking perfect.
Positioning The Sticker
Start by holding the sticker up against your wall and visualizing its placement. Step back and check how it fits with other elements in the room. Use painter’s tape to temporarily fix the sticker in place; this allows you to adjust without damaging the wall or the sticker.
Ask yourself: Does the sticker feel balanced in this spot? Small shifts can make a big difference in overall harmony.
Peeling And Sticking
Carefully peel off the backing paper from one corner, exposing just a small part of the adhesive. Stick that exposed edge to the wall firmly to anchor it. Slowly pull the backing down while pressing the sticker onto the wall with your other hand.
- Work gradually to avoid stretching or tearing.
- Keep the sticker close to the wall surface as you go.
- If you notice any folds, stop and smooth them before continuing.
Smoothing Out Bubbles
After the sticker is fully applied, bubbles may appear beneath the surface. Use a soft cloth or a plastic card to gently push the air out toward the edges. Small bubbles often disappear on their own after a day or two, but bigger ones need immediate attention.
If a bubble persists, carefully lift the sticker near it and reapply slowly while smoothing. This keeps your wall art crisp and flawless.
Final Adjustments
Take a final look and press down firmly along all edges to secure the sticker. Remove any remaining painter’s tape you used for positioning. If your sticker has detailed parts, use a toothpick or a pin to gently pop tiny trapped air pockets.
How does your wall art feel now—perfectly in place or does it need a little tweak? Small fixes here can save frustration later and keep your space looking sharp.
Tips For Longer-lasting Stickers
Keeping wall art stickers looking fresh and vibrant takes some care. Simple steps can extend their life and maintain their appeal. A few habits make a big difference. These tips help your stickers stay stuck and colorful for longer periods.
Avoiding Moisture And Heat
Moisture weakens the glue behind stickers. Avoid placing them in bathrooms or kitchens where steam is common. Heat also softens adhesive, causing stickers to peel. Keep stickers away from direct sunlight and heaters. This prevents fading and lifting.
Cleaning Around The Stickers
Dust and dirt can build up near stickers. Clean gently with a dry cloth to avoid damage. Avoid using water or cleaning sprays directly on stickers. This protects the adhesive and the print. Regular light cleaning keeps stickers looking new.
When To Replace Your Wall Art
Stickers fade or peel after long use. Replace them if colors dull or edges lift. Fresh stickers refresh room style instantly. Removing old stickers carefully prevents wall damage. Choose new designs to update your space effortlessly.

Credit: www.etsy.com
Creative Ideas For Wall Art Placement
Placing wall art stickers gives you a chance to personalize your space in unique ways. How you arrange these stickers can change the entire vibe of a room. Trying out different placement ideas can spark creativity and make your walls truly stand out.
Creating Feature Walls
Focus on one wall and turn it into the room’s highlight. Use large, bold stickers or a cluster of smaller ones to create a design that draws the eye. You can shape patterns like a tree, cityscape, or abstract art that fills the wall without overwhelming it.
Think about the wall’s purpose—do you want it calming in a bedroom or energizing in a living room? Choose colors and designs that match the mood. Have you ever noticed how a single well-decorated wall can change how a room feels completely?
Combining Stickers With Other Decor
Mix wall stickers with items like framed photos, shelves, or mirrors for a layered look. Stickers can act as a backdrop or accent that ties everything together. For example, placing botanical stickers around real plants creates a natural, immersive vibe.
Try arranging stickers around light switches or above furniture to highlight these elements. What if your wall art could interact with the objects in your room, making the space feel more connected?
Seasonal And Themed Arrangements
Change your wall stickers to match holidays or seasons without the mess of traditional decorations. Snowflakes for winter, leaves for fall, or beach themes for summer can keep your space fresh and exciting. It’s a simple way to celebrate occasions and keep your walls lively.
You could even create themed corners—like a reading nook with quotes and book-related stickers or a kid’s play area with fun animals and shapes. How often do you update your room’s look to reflect your current mood or interests?
Frequently Asked Questions
How Do You Prepare A Wall For Art Stickers?
Clean the wall surface thoroughly using mild soap and water. Ensure it is dry and smooth before applying the sticker. Remove dust and grease for better adhesion and durability.
Can Wall Art Stickers Be Applied On Textured Surfaces?
Wall art stickers work best on smooth, flat surfaces. Textured walls may cause bubbles and poor sticking. For best results, choose smooth walls or use special adhesive stickers designed for textures.
How Long Do Wall Art Stickers Typically Last?
Wall art stickers usually last 3 to 5 years indoors. Longevity depends on wall condition, exposure to sunlight, and humidity. Proper application and care extend their lifespan.
Can I Reposition Wall Art Stickers After Applying?
Yes, some stickers allow gentle repositioning within minutes of application. Peel slowly and reapply carefully to avoid damage. However, repositioning multiple times may reduce adhesive strength.
Conclusion
Applying wall art stickers can brighten any room quickly and easily. Start with a clean, dry wall for best results. Peel the sticker slowly to avoid tears or bubbles. Press firmly from the center outward to stick it well. Take your time to position it just right.
Changing your decor becomes simple and fun. Try different designs to express your style. Enjoy the fresh look without any mess or fuss. Wall art stickers offer a quick way to refresh your space.


