
Are you looking to transform your bedroom without spending a fortune or dealing with messy paint? Making your own bedroom wall stickers is a simple and fun way to add personality and style to your space.
Imagine turning a plain wall into a vibrant canvas that reflects your unique taste—all with materials you can find easily. In this guide, you’ll discover easy steps to create eye-catching wall stickers that bring your room to life. Ready to give your bedroom a fresh, creative makeover?
Let’s dive in and make your walls speak your style!

Credit: www.etsy.com
Choosing The Right Wall Sticker Design
Choosing the right wall sticker design sets the tone for your bedroom. It creates a mood and adds personality. The design should reflect your taste and fit the room’s style. A good choice makes the space inviting and comfortable.
Popular Themes And Styles
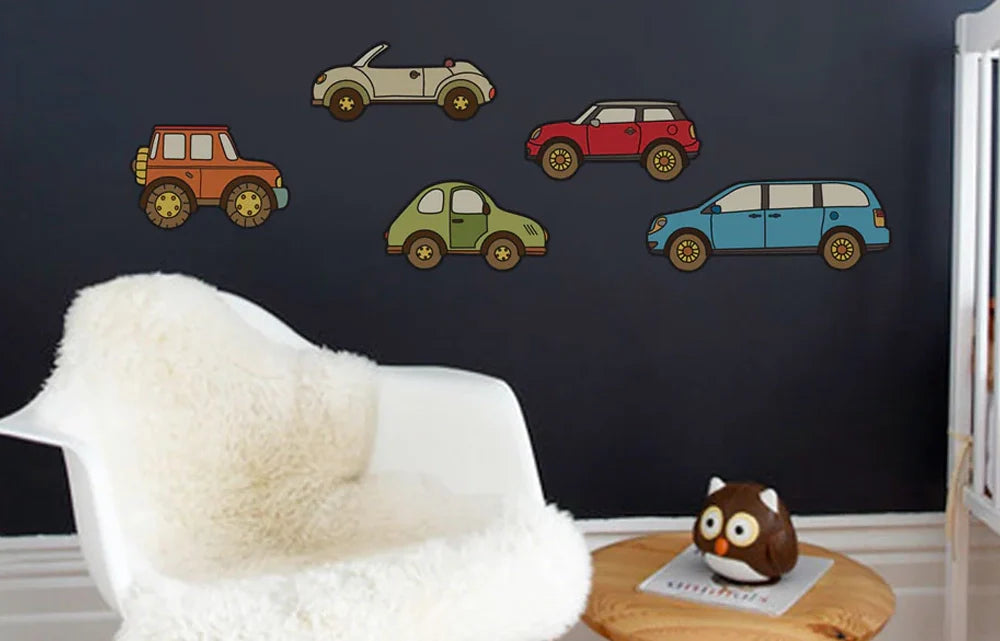
Nature themes like trees, flowers, and animals bring calmness. Geometric shapes offer a modern and clean look. Kids often enjoy cartoon characters or space themes. Minimalist designs work well for a sleek, simple room. Vintage or retro styles add charm and warmth.
Custom Vs Ready-made Designs
Custom stickers let you pick exact images and sizes. They match your room perfectly. Ready-made designs are quick and easy to get. They come in many styles and prices. Custom options cost more but feel unique. Ready-made ones suit budgets and fast decoration.
Selecting Colors To Match Your Room
Choose colors that blend with your walls and furniture. Light colors make a room feel larger and airy. Dark colors add depth and coziness. Use contrasting colors for a bold look. Soft pastels create a peaceful and gentle atmosphere. Always test colors before buying stickers.

Credit: www.amazon.in
Gathering Materials And Tools
Gathering the right materials and tools is the first step to creating beautiful bedroom wall stickers. Having all essentials ready saves time and helps the process go smoothly. It also ensures the stickers look great and stick well on the wall.
Some tools are necessary, while others can help make the work easier and more precise. Knowing where to find quality supplies is important for a lasting finish. Prepare everything carefully before starting your project.
Essential Supplies Needed
- Vinyl sheets or adhesive paper for the stickers
- Cutting mat to protect your work surface
- Sharp craft knife or scissors
- Transfer tape to move designs onto the wall
- Ruler or measuring tape for accurate sizing
- Marker or pencil to sketch your design
- Cleaning cloth and mild soap for wall preparation
Optional Tools For Precision
- Weeding tools to remove excess vinyl
- Corner rounder punch for smooth edges
- Self-healing cutting mat for repeated use
- Stencil brushes if painting details on stickers
- Level to ensure straight application on walls
Where To Buy Quality Materials
Craft stores often carry vinyl sheets and cutting tools. Online shops provide a wide selection and competitive prices. Check for customer reviews to ensure good quality. Some home improvement stores also stock adhesive papers and tools. Choose supplies suited for indoor wall use to avoid peeling or damage.
Preparing The Wall Surface
Clean the wall thoroughly to remove dust and dirt. Smooth out any bumps or holes with sandpaper or filler. A flat, dry surface helps stickers stick better and last longer.
Preparing the wall surface is a crucial step in ensuring your bedroom wall stickers adhere properly and look fantastic. Imagine spending time and effort designing or selecting the perfect stickers, only to see them peel off within days. A well-prepared surface is your secret weapon against this disappointment.Cleaning And Smoothing Walls
Start by giving your walls a good clean. Dust and grease can act like a barrier between your stickers and the wall. Use a mild soap mixed with warm water to gently scrub the wall. Rinse with clean water and let it dry completely. Don’t skip this step—residue can weaken the sticker’s stickiness. Once clean, check the surface for any rough patches. Use fine-grit sandpaper to smooth out these areas. A smooth surface allows for better contact, making your stickers look professionally applied.Repairing Imperfections
Before applying any stickers, examine your wall for imperfections like cracks or holes. These can disrupt the adhesion and overall appearance of your stickers. Use spackling paste to fill in any gaps, then sand the area until it’s flush with the rest of the wall. This creates a seamless canvas for your stickers. Think about it: would you hang a beautiful painting on a damaged wall? The same logic applies here. Your stickers deserve a perfect backdrop.Priming For Better Adhesion
Priming the wall might seem like an extra step, but it can make a significant difference. A primer creates a uniform surface that helps stickers stick better and last longer. Choose a primer that’s compatible with your wall’s material. For example, if your walls are previously painted, a basic latex primer will do the trick. Apply the primer evenly and let it dry completely. This step not only enhances adhesion but also prevents stickers from damaging the paint when removed. Have you ever removed a sticker only to find paint peeling off with it? A good primer can help prevent this headache. By taking the time to prepare your wall surface, you ensure that your bedroom wall stickers not only look stunning but also stand the test of time. Are you ready to give your walls the attention they deserve?
Credit: www.designcafe.com
Cutting And Designing Stickers
Cutting and designing your bedroom wall stickers is where your creativity truly shines. This stage transforms simple shapes into eye-catching decorations that reflect your personality. Taking your time here can make a huge difference in how professional and unique your stickers look once applied.
Measuring And Marking
Start by measuring the area on your wall where you want to place the stickers. Use a ruler or measuring tape to get precise dimensions.
Mark these measurements lightly on the sticker paper with a pencil. This helps avoid mistakes and ensures your designs fit perfectly on your wall space.
Have you considered how the placement of each sticker affects the overall balance of your room? Marking guides help you visualize this before you cut anything.
Cutting Techniques For Beginners
Use sharp scissors or a craft knife for clean edges. Dull tools can cause jagged cuts that ruin the look of your sticker.
Cut slowly and follow your marked lines carefully. If your design has curves or intricate details, small, precise cuts work better than large, sweeping ones.
Try cutting a practice sticker first to get comfortable with your tools. This little step saves frustration and wasted materials later on.
Adding Personal Touches
Think about adding your own drawings, patterns, or even hand-written words to the sticker design. This makes your wall truly one of a kind.
Use colored markers or paint pens designed for stickers to enhance your design after cutting. This is where your style can really pop!
What personal story or memory could you capture with your wall stickers? Adding this layer of meaning makes decorating more rewarding and fun.
Applying The Wall Stickers
Applying bedroom wall stickers can transform your space quickly and with minimal effort. The key lies in careful handling and placement to ensure a smooth and appealing finish. Let’s look at some practical tips to help you apply your wall stickers like a pro.
Positioning And Aligning
Start by deciding where exactly you want your stickers to go. Use a pencil to lightly mark the spot, so you can adjust before sticking. Holding the sticker up to the wall and stepping back helps you see if the placement feels right.
Consider using a level or ruler to keep your stickers straight, especially if you’re working with multiple pieces. Aligning them correctly from the start saves you from having to peel and re-stick later, which can damage the adhesive.
Peeling And Sticking Tips
Peel the backing paper slowly to avoid ripping the sticker. If you have a large sticker, peel just a small section at first and stick that part to the wall. This makes it easier to manage and reduces the chance of it folding over on itself.
Press the sticker gently with your fingers as you go, smoothing it down gradually. Use a soft cloth or a squeegee to press firmly and ensure the sticker adheres well. Don’t rush this step—taking your time here makes a big difference in the final look.
Avoiding Air Bubbles And Wrinkles
Air bubbles can be frustrating, but you can prevent them by smoothing the sticker from the center outward. If bubbles appear, prick them gently with a pin and press out the air. Wrinkles usually happen when you stretch the sticker too much—let the sticker lie flat naturally without forcing it.
Have you ever noticed how a small bubble can ruin the whole look? Taking a moment to smooth carefully can save you from that disappointment. What other tricky details have you encountered with wall stickers?
Maintaining And Removing Stickers
Maintaining and removing bedroom wall stickers is essential to keep your space looking fresh and avoid damage to your walls. Proper care extends the life of your stickers and ensures easy removal when you want a change. Let’s dive into how you can clean, remove, and even reuse these decorative pieces effectively.
Cleaning Without Damage
Dust and dirt can dull the look of your wall stickers. Use a soft, dry cloth or a microfiber duster to gently wipe the surface. Avoid harsh chemicals or abrasive scrubbing since these can peel or fade the stickers.
If you notice any stains, lightly dampen a cloth with water and gently dab the area. Never soak the sticker or the wall around it, as excess moisture can weaken the adhesive and cause peeling. Keeping your stickers clean helps maintain their vibrant colors and crisp edges.
Safe Removal Methods
When it’s time to remove your stickers, patience is key. Slowly peel from one corner, pulling gently at a 45-degree angle. Rushing or yanking can rip the sticker or damage your wall paint.
If the sticker resists, use a hairdryer on low heat to warm the adhesive. This softens the glue, making removal smoother. After removal, use a mild soap solution and a soft cloth to clean any leftover residue from the wall.
Reusing Or Repurposing Stickers
Wondering if you can reuse your wall stickers? The answer depends on the sticker type and how carefully you remove it. Vinyl stickers often keep their shape if peeled slowly and stored on wax paper.
You can repurpose leftover stickers on notebooks, laptops, or furniture to create a coordinated look in your room. This not only saves money but also reduces waste. How creative can you get with your sticker collection?
Creative Ideas For Bedroom Decor
Creative ideas bring life to bedroom walls. Stickers offer a fun and easy way to refresh any room. They can match many styles and moods. Use stickers to express personality and create a cozy space.
Mixing Stickers With Other Decor
Combine wall stickers with shelves or framed photos. This adds depth and interest to the room. Use stickers around mirrors or lamps for a balanced look. Layering textures makes the space feel warm and inviting. Try pairing floral stickers with soft fabrics for a calm vibe.
Seasonal And Themed Arrangements
Change wall stickers to match seasons or holidays. Snowflakes and stars brighten winter walls. Flowers and butterflies work well in spring. Halloween or beach themes create fun and lively rooms. Switch stickers easily to keep the decor fresh and new.
Inspiring Diy Projects
Create custom stickers with paint or markers on clear sheets. Cut simple shapes and arrange them on walls for unique designs. Use stencils to add patterns around stickers. Personalize stickers with names or quotes for a special touch. DIY projects make decorating fun and affordable.
Frequently Asked Questions
What Materials Do I Need To Make Bedroom Wall Stickers?
You need adhesive vinyl sheets, a cutting tool, transfer tape, and design templates. Clean the wall before application for best results.
How Do I Design Custom Bedroom Wall Stickers?
Use graphic software or hand-draw designs. Keep shapes simple and clear. Print or cut the design on vinyl sheets.
Can I Remove Bedroom Wall Stickers Without Damage?
Yes, peel slowly starting at a corner. Use a hairdryer to soften adhesive if needed. Clean any residue with warm soapy water.
How Do I Apply Bedroom Wall Stickers Smoothly?
Clean and dry the wall first. Use transfer tape for precise placement. Smooth out air bubbles with a squeegee or credit card.
Conclusion
Creating bedroom wall stickers can be simple and fun. Choose designs that match your style and room theme. Use the right materials and tools for best results. Take your time to place stickers carefully on clean walls. Personalize your space with unique patterns or shapes.
Small changes can brighten up your room instantly. Enjoy decorating and make your bedroom a cozy place. Keep exploring new ideas to refresh your walls anytime. This project brings creativity and a fresh look to your home.


