
Want to know how to upload a photo on Canvas quickly and without hassle? Whether you need to share your work for a class assignment or add a personal touch to your profile, uploading a photo can sometimes feel confusing.
But don’t worry—this guide will walk you through every step clearly and simply. By the end, you’ll be able to upload your photo with confidence, saving time and avoiding frustration. Keep reading, and let’s make your Canvas experience smoother together!

Credit: at.csudh.edu
Choosing The Right Photo
Choosing the right photo to upload on Canvas is more than just a technical task; it’s about telling your story visually. Whether you’re showcasing your artwork, creating an educational presentation, or simply sharing a personal moment, the photo you choose can make all the difference. A carefully selected image not only enhances your Canvas project but also engages your audience in a meaningful way.
Image Quality Tips
High-quality images have a powerful impact. Ensure your photo is clear and sharp. A blurry or pixelated image can distract from your message. Check the resolution; aim for at least 300 DPI for print quality and 72 DPI for web use. Lighting can also transform a photo—natural light often works best, adding vibrancy and depth.
Best File Formats
Choosing the right file format can affect how your image appears on Canvas. JPEG is a versatile format that balances quality and file size, ideal for photographs. PNG is perfect for images with transparent backgrounds or when you need to maintain high detail. Avoid using GIFs unless you’re uploading animations, as their quality is often lower.
Optimizing Photo Size
Large files can slow down your Canvas page. Optimize your photo size without sacrificing quality. Tools like Photoshop or online compressors can help reduce file size. Aim for a balance where your image loads quickly but still looks great. Remember, a fast-loading page keeps your audience engaged.
Preparing Your Photo
Preparing your photo is an important step before uploading it on Canvas. A well-prepared image looks clear and professional. It helps your artwork or project stand out. Simple adjustments can improve the overall quality. This process saves time and avoids mistakes later.
Basic Editing Techniques
Start with basic edits to enhance your photo’s appearance. Adjust brightness and contrast to make details visible. Use sharpening tools to improve clarity. Remove any unwanted spots or blemishes. These small changes make a big difference.
Color Correction
Correct the colors to match the original scene or your vision. Adjust saturation to make colors vibrant but natural. Fix white balance to avoid unwanted color tones. Ensure the photo looks balanced and pleasing to the eye.
Cropping And Resizing
Crop your photo to remove distractions and focus on the main subject. Choose the right aspect ratio for Canvas requirements. Resize the image to fit Canvas dimensions without losing quality. Proper sizing ensures your photo looks great on the final print or display.
Accessing The Canvas Upload Platform
Accessing the Canvas upload platform is simple and quick. It allows you to share your photos easily. The platform is user-friendly and supports many image formats. Before uploading, you must have an account. Once logged in, you can find the upload section in a few clicks.
Creating An Account
Visit the official Canvas website to start. Click on the “Sign Up” or “Register” button. Fill out your name, email, and create a password. Use a valid email for verification. Check your inbox for a confirmation link. Click the link to activate your account. Now, you can log in anytime to upload photos.
Navigating The Upload Section
After logging in, look for the “Upload” tab. It usually appears in the main menu or dashboard. Click the upload button to open the photo upload page. You can drag and drop your images or select files from your device. The platform shows supported file types and size limits. Add titles or descriptions to your photos. Finally, hit the “Submit” or “Upload” button to complete the process.

Credit: shopsavvy.com
Uploading Your Photo
Uploading your photo on Canvas is a straightforward task that lets you personalize your learning profile or course content. It only takes a few clicks to add your image, making your digital presence more engaging. Let’s walk through the process, tackle common problems, and share tips to speed things up.
Step-by-step Upload Process
First, log into your Canvas account and navigate to your profile page. Look for the option to edit your profile or change your profile picture—usually found by clicking on your current avatar or name.
Next, select the upload button and browse your device for the photo you want to use. After selecting the file, confirm the upload by clicking the save or submit button. Your new photo will then appear on your profile, visible to your classmates and instructors.
Common Upload Issues
Sometimes, uploads fail because the file size is too large or the file format is not supported. Canvas typically accepts JPEG, PNG, and GIF formats, so check your image type before uploading.
If you encounter an error message or the upload stalls, try refreshing the page or clearing your browser cache. Slow internet connections can also cause problems, so switching to a faster network might help.
Tips For Faster Uploads
- Resize your photo:Large images take longer to upload. Use basic photo editing tools to reduce the size before uploading.
- Use common file formats:Stick to JPEG or PNG for smoother uploads.
- Check your internet speed:A stable connection speeds up the process and avoids interruptions.
Have you ever paused your upload because it took too long? Optimizing these small details can save you time and frustration.
Customizing Your Canvas Print
Customizing your canvas print lets you create a unique piece of art. It transforms a simple photo into a beautiful decoration. Personal touches make your canvas truly yours. Adjust size, frame, and effects to match your style and space.
Selecting Canvas Size
Choose a size that fits your wall and room style. Small sizes suit desks and shelves. Large canvases work well on big walls. Consider the photo’s detail; bigger prints show more clearly. Standard sizes include:
- 8×10 inches
- 16×20 inches
- 24×36 inches
Pick a size that balances your photo and the display area.
Choosing Frame Options
Frames add style and protect your canvas edges. Basic options include:
- No frame for a modern look
- Wood frames for warmth and classic style
- Metal frames for a sleek, modern feel
Match the frame color to your room decor or photo tones. Frames can be thin or wide, depending on your taste.
Adding Text Or Effects
Text adds meaning or a message to your canvas. Choose simple fonts for readability. Position text where it enhances the photo. Effects like filters or borders can improve the image. Use subtle effects to keep the photo natural. Common effects include:
- Black and white filter
- Soft glow
- Vignette border
Text and effects give your canvas a personal touch.
Reviewing And Finalizing Your Order
Reviewing and finalizing your order is a key step before printing your photo on canvas. This process ensures your image looks perfect and your order details are correct. Taking time here prevents mistakes and saves you from disappointment.
Previewing The Print
Look closely at the preview of your canvas print. Check the image placement and size. Make sure the colors appear natural and vibrant. Zoom in to see details clearly. This helps catch any unwanted cropping or blurriness.
Checking For Errors
Scan the entire image for any mistakes. Look for spots, unwanted objects, or incorrect orientation. Verify the text, if any, is spelled right and easy to read. Confirm the canvas size matches your choice. Double-check the frame style and other options.
Confirming Payment And Shipping
Enter your payment details carefully. Verify your billing information is accurate. Provide the correct shipping address to avoid delays. Choose your preferred shipping method and delivery speed. Review the total cost, including taxes and fees, before submitting.
Troubleshooting Upload Problems
Uploading photos on Canvas should be a smooth process, but sometimes issues pop up that can halt your progress. Troubleshooting these problems quickly helps you get back on track without frustration. Let’s look at common upload problems and how you can fix them effectively.
Resolving File Compatibility Issues
One common hurdle is file compatibility. Canvas supports popular image formats like JPEG, PNG, and GIF. If your photo is in an unusual format, it might not upload correctly.
Check the file extension first. If it’s not supported, try converting your image using free online tools or simple software like Paint or Preview.
Also, large file sizes can cause problems. Canvas often limits upload size, so resizing your image to under 10MB can solve this instantly. Have you ever struggled with an unsupported file type? Changing the format usually clears the way.
Dealing With Upload Failures
Upload failures can happen even if your file looks fine. Sometimes, slow internet or browser issues are the culprits. Try refreshing your page or switching to a different browser like Chrome or Firefox.
Clearing your browser cache often helps too. If you face repeated upload errors, check your internet speed or try connecting to a different network. Your upload might succeed once the connection stabilizes.
Another tip is to avoid special characters in your file name. Simple names with letters and numbers reduce the chance of errors. Have you noticed your upload fails after renaming the file? That could be why.
Contacting Support
If none of these steps work, reaching out to Canvas support is your best bet. They can look into technical issues on their end that you can’t fix yourself.
Gather details like your browser version, file type, and error messages before contacting them. This information speeds up the troubleshooting process.
Remember, support teams are there to help, so don’t hesitate to ask. Have you ever found a quick fix from support that saved your day? Sometimes a simple solution is just a message away.

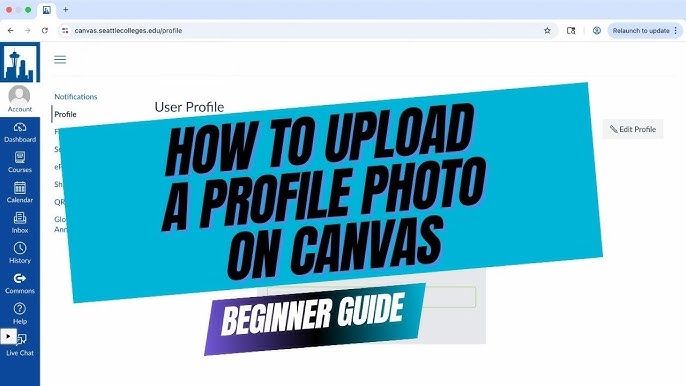
Credit: www.youtube.com
Frequently Asked Questions
How Do I Upload A Photo On Canvas?
To upload a photo on Canvas, log in and go to your course. Find the assignment or discussion. Click “Submit Assignment” or the image icon. Select your photo file from your device and upload it. Confirm by clicking “Submit” or “Post.
“
What File Types Are Supported For Canvas Photo Uploads?
Canvas supports common image files like JPG, PNG, GIF, and BMP. Ensure your photo is in one of these formats for smooth uploading. Avoid unsupported formats to prevent errors during submission.
Can I Upload Photos Using The Canvas Mobile App?
Yes, the Canvas mobile app allows photo uploads. Open the app, navigate to the assignment or discussion, and tap the upload or image icon. Choose your photo from the gallery or take a new one. Then submit it.
How To Fix Photo Upload Errors On Canvas?
Check your internet connection and file size limits. Ensure your photo format is supported. Clear your browser cache or try a different browser. If issues persist, contact your institution’s Canvas support team for help.
Conclusion
Uploading a photo on Canvas is simple and quick. Just follow the steps carefully. Choose the right file and check its size. Make sure your photo looks good before uploading. This helps your work stand out. Practice a few times to feel comfortable.
Soon, adding images will become easy. Keep exploring Canvas features to improve your projects. Don’t hesitate to try different photos and styles. Enjoy creating and sharing your work with others.


