
Are you looking to add a personal touch to your walls without spending a fortune? Making your own vinyl wall stickers is easier than you think, and it lets you create designs that truly reflect your style.
Imagine transforming any room with custom shapes, patterns, or quotes that you designed yourself. In this guide, you’ll discover simple steps to make your own vinyl wall stickers, even if you’ve never tried it before. Ready to turn your walls into your own masterpiece?
Keep reading to learn how!

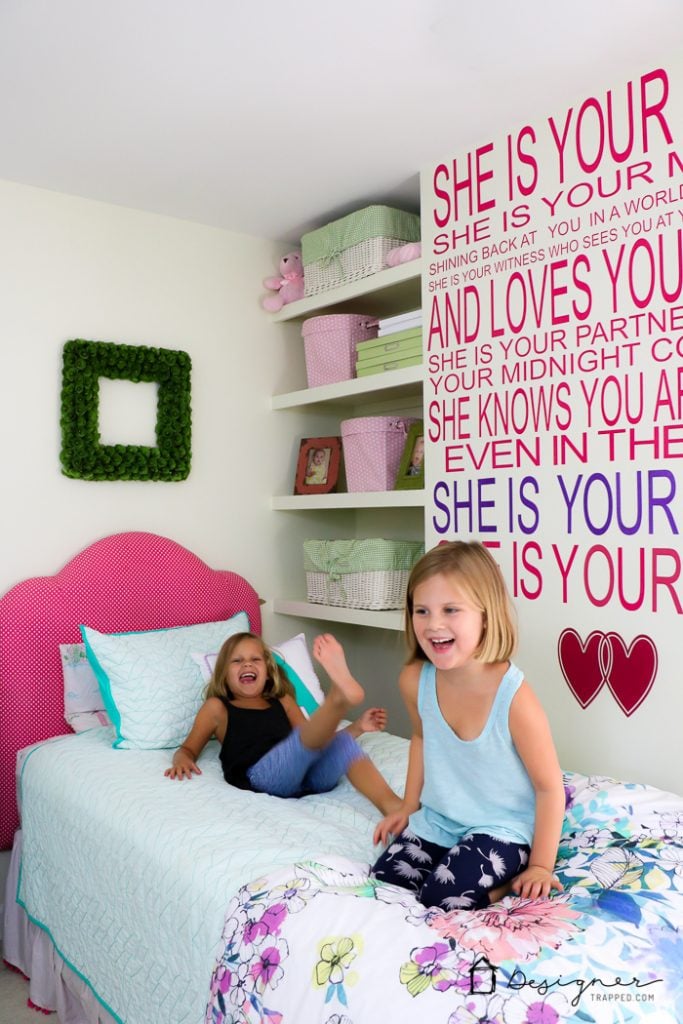
Credit: www.amazon.com
Materials Needed
Gathering the right materials is the first step to making your own vinyl wall stickers. Having quality supplies can make the process smoother and the final product more durable. Knowing exactly what you need also helps avoid unnecessary trips to the store or online orders.
Types Of Vinyl Sheets
Choosing the right vinyl sheet is crucial. You have two main options:
- Adhesive vinyl:This type sticks directly to your wall and is perfect for decals and intricate designs.
- Heat transfer vinyl (HTV):Usually used on fabrics, but you can experiment with it if you want a different texture or effect on your wall.
Matte vinyl offers a subtle look, while glossy vinyl creates a shiny finish. Think about the room’s lighting and style when picking your vinyl.
Essential Tools
Tools can make or break your vinyl sticker project. At the very least, you’ll need:
- Cutting machine or craft knife:Machines like Cricut or Silhouette are great for precision, but a sharp craft knife works well for simple shapes.
- Cutting mat:Protects surfaces and helps keep your vinyl steady while you cut.
- Weeding tool:This helps remove excess vinyl from your design, especially small details.
- Transfer tape:Essential for moving your design from the backing paper to the wall without losing shape.
- Squeegee or credit card:To smooth out bubbles and ensure your sticker sticks properly.
Optional Accessories
Adding a few extras can enhance your experience and results:
- Ruler or measuring tape:Keeps your design aligned and sized right.
- Painter’s tape:Useful for positioning your stickers before final application.
- Spray bottle with soapy water:Helps with repositioning stickers during application if you want to avoid air bubbles.
- Lint roller:Clears dust off your wall to improve adhesion.
Have you ever tried making stickers without a weeding tool? It’s a game-changer for saving time and frustration.
Designing Your Stickers
Designing your vinyl wall stickers is the exciting part where your creativity takes shape. This step sets the tone for how your stickers will look and feel on your walls. Let’s break down how to pick the right design, use design software effectively, and nail the sizing and layout.
Choosing A Design
Think about the mood you want to create in your space. Are you aiming for something playful, elegant, or minimalist? Your design should reflect that vibe clearly.
Look around your home or workspace for inspiration. Maybe a favorite quote, a nature element, or a simple geometric pattern sparks your interest. You don’t need to be an artist—sometimes, simple shapes or text work best.
Ask yourself: Will this design still feel fresh after a year? Timeless designs save you from the hassle of frequent changes.
Using Design Software
Design software can feel intimidating, but many free options are user-friendly. Programs like Canva, Inkscape, or even simple tools like Microsoft PowerPoint let you create crisp, clean designs.
Start with basic shapes and text, then experiment with colors and fonts. Use layers to separate different elements, making editing easier later on.
Save your design in a high-resolution format like PNG or SVG. This ensures your sticker will print sharply, preserving every detail.
Sizing And Layout Tips
Measure the space where you plan to place your sticker before finalizing the design. A sticker that’s too large or too small can throw off the room’s balance.
Try sketching your layout on paper or using your design software’s grid tools. This helps you visualize how the sticker fits in the area.
Consider the viewing distance: smaller, intricate details might get lost if placed too far from the eye. Simpler, bold designs often work better for larger walls.
Cutting The Vinyl
Cut vinyl carefully using a sharp blade to get clean edges for your stickers. Use a cutting mat to protect surfaces and improve precision. Take your time to ensure smooth, accurate cuts for a professional look.
Cutting the vinyl is a crucial step in the process of creating your own vinyl wall stickers. Whether you’re a DIY enthusiast or someone new to this craft, mastering this step can be both rewarding and fun. There are various techniques you can use to cut your vinyl, each with its own advantages and challenges.Manual Cutting Techniques
Manual cutting is an art that requires patience and precision. Using tools like scissors or a craft knife, you can create intricate designs that reflect your personal style. Start by tracing your design onto the vinyl with a pencil or marker. Invest in a good quality cutting mat to avoid damaging your surfaces. A ruler or straight edge can be your best friend, ensuring clean lines and edges. Embrace imperfections—they add a unique charm to your stickers.Using A Cutting Machine
For those who crave precision and efficiency, a cutting machine is a game-changer. Machines like Cricut or Silhouette are popular for their ability to produce complex designs with ease. Load your design into the machine’s software, adjust settings based on vinyl type, and let the machine do the hard work. It’s like having your own personal factory at home! You can even create multiple stickers at once, saving time and effort. Plus, the consistency in every cut ensures professional-looking results every time.Safety Tips
Safety should always be a priority when working with sharp tools and machines. Ensure your workspace is well-lit to avoid accidents and keep your fingers away from cutting blades. When using a cutting machine, read the manual thoroughly to understand its features and safety mechanisms. Keep children and pets away from the crafting area to prevent any mishaps. Remember, a safe crafting environment allows you to focus on creativity without worry. Are you ready to see your designs come to life?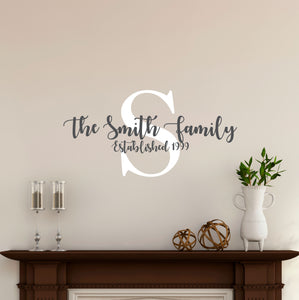
Credit: www.stickywallvinyl.com
Weeding The Design
Weeding the design is a crucial part of making your own vinyl wall stickers. This process involves carefully removing the extra vinyl that is not part of your design. It takes patience and a steady hand, but the results will make your sticker look clean and professional.
Removing Excess Vinyl
Start by peeling away the vinyl around your design slowly. Focus on pulling up small sections rather than big chunks to avoid ripping or distorting the vinyl. Take your time to ensure that only the parts of the design you want to keep remain on the backing sheet.
If you encounter tiny pieces inside letters or intricate shapes, use a gentle touch. These small details often make or break the overall look of your sticker. Have you ever noticed how a missing dot or line can change the entire feel of a design?
Tools For Weeding
Having the right tools can make weeding much easier and less frustrating. A basic weeding tool with a sharp, pointed tip helps you lift small pieces with precision. Tweezers also work well for grabbing tiny bits that are hard to reach.
- Weeding hook or pick
- Tweezers
- Craft knife for very detailed cuts
- Magnifying glass if your design is very small
Using the right tool for the job speeds up the process and reduces mistakes. Do you have a favorite tool that makes your crafting smoother?
Common Challenges
One common challenge is accidentally lifting parts of the design you want to keep. This can be frustrating, but slowing down and working in small sections helps prevent this. Another issue is dealing with very thin or delicate vinyl cuts, which can tear easily.
Static cling or dust can cause tiny pieces to stick where they shouldn’t. Keeping your workspace clean and using a lint roller on the backing sheet before you start helps avoid this problem. Have you ever had a design ruined by a tiny piece of dust?
Patience is your best ally during weeding. The more you practice, the better you’ll get at spotting problem areas before they happen. What’s the most complex design you’ve successfully weeded?
Applying Transfer Tape
Applying transfer tape is a crucial step in creating your own vinyl wall stickers. This clear adhesive sheet helps you lift the cut vinyl from its backing and place it smoothly onto your wall or surface. Mastering this process ensures your design stays intact and looks professional.
Selecting Transfer Tape
Not all transfer tapes are the same. Choose one that matches the complexity of your design. For detailed or small lettering, use low-tack transfer tape to avoid pulling up the vinyl.
If your design has large shapes or solid areas, a medium to high-tack transfer tape works better to hold everything firmly. You can find transfer tapes in rolls or sheets at craft stores or online.
Think about the surface where you’ll apply the sticker, too. Some tapes work better on rough walls, while others stick best to smooth surfaces.
Proper Application Steps
Start by cutting a piece of transfer tape slightly larger than your vinyl design. Peel off the backing carefully without touching the sticky side. Lay the tape gently over the vinyl, starting from one edge and smoothing it down.
Use a squeegee or a credit card to firmly press the transfer tape onto the vinyl. This step helps the tape grab the vinyl pieces completely. Take your time here; rushing can cause the vinyl to lift unevenly.
Once the tape is secure, slowly peel the vinyl backing away at a sharp angle. The vinyl should stick to the transfer tape, ready for you to place it on your wall.
Avoiding Air Bubbles
Air bubbles can ruin the smooth look of your vinyl sticker. To prevent this, always apply your sticker slowly and steadily. Start pressing the vinyl from the center outwards to push air out.
If bubbles appear, gently lift the vinyl and reposition it. Small bubbles can be smoothed out with a squeegee or pinched and pushed out carefully. Remember, patience makes a big difference here.
Have you ever noticed how a tiny bubble can catch your eye immediately? Taking extra care now saves you from frustration later.
Credit: kraftmatics.com
Installing Stickers On Walls
Installing vinyl wall stickers is a simple process that can transform any room. Proper installation ensures the stickers stay flat and last longer. Take your time to prepare the wall and apply the sticker carefully. This will give you a smooth, professional look.
Preparing The Wall Surface
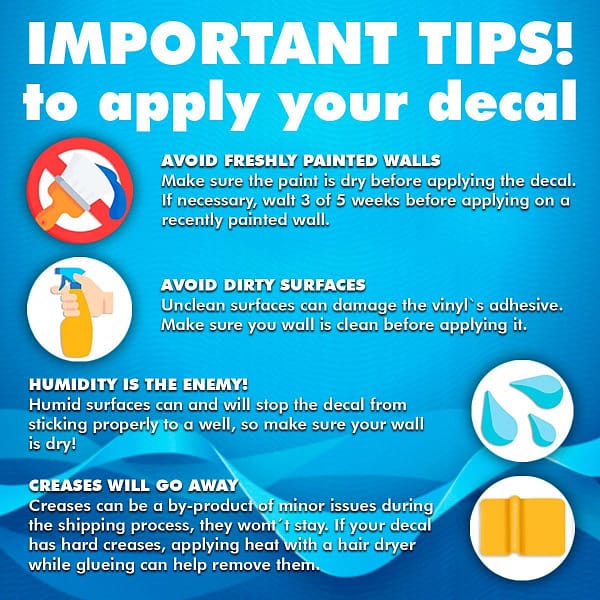
Clean the wall with a mild soap and water solution. Remove all dust, dirt, and grease. Use a dry cloth to wipe the wall completely. Avoid textured or rough surfaces for best results. Make sure the wall is dry before applying the sticker.
Positioning The Sticker
Hold the sticker up to the wall to find the perfect spot. Use a level or ruler to keep it straight. Mark light pencil dots at the corners to guide placement. Peel back a small part of the sticker backing. Align the sticker carefully with your marks.
Pressing And Securing
Slowly press the sticker onto the wall from one side to the other. Use a plastic squeegee or a credit card to smooth out air bubbles. Apply firm pressure across the entire sticker surface. Peel off the transfer tape gently, keeping the sticker in place. Check for any loose edges and press again if needed.
Caring For Your Vinyl Stickers
Caring for your vinyl wall stickers ensures they stay vibrant and intact for a long time. Proper maintenance helps avoid peeling, fading, or damage that can ruin your creative effort. Here’s how you can keep your stickers looking fresh and beautiful.
Cleaning Tips
Keep your vinyl stickers clean by gently wiping them with a soft, damp cloth. Avoid abrasive sponges or harsh chemicals that can wear down the vinyl’s surface. If you need to remove dirt or smudges, a mild soap diluted in water works well.
Try to clean your stickers regularly, especially in kitchens or bathrooms where grease and moisture build up quickly. Remember, too much water can loosen the edges, so always use a lightly damp cloth rather than soaking.
Removing Stickers Safely
Removing vinyl stickers without damage takes patience. Start by warming the sticker with a hairdryer for about 30 seconds; the heat softens the adhesive underneath. Then, slowly peel from one corner, pulling at a sharp angle to avoid tearing.
If any adhesive residue remains, rub it gently with a cotton ball dipped in rubbing alcohol or use a commercial adhesive remover safe for your wall surface. Have you ever pulled off a sticker only to find chunks left behind? Taking it slow prevents that frustrating mess.
Longevity And Maintenance
Consider where you place your vinyl stickers—direct sunlight can fade colors over time. If your stickers are on frequently touched surfaces, expect some wear and clean gently to preserve them longer.
Check your stickers every few months for lifting edges and press them back down firmly. You can also add a clear, matte sealant spray if you want extra protection, but test it on a small area first to avoid discoloration.
Frequently Asked Questions
What Materials Do I Need For Vinyl Wall Stickers?
You need adhesive vinyl sheets, a cutting machine or craft knife, transfer tape, and a clean surface. Optional tools include a ruler and scraper for smooth application.
How Do I Prepare My Wall For Vinyl Stickers?
Clean the wall thoroughly using soap and water or rubbing alcohol. Ensure the surface is dry, smooth, and free of dust for better sticker adhesion.
Can I Customize Vinyl Wall Stickers At Home?
Yes, you can design your own patterns using graphic software. Then cut them on vinyl sheets with a cutting machine or by hand for personalized decor.
How Long Do Vinyl Wall Stickers Typically Last?
Vinyl stickers usually last 3 to 5 years indoors. Their lifespan depends on wall texture, exposure to sunlight, and proper application.
Conclusion
Making your own vinyl wall stickers is fun and easy. You choose the design and colors yourself. Cutting the vinyl carefully helps your stickers look great. Applying them smoothly keeps walls clean and neat. These stickers add personality to any room quickly.
Try different shapes and sizes for variety. Personalizing your space becomes simple and affordable. Enjoy the process and show your creativity. Your walls will thank you for the new look.


