
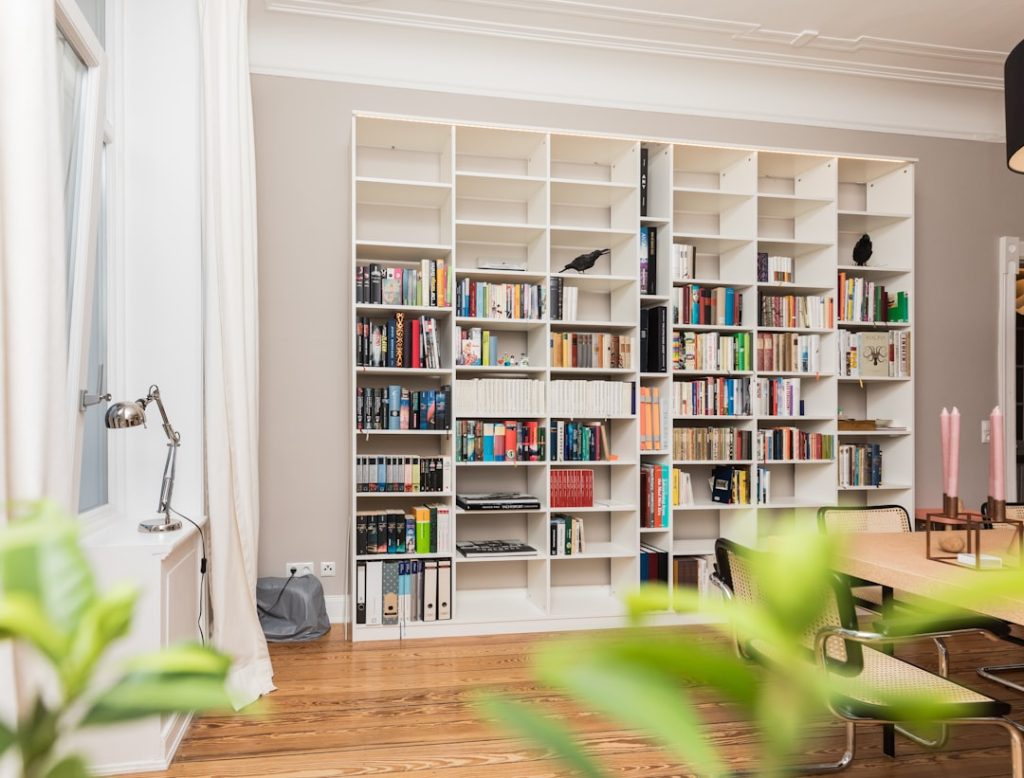
Imagine transforming an empty wall into a stunning, floor to ceiling bookshelf that not only holds your favorite books but also adds charm and personality to your space. You might think building such shelves is complicated or expensive, but what if you could do it yourself with simple tools and clear steps?
Whether you want to organize your collection, showcase décor, or maximize storage, this guide will walk you through everything you need to know. By the end, you’ll have the confidence and know-how to create beautiful, sturdy bookshelves that fit perfectly in your home.
Ready to get started? Let’s dive in!

Credit: www.smorhome.com
Planning Your Bookshelves
Planning your floor to ceiling bookshelves is key to a successful build. Careful preparation saves time and materials. It ensures a perfect fit and a look you love. Think about the space, materials, and design before starting.
Measuring The Space
Measure the wall height and width accurately. Use a tape measure and record the numbers. Check for obstacles like doors, windows, or vents. Note any uneven surfaces or corners. Plan shelf depth based on your room size and book collection.
Choosing Materials
Select strong and durable materials for your shelves. Common choices include plywood, MDF, and solid wood. Consider the finish: paint, stain, or natural wood look. Choose materials that match your budget and skill level. Remember, sturdy shelves support heavy books safely.
Design And Style Options
Pick a design that fits your room style and needs. Options include open shelves, closed cabinets, or a mix. Decide on shelf spacing to hold different book sizes. Think about adding decorative elements like crown molding or trim. Keep the style simple for easy building and lasting appeal.
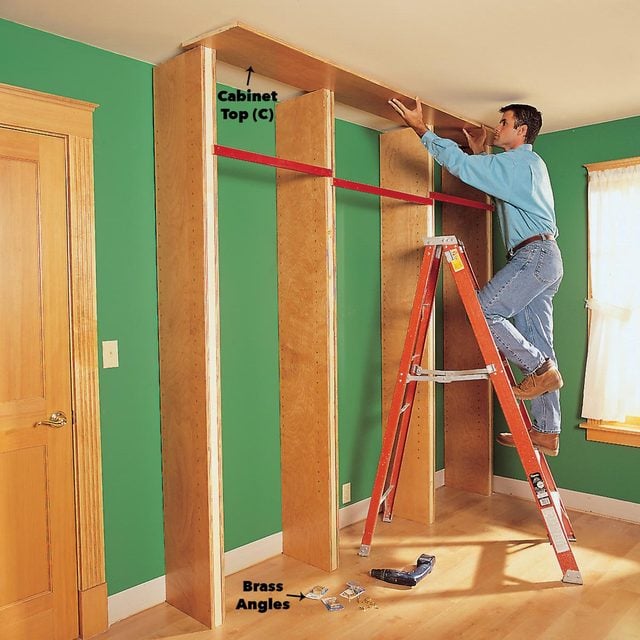
Credit: www.familyhandyman.com
Gathering Tools And Supplies
Before you start building your floor to ceiling bookshelves, gathering the right tools and supplies is crucial. Having everything ready saves time and helps avoid interruptions during the project. Plus, the right materials make your shelves sturdy and stylish.
Essential Tools
Make sure you have the following tools on hand to make the process smooth and efficient:
- Measuring tape:Accuracy matters when fitting shelves from floor to ceiling.
- Level:Keep your shelves perfectly straight to avoid awkward slants.
- Power drill and drill bits:For drilling holes and driving screws quickly.
- Stud finder:Secure your shelves into wall studs for extra strength.
- Circular saw or handsaw:Cut wood panels and shelves to the right size.
- Screwdrivers:Both flathead and Phillips for various fasteners.
- Clamps:Hold pieces steady while assembling or gluing.
Recommended Materials
Choosing the right materials affects both durability and appearance. Solid wood like pine or oak offers strong support and a beautiful finish but can be more expensive. Plywood is budget-friendly and stable, especially if you opt for cabinet-grade plywood with smooth surfaces.
Don’t forget to get quality screws, wood glue, and finishing nails. For a polished look, sandpaper and wood stain or paint will help you add your personal touch. Have extra boards on hand to account for mistakes or design changes.
Safety Gear
Your safety is just as important as the shelves you build. Protect your eyes with safety goggles to avoid dust and wood chips. Ear protection helps reduce noise from power tools, which can be surprisingly loud during long work sessions.
Wear a dust mask or respirator to keep harmful particles out of your lungs, especially when sanding or cutting. Gloves protect your hands from splinters and sharp edges. Have a first aid kit nearby—you never know when a small cut might happen.
Preparing The Area
Clear the wall space and remove furniture for easy access. Measure the area carefully to fit the shelves perfectly. Ensure the floor and wall are clean and level before starting.
Preparing the area for your floor to ceiling bookshelves is a crucial step that sets the foundation for a seamless project. By taking the time to organize and protect your space, you’ll prevent potential mishaps and ensure that your new bookshelves will stand tall and proud for years to come. Let’s dive into the key steps that will make your preparation process both efficient and effective.Clearing The Space
Start by removing any furniture, decorations, or obstacles from the area where your bookshelves will be installed. A clutter-free zone will give you room to work and help you visualize the final look. Think about the joy of a blank canvas—this is your opportunity to create something beautiful! Plus, clearing the space will prevent accidental damage to your belongings.Protecting Floors And Walls
Protecting your floors and walls is essential to avoid scratches, dents, or paint damage. Lay down a drop cloth or old sheet over the floor where you’ll be working. Consider using painter’s tape to safeguard the walls. This simple step saves you from post-project clean-ups and repairs, allowing you to focus on the fun part—building!Marking Measurements
Accurate measurements are key to ensuring your bookshelves fit perfectly. Use a measuring tape to determine the height, width, and depth of your shelving space. Mark these measurements lightly on the wall with a pencil, so you have a visual guide as you build. Have you ever built a puzzle without knowing the size? Measurements are your blueprint for success. By taking these steps to prepare the area, you’re setting yourself up for a smooth building process. What will your floor to ceiling bookshelves hold? Your favorite novels, cherished mementos, or maybe a bit of both?
Credit: www.smorhome.com
Building The Frame
Building the frame is the most important part of floor-to-ceiling bookshelves. It forms the basic structure that holds everything together. A strong, well-built frame ensures stability and durability. This section covers cutting wood, assembling sides, and installing top and bottom pieces. Follow clear steps to create a solid frame that fits your space perfectly.
Cutting Wood To Size
Measure your wall height and shelf width carefully. Use a saw to cut the wood panels to the right size. Make sure edges are straight and smooth. Label each piece to avoid confusion later. Proper cutting saves time and improves the final look.
Assembling The Sides
Start with the vertical side panels. Attach supports inside each side for extra strength. Use wood glue and screws to join pieces firmly. Check that sides are perfectly vertical using a level. The sides must be sturdy to hold the shelves safely.
Installing The Top And Bottom
Place the bottom panel between the side pieces first. Secure it with screws and wood glue. Next, fit the top panel in the same way. Ensure the top and bottom are square with the sides. This keeps the frame stable and ready for shelves.
Installing Shelves
Installing shelves on your floor-to-ceiling bookshelf is a crucial step that shapes both the look and functionality of your project. Getting the spacing right, securing shelves firmly, and choosing between adjustable or fixed shelves can make all the difference. Let’s dive into how you can make these choices work best for your space and needs.
Spacing Shelves Evenly
Think about what you want to store before deciding on shelf spacing. Books come in various sizes, so tailor the gaps to fit your tallest books or decorative items.
Use a tape measure and pencil to mark consistent intervals along the side panels. A quick tip: leaving a bit more height than your tallest item ensures easy access and a clean look.
Would uneven shelves make your collection look cluttered or unique? Remember, even spacing usually offers a balanced appearance and better stability.
Securing Shelves In Place
Once you’ve marked your spots, it’s time to fix the shelves securely. Use strong brackets or shelf pins designed to hold the weight of your books.
For heavier loads, consider adding wall anchors or additional support brackets. This prevents sagging and keeps your shelves safe over time.
Check each shelf by pressing down firmly after installation. Can you feel any movement? If yes, tighten screws or add extra support before loading up.
Adjustable Vs Fixed Shelves
Fixed shelves offer solid support and a streamlined look. They’re great if you have a consistent collection or want a minimalist design.
Adjustable shelves provide flexibility, allowing you to change shelf heights as your needs evolve. This is perfect if you collect items of varying sizes or like to refresh your display often.
Which option fits your lifestyle better? If you enjoy rearranging or adding new items frequently, adjustable shelves might save you time and effort.
Finishing Touches
The finishing touches on your floor to ceiling bookshelves can make all the difference between a DIY project and a polished masterpiece. This stage is where your shelves gain character and durability. Taking time here ensures your hard work lasts and looks stunning.
Sanding And Smoothing
Start by sanding every surface, focusing on edges and corners where roughness tends to hide. Use a medium-grit sandpaper first, then move to a fine grit for a smooth finish. Don’t rush this step—it prepares the wood to accept paint or stain evenly.
If you skip proper sanding, your paint or stain might peel or look blotchy. I once skipped thorough sanding on a project and ended up with uneven color that required extra coats. You want your shelves to feel smooth to the touch and look flawless.
Painting Or Staining
Choose paint or stain based on the look and protection you want. Paint offers a clean, modern look and hides wood imperfections well. Stain enhances the natural wood grain and adds warmth.
Apply thin coats and let each dry fully before adding another. This prevents drips and uneven color. Have you considered using a clear polyurethane finish after staining? It adds durability, especially if your shelves will hold heavy or frequently moved items.
Adding Trim And Molding
Trim and molding add that professional touch and can tie your shelves into the room’s overall design. Crown molding at the top and baseboards at the bottom create a seamless transition to the ceiling and floor.
Measure carefully and cut precisely for a tight fit. Using a nail gun or finishing nails can speed up installation and keep the trim flush against the shelves. Think about whether you want simple straight lines or decorative profiles to match your style.
Mounting And Securing
Mounting and securing floor to ceiling bookshelves is key to their durability and safety. Proper attachment prevents wobbling and potential accidents. This step ensures the shelves stay firmly in place, even under heavy weight. A secure installation also protects your walls and belongings.
Attaching To Wall Studs
Wall studs provide the strongest support for your shelves. Use a stud finder to locate them behind the drywall. Mark the stud positions clearly before drilling. Attach the bookshelf frame using long screws designed for wood. Avoid anchors or drywall screws alone; they do not hold heavy loads well.
Ensuring Stability
Check that the bookshelf stands straight and does not lean. Use a level during installation to keep shelves even. Secure the top and bottom parts to the wall studs. Add brackets or angle braces if needed for extra support. Spread the weight evenly across all shelves to prevent sagging.
Safety Tips
- Use a helper to hold the bookshelf while you secure it.
- Wear safety glasses when drilling into walls.
- Double-check screw tightness after installation.
- Keep heavy items on lower shelves to lower the center of gravity.
- Regularly inspect mounts for signs of wear or looseness.
Organizing Your Collection
Organizing your floor to ceiling bookshelves is more than just placing books on a shelf. It’s about creating a space that reflects your personality and makes your collection easy to enjoy. Thoughtful organization can turn your shelves into a focal point of your room and keep your favorite reads within easy reach.
Arranging Books Creatively
Think beyond lining up books by size or alphabet. Try grouping them by color to create a striking visual effect or by theme to tell a story through your collection. Mixing horizontal stacks with vertical rows adds depth and breaks monotony, making your shelves more dynamic.
Have you considered rotating your books seasonally? This keeps your collection fresh and highlights different genres throughout the year. Also, placing your most-read or beloved books at eye level makes grabbing your next read effortless.
Incorporating Decorative Items
Adding decorative pieces between books can personalize your shelves and prevent them from looking overcrowded. Use items like small plants, framed photos, or unique bookends to add character and texture. These details make your shelves feel curated rather than cluttered.
Balance is key—don’t let decorations overwhelm your books. Leave some empty space to give your eyes a place to rest. This approach makes your collection inviting and easy to browse.
Maintaining Your Shelves
Regular upkeep keeps your shelves looking neat and your books in good condition. Dust your shelves and books often to avoid buildup that can damage paper over time. It’s a simple habit that extends the life of your collection.
Reassess your organization every few months. Are there books you no longer need or decorative items that don’t fit anymore? Keeping your shelves intentional helps you appreciate your collection more and prevents overcrowding.
Frequently Asked Questions
What Materials Are Needed For Floor To Ceiling Bookshelves?
You need plywood or MDF boards, wood screws, brackets, wood glue, sandpaper, paint or stain, and finishing nails. Tools include a saw, drill, level, measuring tape, and stud finder for secure installation.
How Do I Measure Space For Floor To Ceiling Bookshelves?
Measure the wall’s height from floor to ceiling and the width available. Subtract space for baseboards or moldings to ensure a perfect fit without gaps or overlaps.
What Is The Best Wood Type For Bookshelves?
Pine, oak, and plywood are common choices. Pine is affordable, oak is durable, and plywood offers stability and smooth surfaces for painting or staining.
How Can I Secure Tall Bookshelves Safely?
Attach the bookshelf to wall studs using brackets or L-brackets. This prevents tipping and enhances stability, especially important for tall, heavy-loaded shelves.
Conclusion
Building floor to ceiling bookshelves adds style and storage to any room. Start with a clear plan and measure your space carefully. Use strong materials to ensure your shelves hold heavy books safely. Take your time with each step for the best results.
Enjoy organizing your books and displaying your favorite items. A well-made bookshelf can change a room’s look and feel. Try this project to create a practical and beautiful feature in your home. Simple tools and patience lead to great success.
Your new shelves will bring joy for years.


