
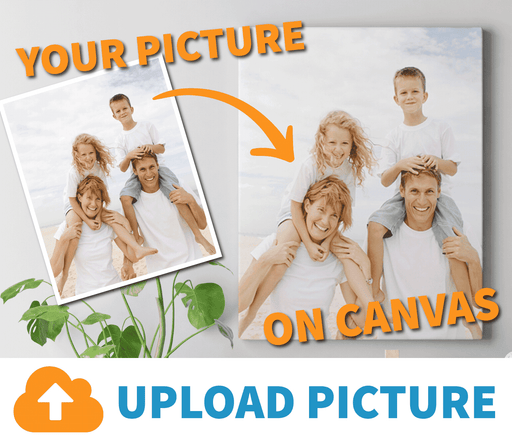
Have you ever wanted to turn your favorite photo into a beautiful canvas print? Uploading a picture onto canvas might sound tricky, but it’s easier than you think.
Whether you want to decorate your home, create a special gift, or showcase your art, this simple process can bring your images to life. You’ll discover clear, step-by-step instructions that anyone can follow. By the end, you’ll feel confident and ready to create your own stunning canvas masterpiece.
Keep reading to unlock the secrets of uploading your picture onto canvas with ease!

Credit: www.youtube.com
Preparing Your Picture
Before uploading a picture onto Canvas, prepare it carefully. A well-prepared image can enhance your project. Follow these steps to ensure your picture is ready for upload.
Choosing The Right Image
Select an image that fits your project theme. Ensure it’s clear and visually appealing. A high-resolution image works best. Avoid blurry or pixelated pictures. Consider the message you want to convey.
Editing For Best Results
Edit your image to improve quality. Use photo editing tools like Photoshop or GIMP. Adjust brightness, contrast, and saturation. Crop the image to remove unnecessary parts. This focuses the viewer’s attention. Resize the image to fit Canvas requirements. Smaller files upload faster.
File Formats To Use
Choose the correct file format for your image. JPEG is great for photographs. PNG is ideal for graphics with transparency. Avoid using TIFF or BMP as they’re large. Smaller file sizes speed up uploads.
Selecting The Canvas
Selecting the right canvas is crucial before you upload your picture. It sets the foundation for your artwork and affects how your image will look once printed or painted. Knowing what kind of canvas to pick helps you avoid surprises and ensures your final piece matches your vision.
Types Of Canvas Materials
There are several canvas materials to consider, each with its own texture and durability. Cotton canvas is common and affordable, offering a smooth surface that works well for most digital prints.
Linen canvas is more expensive but provides a finer texture and greater strength, making it ideal for professional artists or high-quality reproductions. Synthetic canvases, like polyester, resist moisture and stretching, which can be perfect for outdoor displays or humid environments.
Think about where your canvas will be displayed and how much handling it will endure. Which material fits your picture’s style and purpose best?
Choosing The Size
The size of your canvas changes how your picture feels. Small canvases highlight details and fit well in cozy spaces, while large canvases make a bold statement and fill open walls.
Consider the resolution of your picture—uploading a low-resolution image onto a large canvas can cause blurriness. Also, think about the room where you want to hang it. Does your space call for a subtle accent or a centerpiece?
Ask yourself: What size will let your picture shine without losing quality?
Surface Preparation Tips
Preparing the canvas surface before uploading your picture ensures better adhesion and vibrancy. If you’re using a raw canvas, applying a layer of gesso can create a smooth, primed surface ready to hold ink or paint.
For pre-stretched canvases, lightly sanding the surface can help the image stick better. Make sure the canvas is clean and dry—dust or moisture can affect the final result.
Have you ever noticed how a well-prepared surface makes colors pop? Taking a few extra minutes here saves frustration later.
Uploading The Picture
Uploading a picture onto canvas is the first step in turning your image into a beautiful piece of art. This process involves preparing the image and choosing how to transfer it onto the canvas. Understanding the options helps you pick the best way to get your picture printed or transferred with high quality.
Using Digital Printing Services
Digital printing services offer a quick and easy way to upload your picture onto canvas. You simply upload the image file to the service’s website. Most services accept common file types like JPEG or PNG. They handle the rest, printing your image directly onto a high-quality canvas.
These services often provide options to adjust size, crop, or add filters. The final product comes ready to hang or frame. This method works well for sharp, colorful images and detailed photos.
Diy Transfer Methods
DIY transfer methods allow you to create a custom canvas at home. One popular way is using transfer paper. Print your image on the transfer paper with an inkjet printer. Then, press the image onto the canvas with heat or special glue.
Another option is using gel medium. Apply a layer of gel on the canvas, place the printed image face down, and let it dry. After drying, gently remove the paper to reveal the image on the canvas.
These methods are affordable and fun but may require practice to get perfect results.
Setting Up The Image For Print
Preparing your image correctly ensures the best print quality on canvas. Check the resolution; it should be at least 300 DPI for clear prints. Resize the image to match the canvas dimensions without stretching or distorting.
Adjust brightness and contrast to enhance colors. Crop the image to focus on the main subject. Save the file in a high-quality format like TIFF or PNG to avoid compression loss.
Proper setup avoids blurry or pixelated prints and makes your picture look professional on canvas.
Enhancing Your Canvas Art
Enhancing your canvas art transforms a simple printed picture into a unique masterpiece that truly reflects your style. Adding personal touches can make your artwork stand out and last longer. Think about what small changes could bring your canvas to life and keep it looking fresh for years.
Adding Paint Or Texture
Adding paint or texture to your canvas art gives it depth and character. You can use acrylic paints to highlight certain areas or add brush strokes that create a 3D effect. Even simple touches like dots, lines, or splashes can make your picture pop.
Texture mediums like modeling paste or gel can create raised surfaces that invite touch. Try experimenting with sponges or palette knives to add interesting textures. Have you ever thought about mixing materials to make your canvas truly one-of-a-kind?
Framing Options
Choosing the right frame can completely change how your canvas art looks in your space. Floating frames add a modern feel, while classic wooden frames provide warmth and tradition. You could even try no frame at all for a clean, minimalist vibe.
Consider the room’s decor and lighting when selecting a frame. A bright frame might complement a colorful picture, while a dark frame could make the colors stand out more. What kind of mood do you want your artwork to set?
Sealing And Protecting
Protecting your canvas art helps keep it vibrant and safe from dust, moisture, and fading. Applying a clear varnish or sealant is a smart way to shield your picture without altering its appearance. Matte finishes reduce glare, while gloss finishes enhance color brightness.
Make sure to choose sealants that are compatible with your paint type. Test on a small corner first to avoid unwanted effects. How long do you want your canvas to maintain its fresh look? Taking this step can make a big difference in durability.
Troubleshooting Common Issues
Uploading a picture onto Canvas should be straightforward, but sometimes things don’t go as planned. You might notice your image looks off or the upload simply won’t complete. These common issues can be frustrating, but a few simple fixes can get your picture looking just right in no time.
Color Accuracy Problems
Have you ever uploaded a photo only to find the colors look dull or completely different? This usually happens because Canvas and your device display colors differently. To improve color accuracy, try calibrating your monitor or adjusting your image’s color profile before uploading.
Another tip is to save your image in sRGB color space, which is widely supported by web platforms like Canvas. If colors still seem off, check if your browser or Canvas settings have any color management options you can tweak.
Image Distortion Fixes
Seeing your picture stretched or squished after upload can be disappointing. This often results from Canvas resizing images to fit specific dimensions without maintaining the original aspect ratio. Before uploading, resize your image to match the recommended Canvas dimensions exactly.
You can also crop your image using simple editing tools to keep the important parts intact. If distortion persists, try uploading the image in a different file format like PNG or JPEG to see if that resolves the issue.
Handling Upload Errors
Upload errors can stop your workflow and leave you wondering what went wrong. Common causes include file size limits, unstable internet connections, or unsupported file types. Check Canvas’s file size restrictions and compress your image if it’s too large.
If your connection drops mid-upload, try restarting your router or switching to a more stable network. Also, confirm your image format is compatible with Canvas—JPEG, PNG, and GIF usually work best.
Have you encountered a specific upload error message? Searching the exact error can often lead to quick solutions shared by other users in forums or support pages.
Credit: www.milweb1.com

Credit: at.csudh.edu
Frequently Asked Questions
How Do I Upload A Picture Onto Canvas?
To upload a picture on Canvas, log in and open your course. Click “Files” or “Assignments,” then select “Upload. ” Choose your image file and confirm. The picture will appear in your Canvas space, ready for use or submission.
What Image Formats Does Canvas Support?
Canvas supports common image formats like JPG, PNG, GIF, and BMP. Ensure your picture is in one of these formats before uploading. Using supported formats guarantees smooth upload and proper display within your Canvas course.
Can I Edit A Picture After Uploading On Canvas?
Canvas offers limited editing features like cropping and resizing within the platform. For advanced edits, use external photo editors before uploading. This approach ensures your picture looks perfect when shared or submitted.
Is There A File Size Limit For Uploading Pictures On Canvas?
Yes, Canvas typically limits uploads to 500 MB per file. For images, keeping file size under 10 MB is best for quick uploads. Compress large images before uploading to avoid errors and delays.
Conclusion
Uploading a picture onto Canvas is simple and quick. Just follow the basic steps carefully. Choose your file, upload it, and adjust as needed. Practice helps you get better with each try. This skill saves time and makes your work look great.
Keep exploring Canvas tools to improve your projects. Enjoy sharing your images easily and clearly every time.


