

Want to turn your favorite photos into stunning wall art? Printing photos on canvas is a simple way to bring your memories to life with a professional, eye-catching look.
Whether you’re decorating your home or creating a unique gift, you’ll discover how easy it is to transform your pictures into beautiful canvas prints. Keep reading, and you’ll learn the exact steps to make your photos stand out and impress everyone who sees them.

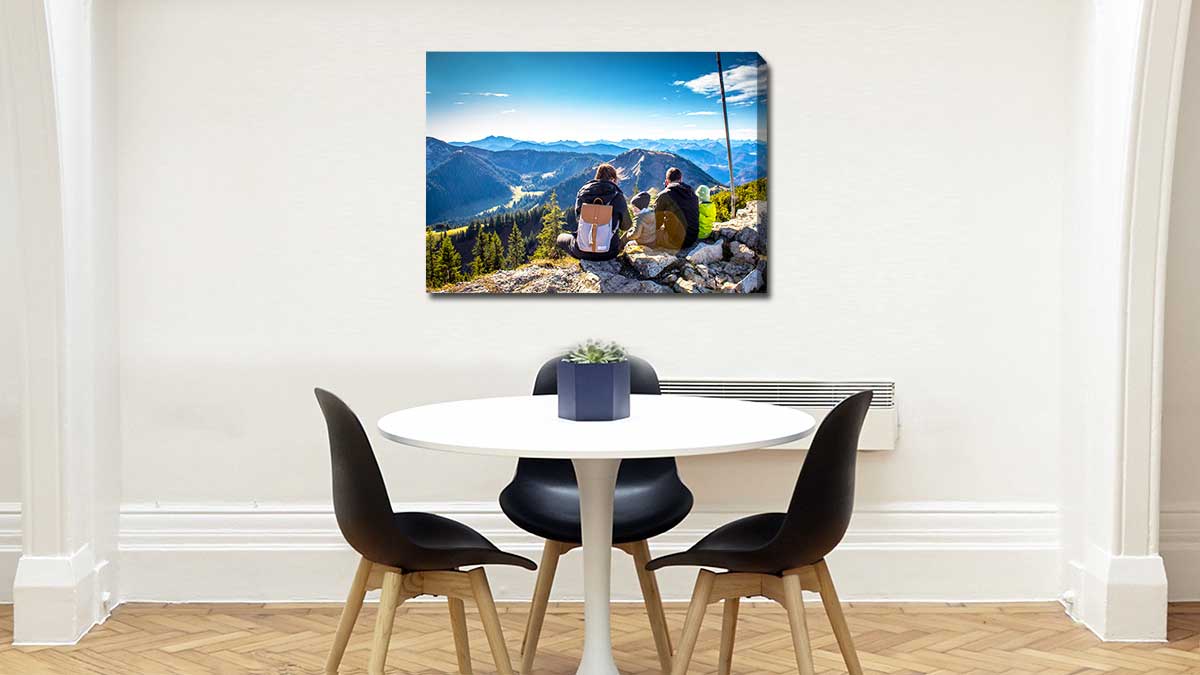
Credit: www.canvasjet.com
Choosing The Right Photo
Choose a clear, high-quality photo with good lighting and sharp details. Pictures with simple backgrounds work best for canvas prints. Select images that hold special meaning or tell a story to make your canvas more personal.
Choosing the perfect photo for canvas printing is a crucial step to ensure that your final artwork is both captivating and meaningful. The photo you choose should not only be visually appealing but also carry a personal significance or a story that resonates with you. By carefully selecting the right image, you enhance the emotional connection and aesthetic appeal of your canvas print.Selecting High-resolution Images
To achieve a stunning canvas print, start by selecting high-resolution images. Low-resolution photos can appear blurry or pixelated when enlarged, diminishing the quality of your print. Aim for a resolution of at least 300 DPI (dots per inch) to ensure crisp, clear results. When browsing through your photo library, check the file size and dimensions. Images taken with a modern smartphone or a DSLR camera usually have the necessary resolution for large prints. This ensures that every detail is captured beautifully on canvas.Considering Image Composition
Composition plays a vital role in the visual impact of your canvas print. Consider the rule of thirds to create a balanced and engaging photo. This involves dividing your image into nine equal segments and placing key elements along these lines or intersections. Think about the focal point of your photo. Is it prominently featured? A well-composed image guides the viewer’s eye naturally, making it more captivating. Reflect on what you want to convey with the photo and how its composition can enhance that message.Matching Photos To Your Space
Think about where you plan to display your canvas print. The colors and theme of your photo should complement the room’s décor and mood. For a tranquil bedroom, a serene landscape might be ideal, while a dynamic cityscape could energize a home office. Consider the size of the space and the wall where the canvas will hang. A large, bold image can become a focal point in a spacious living room, while a series of smaller prints might work better in a hallway. How will the photo interact with the elements already present in your space? Ultimately, the right photo will not only enhance your living area but also reflect your personal style and taste. Choose wisely and let your canvas print tell its own unique story.Picking Canvas Materials
Picking the right canvas materials is key to printing photos that look great and last long. The canvas fabric, its thickness, texture, and the frame style all affect the final appearance. Choosing these carefully ensures your photo print matches your style and space.
Types Of Canvas Fabric
Canvas fabric comes in several types. Cotton canvas is soft and natural, offering warm tones. Polyester canvas is smooth and durable, good for bright colors. A blend of cotton and polyester combines softness and strength. Each type changes how colors appear and how the canvas feels to touch.
Canvas Thickness And Texture
Canvas thickness varies from thin to thick. Thicker canvas feels sturdy and lasts longer. Thin canvas is lighter and easier to stretch. Texture also matters. Smooth canvas shows fine details clearly. Rough texture adds a classic, artistic look. Choose thickness and texture based on your photo and where you will display it.
Frame Options And Styles
Frames protect the canvas and add style. Stretcher bars are simple wooden frames that keep the canvas tight. Floating frames add depth and a modern touch. Ornate frames bring a vintage or elegant feel. Frame color and width affect the overall look. Pick a frame that fits your room and personal taste.
Preparing Your Photo For Print
Preparing your photo for print is an important step before transferring the image onto canvas. The quality of your print depends on how well you edit and adjust the photo. Small changes can make a big difference in the final product. Taking time to prepare your image ensures your canvas looks sharp and vibrant.
Editing And Enhancing Images
Start by removing any blemishes or unwanted objects from the photo. Use simple editing tools to sharpen details and reduce noise. Enhance the clarity to make the image more crisp. Brightening dark areas and fixing blurry spots helps the photo stand out.
Adjusting Colors And Contrast
Adjust colors to make them look natural and vivid. Increase contrast to add depth and dimension. Avoid making colors too bright or too dull. Aim for balance so the photo looks realistic on the canvas. Color correction improves the overall mood of the image.
Sizing And Cropping Tips
Set the image size to match your canvas dimensions. Use high resolution to avoid pixelation. Crop the photo to focus on the main subject. Keep important parts away from the edges to prevent cutting off. Check the aspect ratio to maintain the photo’s original shape.
Credit: posterprint.co.uk
Printing Methods For Canvas
Choosing the right printing method for your canvas photo can make a huge difference in the final look and durability. Different techniques offer unique benefits, whether you want museum-quality art or a quick, budget-friendly option. Understanding these methods helps you decide what fits your needs and budget best.
Inkjet Vs. Giclée Printing
Inkjet printing is widely used for canvas prints because it produces vibrant colors and fine details. It sprays tiny droplets of ink directly onto the canvas, creating sharp images. However, not all inkjet prints are equal—giclée printing is a specialized type of inkjet that uses archival-quality inks and papers.
Giclée prints last longer and resist fading, making them ideal for art collectors or anyone wanting a lasting keepsake. The colors tend to be richer, and the resolution is higher compared to standard inkjet. If you want a professional-grade print that looks stunning on your wall, giclée is worth considering.
Using Professional Printing Services
Professional printing services offer convenience and quality you might struggle to achieve at home. They use advanced printers and high-quality materials to ensure your photo looks perfect on canvas. Many services also provide custom sizing, framing, and finishing options to match your style.
Working with a pro means you don’t have to worry about technical details like color calibration or canvas stretching. Plus, you get expert advice and support if you want to improve your photo’s appearance before printing. Have you checked out local print shops or online services that specialize in canvas prints? They often have special deals and samples to help you decide.
Diy Printing At Home
Printing photos on canvas at home can be rewarding but requires some preparation. You’ll need a high-quality inkjet printer capable of handling canvas sheets and special ink designed for longevity. It’s important to buy canvas specifically made for inkjet printing to avoid smudging and ink absorption issues.
Keep in mind that home printers may not match the color accuracy or resolution of professional prints. You might also face challenges in properly stretching and mounting the canvas. However, if you enjoy hands-on projects and want full control over the process, DIY printing can be a fun and cost-effective option.
What kind of finish do you want for your photo? Matte, glossy, or textured? Your choice will affect both the printing method and materials you use.
Stretching And Mounting Canvas
Stretching and mounting your printed photo on canvas transforms a simple image into a stunning piece of art. This process gives your canvas a professional, gallery-ready look and ensures it stays tight and flat over time. Knowing how to stretch and mount properly can save you money and give you full control over the final appearance.
Tools Needed For Stretching
Before you start, gather the essential tools. You’ll need:
- Canvas stretcher bars:These wooden frames come in various sizes and form the base for your canvas.
- Staple gun with staples:To secure the canvas tightly to the frame.
- Canvas pliers:They help you grip and pull the canvas evenly without damaging it.
- Scissors or a sharp blade:For trimming excess canvas after stretching.
- Measuring tape or ruler:To check the alignment and size accuracy.
Having these tools ready makes the process smoother and prevents common stretching mistakes.
Step-by-step Stretching Guide
Start by assembling the stretcher bars into a frame, making sure the corners are square. Lay your printed canvas face down on a clean surface and place the frame on top.
Use canvas pliers to pull one side of the canvas tightly over the frame and staple it in the center. Then move to the opposite side, pulling tight and stapling in the center as well.
Repeat this process for the other two sides. Continue stapling towards the corners, alternating sides to keep the tension even. Be careful not to overstretch, which can warp the image.
Fold the corners neatly and secure them with staples. Trim any excess canvas with scissors, but leave enough to maintain tension.
Framing And Hanging Techniques
Once stretched, your canvas can be framed or hung as is. Floating frames work well to showcase the edges of your canvas and add a modern touch.
For hanging, install D-rings or sawtooth hangers on the back of the stretcher bars. Use a sturdy wire to connect the rings for flexible placement on your wall.
Consider the weight of your canvas when selecting wall hooks; heavy-duty hooks prevent accidents. Have you thought about how lighting can highlight your canvas’s texture and colors?

Credit: fujifilmprintlife.ca
Protecting And Maintaining Canvas Prints
Protecting and maintaining canvas prints keeps them vibrant and lasting longer. Proper care prevents fading, dirt buildup, and damage. It also helps retain the photo’s original colors and texture. Follow simple steps to ensure your canvas print stays beautiful over time.
Applying Protective Coatings
Protective coatings shield canvas prints from dust, moisture, and UV rays. Use a clear acrylic spray designed for art. Spray evenly in a well-ventilated area. Allow each coat to dry completely before applying the next. Avoid thick layers to prevent cracking or yellowing. This coating enhances color depth and durability.
Cleaning And Care Tips
Dust canvas prints regularly with a soft, dry cloth. Use a microfiber cloth for gentle cleaning. Avoid water or cleaning solutions that can damage the surface. For stubborn spots, lightly dab with a damp cloth and dry immediately. Never rub hard as it may damage the print or canvas.
Avoiding Sun And Moisture Damage
Keep canvas prints away from direct sunlight to prevent fading. Choose walls with indirect light for display. Avoid placing prints in damp or humid areas like bathrooms. Use a dehumidifier in rooms prone to moisture. Proper placement helps maintain the print’s quality and lifespan.
Creative Display Ideas
Printing photos on canvas offers more than just a beautiful image—it provides a chance to personalize your space with style and creativity. How you display these canvases can transform a room and reflect your unique taste. Let’s dive into some creative ideas that can help you showcase your canvas prints in ways that truly stand out.
Gallery Wall Arrangements
Creating a gallery wall is a dynamic way to display multiple canvas photos together. Arrange your canvases in a grid or a more freeform layout to fill a wall with personality. You might try lining up photos by theme, color, or even by event to tell a story through your display.
Think about spacing too—leaving equal gaps creates balance, while varied spacing adds a casual vibe. Don’t hesitate to experiment with different layouts on the floor before hanging. This hands-on approach helps you visualize how your gallery will look and feel.
Mixing Canvas Sizes And Shapes
Using canvases of different sizes and shapes can add depth and interest to your display. A large, bold canvas can serve as a focal point, while smaller canvases complement it around the edges. Square, rectangular, or even circular canvases can be combined to break the monotony of standard shapes.
Try grouping a tall rectangular canvas with a cluster of smaller squares nearby. This creates a layered effect that draws the eye across the wall. How might varying sizes help highlight your favorite photo?
Incorporating Other Wall Art
Don’t limit yourself to just canvas photos—mix in other wall art pieces to enrich your display. Adding framed prints, mirrors, or even textured wall hangings can create a compelling contrast. This mix makes your wall feel curated and full of life.
Consider placing a canvas photo next to a metal sculpture or a colorful painting to break up the visual space. Combining different materials and styles invites curiosity and keeps your wall from feeling flat. What unique art pieces do you have that could complement your canvas photos?
Frequently Asked Questions
How Do I Prepare Photos For Canvas Printing?
Prepare photos by choosing high-resolution images. Edit brightness and contrast for better quality. Save files in JPEG or PNG format. Ensure the photo dimensions match canvas size to avoid distortion.
What Types Of Canvases Are Best For Photo Printing?
Cotton and polyester canvases are ideal for photo printing. Cotton offers a classic texture, while polyester provides vivid colors. Choose canvas weight between 10-14 oz for durability and quality.
Can I Print Photos On Canvas At Home?
Yes, home printing is possible with specialized inkjet printers. Use canvas-compatible ink and sheets. Follow printer settings for canvas to avoid smudging. Professional printing ensures higher quality and longevity.
How To Protect Canvas Prints From Damage?
Apply a clear protective spray or varnish after printing. Avoid direct sunlight and moisture exposure. Frame the canvas or use a glass cover for extra protection. Proper care extends print life and color vibrancy.
Conclusion
Printing photos on canvas lets you turn memories into art. Choose the right photo and canvas size carefully. Use good quality materials for clear, lasting prints. Follow simple steps for best results every time. Enjoy creating a unique piece that brightens any room.
Start your canvas project today and cherish your photos differently.


