
Want to brighten up your space with string lights but worried about putting holes in your ceiling? You’re not alone.
Many people want that cozy, magical glow without damaging walls or ceilings. The good news? You don’t need nails or drills to hang string lights securely. You’ll discover simple, effective ways to get your lights up quickly and safely. Keep reading—you’re about to learn tricks that make decorating easy and stress-free.

Credit: teachernyla.com
Choosing The Right String Lights
Choosing the right string lights is key for a beautiful ceiling display. The right lights set the mood and fit your space perfectly. Consider style, length, and brightness before buying. This helps avoid extra work or poor lighting.
Types Of String Lights
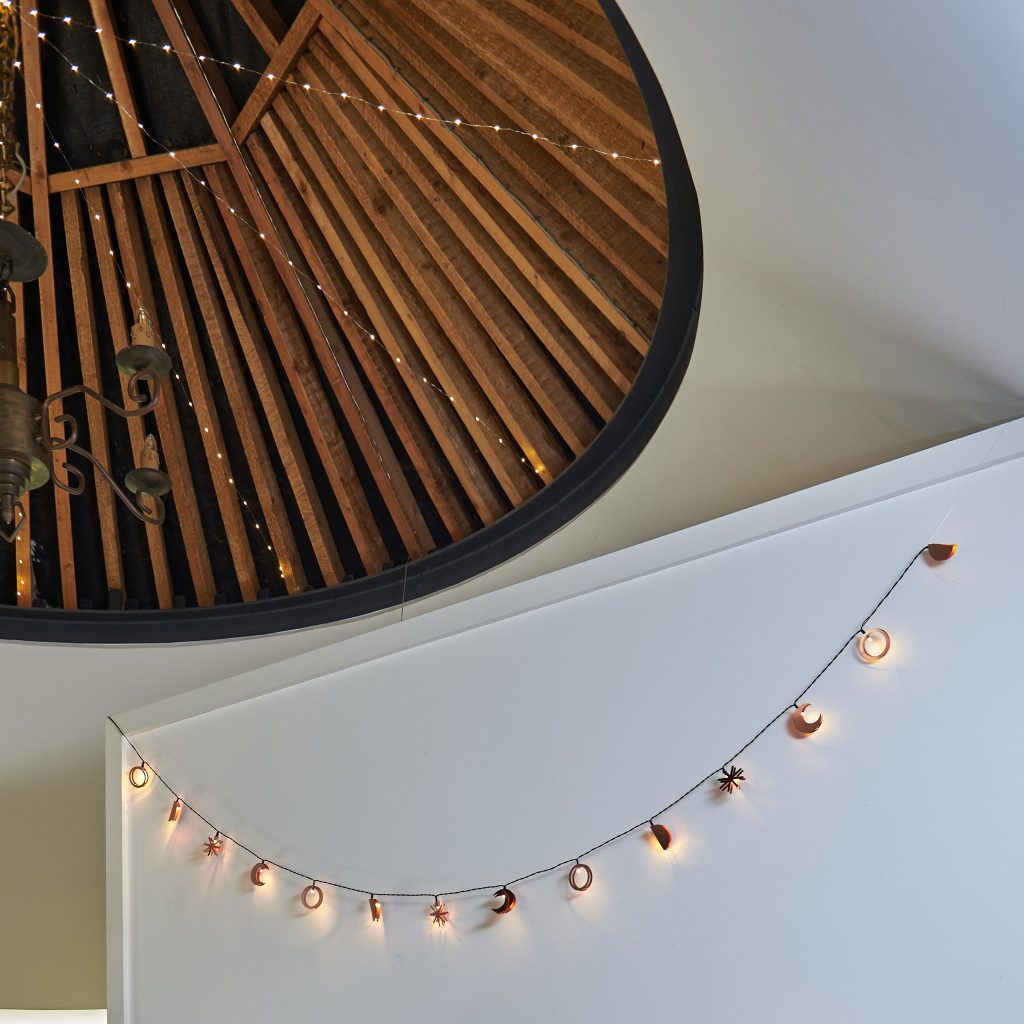
String lights come in many styles. Classic globe bulbs create a warm, cozy glow. Fairy lights use tiny LEDs for a delicate, twinkling effect. Edison bulbs offer a vintage look with larger bulbs. Some lights are battery-powered, making them easy to place anywhere. Choose a style that matches your room’s theme and purpose.
Length And Brightness Considerations
Measure your ceiling area before buying string lights. Too short means gaps and extra extensions. Too long can cause clutter and waste electricity. Brightness depends on bulb size and LED count. For soft ambiance, pick low-lumen bulbs. For task lighting, brighter bulbs work best. Check the wattage and lumens on the packaging for guidance.
Preparing Your Ceiling Surface
Preparing your ceiling surface is key to successfully hanging string lights without nails. A clean, well-understood surface ensures the adhesive options hold strong and your lights stay put. Taking a few minutes to prep can save you from frustrating falls and damage later on.
Cleaning And Drying
Start by wiping down your ceiling with a damp cloth to remove dust, dirt, and grease. Even tiny particles can weaken adhesive strips or hooks.
After cleaning, make sure the surface is completely dry before you attach anything. Moisture can prevent adhesives from sticking properly, causing your lights to drop unexpectedly.
If you notice stubborn spots, try a mild soap solution, but rinse well and dry thoroughly afterward. Think about the last time you stuck a sticker to a dusty wall—did it hold or fall off?
Assessing Ceiling Material
Not all ceilings are created equal. Knowing what material you have helps you choose the best no-nail hanging method.
- Drywall:Smooth drywall usually works well with adhesive hooks or strips designed for indoor use.
- Textured ceilings:Bumpy surfaces might reduce adhesive effectiveness, so consider lightweight clips or tension rods instead.
- Wood ceilings:Wood often provides a better grip for adhesives but watch for finishes that could affect stickiness.
- Popcorn ceilings:These can be tricky since the texture may prevent adhesives from holding securely.
Have you checked your ceiling’s texture recently? Understanding it can guide you to the right products and avoid wasted effort.
Damage-free Hanging Methods
Hanging string lights on your ceiling without nails is not only a smart choice for preserving your walls and ceilings but also a practical way to change your décor whenever you want. Damage-free hanging methods let you brighten up your space without the worry of holes or sticky residue. These options are perfect if you rent your place or simply want to avoid permanent marks.
Using Adhesive Hooks
Adhesive hooks are a popular choice because they stick firmly to most surfaces and come off cleanly. Choose hooks that support the weight of your lights—usually, small or medium-sized ones work well for string lights. Make sure you clean the ceiling area before sticking the hooks; a little rubbing alcohol on a cloth does the trick.
Once the hooks are in place, you can easily loop your string lights onto them. The best part? You can reposition or remove the hooks without peeling paint or leaving sticky spots. Have you noticed how much easier it is to decorate when you don’t have to patch holes afterward?
Command Strips And Clips
Command strips and clips are designed specifically for damage-free hanging. They often come with a two-part adhesive system that holds tight but pulls away smoothly. Clips are great if you want a neat, straight line of lights because they keep the wires organized and close to the ceiling.
Apply the strips or clips to a clean, dry surface. Press firmly and wait the recommended time before hanging your lights to ensure a strong bond. This method is especially useful for uneven surfaces or textured ceilings where hooks might not stick well.
Twist Ties And Wire
If your ceiling has exposed beams, pipes, or grid panels, twist ties or thin wire can be a lifesaver. These allow you to secure string lights without adhesives or nails, wrapping around the structure to hold lights in place. This method is flexible—you can adjust the tension or move the lights around whenever you want.
Use colorful twist ties to add a fun touch or wire coated with plastic to avoid scratching surfaces. Have you tried this approach for outdoor patios? It’s a simple way to hang lights that withstand wind and weather without damage.

Credit: sparkle.lighting
Creative Hanging Ideas
Hanging string lights on your ceiling without nails opens up a world of creative possibilities. You can transform any room into a cozy, inviting space without damaging your walls or ceiling. Let’s dive into some imaginative ways to hang your lights that add character and charm.
Creating Patterns And Shapes
Why settle for a simple straight line of lights when you can create eye-catching patterns or shapes? Try arranging your string lights in geometric shapes like triangles, hexagons, or zigzags. This adds a modern and artistic touch to your room’s atmosphere.
Loops and waves also work beautifully, especially in bedrooms or living rooms. You can easily attach the lights with removable adhesive hooks or clear clips to maintain your pattern without nails. Have you thought about spelling out a word or making a heart shape? It’s a unique way to personalize your space and impress guests.
Combining With Other Decor
String lights don’t have to stand alone. Pairing them with other decor elements can elevate your room’s style instantly. Draping lights around indoor plants, photo frames, or shelves creates a warm glow that highlights your favorite items.
Try weaving lights through a fabric canopy or wrapping them around curtain rods for a dreamy effect. Using clips or command strips keeps everything secure and damage-free. What small decor piece in your room could benefit from a little extra sparkle?
Safety Tips For Hanging Lights
Use adhesive hooks or clips to hang string lights safely without damaging the ceiling. Avoid overloading electrical outlets and check that lights are rated for indoor use. Always secure wires tightly to prevent falls or accidents.
Hanging string lights on the ceiling can transform any space. But safety must be a priority. Avoiding hazards ensures a pleasant and secure experience. Here are some safety tips to keep in mind.Avoiding Overloads
Do not plug too many lights into one outlet. This can cause circuits to overload. Use extension cords with surge protectors. Check the wattage of your lights. Make sure it matches the capacity of your outlets. Use only the recommended number of string light sets together. This prevents overheating and reduces fire risks.Securing Cords Properly
Keep cords away from pathways. This reduces tripping hazards. Use adhesive hooks or clips to secure cords. These hold the lights firmly without nails. Ensure cords do not hang loosely. This can prevent snagging. Regularly check cords for frays or damage. Replace any damaged cords immediately. It ensures long-term safety and reliability.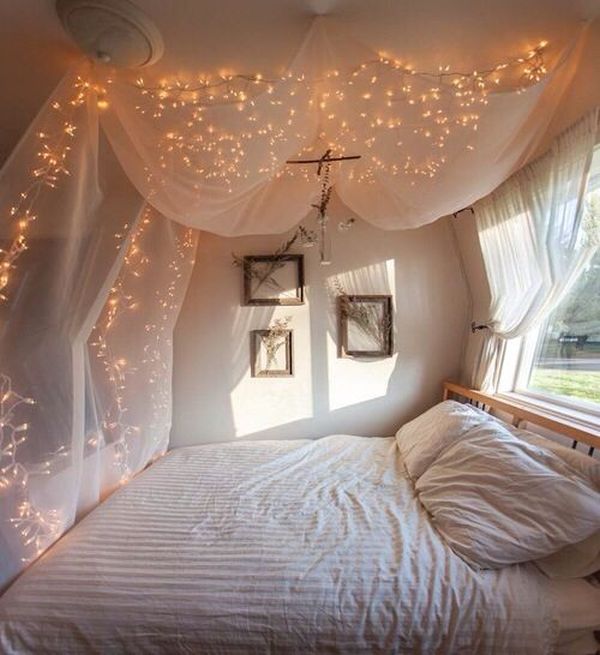
Credit: www.digsdigs.com
Removing String Lights Without Damage
Removing string lights from the ceiling without causing damage is important. It protects your walls and keeps the lights intact for future use. Careful removal helps avoid paint peeling or sticky residue. It also prevents breaking the wires or bulbs. Taking time and using the right techniques makes a big difference.
Gentle Adhesive Removal
Use gentle adhesive removers to protect your ceiling surface. Avoid strong chemicals that can harm paint or wallpaper. Try rubbing alcohol or warm soapy water on a soft cloth. Rub slowly on the adhesive spots until they loosen. Use a plastic card or your fingers to peel off the sticky residue. Always test a small hidden area first to check for damage.
Storage Tips For Reuse
Proper storage keeps string lights safe for later use. Wrap the lights loosely around a piece of cardboard or a spool. Avoid tight coils that can damage wires or bulbs. Store them in a dry, cool place to prevent moisture damage. Use ziplock bags or plastic containers to keep dust away. Label the storage box to find the lights easily next time.
Frequently Asked Questions
How Can I Hang String Lights Without Nails?
You can use adhesive hooks, removable clips, or clear tape to hang string lights without nails. These options avoid wall damage and are easy to remove.
What Are The Best Alternatives To Nails For String Lights?
Best alternatives include command hooks, adhesive strips, and ceiling clips. They hold lights securely and protect surfaces from holes or marks.
Will Adhesive Hooks Damage My Ceiling Or Walls?
No, adhesive hooks designed for walls usually don’t damage surfaces. Always follow instructions and test a small area before full application.
Can I Hang Heavy String Lights Without Nails?
Yes, use strong adhesive hooks or heavy-duty clips designed to support more weight. Ensure the ceiling surface is clean and dry for better adhesion.
Conclusion
Hanging string lights without nails is simple and safe. Use hooks, clips, or adhesive strips for easy setup. These tools protect your ceiling and avoid damage. You can change the lights anytime without leaving marks. This method saves time and keeps your space neat.
Enjoy a cozy, well-lit room without hassle. Try these tips for a bright, beautiful ceiling today.


