
Are you ready to transform your space with a stylish pendant light fixture? Installing one yourself might seem tricky, but with the right steps, you can do it safely and easily.
Imagine the warm glow and modern look a pendant light can add to your room—without waiting for a professional. This guide will walk you through every step, making sure you feel confident and in control from start to finish. Let’s get your new light shining bright!

Credit: designingvibes.com
Tools And Materials Needed
Installing a pendant light fixture needs the right tools and materials. Having everything ready makes the process easier and safer. This section lists what you need before starting your project.
Essential Tools
- Screwdriver (flathead and Phillips)
- Wire stripper and cutter
- Voltage tester
- Drill with drill bits
- Measuring tape
- Wire nuts
- Ladder or step stool
- Pliers
Choosing The Right Fixture
Select a pendant light that fits your space size and style. Check the fixture’s weight and mounting type. Make sure it matches your ceiling’s electrical box. Choose the right bulb type and wattage for brightness and energy use.
Safety Gear
- Insulated gloves to protect from electric shock
- Safety goggles to guard your eyes
- Dust mask if drilling into old ceilings
- Non-slip shoes for stable footing
Preparing The Workspace
Preparing your workspace is a crucial first step before installing a pendant light fixture. It sets the stage for a smooth and safe installation process. Taking time to organize and secure your area can prevent accidents and save you from frustration later on.
Turning Off Power
Safety should always come first. Locate your home’s electrical panel and switch off the power to the room where you’ll be working. Double-check by flipping the light switch or using a voltage tester to ensure no electricity is flowing.
Have you ever underestimated how important cutting power is? I once skipped this step, and it was a shock—literally. Don’t risk it; turning off the power is non-negotiable.
Clearing The Area
Make sure the space beneath the fixture is free from furniture and other obstacles. This gives you room to move and reduces the chance of knocking something over. Lay down a drop cloth or old sheet to catch any dust or debris during installation.
Think about the last time you tried fixing something in a cluttered room—did it slow you down? Clearing the area can speed things up and keep your tools within easy reach.
Gathering Supplies
Collect all necessary tools and materials before you start. This usually includes a screwdriver, wire strippers, a ladder, electrical tape, and your new pendant light kit. Having everything on hand avoids constant trips back and forth, keeping your focus sharp.
Ask yourself: Do I have everything I need right now? Missing even one small tool can halt progress and cause frustration. Check your light fixture’s instructions for any special tools or parts required.
Removing The Old Fixture
Turn off the power before starting to avoid electrical shock. Carefully remove the old fixture by unscrewing and disconnecting its wires. Keep track of screws and parts for easy installation of the new pendant light.
Removing the old light fixture is an essential step in upgrading to a stylish pendant light. Before you bring in the new, the old must go. This process might seem daunting, but with the right guidance, it becomes manageable and even enjoyable. Imagine the satisfaction of removing the outdated fixture yourself, paving the way for a fresh, modern addition to your space. Ready to get started?Unscrewing The Fixture
Begin by turning off the power to the fixture from the circuit breaker. Safety should always be your priority. Once you’re sure there’s no electrical current, use a screwdriver to remove the screws holding the fixture to the ceiling or wall. Keep these screws handy; you might need them for the new fixture or for another project down the road. As you carefully lower the fixture, you’ll start to see the wiring that connects it to your home’s electrical system.Disconnecting Wiring
Now it’s time to tackle the wiring. You’ll likely see three wires: black, white, and green or bare copper. Carefully remove the wire connectors, which are usually plastic caps. Unscrew them and gently pull the wires apart. Think of this step as untangling the old to make way for the new. Keep track of which wires go where, as this will guide you when connecting your new pendant light.Inspecting The Electrical Box
With the old fixture removed, take a moment to inspect the electrical box. This is your chance to ensure everything is in good condition before installing the new light. Check for any loose screws, signs of wear, or damage. A sturdy and secure electrical box is crucial for the safe installation of your new fixture. If anything seems off, consider consulting an electrician. It’s better to address issues now than to face complications later. By approaching these steps methodically, you set the foundation for a smooth installation of your new pendant light fixture. Are you feeling more confident about tackling this project?
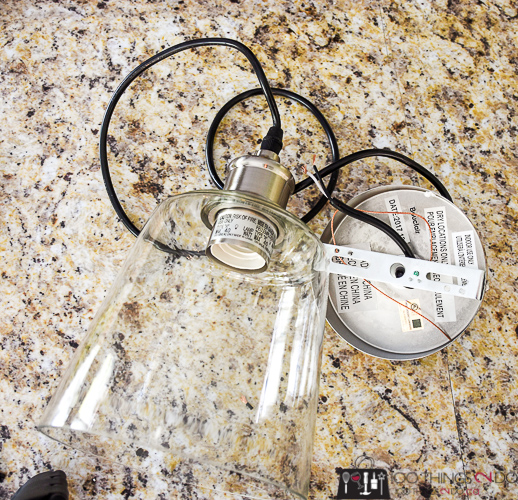
Credit: 100things2do.ca
Installing The New Pendant Light
Installing a new pendant light can brighten any room and add style. This process involves a few careful steps. Following each step closely ensures a safe and secure fixture.
Mounting The Bracket
Start by attaching the mounting bracket to the electrical box in the ceiling. Use screws provided with your light fixture. Ensure the bracket is tight and level. This support holds the entire pendant light.
Wiring Connections
Turn off power at the circuit breaker before touching wires. Connect the fixture wires to the house wires. Usually, black connects to black (live), white to white (neutral), and green or copper to ground. Use wire nuts to secure connections. Wrap electrical tape around the nuts for extra safety.
Securing The Fixture
Once wiring is complete, lift the pendant light into place. Align it with the mounting bracket. Use screws or nuts to fasten the fixture securely. Make sure the pendant hangs straight. Restore power and test the light to confirm proper installation.
Adjusting Height And Position
Adjusting the height and position of a pendant light fixture is essential for both style and function. Proper placement ensures the light shines where needed and complements your room’s design. Small changes can make a big difference in how the fixture looks and performs.
Measuring Drop Length
Begin by measuring the distance from the ceiling to the surface below. This surface could be a table, countertop, or floor. The ideal drop length depends on the room and fixture style.
- For dining areas, keep the bottom of the pendant 28 to 34 inches above the table.
- In open spaces, allow 7 feet of clearance from the floor.
- Measure twice to avoid mistakes.
Setting The Cord
After measuring, adjust the cord to the desired length. Most pendant lights have a flexible cord or chain for easy adjustment. Use wire cutters if you need to shorten it.
- Loosen the fixture’s canopy to access the cord.
- Pull the cord to the correct length.
- Trim excess cord carefully.
- Secure the cord inside the canopy.
Leveling The Pendant
Ensuring the pendant hangs straight improves the look and light spread. Use a small level tool or a smartphone app to check.
- Adjust the cord or chain until the fixture is perfectly vertical.
- Tighten all screws and fasteners.
- Step back and check from different angles.
- Make small tweaks if needed.
Testing And Final Touches
After installing a pendant light fixture, testing and final touches are crucial. These steps ensure the fixture works properly and looks great. Take your time to do them carefully. This part includes restoring power, checking the light, and cleaning up the workspace.
Restoring Power
Turn the circuit breaker back on to restore power. Check the switch that controls the pendant light. Make sure everything is connected safely before switching the power on. Avoid touching wires during this process to stay safe.
Checking The Light
Flip the light switch to test the fixture. The bulb should light up immediately. If the light does not turn on, double-check the wiring and the bulb. Use a different bulb if needed. Ensure the fixture is stable and hanging correctly.
Cleaning Up
Remove all tools and packaging from the area. Wipe down the light fixture gently to remove dust and fingerprints. Sweep or vacuum the floor to clear any debris. Proper cleanup leaves your space safe and tidy.
Troubleshooting Tips
Installing a pendant light fixture can sometimes lead to unexpected issues that disrupt your lighting experience. Troubleshooting these problems quickly ensures your space looks perfect and functions well. Let’s dive into common challenges you might face and how to fix them effectively.
Fixing Flickering Lights
Flickering lights can be annoying and might indicate a loose bulb or a faulty connection. Start by turning off the power and making sure the bulb is screwed in tightly. If the flicker continues, try swapping the bulb with a new one to rule out a defective bulb.
If the problem persists, check the light switch and dimmer compatibility. Some dimmers don’t work well with certain LED bulbs, causing flicker. Have you ever noticed your flickering stop after changing the bulb type? That’s a clue your dimmer might need an upgrade.
Dealing With Loose Fixtures
A pendant light that wobbles or feels loose can be both unsafe and unsightly. Begin by shutting off the power, then check the mounting bracket and screws holding the fixture. Tighten any loose screws carefully, but avoid overtightening, which can damage the fixture or ceiling.
If the fixture still moves, inspect the mounting box in the ceiling. Sometimes, a worn or damaged box needs replacing to provide a secure base. Have you ever had to reinforce your ceiling box for a heavy fixture? It’s a small fix that makes a big difference.
Addressing Wiring Issues
Wiring problems can cause your pendant light to fail completely or behave erratically. If your fixture doesn’t turn on, first confirm the power is on at the circuit breaker. Then, examine all wire connections inside the junction box to ensure they are secure and properly matched by color.
Loose wire nuts or exposed wires can cause short circuits or flickering. Use electrical tape to secure connections if needed. Don’t hesitate to consult a professional if you’re unsure—safety always comes first when dealing with electricity.
.jpg)
Credit: www.jimselectrical.com.au
Frequently Asked Questions
What Tools Are Needed To Install A Pendant Light Fixture?
You need a screwdriver, wire stripper, voltage tester, pliers, and a ladder. These tools help ensure a safe and efficient installation process.
How Do I Safely Turn Off Power Before Installation?
Switch off the circuit breaker connected to the light fixture. Use a voltage tester to confirm no electricity flows to the wires.
Can I Install A Pendant Light Without An Electrician?
Yes, if you follow safety steps and local codes. Basic electrical knowledge is necessary to avoid hazards or damage.
How High Should I Hang A Pendant Light Fixture?
Hang the pendant light 28 to 34 inches above the countertop or table for optimal lighting and aesthetics.
Conclusion
Installing a pendant light fixture is easier than it seems. Follow each step carefully for safety and success. Take your time to connect wires correctly and secure the fixture well. This small project can brighten your room and change its look.
Enjoy the new light and the cozy feel it brings. Remember, safety first—turn off power before starting. Now, your space has a fresh, stylish touch thanks to your effort.


