
Are you ready to add a stunning touch to your Minecraft home? Learning how to make a chandelier in Minecraft is easier than you think, and it can completely transform your space.
Imagine your rooms glowing with style and elegance, impressing every visitor who steps inside. In this guide, you’ll discover simple steps and clever tips to build your own eye-catching chandelier. Keep reading, and by the end, you’ll know exactly how to brighten up your world with a dazzling light fixture that’s all your own.

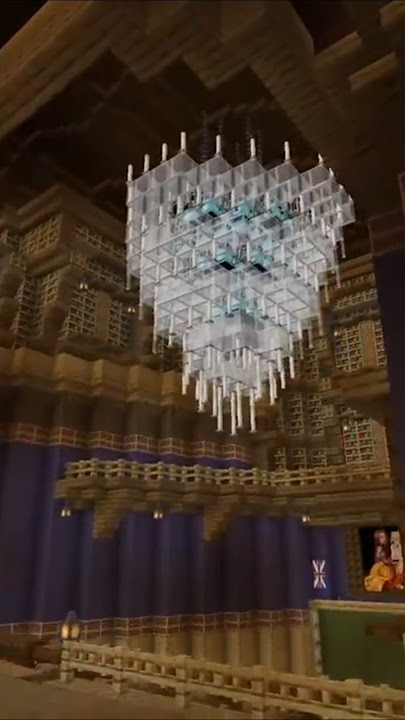
Credit: www.reddit.com
Materials Needed
Creating a chandelier in Minecraft requires specific materials. Gathering the right blocks and tools ensures your chandelier looks great and works well. Prepare everything before you start building.
Blocks And Items
- Iron Bars – Use for the chandelier frame.
- Glowstone – Acts as the light source.
- Chains – Hang the chandelier from the ceiling.
- Fence Posts (optional) – Adds decorative details.
- Lanterns (optional) – Extra lighting options.
Tools Required
- Pickaxe – To collect glowstone and iron bars.
- Shears – To gather chains if needed.
- Crafting Table – To combine items into chandelier parts.
- Scaffolding or blocks – To reach high places for hanging.
Choosing A Location
Choosing the right location for your chandelier in Minecraft can make a big difference in how it looks and functions. Think about where you want to place it before you start building. The spot should match the size of your room and the height of your ceiling to create the best visual effect and lighting.
Room Size And Ceiling Height
The size of your room matters when deciding where to hang your chandelier. A small room with a big chandelier can feel cramped, while a large room with a tiny chandelier might look empty. Measure your space and choose a chandelier size that fits well without overpowering the room.
Ceiling height is just as important. In Minecraft, ceilings can vary from just a few blocks tall to very high. If your ceiling is low, a chandelier that hangs down too far might block movement or view. Aim to keep at least two blocks of clearance between the bottom of your chandelier and the floor for easy navigation.
Lighting Considerations
Your chandelier’s main purpose is to light up the room. Think about how much light the space needs. If you’re building a large dining hall, you’ll want a chandelier with multiple light sources to brighten every corner.
Also, pay attention to where natural light enters the room. Placing your chandelier directly under a window might cause shadows or uneven lighting. Try positioning it in the center of the room or above key areas like tables or seating to ensure balanced illumination.
Have you ever noticed how a well-placed light changes the mood of a room? Your chandelier can do the same in Minecraft. Experiment with different locations to find the perfect balance between style and function.
Building The Frame
Building the frame of your Minecraft chandelier sets the foundation for its overall look and stability. This step requires attention to detail and a bit of creativity to ensure your chandelier hangs perfectly and looks stunning. Let’s break down how you can create a strong and attractive frame that will hold your lights just right.
Creating The Base
The base of your chandelier is where everything starts. Choose a material that fits your room’s style—wood, stone, or even metal blocks work well. I once used dark oak wood for a warm, rustic vibe, which added a cozy feel to my build.
Make a square or circular shape depending on your design. Keep it compact but spacious enough to hold the lights you plan to add later. A 3×3 or 4×4 block base usually provides good balance.
- Place blocks evenly to avoid an unbalanced frame.
- Check the shape from all angles to ensure symmetry.
- Consider leaving gaps for light sources like lanterns or glowstone.
Adding Support Chains
Support chains give your chandelier a realistic and sturdy look. They connect the base to the ceiling, so they need to be placed carefully. I found that using iron bars or chains works best to mimic the look of real hanging chains.
Start by attaching the chains directly above each corner or edge of your base. Let them hang down to the ceiling block or the support structure above. Make sure the length matches so the chandelier hangs evenly.
- Use chains or iron bars to create a strong visual link.
- Adjust the length to keep the chandelier balanced.
- Try mixing different materials if you want a unique look.
Have you ever noticed how the right frame can completely change a chandelier’s appearance? Paying attention to these details makes your creation stand out in any Minecraft build.
Adding Light Sources
Adding light sources is key to making your Minecraft chandelier both functional and visually appealing. The right lighting not only brightens your space but also highlights your build’s details. You’ll want to balance brightness with style to create a chandelier that stands out.
Placing Glowstone Or Lanterns
Glowstone and lanterns are excellent choices for chandelier lighting. Glowstone emits a strong light and fits nicely into ceiling designs, while lanterns offer a classic look and hang beautifully from chains or fences.
Try mixing both for a unique effect—glowstone blocks embedded in the frame with lanterns dangling underneath. This combo adds depth and texture to your chandelier’s light. Have you experimented with different light sources to see which fits your build’s vibe best?
Ensuring Even Lighting
Uneven lighting can create unwanted shadows or dark spots around your chandelier. To avoid this, space your light blocks evenly throughout the design.
Think about how the light spreads in the room. Placing lights too close together might be too bright, while spacing them too far can leave gaps. Adjust placement until your chandelier lights up the space smoothly and beautifully.
Decorative Touches
Decorative touches bring life and charm to your Minecraft chandelier. These small details make your creation stand out. They add depth and beauty, turning a simple light fixture into an art piece. Use colors and shapes to create a unique look. Experiment with different blocks and patterns to match your room’s style.
Using Stained Glass
Stained glass adds color and elegance to your chandelier. Choose colors that match your room’s theme. Place stained glass blocks or panes around the light source. This creates a soft glow with colorful light effects. Layer different colors for a more vibrant look. Transparent stained glass lets light pass through while adding style.
Incorporating Additional Details
Small details make your chandelier more interesting. Use fences, chains, or iron bars to hang parts. Add lanterns or glowstone blocks for varied lighting. Place buttons or trapdoors for texture and design. These elements create a realistic and complex look. Mix materials for contrast and style. Keep balance between decoration and light function.

Credit: www.youtube.com
Tips For Customization
Creating a chandelier in Minecraft can be a fun and creative project. Customization adds a unique touch to your builds, making them stand out. Whether you are crafting a grand centerpiece or a simple light fixture, personalization is key. Explore different designs and materials to craft a chandelier that complements your space perfectly.
Varying Sizes And Shapes
Experiment with different sizes and shapes for your chandelier. Use blocks like glass panes and iron bars for sleek designs. For larger rooms, consider a grand chandelier with multiple layers. In smaller spaces, a compact design may fit better. Mix blocks to create unique shapes.
Color And Material Choices
Choose colors and materials that match your room’s theme. Use stained glass for colorful lighting effects. Wooden blocks can offer a rustic charm. For a modern look, try quartz or concrete blocks. Consider combining materials for a more dynamic appearance.
Troubleshooting Common Issues
Building a chandelier in Minecraft is exciting, but sometimes you might run into issues that dim your creation’s glow or attract unwanted visitors. Troubleshooting these common problems can save you time and frustration. Let’s look at how to fix lighting gaps and prevent mobs from spawning around your chandelier.
Fixing Lighting Gaps
Lighting gaps happen when parts of your chandelier or surrounding area aren’t fully illuminated. These dark spots can ruin the look and let mobs spawn nearby. To fix this, first check if the light sources—like glowstone or sea lanterns—are placed evenly.
If you notice shadows or dark blocks, try adding additional light blocks in those spots. Hanging extra light blocks inside or around the chandelier can close these gaps. You might also consider using transparent blocks like glass to spread the light better without blocking the design.
Have you ever thought about the height of your chandelier? Sometimes, lowering or raising it slightly changes how light spreads. Experiment with different heights until the area below is fully lit. Remember, even a small adjustment can eliminate those stubborn shadows.
Preventing Mob Spawns
Even a beautifully lit chandelier can attract mobs if the light level isn’t high enough. Minecraft mobs spawn in darkness, so keeping light levels at 8 or above is crucial. Use a light level checker mod or count the light levels manually to ensure your chandelier provides enough brightness.
Besides adding more light sources, placing slabs or transparent blocks around the chandelier can help prevent mobs from spawning on top. Mobs cannot spawn on slabs if they are placed in the lower half of the block. This simple trick keeps your chandelier safe without affecting its look.
Do you ever wonder if your chandelier’s location affects mob spawns? Building it inside your base or well-lit areas reduces spawn chances. Avoid placing chandeliers in caves or dark outdoor spots unless you use extra lighting around them.

Credit: www.reddit.com
Frequently Asked Questions
How Do You Craft A Chandelier In Minecraft?
To craft a chandelier, gather iron bars and glowstone blocks. Arrange iron bars in a T-shape and place glowstone at the center. This creates a simple, glowing chandelier perfect for your Minecraft builds.
What Materials Are Needed For A Minecraft Chandelier?
You need iron bars and glowstone blocks. Iron bars form the frame, while glowstone provides light. These materials are easy to find or craft in the game.
Can I Customize My Minecraft Chandelier Design?
Yes, you can customize chandeliers using different blocks like lanterns or sea lanterns. Experiment with shapes and materials to match your build style.
How Do I Hang A Chandelier In Minecraft?
Place the chandelier below a ceiling block using iron bars or chains. Ensure it hangs at the desired height to illuminate your room effectively.
Conclusion
Making a chandelier in Minecraft adds style to your builds. You only need simple materials and basic steps. Experiment with different designs to fit your space. Lighting up rooms becomes fun and creative. Keep practicing to improve your building skills.
Enjoy the process and show off your creation. Minecraft lets you bring your ideas to life. Try making chandeliers in different sizes and shapes. It’s a great way to personalize your world. Keep building and have fun with your designs!


