

Are you looking to give your chandelier a stunning makeover? Adding crystals can instantly transform your lighting fixture, making it sparkle and catch everyone’s eye.
But how do you do it without breaking the bank or struggling with complicated steps? In this guide, you’ll discover simple, clear instructions to add crystals to your chandelier easily. By the end, your chandelier will shine brighter than ever, creating a warm and elegant atmosphere in your home.
Ready to make your space sparkle? Let’s dive in!
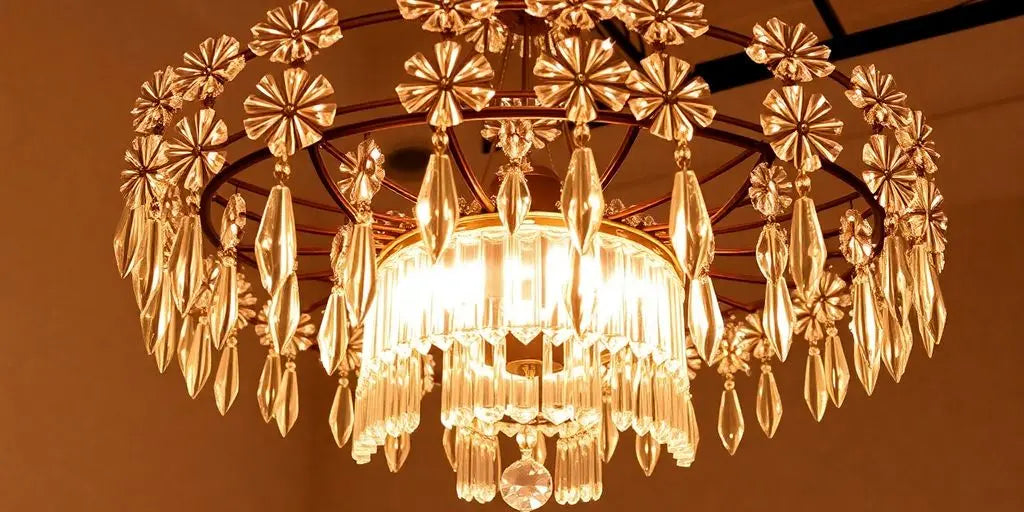
Credit: chandelierslife.com
Choosing The Right Crystals
Choosing the right crystals for your chandelier makes a big difference. The right crystals bring out the beauty and shine of the fixture. They create a sparkling effect that lights up the room. Picking crystals that fit well with your chandelier style is key. Consider the type, size, and shape of crystals to find the perfect match.
Types Of Crystals
Crystals come in many materials and qualities. Common types include:
- Glass crystals – affordable and clear.
- Swarovski crystals – high-quality with excellent sparkle.
- Quartz crystals – natural and unique.
- Acrylic crystals – lightweight and budget-friendly.
Each type reflects light differently. Choose one that fits your budget and desired sparkle.
Crystal Sizes And Shapes
Crystals vary in size from tiny beads to large pendants. Use smaller crystals for delicate designs. Larger crystals create bold, eye-catching looks.
Shapes influence the light patterns. Popular shapes include:
- Teardrop – classic and elegant.
- Octagon – creates many light reflections.
- Round – smooth and simple.
- Pendant – dramatic and decorative.
Select sizes and shapes that fit your chandelier’s frame and design.
Matching Crystals To Your Chandelier Style
Chandeliers have different styles like vintage, modern, or rustic. Match crystals to these styles for harmony.
- Vintage chandeliers suit teardrop or prism crystals.
- Modern styles work well with geometric or round crystals.
- Rustic chandeliers pair nicely with natural quartz or simple glass crystals.
The right crystal choice enhances your chandelier’s character and room ambiance.
Gathering Essential Tools
Before you start adding crystals to your chandelier, gathering the right tools is crucial. Having everything prepared saves time and prevents frustration. It also ensures your project goes smoothly and safely.
Basic Tools Needed
You will need a few simple tools to attach crystals properly. A pair of needle-nose pliers helps in bending and securing small hooks. Wire cutters are essential for trimming any excess wire or string.
Additionally, a small ladder or step stool gives you better access to the chandelier. A soft cloth can protect the crystals and fixture from scratches during handling. Don’t forget a container to keep loose crystals safe while you work.
Safety Equipment
Safety should never be overlooked. Wear safety glasses to protect your eyes from falling crystals or accidental wire snaps. Gloves can give you a better grip and protect your hands from sharp edges.
Make sure the chandelier’s power is turned off before you start. You want to avoid any electrical hazards while focusing on your decoration. Have a helper nearby if possible, to hold the ladder or pass tools.
Optional Decorative Accessories
Want to add a unique touch? Consider small decorative hooks or jump rings designed for jewelry-making. These can make attaching crystals easier and more secure.
Colored beads or small chains can add extra sparkle and personality to your chandelier. Even crystal drops of different shapes and sizes can create a custom look. Have you thought about mixing clear and colored crystals for a stunning effect?
Preparing Your Chandelier
Ensure the chandelier is clean and free of dust before adding crystals. Carefully remove any existing decorations to avoid damage. Gather all necessary tools and crystals for a smooth process.
Adding crystals to a chandelier can transform it from an ordinary fixture into a stunning centerpiece. However, before you begin attaching those sparkling gems, it’s crucial to prepare your chandelier properly. This preparation ensures not only a smooth process but also safety and longevity for your chandelier. Let’s dive into the essential steps for preparing your chandelier.Turning Off Power
Safety should be your top priority. Before you start any work, ensure the power to the chandelier is turned off at the circuit breaker. This step prevents any accidental electrical shocks and keeps you safe as you work. Double-check by flipping the light switch to see if the chandelier lights up.Cleaning The Fixture
A clean surface is essential for the crystals to shine their brightest. Use a soft cloth and a gentle cleaner to wipe down the chandelier. Dust and grime can dull the sparkle, so pay attention to each nook and cranny. You might find it helpful to use a small brush for intricate details.Removing Old Decorations
If your chandelier already has some decorations, it’s best to remove them before adding new crystals. Old decorations can clash with the new look you’re aiming for. Carefully detach any existing embellishments, ensuring you don’t damage the fixture in the process. This step clears the way for a fresh, cohesive design. By following these steps, you’re setting the stage for a dazzling transformation. Have you ever marveled at a beautifully adorned chandelier and wondered about its origins? Now, you’re on your way to creating your own masterpiece.
Credit: www.seuslighting.com
Attaching Crystals Step-by-step
Attaching crystals to a chandelier can transform it from ordinary to stunning. The process requires careful attention to detail and patience to ensure each crystal hangs perfectly. Here’s how you can add those sparkling touches step-by-step.
Planning Crystal Placement
Before you start attaching crystals, take a moment to plan their placement. Consider the chandelier’s shape and how the crystals will catch the light from different angles.
Sketch a rough layout or take a photo of your chandelier and mark where you want each crystal to go. This helps avoid overcrowding and keeps your design balanced.
Think about mixing different sizes or shapes to add depth. How will you highlight the chandelier’s best features with your crystal arrangement?
Using Hooks And Connectors
Hooks and connectors are essential tools for hanging crystals securely. Small metal hooks, often called “S-hooks,” are common and easy to use.
Attach a hook to each crystal’s loop, then connect it to the chandelier frame or existing chains. Make sure hooks are closed tightly to prevent any crystals from slipping off.
If you want a cleaner look, use tiny jump rings as connectors. These can link crystals together or attach them more discreetly to the fixture.
Securing Crystals Safely
Safety is key when handling delicate crystals on a hanging fixture. Always work on a stable ladder or step stool to avoid accidents.
Check each hook and connector after attaching the crystal to ensure it’s firmly in place. Give the crystals a gentle tug to test their security.
If your chandelier is heavy or large, consider using pliers to squeeze hooks tighter. This extra step can save you from future damage or injury.
Enhancing The Design
Enhancing the design of your chandelier with crystals transforms it from a simple light fixture into a stunning centerpiece. The way you add and arrange these crystals can completely change the mood and style of your space. Think about how you want the light to reflect and what kind of atmosphere you want to create.
Layering Crystals For Depth
Adding crystals in layers creates a rich, textured look that draws the eye. Start by hanging larger crystals closest to the frame, then add smaller ones in front or below. This technique builds a sense of depth and complexity without overcrowding the design.
Try mixing different shapes and sizes to make the layers more dynamic. You’ll notice how the light catches each layer differently, adding sparkle and movement. Have you ever noticed how layered jewelry looks more interesting than a single strand? The same idea applies here.
Adding Colorful Or Themed Crystals
Colored crystals can bring personality and a unique touch to your chandelier. Choose colors that complement your room’s palette or reflect a theme you love, such as ocean blues for a beach vibe or warm ambers for a cozy feel.
Themed crystals also tell a story—like star shapes for a celestial theme or leaf-shaped crystals for something natural. Don’t be afraid to mix clear and colored crystals; the contrast can highlight your design beautifully. What colors or themes speak to you in your home?
Balancing Symmetry And Asymmetry
Symmetry creates a classic, elegant look that feels orderly and balanced. Arrange crystals evenly on each arm or layer to achieve this effect. It’s perfect if you want your chandelier to look polished and timeless.
On the other hand, asymmetry adds surprise and modern flair. Placing crystals unevenly or in unexpected clusters can make the piece feel more artistic and alive. Try a mix of both approaches to see what fits your style—would you prefer calm or a little chaos in your lighting?

Credit: chandelierslife.com
Maintenance Tips
Keeping your chandelier crystals bright and sparkling requires regular care. Proper maintenance preserves their shine and extends their life. Simple habits help avoid buildup and damage over time.
Cleaning Crystals Regularly
Dust and dirt dull the crystals’ sparkle. Wipe them gently with a soft cloth. Use a mild glass cleaner or a mixture of water and vinegar. Avoid harsh chemicals that can damage the crystals. Clean at least once a month or more if needed.
Replacing Damaged Pieces
Check crystals carefully for chips or cracks. Replace damaged pieces promptly to keep the chandelier looking perfect. Keep spare crystals on hand that match the original design. Use pliers or tweezers for safe removal and installation.
Preventing Tarnish And Wear
Metal parts can tarnish or wear over time. Use a gentle metal polish to keep them shiny. Avoid moisture and humidity near the chandelier. Turn off the light and let it cool before cleaning to prevent damage.
Frequently Asked Questions
How Do I Choose Crystals For My Chandelier?
Select crystals based on size, shape, and clarity. Match the style of your chandelier and room décor for a cohesive look. Consider lead content for better sparkle and durability. Purchase from reputable suppliers to ensure quality and authenticity.
What Tools Are Needed To Add Crystals To A Chandelier?
You will need pliers, wire cutters, and hanging hooks or rings. A ladder or sturdy step stool is essential for safety. Gloves can protect your hands while handling crystals. Organize all materials beforehand for a smooth installation.
How Do I Safely Hang Crystals On A Chandelier?
Turn off the power before starting. Attach crystals using hooks or wires on designated chandelier arms. Handle crystals gently to avoid breakage. Ensure each crystal is securely fastened to prevent falling. Double-check stability before restoring power.
Can I Mix Different Crystal Shapes On My Chandelier?
Yes, mixing shapes adds visual interest and dimension. Balance the arrangement to maintain harmony and style. Use similar colors and sizes to unify the design. Experiment carefully to avoid overwhelming the chandelier’s look.
Conclusion
Adding crystals to a chandelier brings extra sparkle and charm. It brightens any room with beautiful reflections and light. The process is simple with the right tools and patience. Choose crystals that match your style and chandelier design. Take your time to hang each piece carefully.
Enjoy the new look and feel of your space. This small change makes a big difference in home decor. Try it yourself and see the magic happen.


