
Your crystal chandelier is more than just a light fixture—it’s a dazzling centerpiece that adds elegance to your space. But over time, dust and grime can dull its sparkle, making it look tired and less inviting.
You might think cleaning it is too complicated or risky, but with the right steps, you can restore its shine safely and easily. Keep reading to discover simple, effective ways to clean your crystal chandelier and make it shine like new again.

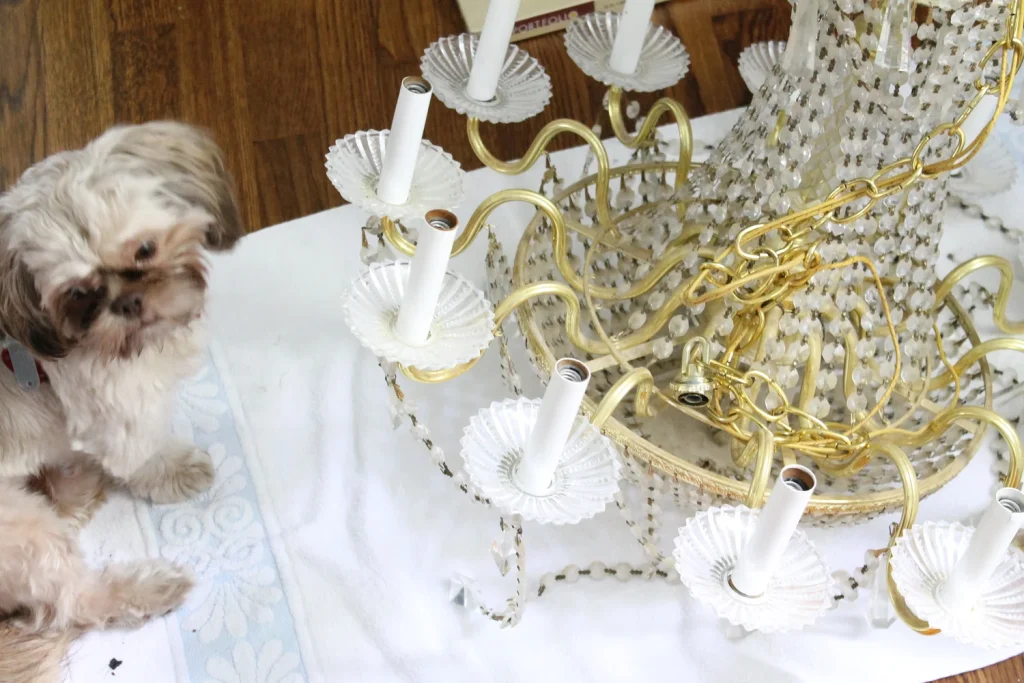
Credit: www.amazon.ca
Gather Cleaning Supplies
Gathering the right cleaning supplies sets the foundation for a sparkling crystal chandelier. Without proper tools, you risk damaging delicate crystals or missing spots that dull its shine. Have you ever tried cleaning a chandelier with just water and a cloth? It rarely gives the brilliant results you want.
Essential Cleaning Solutions
Choose a cleaning solution that won’t harm the crystals or metal parts. A mixture of warm water and mild dish soap works well for most chandeliers. You can also buy a commercial crystal cleaner designed specifically for chandeliers.
Be careful with ammonia-based cleaners—they can dull the finish on some metals. Test any solution on a small, hidden area first to avoid surprises.
Soft Cloths And Towels
Soft, lint-free cloths are a must to avoid scratching the crystals. Microfiber cloths work best because they trap dust and don’t leave fibers behind. Keep several cloths on hand—one for cleaning and others for drying.
Have you noticed how rough towels can leave marks? Using the right cloth prevents that and makes your work easier.
Protective Gear
Cleaning a chandelier means reaching up high, so protect your eyes and hands. Wear safety goggles to shield your eyes from dust or drips. Gloves keep your hands clean and prevent oils from your skin from transferring to the crystals.
Consider using a sturdy ladder or step stool to get close enough safely. Have you checked your ladder’s stability before starting?
Additional Tools For Detail Work
- Soft-bristled brush:Great for dusting hard-to-reach corners.
- Compressed air canister:Blows away dust without touching the crystals.
- Spray bottle:Helps apply cleaning solution evenly without soaking the fixture.
These small tools can make a big difference in how thoroughly you clean your chandelier.

Credit: showsun-lighting.com
Prepare The Area
Preparing the area before cleaning a crystal chandelier is essential. It helps protect your space and makes the cleaning process smoother. Taking time to organize your surroundings reduces the risk of accidents and damage.
Clear the space beneath the chandelier. Remove furniture or cover it with a soft cloth or plastic sheet. This step catches any drips or falling dust and protects your belongings.
Gather all cleaning supplies before you start. Having everything ready saves time and keeps you focused. Use a sturdy ladder or step stool to reach the chandelier safely.
Clear The Surrounding Space
Remove chairs, tables, or objects under the chandelier. Use a drop cloth or old sheet to cover the floor. This prevents scratches and catches dirt or water droplets.
Turn Off The Power
Switch off the chandelier’s power from the main circuit. Double-check by pressing the light switch. This prevents electrical hazards during cleaning.
Set Up Your Cleaning Tools
Prepare a soft cloth, microfiber towels, and a gentle cleaner. Use a spray bottle for easy application. Keep gloves handy to protect your hands.
Use A Stable Ladder
Choose a ladder that reaches the chandelier comfortably. Ensure it stands on a flat, even surface. Avoid stretching or overreaching to maintain safety.
Turn Off Power And Protect Flooring
Switch off the power to avoid electric shock while cleaning. Place a soft cloth or towel under the chandelier to protect the floor from drips or fallen crystals.
Cleaning a crystal chandelier can be daunting, but safety is key. Start by turning off the power. This prevents accidental electric shock. Protecting the flooring is equally important. Crystal chandeliers can drip cleaning solutions. These solutions can damage floors. Use drop cloths or plastic sheets. They catch any falling debris or drips.Turn Off Power
Safety first. Locate the circuit breaker. Switch off the power to the chandelier. Ensure the light is completely off. Check with a tester if unsure. This prevents electrical hazards.Protect Flooring
Spread a drop cloth under the chandelier. Use plastic sheets for added protection. Make sure the floor is fully covered. This shields it from drips and dust. Clean-up becomes easier too.Dust The Chandelier
Dusting your crystal chandelier is the first and most important step to maintain its sparkle. Dust can build up quickly and dull the shine, making your beautiful fixture look lifeless. Regular dusting keeps your chandelier looking fresh and reduces the need for deep cleaning sessions.
Gather The Right Tools
Use a soft microfiber cloth or a feather duster to gently remove dust. Avoid rough materials that can scratch delicate crystals. If your chandelier has many small parts, a small paintbrush can help reach tight spots without causing damage.
Turn Off The Power
Safety is key. Always switch off the chandelier’s power before dusting. This prevents any electrical accidents and allows you to clean more confidently without worrying about light bulbs or wiring.
Dust From Top To Bottom
Start dusting at the top and work your way down. This method prevents dust from falling onto already cleaned areas. Take your time and move slowly to avoid loosening any crystals or parts.
Use Gentle, Circular Motions
Wipe each crystal gently in small circular motions. This technique lifts dust without pushing it deeper into crevices. It also helps maintain the shine by evenly distributing natural oils from your hands, keeping the crystals looking vibrant.
Consider Dusting Frequency
How often do you dust your chandelier? For most homes, once every two weeks works well. If your space is prone to dust or you have pets, you might want to dust it weekly to keep the brilliance intact.
Choose A Cleaning Method
Choosing the right cleaning method for your crystal chandelier is crucial to keep it sparkling without causing damage. Each technique has its pros and cons depending on your chandelier’s size, complexity, and how much time you can dedicate. Think about what fits your situation best before you start—this can save you frustration and protect your investment.
Spray And Wipe Technique
This method is perfect if your chandelier is fixed in place and you want a quick refresh. You simply spray a cleaner designed for crystals onto the crystals and gently wipe with a soft cloth.
Make sure to cover the floor and furniture beneath to catch drips. Use a ladder safely and work in small sections to avoid missing spots or leaving streaks. This technique works well for regular maintenance but might not be enough if your chandelier is very dusty or has stubborn grime.
Dismantle And Soak Method
If your chandelier is heavily soiled or you want a thorough clean, this method is the way to go. Carefully remove the crystals and soak them in a warm, mild detergent solution for about 20-30 minutes.
Rinse with clean water and dry with a lint-free cloth before reassembling. This approach takes more time and effort but gives you the best results, especially for intricate designs with many pieces. Have you ever taken apart something delicate and found it easier to clean piece by piece? That’s exactly the advantage here.
Clean Crystal Pieces
Cleaning crystal pieces is a delicate task that requires attention and the right approach. Each crystal must be cleaned carefully to avoid damage and maintain its shine. Dirt and dust can dull the sparkle, so regular cleaning helps keep your chandelier looking bright and beautiful.
Use Mild Cleaning Solution
Choose a gentle cleaner to avoid harming the crystal. Mix warm water with a small amount of dish soap. Avoid strong chemicals or ammonia, which can cause cloudiness or damage. Dip a soft cloth or sponge in the solution and gently wipe each crystal piece.
Rinse the crystals with clean water to remove soap residue. Dry them immediately with a soft, lint-free cloth. This helps prevent water spots and streaks. Use a spray bottle for better control, but do not spray directly on the fixture.
Handle With Care
Hold each crystal firmly but gently. Avoid twisting or pulling, as this can loosen or break the pieces. Support the crystal from its base or the metal frame if possible. Use soft gloves to prevent fingerprints and improve grip.
Work slowly and carefully to avoid accidents. Place cleaned crystals on a soft towel or cloth to keep them safe while cleaning others. Keep the area well-lit to see dust and spots clearly.
Dry And Polish Crystals
Drying and polishing the crystals is the final step in cleaning a crystal chandelier. This process restores the sparkle and shine of each crystal. Proper drying prevents water spots and streaks. Polishing enhances clarity and brilliance.
Use a clean, soft cloth to gently dry each crystal. Avoid rough fabrics that might scratch the surface. Take your time to ensure no moisture remains.
After drying, polish the crystals carefully. This step removes any smudges or fingerprints. It also gives the chandelier a fresh, bright look.
Choose The Right Cloth
Select a lint-free microfiber cloth. It picks up dust and oils without leaving residue. Avoid paper towels or abrasive materials.
Dry Gently To Avoid Damage
Pat crystals dry instead of rubbing hard. Use light pressure to protect delicate pieces. Work slowly and cover every crystal.
Polish With Circular Motions
Use small, circular movements to polish crystals. This technique prevents streaks and enhances shine. Focus on one crystal at a time.
Check For Missed Spots
Hold the chandelier under good lighting. Look for spots that need extra drying or polishing. Repeat the process on those areas.
Reassemble The Chandelier
Reassembling your crystal chandelier is the final step that brings back its sparkling beauty. It requires patience and attention to detail to ensure every piece fits perfectly. Taking your time here will make the entire cleaning effort worthwhile.
Organize Your Workspace And Components
Before you start putting the chandelier back together, arrange all the cleaned crystals and hardware neatly. Use trays or containers to separate different parts by size and shape. This organization helps you avoid confusion and speeds up the process.
Attach Crystals Carefully To Avoid Damage
Handle each crystal with care to prevent chips or scratches. When attaching crystals, secure the hooks or wires firmly but gently. Loose connections can cause crystals to fall later, and overtightening might cause breakage.
Check Electrical Connections And Safety
While reassembling, double-check the wiring and sockets for any signs of wear or damage. Make sure all connections are tight and insulated. Your safety depends on a properly reassembled electrical system.
Test The Chandelier Before Final Tightening
Once most of the chandelier is put back together, turn on the light to see how it looks and if everything works. This testing helps identify any loose parts or electrical issues early. Adjust as needed before securing all screws and components fully.
Maintain A Step-by-step Approach For Complex Designs
If your chandelier has multiple tiers or intricate patterns, reassemble it tier by tier. This approach reduces mistakes and makes the process less overwhelming. Breaking the task into small sections keeps you focused and organized.
Final Inspection And Touch-ups
After cleaning, your crystal chandelier should sparkle and shine. But don’t stop just yet. A final inspection and touch-ups can make a big difference. This ensures your chandelier looks its absolute best.
Inspect For Streaks Or Spots
Look closely at each crystal piece. Check for streaks or water spots. Use a dry, lint-free cloth. Gently buff any areas with imperfections. This enhances clarity and shine.
Ensure All Crystals Are Secure
Gently shake the chandelier. Listen for any loose crystals. Tighten any loose connections. This prevents future damage or loss.
Check Light Bulbs
Make sure all bulbs are working. Replace any burnt-out bulbs. Use a soft cloth to wipe them clean. This ensures they emit the brightest light.
Final Dust Removal
Use a feather duster. Remove any remaining dust particles. Pay attention to hard-to-reach areas. This keeps your chandelier dust-free longer.
Adjust Hanging Position
Ensure the chandelier is level. Adjust its position if needed. A well-balanced chandelier enhances room aesthetics.
Reattach Any Removed Parts
Reattach any parts you removed. Ensure each piece is in its original place. This maintains the chandelier’s original design.

Credit: www.ankurlighting.com
Maintenance Tips For Lasting Shine
Keeping your crystal chandelier shining brilliantly requires more than occasional deep cleaning. Regular maintenance plays a key role in preserving its sparkle and preventing grime buildup. With the right habits, your chandelier can stay radiant for years without demanding too much effort from you.
Regular Dusting And Gentle Wiping
Dust settles quickly on chandeliers, dulling their shine. Use a soft microfiber cloth or a feather duster weekly to remove surface dust. Avoid harsh cloths that can scratch the crystals.
If you notice fingerprints or spots, lightly dampen the cloth with water or a mild glass cleaner. Always dry each piece carefully to avoid watermarks that can cloud the crystals.
Protecting Crystals From Harmful Substances
Have you ever noticed your chandelier looking dull after a kitchen renovation or heavy cooking? Smoke, grease, and cleaning chemicals can damage crystal surfaces.
Try to keep your chandelier away from direct exposure to such elements. If your chandelier is near a kitchen, increase dusting frequency and consider using an air purifier to reduce airborne grease.
Check And Tighten Fixture Components
Loose parts can cause crystals to shift or fall, reducing the overall sparkle. Periodically check the screws, hooks, and arms of your chandelier to ensure everything is secure.
This simple step also prevents damage and keeps the fixture safe. Have you ever had a crystal fall unexpectedly? Tightening parts beforehand can save you the hassle and cost of replacements.
Use Appropriate Light Bulbs
The type of light bulbs you use affects both the chandelier’s appearance and its longevity. LED bulbs emit less heat, reducing the risk of crystal discoloration or damage over time.
Choose bulbs with a warm white color to enhance the chandelier’s brilliance without harsh glare. Proper lighting not only beautifies the crystals but also saves energy.
Schedule Professional Cleaning Periodically
Even with regular upkeep, some dirt and grime can build up in hard-to-reach spots. A professional cleaning once every few years can restore your chandelier’s original sparkle.
Professionals have the right tools and solutions to clean delicately without risking damage. Don’t hesitate to invest in this service if you want your chandelier to look its best year after year.
Frequently Asked Questions
How Often Should I Clean My Crystal Chandelier?
Clean your crystal chandelier every 6 to 12 months. Frequent dusting helps maintain its sparkle between deep cleanings. Regular cleaning prevents buildup and keeps crystals shining brightly in your space.
What Is The Safest Way To Clean Crystal Chandeliers?
Use a soft microfiber cloth and a gentle cleaning solution. Avoid harsh chemicals and abrasive materials. Always turn off the power and cover bulbs before cleaning to protect your chandelier and ensure safety.
Can I Clean A Crystal Chandelier Without Removing Crystals?
Yes, you can clean without removing crystals by using a spray cleaner. Spray lightly and wipe gently with a microfiber cloth. This method saves time and reduces the risk of damaging or losing crystals.
Should I Use Commercial Or Homemade Cleaners For Chandeliers?
Both work well if used correctly. Homemade cleaners with water and vinegar are safe and effective. Commercial cleaners often contain specialized ingredients for extra shine. Choose based on your preference and chandelier type.
Conclusion
Cleaning a crystal chandelier keeps it shining bright and beautiful. Regular care stops dust and dirt from building up. Use gentle cleaners and soft cloths to avoid damage. Take your time and handle crystals with care. Clean chandeliers add charm and light to any room.
A clean chandelier makes your space feel fresh and elegant. Follow these steps to keep your chandelier sparkling every day. Simple habits bring lasting shine.


