
Have you ever wanted to add a unique, charming touch to your room or dollhouse? Making your own doll desk lamp is easier than you think—and it’s a fun project you can do step by step.
Imagine creating a tiny lamp that not only lights up but also shows off your creativity. In this guide, you’ll discover simple tips and tricks to build a beautiful doll desk lamp that fits perfectly with your style. Ready to bring your mini space to life?
Let’s get started!
Materials Needed
Gathering the right materials is key to making a doll desk lamp that’s both charming and functional. Choosing quality supplies will save you frustration and help your project shine. Let’s take a look at what you’ll need before you start crafting.
Basic Tools And Supplies
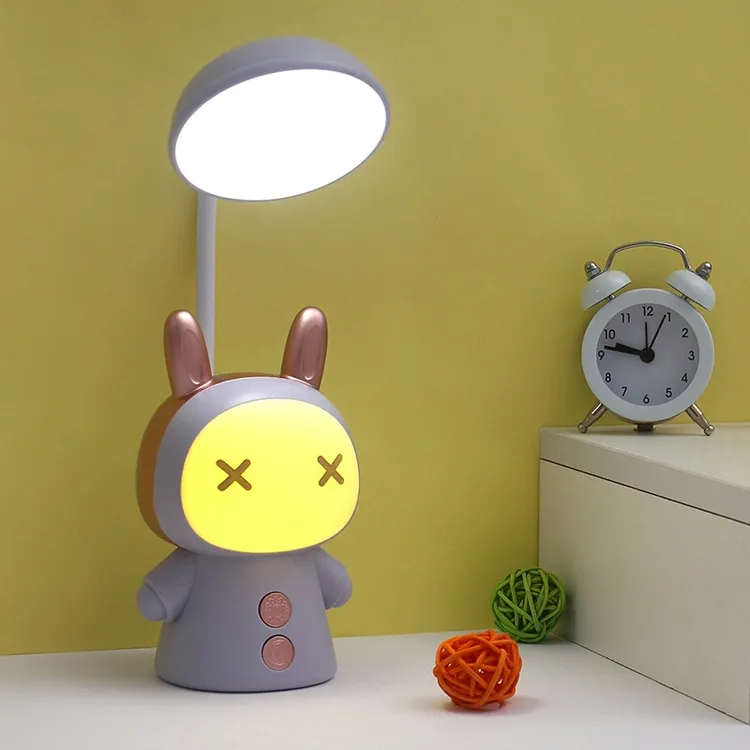
- Small LED light– Compact and safe for a doll-sized lamp.
- Battery pack– Choose one that fits easily inside your lamp base.
- Thin wire– For connecting the LED to the battery.
- Miniature lamp shade– You can buy one or make it from fabric or paper.
- Wood or sturdy cardboard– To build the desk base and lamp stand.
- Hot glue gun and glue sticks– Essential for quick, strong bonds.
- Craft knife and scissors– For precise cutting.
- Paints and brushes– To decorate your lamp and desk.
Optional Decorative Elements
Want to add personality? Consider small stickers, beads, or miniature books to place on the desk. These make your doll’s workspace feel lived-in and unique.
Why These Materials Matter
Using an LED light instead of a traditional bulb keeps the lamp cool and safe. I once tried a tiny bulb and ended up with melted plastic—learn from my mistake! Selecting sturdy materials for the desk ensures your lamp won’t topple over easily.
Do you already have some of these items at home? Sometimes, the best projects start with what’s on hand. Think about how you might repurpose old toys or craft scraps into a new doll desk lamp.
Credit: www.ebay.ca
Choosing The Right Doll
Choosing the right doll is key to making a beautiful doll desk lamp. The doll acts as the lamp’s base, so size and style matter. Pick a doll that fits your space and matches your lamp design. The right doll will make your lamp stand out and feel personal.
Size And Proportion
Choose a doll that fits your desk or table well. Small dolls work best for small desks. Large dolls may look awkward on tiny surfaces. The doll should balance the lamp’s shade and light fixture. Too tall or too short dolls can affect the lamp’s look and stability.
Material And Durability
Pick dolls made from sturdy materials like plastic, resin, or wood. Fragile dolls may break during the lamp-making process. Durable dolls hold the lamp parts firmly. Avoid dolls with delicate parts that can crack or fall off.
Style And Theme
Match the doll’s style to your room or lamp theme. Classic dolls suit vintage or elegant designs. Modern dolls fit contemporary or minimalist lamps. Choose colors and outfits that go well with your room’s decor.
Pose And Posture
Dolls with a stable and balanced pose work best. Standing or sitting dolls provide a solid base. Avoid dolls with awkward or unstable postures. The doll must hold the lamp safely without tipping over.
Customization Potential
Some dolls allow easy changes like repainting or accessorizing. This helps personalize your lamp. Choose dolls with smooth surfaces for painting. Dolls with removable parts offer creative options.
Preparing The Doll For Assembly
Preparing your doll for assembly is a crucial step that sets the foundation for a sturdy and charming desk lamp. Taking time to properly get your doll ready ensures the final product not only looks great but also functions safely and reliably. This part of the process involves cleaning, modifying, and reinforcing the doll to handle the electrical components and light fixture.
Cleaning And Inspecting The Doll
Start by giving your doll a thorough cleaning. Use a mild soap and warm water to remove dirt, dust, and any sticky residues. A clean surface helps paint or glue adhere better and prevents damage to wiring.
After cleaning, closely inspect the doll for cracks or weak spots. These areas might need extra reinforcement to avoid breaking when you add the lamp parts. If you spot any damage, consider filling it with epoxy or using a small patch of fabric glue for strength.
Removing Unnecessary Parts
Most dolls have parts that won’t fit or may interfere with your lamp’s assembly. Carefully remove limbs or accessories that could get in the way. Use a small screwdriver or craft knife to detach these pieces without damaging the doll’s body.
Think about the design of your lamp—will the doll’s arms hold the bulb or shade? If yes, leave those intact but make sure they are stable. Removing extra parts can also lighten the doll, making it easier to balance the lamp on your desk.
Creating Openings For Wiring
Your doll needs holes for wiring the lamp safely. Identify the best spot for the wire to enter and exit—usually the back or base of the doll. Use a small drill or rotary tool to make smooth, clean holes.
Be careful not to make the holes too big, or the wires may slip out or look messy. You want the wires to fit snugly, so they stay hidden and secure inside the doll. Have you thought about the path your wiring will take? Planning it now saves frustration later.
Reinforcing The Doll’s Structure
To support the weight of the lamp parts, reinforce weak areas with glue or small internal supports like toothpicks or wire. Adding these reinforcements prevents cracks and keeps the doll stable on your desk.
Check if the doll’s base is flat and steady. If it wobbles, add a small wooden or plastic platform underneath and secure it with glue. Stability is key to avoid accidents and protect both your lamp and your workspace.
Selecting The Lamp Components
Choosing the right components is key to building a doll desk lamp. Each part affects the lamp’s look and function. Careful selection ensures safety and style. Focus on three main parts: lamp socket and bulb, wiring and switch, and lamp shade options.
Lamp Socket And Bulb
Pick a lamp socket that fits your doll desk size. Small sockets work best for mini lamps. Choose LED bulbs for low heat and energy savings. Soft white bulbs create a warm glow. Check the bulb’s size to avoid overpowering the desk lamp.
Wiring And Switch
Use thin, flexible wires suited for small lamps. Make sure the wiring is safe and insulated. A simple on/off switch is easy to install and use. Slide or toggle switches fit well on doll desk lamps. Position the switch where it’s easy to reach but hidden from plain sight.
Lamp Shade Options
Choose a lamp shade that matches the doll desk style. Paper or fabric shades add charm and soften light. Transparent shades offer a modern look and brighter light. Make sure the shade size fits the lamp socket and bulb. Secure the shade to avoid wobbling or falling.
Assembling The Lamp Base
Attach the lamp base securely to ensure stability. Use screws or glue to hold parts firmly in place. Check that the base stands evenly before moving on.
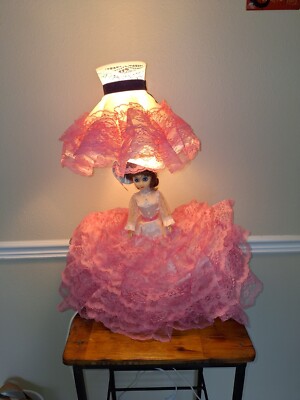
Assembling the lamp base is the first step in creating your own mini masterpiece, a doll desk lamp that adds charm and a touch of realism to any dollhouse. It’s a process that requires a bit of creativity and some basic materials. With a few simple steps, you can transform ordinary items into an adorable miniature lamp base.Gather Your Materials
To start, you’ll need some basic materials, which might already be lying around your house. An empty spool of thread makes an excellent lamp base, offering a stable foundation. Additionally, grab some decorative paper or fabric to wrap around the spool, adding a touch of style and personality to your creation.Prepare The Spool
Before you wrap the spool, ensure it’s clean and smooth. Any leftover thread should be removed, and you might want to sand down rough edges. This preparation helps the decorative covering adhere better and ensures a polished final look.Decorate The Base
Wrap the spool with your chosen decorative material, securing it with glue. Choose colors and patterns that match the room where the lamp will be placed. This is your chance to get creative—mixing and matching different textures can make your lamp truly unique.Attach The Lamp Neck
For the lamp neck, a simple toothpick or a small dowel rod works wonders. Secure it to the top of the spool using a strong adhesive, ensuring it stands straight. This neck will support the lampshade, so it needs to be well anchored.Final Touches
Consider adding tiny embellishments to the base for an extra touch of elegance. Small beads or buttons can serve as decorative knobs. The goal is to make the base as aesthetically pleasing as it is functional, ensuring your doll’s desk lamp is a standout piece. Creating a doll desk lamp base isn’t just about assembling parts; it’s about infusing your creation with your unique style. What creative twist will you add to your lamp base?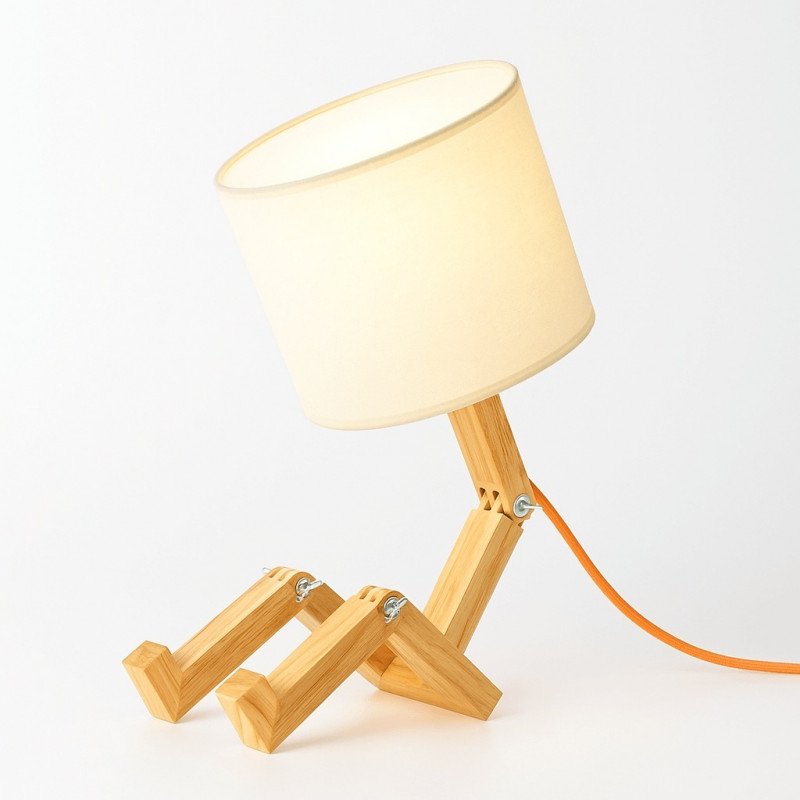
Credit: www.barcelonaled.com
Installing Electrical Parts Safely
Installing electrical parts safely is key to building a doll desk lamp. It protects you and ensures the lamp works well. Careful handling of wires and connections reduces risks of shocks or shorts. Always work with the power unplugged. Use tools made for electrical work. Follow instructions closely to avoid mistakes.
Wiring Instructions
Choose wires that match the lamp’s power needs. Strip about half an inch of insulation from each wire end. Connect the live wire to the lamp’s switch. Attach the neutral wire directly to the bulb holder. Use wire nuts or connectors to join wires securely. Keep wires neat and avoid crossing them. Double-check connections before plugging in the lamp.
Securing Connections
Secure all wire connections tightly. Loose wires can cause sparks or failure. Twist wires firmly before adding connectors. Use electrical tape to cover exposed parts. Place connectors inside the lamp’s base or housing. Avoid forcing wires into small spaces. Test the lamp gently after assembly to ensure safety.
Attaching The Lamp Shade
Attaching the lamp shade is a crucial step in making your doll desk lamp truly come to life. The right attachment ensures stability and a polished look. It also affects how the light spreads across your doll’s workspace, setting the perfect mood.
Choosing The Right Shade Attachment
Not all lamp shades fit every base. You need to pick an attachment style that matches your doll lamp’s neck or frame.
- Clip-on shadesare easy to use and perfect for small lamps.
- Spider fittingswork well if your lamp has a harp structure.
- Uno fittingsscrew directly onto the socket, offering a secure hold.
Think about the size and weight of your shade. Will it balance well without tipping over? This choice impacts both function and style.
Securing The Shade To The Lamp Base
Once you’ve selected the attachment, it’s time to fix the shade onto the base securely. A loose shade can wobble or fall off, which defeats the purpose.
- For clip-on shades, gently press the clips onto the bulb or socket.
- If using a spider fitting, place the shade on the harp and tighten the finial on top.
- With uno fittings, carefully screw the shade’s ring onto the socket until snug.
Always double-check the fit by lightly shaking the lamp. Your shade should stay put without any movement.
Adjusting Shade Position For Optimal Lighting
After attaching, adjust the shade to direct light exactly where your doll needs it. This step can change the entire look and feel of the lamp.
- Tilt the shade slightly forward or backward to control glare.
- Rotate the shade if it has a directional design to highlight specific areas.
- Consider the shade’s height to avoid blocking too much light.
Have you noticed how a small shift in shade position can make your doll’s desk more inviting? Experiment with angles until it feels just right.
Finishing Touches And Decoration
Finishing touches and decoration bring personality to your doll desk lamp. These details make your lamp unique and charming. Simple additions can enhance the lamp’s look and feel. Focus on small elements that complement your lamp’s style.
Choosing The Right Paint And Patterns
Pick paint colors that match your doll’s theme. Use soft pastels for a gentle look or bright colors for fun. Patterns like stripes or polka dots add interest. Apply paint carefully with a small brush to avoid mess.
Adding Miniature Accessories
Small accessories create a playful vibe. Tiny books, flowers, or a miniature clock work well. Use glue to fix items securely. Keep accessories light to avoid tipping the lamp over.
Using Fabric And Textiles
Fabric pieces add texture and warmth. Cut small swatches for a lampshade cover or a base mat. Choose soft fabrics like cotton or felt. Attach fabric neatly with craft glue or double-sided tape.
Applying Stickers And Decals
Stickers give quick decoration options. Select themed stickers like stars or animals. Place them evenly around the lamp. Seal stickers with clear varnish for durability.
Sealing And Protecting The Surface
Seal your lamp to protect the design. Use clear spray varnish or Mod Podge. This step prevents paint and decorations from peeling. Let the sealant dry completely before use.
Testing The Lamp
Testing the lamp is an important step in making a doll desk lamp. It helps to ensure the lamp works safely and looks good. This step checks the wiring, light, and switch. Doing this carefully prevents any problems later. Take your time and follow each part below to test the lamp properly.
Checking The Wiring Connections
First, inspect all wiring connections. Make sure wires are secure and not loose. Look for any bare wires that might touch each other. Use electrical tape to cover exposed areas. Confirm the wires connect to the correct parts. Proper wiring keeps the lamp safe and working well.
Testing The Light Bulb
Insert the bulb into the socket gently. Turn on the switch to see if the bulb lights up. Watch for flickering or dim light. Replace the bulb if it does not glow or is unstable. A bright, steady light shows the lamp is ready to use.
Checking The Switch Function
Operate the switch several times. It should turn the lamp on and off smoothly. Listen for any unusual sounds like buzzing or clicking. A good switch improves the lamp’s performance and safety. Fix or replace the switch if it does not work properly.
Ensuring Stability And Safety
Place the lamp on a flat surface. Check if it stands firm without wobbling. Make sure no parts are loose or sharp. Keep the lamp away from water or heat sources. Stability and safety protect your doll and your space.
Creative Variations
Creating a doll desk lamp can be fun and rewarding. Once you have the basic structure, it’s time to explore creative variations. These variations make each lamp unique and add a personal touch. Let’s dive into how you can paint, customize, and choose different doll types for your lamp.
Painting And Customizing
Painting offers endless possibilities for your doll lamp. Choose colors that match your room or dollhouse theme. Use acrylic paints for bright, durable colors. Add patterns like stripes or polka dots for a playful look. Incorporate metallic paints for a modern, shiny finish. Customizing doesn’t stop at paint. Add beads, stickers, or small decals for extra flair. Use fabric scraps to make tiny lampshades or embellishments. Experiment with different materials for a unique texture and style.
Alternative Doll Types
The type of doll used changes the lamp’s overall look. Try using dolls from different eras for a vintage touch. Use action figures for a quirky, playful style. Consider miniature dolls for a delicate, refined appearance. Each doll type brings a different personality to your lamp. Select a doll that resonates with your personal style or theme. The choice of doll greatly influences the lamp’s final impression.

Credit: design-milk.com
Frequently Asked Questions
What Materials Are Needed To Make A Doll Desk Lamp?
You need a small lamp kit, a doll figurine, a lampshade, glue, and basic tools. Choose lightweight materials for easy assembly and safe use.
How Do I Safely Wire A Doll Desk Lamp?
Use low-voltage LED bulbs and follow lamp kit instructions closely. Ensure all connections are secure to prevent electrical hazards.
Can I Customize The Doll Desk Lamp Design?
Yes, customize by painting the doll, choosing different lampshades, or adding decorative elements. Personal touches make your lamp unique and stylish.
How Long Does It Take To Build A Doll Desk Lamp?
Building time varies but usually takes 1-2 hours. Preparation and drying glue may extend the process slightly.
Conclusion
Creating a doll desk lamp can be a fun and simple project. You only need a few materials and some patience. This lamp adds charm and light to any doll space. It also helps develop your crafting skills. Try different colors and designs to make it unique.
Enjoy the process and feel proud of your work. Keep experimenting with new ideas for more creative projects. Making things by hand always feels special and rewarding. Give it a try and brighten your doll’s world today.


