
Are you tired of dull lighting that strains your eyes while working or reading at your desk? Imagine having a bright, energy-saving LED desk lamp made by you, just the way you want it.
Building your own LED desk lamp is easier than you think, and it gives you full control over the style, brightness, and functionality. In this guide, you’ll discover simple steps that anyone can follow to create a lamp that not only lights up your workspace but also adds a personal touch.
Ready to transform your desk with a lamp you built yourself? Let’s get started!
Materials And Tools Needed
Gathering the right materials and tools is the first step to building a LED desk lamp that works well and lasts long. Having quality parts can make the assembly process smoother and the final product more reliable. Let’s break down exactly what you need to get started.
Choosing The Right Led Bulb
The LED bulb is the heart of your desk lamp. You want to pick one that provides enough light without consuming too much power.
Look for bulbs labeled as “daylight” or “cool white” if you want bright, clear light for reading or working. Wattage is also important; a 5 to 7-watt LED bulb usually offers enough brightness for a desk lamp.
Have you thought about whether you want a dimmable bulb? This feature adds flexibility, letting you adjust the light based on your task or time of day.
Selecting Desk Lamp Components
Besides the LED bulb, you’ll need a few key parts to build your lamp. These include:
- Lamp base:Choose something sturdy to prevent tipping.
- Lamp arm or stand:This holds the bulb and allows you to direct light where you need it.
- Socket:Make sure it matches your LED bulb’s base type, usually E26 or E27.
- Switch:A simple on/off switch works well, but you can also use touch or dimmer switches for more control.
- Wiring and plug:Proper electrical wiring is crucial for safety and functionality.
Picking parts with compatible sizes and electrical ratings will save you headaches during assembly.
Essential Tools For Assembly
Having the right tools on hand can turn a frustrating project into an enjoyable one. You’ll need:
- Screwdrivers:Both flathead and Phillips for tightening screws.
- Wire strippers:To safely strip insulation from wires.
- Soldering iron (optional):Useful if you want stronger, more reliable electrical connections.
- Electrical tape or heat shrink tubing:For insulating wire connections.
- Measuring tape or ruler:To ensure everything fits properly.
Have you checked your toolbox lately? It might already have most of what you need, saving you time and money.

Credit: www.reddit.com
Designing Your Lamp
Building a LED desk lamp involves choosing the right materials and simple wiring steps. Focus on assembling parts carefully to ensure good light and safety. Creating your own lamp can save money and match your style perfectly.
Designing Your Lamp Creating a LED desk lamp from scratch is an exciting journey into the world of creativity and functionality. The design phase allows you to blend aesthetics with practicality, ensuring your lamp not only looks great but also serves its purpose effectively. Whether you prefer a modern, minimalist look or a more traditional style, your design choices will set the tone for the entire project.Picking A Style And Shape
Choosing the right style and shape for your LED desk lamp is crucial. Consider the space where the lamp will reside. Is it a sleek, modern office or a cozy, rustic study? Your personal taste plays a huge role. Reflect on what styles resonate with you. A geometric shape might appeal if you love clean lines, while a more organic design could be perfect if you enjoy natural aesthetics. Think about functionality. Do you need an adjustable arm or a fixed design? This decision will impact how you use the lamp daily.Planning The Electrical Circuit
Understanding the basics of an electrical circuit is essential. You don’t need to be an electrician, but a simple circuit diagram can be your best friend. Consider using LEDs with an appropriate voltage and current rating. This ensures your lamp is energy-efficient and long-lasting. Safety should be a priority. Double-check connections, and always use insulated wires to prevent any mishaps.Sketching Your Design
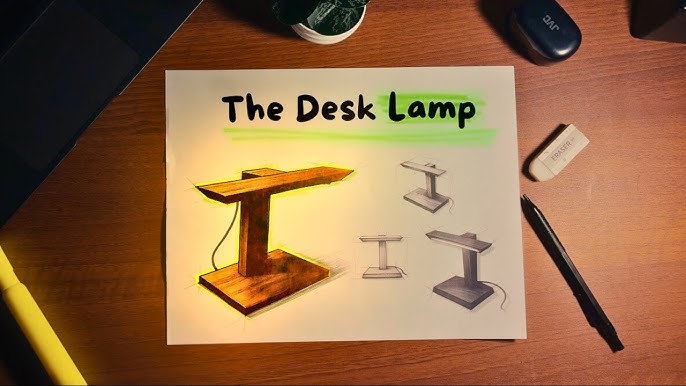
Grab a pencil and paper and start sketching. Visualizing your design helps bring your ideas to life. Focus on key components like the lamp base, arm, and light fixture. How will they connect and interact? Don’t be afraid to iterate. Your first sketch might not be perfect, but each version will refine your vision and get you closer to your ideal lamp.Preparing The Lamp Base
Preparing the lamp base is a key part of building a LED desk lamp. The base must be stable and neat to hold the lamp securely. Start with selecting the right materials that fit your style and workspace. Wood, metal, or acrylic work well for bases. The base needs to be cut, shaped, drilled, and finished carefully. This preparation ensures the lamp is safe and looks professional.
Cutting And Shaping Materials
Select materials that are sturdy and easy to work with. Use a saw or cutter to cut the base into the desired shape. Keep the shape simple, like a circle, square, or rectangle. Smooth corners make the lamp safer and more attractive. Take your time to make clean, straight cuts to fit the lamp design.
Drilling Holes For Wiring
Drill holes where the wiring will pass through the base. Measure the positions for holes before drilling. Use a drill bit sized for the wires to avoid tight fits. Drill slowly to prevent cracks or splits in the material. Clean the holes to remove any dust or debris for easy wiring.
Sanding And Finishing The Base
Sand the base surface to remove rough edges and splinters. Use fine-grit sandpaper for a smooth finish. Wipe off dust with a clean cloth after sanding. Apply paint, varnish, or sealant to protect the base and improve its look. Let the finish dry completely before moving to the next step.

Credit: v9immigration.ca
Wiring The Led Light
Wiring the LED light is a crucial part of building your desk lamp. It connects all the electrical components and brings your project to life. Paying close attention here ensures safety and functionality, so take your time and double-check each connection.
Connecting The Led To Power Source
Start by identifying the positive (anode) and negative (cathode) leads of your LED. The positive lead usually connects to the power source’s positive terminal, while the negative goes to the ground.
Use a resistor between the power source and LED to prevent burning out the bulb. The resistor value depends on your LED specs and power voltage—common values range from 220 to 470 ohms.
Twist wires securely and solder connections if possible. Loose connections cause flickering or failure, which can be frustrating after all your hard work.
Adding A Switch For Control
A switch lets you turn your lamp on and off without unplugging it. Choose a simple toggle or push-button switch rated for your lamp’s voltage and current.
Place the switch on the positive wire leading to the LED. Cut the wire, strip the ends, and connect each to the switch terminals.
Think about where you want the switch located for easy reach. I once placed mine too far back, and it was annoying to operate—make it convenient for your workspace.
Testing The Electrical Connections
Before final assembly, test all wiring with a multimeter or by powering up the circuit briefly. Check for continuity and confirm the LED lights up without flickering.
If the LED doesn’t turn on, recheck your resistor placement, polarity, and switch wiring. Sometimes reversing the LED leads or a loose wire is the culprit.
Testing early saves you time and prevents having to reopen your lamp later. Have you ever ignored a simple test only to troubleshoot hours later? Don’t skip this step.
Assembling The Lamp Parts
Assembling the lamp parts is where your desk lamp starts to take shape. This stage requires patience and attention to detail to ensure everything fits securely and works safely. Whether you’re a beginner or have some DIY experience, a careful approach here will make your lamp both functional and durable.
Attaching The Led To The Base
Begin by positioning the LED module onto the lamp base. Make sure the contact points align properly for a stable connection. If your base has pre-drilled holes or slots, use small screws or clips to hold the LED firmly in place.
Have you noticed how some LEDs come with a thermal pad? This helps dissipate heat and prolongs the LED’s life. Don’t skip this step—it can make a big difference in performance.
Securing The Wiring
Next, connect the wiring carefully. Use wire connectors or solder the joints for a secure electrical connection. Avoid loose wires; they can cause flickering or even short circuits.
Think about the wire path. Keep it neat and avoid sharp bends. Using cable clips or small zip ties helps keep everything tidy and prevents accidental pulls on the wires.
Final Adjustments And Tightening
Before finishing, check all connections and parts for tightness. Loose screws or wires can affect the lamp’s stability and safety. Give each joint a gentle tug to confirm it’s secure.
Adjust the lamp’s angle and height to suit your workspace. This is your chance to customize the light exactly how you want it. Don’t be afraid to make small tweaks until it feels just right.

Credit: m.youtube.com
Customizing Your Lamp
Customizing your LED desk lamp makes it truly yours. You control how it looks and works. Personal touches add style and function to your workspace.
Painting And Decorating
Choose colors that match your room or mood. Use spray paint for a smooth finish. Stick to light coats to avoid drips. Add patterns with stencils or tape. You can also use stickers or washi tape. Seal the paint with a clear coat to protect it.
Adding Diffusers Or Shades
Diffusers soften the light and reduce glare. Use materials like frosted plastic or fabric. Cut them to fit the lamp’s shape. Attach with clips or glue. Shades give your lamp a unique look. Try paper, metal, or wood for different styles. Make sure the shade does not block heat from the LED.
Incorporating Smart Features
Add smart bulbs to control brightness and color. Connect with apps or voice assistants. Include timers to save energy. Use motion sensors to turn the lamp on or off. Smart plugs can also control power remotely. These features improve convenience and save electricity.
Safety Tips And Maintenance
Building a LED desk lamp is rewarding, but safety and upkeep matter most. Proper care keeps the lamp safe and working well. Follow these safety tips and maintenance steps to protect yourself and extend the lamp’s life.
Avoiding Electrical Hazards
- Always unplug the lamp before working on it.
- Use insulated tools to handle wires and components.
- Check wires for cuts or damage before use.
- Do not touch live wires or terminals.
- Keep the lamp away from water and wet surfaces.
- Use the correct voltage and power source as specified.
- Secure all connections tightly to prevent sparks.
Cleaning And Care
Turn off and unplug the lamp before cleaning. Use a soft, dry cloth to wipe dust from the lamp surface. Avoid using water or liquid cleaners that can damage electrical parts. Clean the LED bulb gently to keep brightness. Keep vents clear to prevent overheating. Regular dusting improves light quality and lamp lifespan.
Replacing Parts When Needed
Check the lamp regularly for worn or broken parts. Replace damaged wires, switches, or bulbs promptly. Use parts that match the original specifications. Avoid using incompatible components that can cause malfunctions. Keep spare bulbs and fuses handy for quick fixes. Proper replacement ensures the lamp stays safe and functional.
Frequently Asked Questions
What Materials Are Needed To Build An Led Desk Lamp?
You need LED bulbs, a lamp base, wiring, a switch, a power source, and tools like a soldering iron. These materials ensure your lamp is functional, durable, and safe.
How Do I Safely Wire An Led Desk Lamp?
Use insulated wires, connect the LED to the power source via a switch, and secure all connections. Always unplug before working and test with a multimeter to avoid short circuits.
Can I Customize The Brightness Of My Led Desk Lamp?
Yes, by adding a dimmer switch or using adjustable LED bulbs, you can control the light intensity. This customization enhances comfort and suits different tasks.
What Power Source Is Best For An Led Desk Lamp?
A low-voltage DC adapter or rechargeable battery is ideal for safety and efficiency. Avoid high voltage to prevent overheating and ensure longevity.
Conclusion
Building a LED desk lamp is simple and rewarding. It saves money and lets you customize your light. Use basic tools and follow clear steps carefully. You can choose the brightness and style you like best. This project helps improve your skills and creativity.
Enjoy better lighting while working or reading. Start your DIY lamp today and see the difference. Small efforts bring great results. Brighten your space with your own handmade lamp.


