

Looking for a way to brighten up your workspace with a lamp that’s both stylish and practical? You’re in the right place.
Making your own gooseneck desk lamp is easier than you think, and it lets you customize every detail to fit your space perfectly. Imagine having a lamp that bends exactly where you need the light, giving you the perfect glow for reading, working, or creating.
In this guide, you’ll discover simple steps and helpful tips to build your own gooseneck desk lamp—no special skills required. Ready to add a unique touch to your desk and enjoy better lighting every day? Let’s get started!
Materials Needed
Gathering the right materials is a crucial first step in making your own gooseneck desk lamp. Choosing quality tools and components will make your project smoother and the final product durable. Think about the tools and parts you already have and what you’ll need to get before starting.
Essential Tools
- Screwdrivers:Both flathead and Phillips types are necessary for assembling parts.
- Wire Strippers:These help you safely strip insulation off electrical wires without damage.
- Soldering Iron:Useful if you need to connect wires securely for a stable electrical connection.
- Drill:Needed for making holes in the base or lamp body to attach components.
- Pliers:Handy for bending wires and holding small parts during assembly.
Do you have a cluttered toolbox? Sorting your tools before you start can save frustration later.
Lamp Components
- Gooseneck Arm:This flexible tube allows you to adjust the lamp’s direction easily.
- Lamp Base:Choose a sturdy base to keep your lamp steady on the desk.
- Light Bulb Socket:The part where the bulb screws in; make sure it fits your bulb type.
- Electrical Cord with Plug:Provides power to the lamp; check for safety certifications.
- Light Bulb:LED bulbs are energy-efficient and long-lasting, a smart choice.
Think about how you want your lamp to look and function. Are you aiming for a sleek modern design or a vintage vibe?
Optional Decorative Items
- Paint or Spray Paint:Customize the color of your lamp to match your style.
- Decorative Washers or Caps:These small touches can cover screws and add polish.
- Fabric or Leather Wrap:Wrapping the gooseneck arm adds texture and grip.
- Stickers or Decals:A fun way to personalize without permanent changes.
Have you considered adding something unique that reflects your personality? Even small decorations can make a big difference.

Credit: www.ebay.ca
Selecting The Right Gooseneck
Selecting the right gooseneck is key to making a functional and stylish desk lamp. The gooseneck affects how easily you can adjust the light and how well it holds its position. Picking one that matches your needs can save you from frustration and make your lamp a joy to use every day.
Types Of Gooseneck Tubes
There are several types of gooseneck tubes to consider. The most common are metal, plastic-coated, and flexible spring models. Metal tubes offer durability and a sleek look, but they might be heavier and less flexible.
Plastic-coated goosenecks provide smooth movement and protect the metal inside from rust. Flexible spring types allow you to bend the lamp in almost any direction, which is great if you need precise control over your light angle.
Think about where you will use the lamp. Will it face frequent adjustments? Metal goosenecks hold their shape well, but if you want softer, quieter movement, plastic-coated versions might suit you better.
Choosing The Best Size And Flexibility
Size and flexibility go hand in hand when selecting a gooseneck. A longer gooseneck offers more reach but may be less stable. Shorter ones are sturdier but limit how far you can adjust the lamp.
Flexibility depends on how tightly the gooseneck holds its position after bending. If you want a lamp that stays put firmly, choose a stiffer gooseneck. For frequent repositioning, pick one that moves smoothly with less effort.
Ask yourself: do you need quick, frequent adjustments or a fixed light source? Your answer will guide you to the right balance between size and flexibility. Testing different options in a store or reading user reviews can reveal surprising details about each gooseneck’s real-world performance.
Building The Lamp Base
Secure a sturdy base using wood or metal to support the lamp’s weight. Ensure the base is flat and balanced for stability. Attach the base firmly to prevent wobbling during use.
Building a sturdy base for your gooseneck desk lamp is crucial for stability and functionality. The base supports the entire structure, so it must be well-crafted to keep your lamp balanced and secure. Let’s explore some stable base options and assembly tips to help you create a reliable foundation for your lamp.Stable Base Options
Choosing the right material for your lamp base is essential. Consider using a heavy material like metal or stone for added stability. A metal disc or a concrete block can provide a solid foundation that prevents your lamp from tipping over. Alternatively, you can use a wooden base for a more natural look. Opt for hardwoods like oak or walnut, which are dense and durable. You can even add a non-slip pad underneath to enhance grip on your desk surface. Another option is to repurpose an existing object as a base. Think about using an old book, a small planter, or even a decorative tray. This not only saves money but also adds a unique touch to your lamp.Assembly Tips
When assembling your lamp base, ensure that all components are securely fastened. Use strong adhesives or screws to attach the gooseneck to the base. This prevents any wobbling or movement during use. Pay attention to the balance of your lamp. Test the weight distribution by gently adjusting the neck and checking if the base remains stable. If needed, add weight to the base or adjust the design for better balance. Consider the aesthetics of your base design. A well-finished base can complement your room’s decor. Sand and polish wooden bases for a smooth finish or paint metal bases for a sleek look. Have you ever built something that looked great but wasn’t practical? Remember, the goal is to blend style with function, ensuring your lamp not only looks good but also serves its purpose efficiently.Wiring The Lamp
Wiring your gooseneck desk lamp is a crucial part of the build that ensures it works safely and effectively. It might seem tricky at first, but understanding the basics and following clear steps can make the process straightforward. Proper wiring not only powers your lamp but also protects you from electrical hazards.
Electrical Safety Basics
Before you start connecting wires, make sure your workspace is dry and well-lit. Always unplug the lamp or keep the power source switched off while working on the wiring. Using insulated tools and wearing rubber-soled shoes can add an extra layer of protection against electric shocks.
Check the wire insulation for any damage; frayed or exposed wires increase the risk of short circuits. Also, use a voltage tester to confirm no current is running through the wires before you touch them. Do you have a clear, organized setup where wires won’t get tangled or pinched? This can prevent future electrical problems.
Connecting The Components
Start by identifying the wires: typically, black or brown is live, white or blue is neutral, and green or yellow-green is ground. Connect the live wire from your power cord to the lamp’s switch terminal. This allows you to control the light with the switch easily.
Next, attach the neutral wire to the lamp socket’s neutral terminal. The ground wire should be connected to any metal parts of the lamp’s frame or the grounding terminal if available. Secure all connections tightly using wire nuts or terminal screws to avoid loose contacts.
- Strip about half an inch of insulation from each wire end.
- Twist the wire strands together to prevent fraying.
- Match the wire colors carefully—mistakes here can be dangerous.
- Use electrical tape to cover any exposed wire after connecting.
Have you ever felt unsure about which wire goes where? Labeling each wire before connecting can save confusion and rework. Taking your time here makes your lamp safer and more reliable.
Attaching The Lampshade
Attaching the lampshade is a key step in making a gooseneck desk lamp. The right shade adds style and controls light direction. It also protects your eyes from glare. This section covers how to choose a shade and attach it securely.
Selecting A Shade Style
Choose a lampshade that fits your lamp’s size and design. Shades come in many shapes like drum, cone, or bell. Each shape changes the light’s focus and room mood.
Consider shade materials. Fabric shades soften light, while metal ones create a sharper glow. Pick a color that matches your desk and room decor.
Secure Attachment Methods
Attach the shade firmly to avoid wobbling or falling. Common methods include:
- Spider fitter: Fits on top of the bulb socket with a ring.
- Clip-on: Clips directly to the bulb’s edges.
- Uno fitter: Fits around the socket base below the bulb.
Use screws or brackets if your lamp base has holes or slots. Tighten all parts to keep the shade steady. Test the lamp by gently moving the gooseneck. A well-attached shade stays in place.
Finishing Touches
Finishing touches transform your gooseneck desk lamp from a simple project into a unique piece that reflects your style and ensures functionality. This stage is where creativity meets practicality, allowing you to personalize your lamp while making sure it works perfectly. Let’s focus on how to add the final flair and check the lamp’s performance.
Painting And Decorating
Painting your lamp gives it character and protects the materials from wear and tear. Choose a paint that sticks well to metal or plastic, depending on your lamp’s build. Spray paint offers a smooth finish, but hand-painting allows more detailed designs.
Try experimenting with colors that match your workspace or bring a pop of brightness. Adding decals or wrapping parts with fabric or washi tape can make your lamp truly one-of-a-kind. Have you thought about mixing matte and glossy finishes? It adds depth without overwhelming the design.
Testing The Lamp
Before you celebrate your finished lamp, testing is crucial. Plug it in and check if the light turns on smoothly and stays steady without flickering. Adjust the gooseneck to different angles and make sure the lamp holds its position firmly.
Check the switch and cord for any loose connections or overheating. If you notice any issues, don’t ignore them—safety comes first. How does it feel to use your lamp after all your hard work? This moment confirms your effort has paid off.
Troubleshooting Common Issues
Troubleshooting common issues helps keep your gooseneck desk lamp working well. Fixing problems early saves time and effort. Many issues are simple to solve with basic tools and careful checks.
Electrical problems often cause the lamp to stop working. Mechanical parts might get stiff or loose. Knowing how to fix these issues keeps the lamp functional and safe.
Fixing Wiring Problems
Check the power cord for cuts or damage. A broken wire can stop electricity flow. Use a multimeter to test the wire continuity. Replace the cord if it shows no continuity.
Inspect connections inside the lamp base. Loose wires can cause flickering or no light. Tighten any loose wire nuts or terminals carefully. Make sure no wires touch each other incorrectly.
Test the bulb socket for corrosion or dirt. Clean it gently with a dry cloth. Replace the socket if damaged or worn out. Always unplug the lamp before working on wiring.
Adjusting The Gooseneck
The gooseneck may become stiff or too loose over time. Bend it slowly to avoid breaking the internal wires. If stiff, apply a small amount of lubricant on the joints.
For a loose gooseneck, try tightening the base where it attaches. Some lamps have screws to adjust tension. Use the right tool to avoid damage.
Ensure the lamp head stays in the desired position. Adjust the neck gently until it holds firm. Avoid forcing the neck too much to prevent damage.
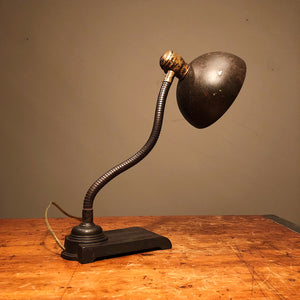
Credit: madvanantiques.com
Ideas For Customization
Customizing your gooseneck desk lamp is where your personality can truly shine. It’s not just about functionality; it’s about creating a piece that fits your style and workspace vibe perfectly. Let’s look at some ideas that can make your lamp unique and meaningful to you.
Creative Designs
Think about the shape and color of your lamp. Could you paint the metal parts with bold colors or patterns? Adding a matte or glossy finish can completely change the look.
Try attaching decorative elements like wooden beads or metallic accents. You might also experiment with different lamp shades—glass, fabric, or even handmade paper can add a special touch.
Have you considered integrating smart features? Adding a touch sensor or a dimmer switch can make your lamp more functional and fun to use every day.
Upcycling Materials
Using old or discarded items can give your lamp a unique story and reduce waste. For example, an old bicycle handle can become the flexible neck, or vintage plumbing pipes can form the base.
Look around your home or local thrift stores for interesting pieces. A small metal basket or an old camera lens can serve as a lamp base or decorative element.
Upcycling not only saves money but also challenges your creativity. What unexpected item could you transform into a part of your lamp? This approach makes your project eco-friendly and one-of-a-kind.

Credit: www.amazon.ca
Frequently Asked Questions
What Materials Are Needed For A Gooseneck Desk Lamp?
You need a flexible gooseneck tube, lamp socket, bulb, power cord, switch, and base. Tools include a drill, screwdriver, and wire strippers.
How Do I Assemble The Gooseneck Lamp Base?
Secure the base firmly using screws. Attach the gooseneck tube to the base. Ensure stability for safe use.
What Type Of Bulb Works Best For This Lamp?
Use LED bulbs for energy efficiency and low heat. Choose the right wattage as per lamp socket specifications.
How Do I Wire The Lamp Safely?
Turn off power before wiring. Connect the lamp socket wires to the power cord. Use wire nuts and electrical tape for secure connections.
Conclusion
Making a gooseneck desk lamp is a fun and useful project. You can customize it to fit your style and needs. It helps brighten your workspace with adjustable light. Using simple tools and materials keeps the process easy. Take your time and enjoy building something practical.
This lamp will add charm and function to any desk. Try it today and see the difference it makes.


