

Have you ever wanted to draw a desk lamp but didn’t know where to start? You’re in the right place.
Drawing a desk lamp step by step is easier than you think. With simple instructions and clear guidance, you can create a realistic and stylish lamp drawing that you’ll be proud of. Imagine how satisfying it will feel to bring this everyday object to life on your paper.
Ready to unlock your creativity and improve your drawing skills? Let’s dive in and make your desk lamp drawing come alive!
Materials Needed
Before starting your desk lamp drawing, gather the right materials. Having the proper tools helps you create clean and detailed artwork. Use simple supplies that are easy to find and use.
Choose materials that suit your skill level. Basic drawing tools work well for beginners and can produce great results.
Drawing Paper
- Choose smooth, white paper for clear lines
- Use medium weight paper to avoid tearing
- A4 or letter size works perfectly for desk lamp sketches
Pencils
- Use a range of pencils: HB for outlines, 2B for shading
- Mechanical pencils offer precision for fine details
- Keep pencils sharp for better control
Eraser
- A soft rubber eraser to correct mistakes gently
- Kneaded eraser helps lighten lines without damage
- Use a pencil eraser for small, precise corrections
Ruler
- Helps draw straight lines and measure proportions
- 12-inch or 30-centimeter rulers are ideal
- Clear plastic rulers make it easy to see your drawing
Optional Materials
- Colored pencils to add color and depth
- Blending stumps for smooth shading effects
- A sketchbook to keep all your drawings organized
Basic Shapes And Structure
Starting with basic shapes makes drawing a desk lamp easier. Simple shapes build a strong foundation. This approach helps capture the lamp’s form and balance. Focus on circles, rectangles, and lines to map out the structure.
Understanding the structure guides the drawing process. It keeps proportions right and simplifies details. Visualizing the lamp as a combination of shapes helps to create a clear outline. This step saves time and effort later.
Identifying The Main Components
Break the desk lamp into three main parts: the base, the arm, and the shade. Each part has a simple shape that you can sketch first. The base usually looks like a flat oval or rectangle. The arm is often a straight or bent line. The shade resembles a cone or dome shape.
Sketching Basic Shapes
Use light pencil strokes to draw the basic shapes. Begin with a circle or oval for the base. Draw straight lines or rectangles for the arm’s segments. Create a cone or dome shape for the lamp shade. Keep shapes loose and adjustable.
Connecting Shapes Smoothly
Join the shapes with smooth lines to form the lamp’s outline. Pay attention to joints where the arm bends. Add curves where the shade connects to the arm. This step turns rough shapes into a clear lamp sketch.
Checking Proportions And Angles
Review the size of each part compared to others. Make sure the arm is not too long or short. The base should look stable enough to hold the lamp. Adjust angles to reflect a natural lamp posture. Correct proportions enhance realism and balance.
Drawing The Lamp Base
Drawing a desk lamp can be an enjoyable experience. A well-drawn lamp base provides a strong foundation for your illustration. Capturing the essence of the base ensures your lamp looks grounded and realistic. Let’s explore how to draw the lamp base step by step.
Understanding The Lamp Base Structure
Begin by observing the lamp base’s shape and size. Most bases are round or rectangular. Sketch a simple outline reflecting its form. This will guide the rest of your drawing.
Creating The Base Outline
Use light pencil strokes to sketch the base outline. Keep your lines soft. This helps you make adjustments easily. Ensure the base looks symmetrical and balanced.
Adding Details To The Base
Look closely at the base’s surface. Add details like patterns, textures, or any unique features. This step gives your drawing depth and character.
Shading And Refining
Apply shading to show light and shadow. This enhances the three-dimensional look. Focus on areas where light naturally falls. Refine your lines and add contrast for a polished look.
Finalizing The Base
Review your drawing for any final touches. Erase unnecessary lines. Ensure the base connects well with the lamp stem. This completes the base drawing process.
Sketching The Lamp Arm
Sketching the lamp arm is an important step in drawing a desk lamp. The arm connects the base to the lamp head. It gives the lamp its unique shape and flexibility. Start with light, simple lines to capture the basic form.
Focus on the arm’s length and angle. Most desk lamps have adjustable arms with joints. These joints allow the lamp head to move up and down. Keep the shapes simple and clear to show these connections.
Drawing The Basic Shape Of The Lamp Arm
Begin by drawing two parallel lines. These lines form the main structure of the arm. Make sure they are straight and even. The length depends on your lamp style.
Adding Joints And Hinges
Next, add circles or small ovals at the points where the arm bends. These represent the hinges. They let the lamp move. Place them evenly along the arm’s length.
Refining The Arm’s Details
Now, add details like screws or bolts near the joints. Sketch small rectangles or circles to show these parts. They make the arm look realistic and functional.
Shading And Texturing The Lamp Arm
Use light shading to give the arm depth. Shade one side slightly darker. This creates a 3D effect. Add texture lines if the arm is metallic or plastic.
Creating The Lamp Shade
Creating the lamp shade shapes the character of your desk lamp. It gives the lamp its unique style and controls how light spreads. Drawing the shade with clean lines makes your sketch look neat and professional.
Start with simple shapes to outline the lamp shade. Use light strokes to easily adjust the form. The most common shapes are cone, cylinder, or dome. Choose the shape that fits your lamp design best.
Sketching The Basic Shape
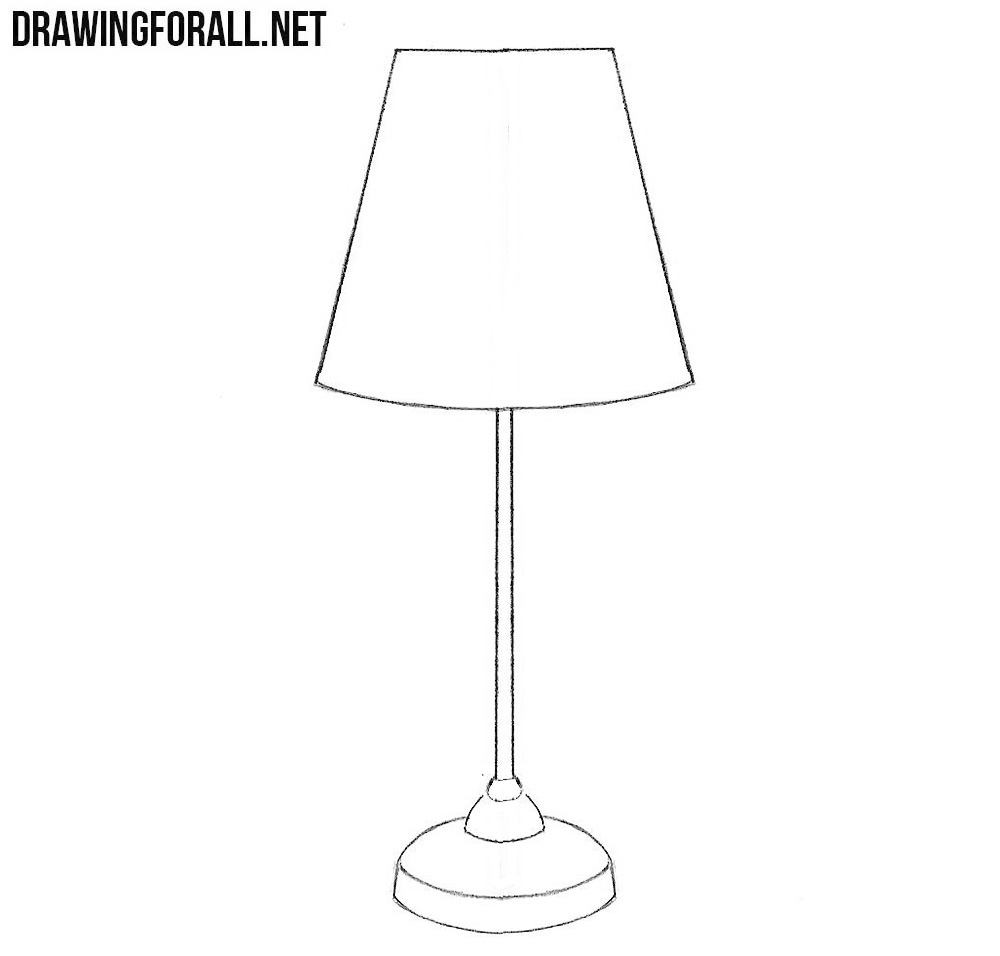
Begin by drawing a smooth oval for the top edge of the shade. Below it, draw a slightly larger oval to form the bottom edge. Connect these ovals with straight or curved lines depending on the shape you want. This creates a 3D look for the shade.
Adding Details And Depth
Next, add thickness to the lamp shade walls. Draw parallel lines inside the basic shape. Show the shade’s inner surface with a slightly darker line. This adds depth and makes the drawing more realistic.
Shading And Texture Tips
- Use soft pencil strokes for smooth surfaces.
- Add gentle shading to one side for light direction.
- Draw subtle lines or dots if the shade has fabric texture.
Keep shading light near the top and darker near the edges. This technique enhances the roundness of the shade.
Credit: www.drawingforall.net
Adding Details And Texture
Adding details and texture brings your desk lamp drawing to life. It transforms a basic outline into a realistic and captivating image. Focus on small elements and surface qualities to make your lamp stand out.
Observing The Lamp’s Surface
Look closely at your desk lamp. Is it smooth metal, matte plastic, or maybe a glossy finish? Each surface reflects light differently and has unique textures you can show with your pencil or pen.
Try to notice tiny scratches, bolts, or reflections. These details help tell the story of your lamp’s material and age. When I first added subtle scratches to my drawing, it suddenly felt more authentic and three-dimensional.
Using Shading To Create Depth
Shading is your best tool for adding texture. Use lighter strokes for smooth areas and darker, more varied strokes for rough or patterned surfaces. This contrast creates depth and makes the lamp look solid.
Consider the light source in your drawing. Where does the light hit the lamp? Where are the shadows? Play with these areas to emphasize curves, edges, and the lamp’s unique shape.
Adding Small Details That Matter
- Draw screws, switches, or the lamp’s joint mechanisms carefully.
- Include the cord’s twists or any visible wiring to add realism.
- Texture the lampshade with tiny dots or lines to suggest fabric or metal mesh.
These small touches make your drawing feel complete. Have you tried zooming in on your reference photo to catch hidden details you might have missed?
Experimenting With Different Texturing Techniques
Try cross-hatching, stippling, or smooth blending to see what fits your lamp best. Each technique gives a different feel and can highlight various materials effectively.
For example, stippling works well for rough, grainy surfaces, while smooth blending suits polished metal. Don’t hesitate to mix techniques; your lamp will look more interesting when textures vary naturally.
Shading And Lighting Effects
Shading and lighting effects bring your desk lamp drawing to life. They add depth and realism, turning a flat sketch into a convincing image. Understanding how light interacts with the lamp’s surfaces helps you decide where to place shadows and highlights.
Understanding The Light Source
Identify where the light is coming from in your drawing. This direction determines which parts of the lamp will be illuminated and which will be in shadow.
If the lamp itself is the light source, imagine how its glow affects nearby surfaces. Shadows will be softer and more diffused close to the light, sharper farther away.
Adding Shadows To Create Depth
Use darker shading on parts of the lamp that are turned away from the light source. This contrast helps the shape stand out and feel three-dimensional.
Don’t forget to add cast shadows on the desk or wall. These ground the lamp in its environment and show how it interacts with the space around it.
Highlighting Reflective Surfaces
Desk lamps often have shiny parts like metal or glass. Add small, bright highlights on these areas to simulate reflections. This makes the material look realistic and tactile.
Keep your highlights consistent with the light source direction. If you place them randomly, the drawing may look confusing or flat.
Blending Techniques For Smooth Transitions
Use smooth blending to transition between light and shadow gradually. Harsh edges can make the lamp appear rigid and unnatural unless the surface is truly sharp.
Try using a blending stump or soft pencil strokes to achieve a subtle gradient. Experiment with pressure to control how light or dark the shading appears.
Using Contrast To Focus Attention
Increase contrast around the lamp’s focal points, like the bulb or switch. This draws the viewer’s eye to important details and makes your drawing more engaging.
Think about where you want the viewer to look first. Adjust your shading accordingly to guide their attention smoothly across the lamp.
Coloring Your Desk Lamp
Coloring your desk lamp brings your drawing to life. It adds depth and personality. Choose colors that match the lamp’s style. Soft shades can create a calm look. Bright colors make it stand out.
Use smooth strokes for even color. Layer colors gently for a richer effect. Blending helps to show light and shadow. This makes your lamp look real and three-dimensional.
Choosing The Right Colors
Pick colors based on the lamp type. Metal lamps look good in gray or silver tones. Classic lamps often have warm colors like brown or cream. Modern lamps can use bold colors like red or blue.
Adding Shadows And Highlights
Shadows give your lamp shape and depth. Add darker tones where light does not hit. Highlights show shiny surfaces and light spots. Use a white pencil or lighter color for highlights.
Using Different Coloring Tools
- Colored pencils for precise and soft coloring.
- Markers for bright and bold colors.
- Watercolors for smooth and blended effects.
- Pastels for a soft, textured look.
Choose tools that match your style and skill level. Try mixing tools to get unique effects.
Creative Variations
Adding creative variations to your desk lamp drawing can make your artwork truly stand out. Experimenting with different styles and colors not only improves your skills but also keeps the process exciting. How can you push the limits of a simple lamp sketch? Let’s look at some ideas that can spark your creativity.
Modern Designs
Modern desk lamps often have clean lines and minimal shapes. Try drawing sleek, geometric forms like sharp angles or smooth curves. Think about including elements like adjustable arms or a touch-sensitive base to make your lamp look contemporary.
Adding details such as metallic finishes or LED strips can enhance the modern vibe. Have you noticed how simple shapes can still express sophistication? Use shading to highlight smooth surfaces and give your lamp a polished appearance.
Vintage Styles
Vintage desk lamps bring a sense of nostalgia and charm to your drawing. Focus on classic features like rounded lampshades, ornate bases, or pull chains. These details add character and tell a story about the lamp’s past.
Use soft lines and subtle textures to mimic materials like brass or aged wood. Sketching small patterns or engravings can make your lamp look authentic. Have you ever wondered how old designs influence today’s trends? Try blending vintage elements with your own twist to create something unique.
Unique Color Schemes
Color can transform a simple lamp into a striking piece of art. Experiment with unexpected combinations like pastel blues with bright yellows or deep reds with soft greens. Don’t hesitate to use bold colors that contrast sharply.
Try adding gradients or patterns to the lampshade for extra visual interest. Play with light and shadow to see how colors change under different lighting. What colors inspire you the most? Choosing unusual palettes can make your drawing memorable and fun to create.

Credit: www.youtube.com
Tips For Improving Your Drawing
Improving your drawing skills can be a rewarding journey. Even small changes can enhance your desk lamp sketches. Focus on techniques that refine your artistic process. Below are some practical tips to elevate your drawing skills.
Practice Consistently
Draw every day, even if only for a few minutes. Consistent practice builds muscle memory. It improves your hand-eye coordination.
Study Real Desk Lamps
Observe real desk lamps closely. Notice their shapes, shadows, and details. Pay attention to how light interacts with different materials.
Use Reference Images
Gather images of desk lamps. Use them as references to understand different styles. They can guide your drawing and spark creativity.
Experiment With Shading
Practice shading to add depth to your drawings. Try different techniques like hatching or cross-hatching. Shading brings your lamp to life.
Focus On Proportions
Pay attention to the proportions of the lamp. Ensure the base, neck, and shade are balanced. Correct proportions make your drawing more realistic.
Utilize Basic Shapes
Break down the lamp into basic shapes. Start with circles, rectangles, and triangles. These shapes form a solid foundation.
Seek Feedback
Share your drawings with friends or online communities. Constructive feedback helps you see areas for improvement. It encourages growth and learning.

Credit: www.youtube.com
Frequently Asked Questions
How Do I Start Drawing A Desk Lamp?
Begin by sketching the basic shapes like circles and rectangles. This forms the lamp’s base, neck, and shade. Keep lines light for easy adjustments later.
What Materials Are Best For Drawing A Desk Lamp?
Use pencils for sketching, erasers for corrections, and fine liners for outlining. Colored pencils or markers can add depth and shading.
How To Add Realistic Shadows To A Desk Lamp Drawing?
Identify the light source first. Shade areas opposite the light with soft, gradual strokes. Use darker tones for deeper shadows and lighter ones for highlights.
Can Beginners Easily Draw A Desk Lamp Step By Step?
Yes, the step-by-step method breaks the drawing into simple shapes. This helps beginners focus on one part at a time, making it manageable and fun.
Conclusion
Drawing a desk lamp can be simple and fun. Follow each step with care and patience. Use basic shapes first, then add details slowly. Practice helps you improve and gain confidence. Keep your lines light at the start. Try different angles to make your drawing unique.
Enjoy the process, not just the result. Soon, you will create lamps that look real. Drawing builds skills that help in many ways. So, grab your pencil and start today!


