
Have you ever faced the challenge of removing a large mirror glued tightly to your wall? It’s not as simple as just pulling it off—doing it wrong can damage your wall or even cause injury.
But don’t worry, you’re about to learn the safest, most effective way to get that mirror down without stress. Keep reading, and you’ll discover clear, step-by-step tips that make this tricky job much easier than you might think. Your walls—and your peace of mind—will thank you.

Credit: www.reddit.com
Tools And Materials Needed
Removing a large mirror glued to a wall needs the right tools and materials. Using proper equipment makes the job safer and easier. Prepare before starting to avoid damage and injury.
Safety Gear
- Protective gloves to avoid cuts from glass edges
- Safety goggles to shield eyes from shards
- Long sleeves and pants to protect skin
- Dust mask if removing old adhesive that may release dust
- Sturdy shoes to protect feet from falling pieces
Cutting Tools
- Utility knife with a sharp blade for scoring edges
- Putty knife or thin pry bar for gentle lifting
- Wire or dental floss to slide behind the mirror and cut adhesive
- Glass suction cups to hold and pull the mirror safely
Adhesive Removers
- Commercial adhesive remover sprays or gels for softening glue
- Rubbing alcohol or acetone for small adhesive spots
- Warm soapy water to clean residue after removal
- Soft cloths or sponges for applying removers gently
Preparing The Work Area
Clear the space around the mirror and cover the floor with a drop cloth. Gather tools like a putty knife, gloves, and safety glasses. Ensure good lighting to see the edges and adhesive clearly.
Preparing the work area is crucial before removing a large mirror glued to a wall. It ensures safety and prevents damage to your home. A well-prepared space also makes the removal process smoother. Follow these steps to get your work area ready.Clear The Space
Start by removing all nearby furniture. This creates a safe zone around the mirror. It also gives you room to move freely. Store delicate items in another room. This prevents accidental breakage during the process. Ensure the area is clear of obstacles. This reduces the risk of tripping or falling.Protect Walls And Floors
Cover the floor with a drop cloth or old sheet. This catches any debris or glass pieces. Tape cardboard or foam around the mirror’s edge. This protects the walls from accidental scratches. Use painter’s tape to secure the coverings. This keeps them in place during the removal process.Assessing The Mirror Attachment
Before you start pulling or prying, it’s crucial to understand how your mirror is attached to the wall. Assessing the mirror attachment helps you choose the safest and most effective removal method. A quick inspection can prevent damage to both your wall and the mirror.
Check Adhesive Type
Look closely at the edges of the mirror to identify the kind of adhesive used. Is it a strong glue, double-sided tape, or perhaps a silicone sealant? Different adhesives require different tools and techniques to loosen.
For example, a silicone adhesive might soften with a heat gun, while strong construction glue may need a solvent or careful prying. If you spot any labels or packaging left from installation, that can give you useful clues.
Have you noticed any discoloration or bubbling around the edges? This can indicate the adhesive type or even warn you about potential wall damage underneath.
Look For Supports Or Frames
Not all mirrors rely solely on glue. Some have hidden supports, clips, or frames that add extra security. Carefully examine the perimeter for metal brackets, wooden strips, or screws that might be holding the mirror in place.
Sometimes the frame itself carries most of the weight, making removal easier once the frame is detached. Other times, supports are glued or nailed behind the mirror, which can complicate the process.
Ask yourself: does the mirror feel solidly fixed, or is there a slight give when you gently push? This can hint at the presence of additional supports.
Loosening The Adhesive
Loosening the adhesive is the key to safely removing a large mirror glued to your wall without causing damage. Adhesives used on mirrors are often strong and designed to hold firm, so you’ll need to weaken them first. Approaching this step carefully not only protects your wall but also prevents the mirror from shattering.
Using Heat To Soften Glue
Heat is one of the most effective ways to soften adhesive. You can use a hairdryer or a heat gun set to a low temperature. Hold it a few inches away from the edge of the mirror and move it slowly across the glued area.
The warmth will make the glue more pliable, reducing its grip. Be patient and avoid overheating, as too much heat can crack the mirror or damage the paint. Have a plastic putty knife ready to gently pry the mirror once the glue feels softer.
Applying Solvents Safely
Solvents like rubbing alcohol or adhesive removers can break down the glue’s bond. Before you start, test the solvent on a small hidden spot to ensure it won’t damage your wall or mirror backing.
Apply the solvent sparingly with a cotton ball along the edges where the mirror meets the wall. Let it sit for a few minutes to penetrate the adhesive. Use a plastic scraper to gently loosen the mirror, adding more solvent if needed.
Remember to ventilate the room well and wear gloves to protect your skin. Solvents can be strong, so using them cautiously will keep both you and your space safe.
Removing The Mirror Safely
Removing a large mirror glued to a wall requires care and patience. Safety is the top priority to prevent injury and damage. Use proper tools and protective gear. Work slowly and steadily for best results.
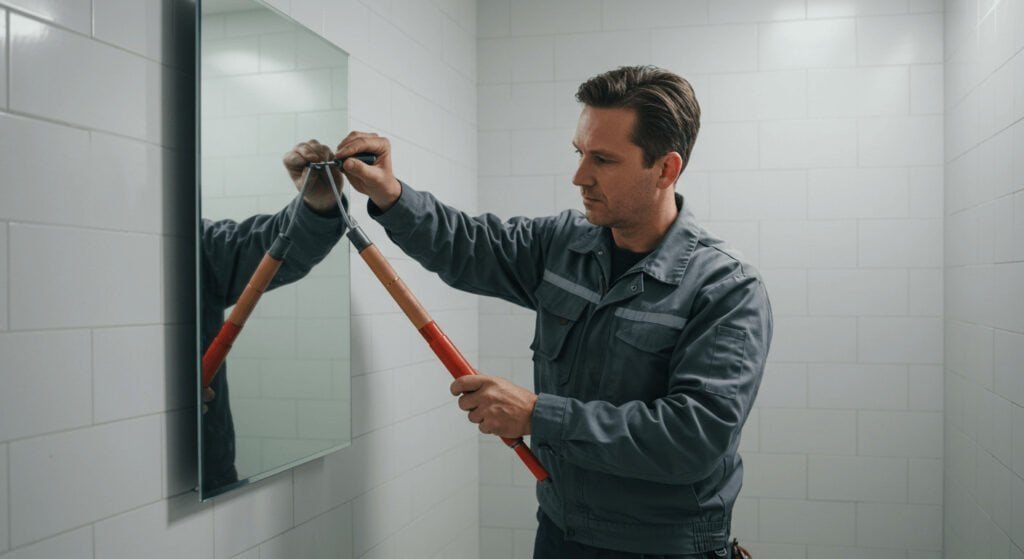
Cutting Through Adhesive
Start by softening the adhesive with a heat gun or hair dryer. Warm the edges of the mirror gently. Use a thin, flexible wire or a utility knife to cut the glue line. Move the wire back and forth in a sawing motion. Take breaks to avoid breaking the glass. Keep the wire close to the wall for better control.
Lifting The Mirror Carefully
After cutting through the adhesive, begin lifting the mirror slowly. Have a helper support the mirror’s weight. Use suction cups for a better grip. Lift the mirror straight off the wall to avoid cracks. Place the mirror on a soft surface immediately. Dispose of any broken glass safely.
Credit: bfymirror.com
Dealing With Residual Adhesive
After successfully removing a large mirror glued to your wall, you’ll likely face one stubborn issue: leftover adhesive. This sticky residue can be tough to get rid of and might damage your wall if not handled carefully. Tackling it properly ensures your wall looks clean and ready for its next makeover.
Scraping Off Residue
Start by gently scraping the adhesive with a plastic putty knife or a credit card to avoid scratching the wall. Be patient and work slowly; rushing can gouge the paint or drywall underneath. If the adhesive is particularly stubborn, warming it slightly with a hairdryer softens it, making scraping easier.
Have you noticed how some adhesives become gummy with heat? That’s your cue to apply gentle heat before scraping. Avoid metal tools unless the wall surface is durable, as they can cause permanent damage.
Cleaning The Wall Surface
Once you remove the bulk of the residue, clean the wall to remove any remaining stickiness. Use a mixture of warm water and mild dish soap, applying it with a soft cloth or sponge. For tougher spots, rubbing alcohol or a commercial adhesive remover can help, but test a small area first to prevent discoloration.
After cleaning, wipe the area with a damp cloth to remove any cleaning solution traces. Dry the surface thoroughly before painting or reapplying any wall treatments. Have you prepared your walls this way before a fresh coat of paint? It makes a huge difference in the final finish.
Repairing Wall Damage
Removing a large mirror glued to a wall often leaves behind some damage. The surface may have holes, cracks, or rough patches. Fixing these issues is important to restore the wall’s smooth look. Proper repair prepares the wall for painting or new decoration. A well-done repair makes the wall look neat and fresh.
Filling Holes And Cracks
Start by cleaning the damaged areas. Remove loose debris or dust. Use a putty knife to apply spackling paste or wall filler. Press the filler into holes and cracks firmly. Smooth the surface with the knife to level it with the wall. Let the filler dry completely before moving on. Drying time depends on the product used, usually a few hours.
Sanding And Smoothing
Once the filler is dry, use fine-grit sandpaper to smooth the area. Sand gently until the surface is even with the rest of the wall. Remove dust with a damp cloth after sanding. Check for any uneven spots and sand again if needed. A smooth surface helps paint or wallpaper stick better. It also hides the repair, making the wall look flawless.
Disposing Of The Mirror
Disposing of a large mirror after removal requires care and attention. Mirrors are fragile and can break easily. Proper disposal helps prevent injury and environmental harm. Follow safe practices to handle and discard the mirror responsibly.
Breaking Mirror Safely
Wear thick gloves and eye protection before handling the mirror. Lay a heavy cloth or tarp on the ground. Place the mirror face down on the cloth. Use a hammer or similar tool to tap the mirror gently. Start from one edge to control the break. Wrap broken pieces in thick newspaper or bubble wrap. Avoid sharp edges sticking out to prevent cuts.
Recycling And Disposal Tips
Check local recycling rules for glass disposal. Some centers accept mirrors, but others do not. Call your waste management service to ask about mirror recycling. If recycling is not possible, dispose of the mirror as bulky waste. Use a sturdy box or container to transport broken glass. Label the package clearly as “broken glass” for safety. Never throw large mirror pieces into regular trash bins directly.

Credit: www.youtube.com
Frequently Asked Questions
How Do I Safely Remove A Large Mirror Glued To A Wall?
Start by loosening the adhesive with a heat gun or hair dryer. Use dental floss or a thin wire to gently saw between the mirror and wall. Work slowly to avoid breaking the glass or damaging the wall surface.
What Tools Are Needed To Remove A Glued Mirror?
You will need a heat source (hair dryer or heat gun), dental floss or thin wire, gloves, safety goggles, and a putty knife. These tools help soften adhesive and safely separate the mirror from the wall without damage.
Can I Reuse A Mirror After Removing It From A Wall?
Yes, if the mirror remains intact without cracks or chips, you can clean off adhesive residue and reuse it. Handle carefully during removal to preserve its condition for future mounting.
How To Avoid Wall Damage When Removing A Glued Mirror?
Apply heat to soften adhesive before prying the mirror. Use gentle sawing motions with dental floss or wire to separate the mirror slowly. Avoid forceful pulling, which can damage drywall or plaster beneath.
Conclusion
Removing a large mirror glued to a wall takes time and care. Use the right tools to avoid damage. Work slowly and gently to keep the wall safe. Remember to protect yourself from glass and dust. Clean the area after the mirror is off.
This simple approach helps you finish the job well. You can handle this task with patience and the right method. Keep safety first, and the wall will look good again.


