
Are you ready to transform your nights into a perfect blend of comfort and support? Setting up your Sleep Number bed is the first step to waking up refreshed and pain-free.
But how do you get it just right for your unique needs? In this guide, you’ll discover simple, clear steps to set up your Sleep Number bed quickly and easily. By the end, you’ll know exactly how to adjust it for the best sleep experience possible.
Keep reading, because your best night’s sleep is closer than you think.

Credit: www.sleepnumber.com
Choosing The Right Sleep Number Bed
Choosing the right Sleep Number bed makes a big difference in your sleep quality. The right bed fits your space and sleep needs. It also offers features that match your comfort preferences. Understanding these points helps you pick a bed that feels just right every night.
Selecting The Perfect Size
Size matters for comfort and room fit. Sleep Number beds come in various sizes:
- Twin
- Full
- Queen
- King
- California King
Choose a size based on your bedroom space and whether you share the bed. Bigger beds give more room to move. Smaller beds fit tight spaces better. Measure your room before deciding.
Understanding Sleep Number Features
Sleep Number beds offer features that improve rest. Key features include:
- Adjustable firmness for each side
- Sleep tracking to monitor sleep quality
- Temperature balancing for better comfort
- Massage functions for relaxation
Each feature adds comfort in its way. Think about which features suit your sleep habits and needs. This helps you get the best value and rest.

Credit: www.sleepnumber.com
Unboxing And Preparing Components
Unboxing and preparing your Sleep Number bed is the first exciting step towards better sleep. It’s important to handle each component carefully and organize your workspace for a smooth setup. Taking time now will save frustration later.
Checking The Package Contents
Start by laying out all the parts on a clean surface. Your Sleep Number bed package usually includes the frame, base, mattress layers, air chambers, control unit, and remote. Don’t rush through this—make sure every piece matches the packing list in the manual.
Look for any visible damage or missing items. If something seems off, contacting customer support early can prevent delays. Imagine starting assembly only to find a key part is missing—you’d have to stop everything and wait.
Preparing The Frame And Base
Next, focus on the frame and base since they form the foundation of your bed. Assemble the frame according to the instructions, ensuring all screws and bolts are tightened securely. A loose frame might cause noise or instability later on.
Place the base on a flat surface where you want the bed to stay. Avoid carpet with thick padding underneath, as it can affect the bed’s performance. Think about where you’ll plug in the control unit too—proximity matters for easy access and cable management.
Have you considered measuring your space before unpacking? This small step can save you the hassle of rearranging furniture after assembly. Setting up your Sleep Number bed thoughtfully makes the process smoother and your sleep experience better.
Assembling The Bed Frame
Begin by unpacking all parts and laying them out clearly. Connect the frame pieces carefully, ensuring they fit snugly. Tighten screws firmly to keep the bed sturdy and stable.
Assembling the bed frame is an essential part of setting up your Sleep Number bed. This process ensures a stable foundation for your mattress. A sturdy frame supports your comfort and enhances your sleeping experience.Connecting The Frame Parts
Begin by laying out all frame parts on the floor. Identify each piece by its label or instruction manual. Align the parts according to the assembly guide. Use the provided connectors to join the frame sections. Ensure each connection is tight and secure. A well-connected frame prevents unnecessary movement.Securing The Foundation
Place the foundation panels onto the assembled frame. Make sure they fit snugly within the frame boundaries. Secure each panel using the included fasteners. Double-check all connections for stability. A secure foundation supports the mattress evenly. This step is crucial for comfort and durability.Installing The Mattress And Air Chambers
Installing the mattress and air chambers is a crucial part of setting up your Sleep Number bed. This process ensures that the bed functions properly and provides the personalized comfort you expect. Paying close attention to how the air chambers fit and how the mattress covers attach can make a big difference in your sleep experience.
Placing The Air Chambers Correctly
The air chambers are the heart of your Sleep Number bed. You need to position them precisely within the bed frame to avoid any discomfort or uneven support.
Start by placing each air chamber flat inside the frame. Make sure the air tubes are accessible and not twisted or pinched. This helps maintain steady air flow and consistent firmness.
Think about how you sleep—do you prefer more support around your hips or shoulders? Adjust the chambers accordingly if your model allows separate zones.
Attaching The Mattress Covers
After positioning the air chambers, the next step is securing the mattress covers. These covers protect the chambers and create a smooth surface for your sheets.
Begin by aligning the cover’s edges with the mattress frame. Smooth out wrinkles and ensure the cover fits snugly without stretching too much.
Many people rush this part and end up with lumps or sagging areas. Taking your time here can lead to a more comfortable sleep and longer mattress life.
Setting Up The Sleep Number Controls
Setting up the Sleep Number controls is a crucial part of getting your bed ready for a personalized sleep experience. These controls allow you to adjust the firmness on each side, so understanding how to connect and power them ensures you get the most out of your investment. Let’s look at how to properly set up the control unit and test the system for smooth operation.
Connecting The Control Unit
Start by locating the control unit that came with your Sleep Number bed. It usually connects to the air chambers inside the mattress through tubes or cables. Make sure each tube is securely attached to the correct port on the control unit to avoid leaks or functionality issues.
Check if the control unit has labeled connections—this helps prevent confusion. If you have a Split King or adjustable model, each side will have its own control unit, so keep them organized. A loose connection here can cause uneven firmness, which defeats the purpose of your Sleep Number bed.
Powering And Testing The System
Once connected, plug the control unit into a power source. You want to ensure the outlet provides stable power to avoid interruptions while adjusting your bed. After powering it on, observe the display or indicator lights for any error messages.
Now test the system by adjusting the firmness settings. Increase and decrease the number to feel how the mattress responds. If the air chambers inflate or deflate correctly and the controls respond smoothly, your setup is successful.
If you notice delays or no changes, double-check your connections or try a different power outlet. Asking yourself, “Does the bed feel balanced on both sides?” can help identify if the system needs troubleshooting before you settle in for the night.
Adjusting Your Sleep Number Settings
Adjusting your Sleep Number settings helps you find the best comfort level. It lets you control the firmness of your bed easily. Small changes can make a big difference in your sleep quality. The Sleep Number system offers a simple way to customize your bed to fit your needs. Understanding how to adjust the settings can improve your rest every night.
Using The Remote Control
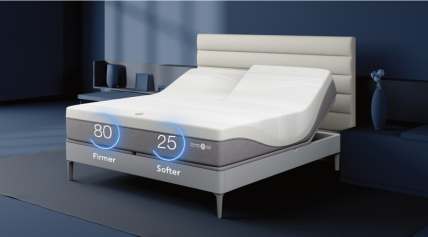
The Sleep Number bed comes with a remote control to adjust firmness. The remote has buttons to increase or decrease the air pressure. Pressing the plus (+) button makes the bed firmer. Pressing the minus (-) button softens the mattress. Some models include a display screen showing your current setting. You can make changes while lying down for convenience. The remote is easy to use and responsive.
Finding Your Ideal Firmness
Start by setting the bed to a medium firmness level. Spend a few minutes lying down and notice how it feels. Adjust the firmness in small steps to avoid discomfort. Try different settings until you feel fully supported and comfortable. Each person’s ideal Sleep Number is unique. Remember to adjust over several nights for the best results. Keep track of your favorite number to set it quickly next time.
Maintaining And Troubleshooting
Maintaining your Sleep Number bed ensures it stays comfortable and functions smoothly over time. Troubleshooting helps you quickly resolve any issues, so you don’t lose precious sleep. Let’s look at some practical tips for keeping your bed clean and what to do if problems arise.
Regular Cleaning Tips
Keeping your Sleep Number bed clean is easier than you might think. Start by vacuuming the mattress surface weekly to remove dust and allergens. This simple step can improve your sleep quality by creating a fresher environment.
Spot clean any stains immediately using a mild detergent and a damp cloth. Avoid soaking the mattress, as excess moisture can damage internal components. Remember to keep the air chambers dry to prevent mold or mildew.
Don’t forget the bedding and accessories. Wash sheets and mattress covers regularly according to the manufacturer’s instructions. This habit keeps allergens at bay and maintains the bed’s overall hygiene.
Common Issues And Fixes
If your Sleep Number bed isn’t inflating properly, check the air hoses for kinks or disconnections. Sometimes, simply reconnecting or straightening the hoses can solve the problem. Have you ever overlooked something this simple and wasted hours troubleshooting?
Another common issue is the remote control not syncing with the bed. Try resetting the remote by removing its batteries for a few minutes. If that doesn’t work, check for interference from other wireless devices nearby.
Occasionally, you might notice uneven firmness between the two sides of the bed. This could be due to a slow air leak. Inspect the air chambers and hoses carefully for any punctures or damage, and contact customer support if you find a problem you can’t fix.

Credit: www.cnet.com
Frequently Asked Questions
How Do I Unbox And Assemble A Sleep Number Bed?
Start by unpacking all parts carefully. Follow the included instructions to assemble the frame and place the mattress. Connect the air chambers securely. Ensure all components fit snugly before inflating the mattress.
How To Connect The Sleep Number Bed To Power?
Plug the air pump’s power cord into a nearby outlet. Ensure the power source is stable and within reach. Avoid using extension cords to prevent power interruptions during inflation.
How Do I Inflate The Sleep Number Mattress?
Use the remote or app to start inflation. Set your desired firmness level by adjusting the air chambers. Inflate slowly to avoid over-pressurizing and ensure comfort.
Can I Adjust Firmness After Setup?
Yes, you can adjust firmness anytime using the remote or app. Increase or decrease air pressure to match your comfort preferences. Adjustments are simple and quick for personalized support.
Conclusion
Setting up a Sleep Number bed is simple and quick. Follow the steps carefully for the best comfort. Adjust the numbers until you feel relaxed and supported. Remember, everyone’s perfect number is different. Take your time to find what suits you best.
Enjoy better sleep with your new bed soon. Sweet dreams await!


