
Have you ever faced the tricky challenge of removing a mirror glued to your wall without causing damage? It’s a common problem that can leave you frustrated and unsure where to start.
But don’t worry—this guide will show you simple, effective steps to safely take down that mirror. By the end, you’ll feel confident handling the job yourself, saving time and money. Keep reading to discover the best techniques to protect your walls and get that mirror off with ease.
Tools Needed
Removing a mirror glued to the wall requires specific tools. Having the right tools makes the job easier and safer. Prepare all items before starting. This helps avoid delays and accidents.
Basic Safety Gear
- Safety glasses to protect your eyes from glass shards
- Thick gloves to prevent cuts and scrapes
- A dust mask to avoid breathing in dust or adhesive particles
- Long sleeves and pants to protect your skin
Cutting And Prying Tools
- Utility knife with a sharp blade to cut through adhesive edges
- Putty knife or thin pry bar to gently separate the mirror from the wall
- Wire or dental floss to saw through the adhesive layer
- Hammer or mallet to tap tools carefully without breaking the mirror
Adhesive Removal Supplies
- Adhesive remover or rubbing alcohol to dissolve glue residues
- Scraper to remove leftover adhesive from the wall
- Soft cloths for wiping and cleaning surfaces
- Warm soapy water for final cleaning

Credit: www.reddit.com
Preparing The Area
Clear the area around the mirror to avoid damage. Lay down a protective sheet on the floor to catch debris. Gather all necessary tools before starting the removal process.
Preparing the area before removing a mirror glued to the wall is crucial for a smooth process. A little foresight can prevent damage to your floors, walls, and other belongings. With careful preparation, you can ensure a safe and efficient removal.Protecting The Floor And Walls
Start by laying down a drop cloth or old blankets on the floor beneath the mirror. This will catch any debris or adhesive that might fall during the removal process. Consider securing the edges with painter’s tape to keep the protective covering in place. Shield the wall around the mirror with cardboard or thick paper. Use painter’s tape to adhere these protective layers without damaging the paint. This extra step ensures that any accidental scratches or adhesive spills won’t ruin your wall surface.Clearing The Surrounding Space
Remove any furniture or decorative items near the mirror. This not only gives you more space to work but also prevents accidental damage. A clear workspace reduces the risk of tripping or knocking things over. Think about the items above or below the mirror as well. If there’s a shelf nearby, clear it. A sudden bump could send your favorite vase crashing to the ground. By preparing the area properly, you set the stage for a hassle-free mirror removal. Are you ready to take on the challenge? With these steps, you’re well on your way to a safer, more organized approach.Loosening The Adhesive
Removing a mirror glued to the wall can be tricky because the adhesive bonds tightly to both surfaces. To avoid damaging your wall or the mirror, you need to carefully loosen that adhesive first. This step requires patience and the right approach to soften or break down the glue without causing cracks or stains.
Using Heat To Soften Glue
Heat is a powerful tool to weaken adhesive bonds. You can use a hairdryer or a heat gun on a low setting to warm the glued area gently. This softens the glue, making it easier to peel the mirror off.
Hold the heat source about 6-8 inches away to avoid overheating or cracking the glass. Move it slowly back and forth over the surface for several minutes. You’ll notice the adhesive becoming more pliable, which means you’re ready to start loosening the mirror.
Have you ever felt how a sticker peels easier after warming it? The same principle applies here, but be cautious not to apply too much heat, or you risk damaging the paint or wall underneath.
Applying Solvents Safely
Certain solvents can break down adhesive glue, but you must use them carefully. Products like rubbing alcohol, acetone, or commercial adhesive removers work well but can harm painted surfaces or wallpaper.
Test the solvent on a small, hidden area first to check for damage. Apply it sparingly with a cotton ball or cloth around the edges of the mirror. Give the solvent time to penetrate and soften the glue before attempting to lift.
Always ventilate the room properly and wear gloves to protect your skin. Using solvents safely helps you avoid a bigger cleanup job and keeps your wall intact while freeing the mirror.
Credit: bfymirror.com
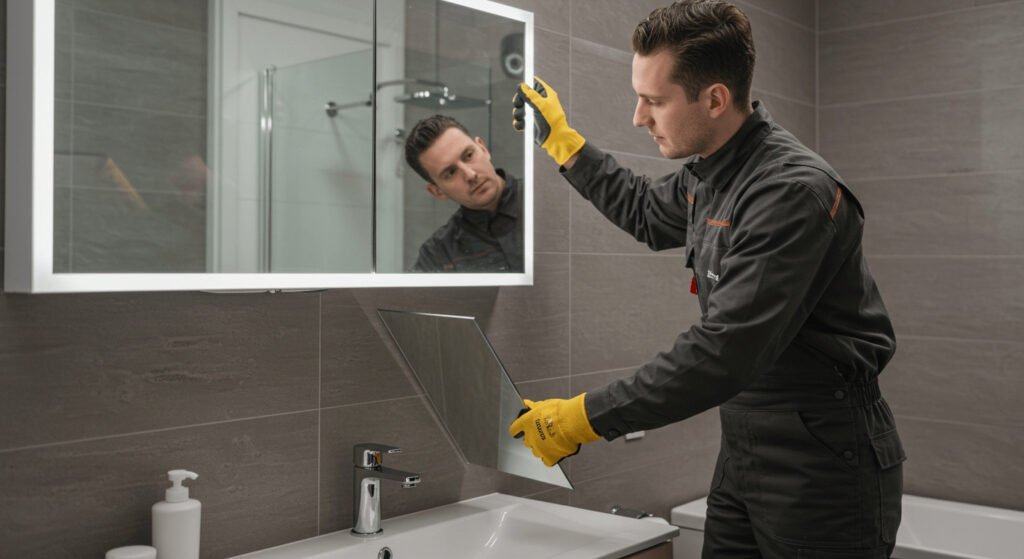
Removing The Mirror
Removing a mirror glued to the wall requires patience and the right approach to avoid damage to both the mirror and the wall. You need to carefully loosen the adhesive without cracking the glass or pulling off chunks of drywall. The key is to work slowly and use tools designed for gentle prying, combined with protective measures to keep you safe throughout the process.
Prying Techniques
Start by softening the adhesive with heat. A hairdryer or heat gun works well, but keep it moving to avoid overheating the glass.
Use a thin, flexible putty knife or a specialized mirror removal tool to slide behind the mirror’s edge. Gently wiggle the tool to create a small gap.
Insert shims or plastic cards into the gap to widen it gradually. Avoid metal tools that can scratch or damage the mirror surface.
- Keep applying heat if the adhesive resists.
- Work in small sections instead of forcing the whole mirror at once.
- Wear gloves and eye protection in case the mirror breaks unexpectedly.
Handling Large Or Heavy Mirrors
Large mirrors can be unwieldy and pose safety risks. Before you start prying, have a helper ready to support the weight.
Use suction cups designed for glass to get a firm grip on the mirror’s surface. This reduces the risk of dropping or cracking it.
Plan your movements carefully. Remove one side first, then slowly ease the mirror away from the wall, keeping it as level as possible.
- Clear the area around you to avoid tripping hazards.
- Keep a soft blanket or padding nearby to place the mirror on once it’s free.
- Consider professional help if the mirror is extremely heavy or glued in a hard-to-reach spot.
Have you ever faced a stubborn mirror that just wouldn’t budge? Sometimes, a little extra patience and the right tools make all the difference between a clean removal and a costly repair.
Cleaning The Wall
After successfully detaching a mirror glued to your wall, the next challenge is cleaning the surface thoroughly. This step is crucial if you want the wall to look smooth and be ready for painting or redecoration. Let’s dive into how you can tackle leftover adhesive and fix any damage to restore your wall’s original charm.
Removing Residual Adhesive
Sticky residue can be stubborn, but patience and the right tools make a big difference. Start by gently scraping off large chunks with a plastic scraper to avoid scratching the wall.
Next, apply a small amount of adhesive remover or rubbing alcohol to a soft cloth and dab it onto the residue. Let it sit for a few minutes to soften the glue, then wipe it away with gentle circular motions.
Have you ever tried using household items like cooking oil or vinegar? These can sometimes work well for mild adhesives and are worth testing on a small patch first.
Repairing Wall Damage
Peeling paint, small holes, or dents often appear after removing a glued mirror. Don’t rush past these imperfections—they can spoil your wall’s finish if left untreated.
Use spackle or lightweight filler to patch up any holes or gouges. Apply it with a putty knife, smooth the surface, and let it dry completely.
Once dry, lightly sand the area to blend it seamlessly with the surrounding wall. This step ensures your next coat of paint will adhere evenly and look professional.
Safety Tips
Removing a mirror glued to the wall can be risky without proper safety measures. Taking precautions protects you and prevents damage to the mirror and wall. Follow these safety tips to handle the process smoothly and safely.
Preventing Glass Breakage
Use gentle pressure to avoid cracking the mirror. Avoid sharp or sudden movements during removal. Keep a soft cloth or blanket nearby to cushion the mirror if it falls. Work slowly and carefully to loosen the adhesive. Applying heat with a hairdryer can soften glue for easier removal.
Protecting Yourself During Removal
- Wear safety goggles to shield your eyes from glass shards.
- Put on thick gloves to protect your hands from cuts.
- Wear long sleeves and pants to cover exposed skin.
- Use a dust mask if the glue produces fumes or dust.
- Clear the area of obstacles to prevent tripping or accidents.
Disposing Of The Mirror
Removing a mirror glued to the wall is only half the task; disposing of it responsibly is just as important. Mirrors contain glass and sometimes backing materials that need careful handling. Proper disposal helps protect the environment and keeps your home safe from broken glass hazards.
Recycling Options
Not all recycling centers accept mirrors because of their special coatings and backing. Check with your local recycling facility to see if they take mirrors or glass with reflective coatings. Some centers have specific drop-off days for hazardous or unusual waste items.
If your community doesn’t recycle mirrors, look for specialized glass recyclers who handle mirrors and tempered glass. You might find businesses that repurpose mirror glass into new products, reducing landfill waste.
Have you ever thought about donating a mirror that’s still intact? Thrift stores or community groups often welcome gently used mirrors, giving them a second life and saving you from disposal headaches.
Safe Disposal Methods
Mirrors can shatter easily, so safety comes first. Wrap the mirror in thick blankets or bubble wrap to prevent shards from flying if it breaks during transport.
Use sturdy cardboard or a wooden board to add extra protection around the mirror. Secure everything with strong tape to keep the package intact.
Dispose of the mirror according to your local waste guidelines. If curbside pickup accepts large items, schedule a special pickup and clearly mark the package as fragile. Otherwise, take it to a landfill or waste facility that accepts bulky items.
Remember, handling broken mirrors requires gloves and eye protection. Have you prepared your safety gear before tackling this task? It’s a small step that prevents injuries.

Credit: www.youtube.com
Frequently Asked Questions
How Do I Safely Remove A Mirror Glued To The Wall?
Start by loosening the adhesive using heat from a hairdryer or heat gun. Gently pry the mirror edges with a plastic scraper. Work slowly to avoid breaking the glass or damaging the wall.
What Tools Are Needed To Remove A Glued Mirror?
You will need a hairdryer or heat gun, a plastic scraper, gloves, safety glasses, and optionally a fishing line to cut through the adhesive.
Can I Remove A Glued Mirror Without Damaging The Wall?
Yes, by applying heat and carefully prying the mirror, you can minimize wall damage. Take your time and avoid using metal tools that can scratch the surface.
How Long Does It Take To Remove A Mirror Glued To The Wall?
The process usually takes 30 to 60 minutes depending on the adhesive strength and mirror size. Patience is key to avoid damage.
Conclusion
Removing a mirror glued to the wall takes patience and care. Use gentle tools and slow movements to avoid damage. Heat and softening agents help loosen the glue safely. Clean the wall after removal for a fresh look. Taking time ensures the best results without harm.
You can handle this task with simple steps and care. Keep safety in mind to protect yourself and your home. The process is easier than it seems with the right approach.


