
Are you looking to add a stylish mirror to your wall but unsure where to start? Mounting a mirror might seem tricky, but with the right steps, you can do it quickly and safely.
Imagine how much brighter and more spacious your room will feel once your mirror is perfectly hung. In this guide, you’ll discover easy-to-follow tips that save you time and avoid common mistakes. Keep reading, and you’ll gain the confidence to transform your space with a simple, beautiful mirror mount.
Choose The Right Mirror
Choosing the right mirror is essential for a successful wall mounting project. The perfect mirror complements your space and stays secure. It must fit your wall and suit your room’s style. A mirror that is too heavy or large can cause damage. The frame style and material affect the overall look and durability. Take time to pick a mirror that matches both your needs and decor.
Consider Mirror Size And Weight
Measure your wall space carefully before selecting a mirror. A mirror that is too big can overwhelm the room. Too small, and it may look out of place. The mirror’s weight impacts the type of mounting hardware needed. Heavy mirrors require strong anchors or studs for support. Lightweight mirrors offer more flexibility in placement. Always check the mirror’s weight to choose the right mounting method.
Select Frame Style And Material
The frame adds style and protects the mirror edges. Choose a frame that matches your room’s decor. Wood frames bring warmth and a classic look. Metal frames offer a modern and sleek appearance. Plastic or resin frames are budget-friendly and lightweight. The frame material also affects the mirror’s weight. Consider durability and ease of maintenance when selecting a frame.

Credit: www.amazon.com
Gather Necessary Tools
Gather a tape measure, level, drill, screws, and wall anchors before starting. Having the right tools ensures a smooth and safe mirror installation. Check that all items are ready to avoid interruptions.
Mounting a mirror on the wall can transform a room. It reflects light and adds style. Before starting, gather the necessary tools. This step ensures a smooth installation. The right tools make the job easier and safer. Let’s dive into what you need.Essential Tools List
- Measuring tape
- Level
- Pencil
- Drill with drill bits
- Screwdriver
- Wall anchors and screws
- Mirror clips or brackets
Safety Gear Tips
Safety is vital when using tools. Wear safety glasses to protect your eyes. Dust or debris might fly around. Gloves protect your hands during drilling. Use a step ladder if the mirror is high. Ensure the ladder is stable. Work in a well-lit area to see clearly. Gather these tools and gear before you begin. It prepares you for a smooth installation process. Enjoy the transformation a mirror brings to your space.Find The Perfect Spot
Finding the perfect spot to mount a mirror is key to enhancing your space. The right location affects light, room size perception, and decor balance. Consider the room’s function and natural light sources. Choose a wall that complements your furniture and style.
Check Wall Type
Identify the wall material before mounting. Common types include drywall, plaster, brick, or concrete. Each wall type needs different anchors or screws. Drywall requires anchors to hold weight safely. Brick or concrete walls need masonry drill bits and special anchors. Knowing your wall type ensures a secure mount and prevents damage.
Measure And Mark Placement
Measure the mirror’s dimensions and the wall space. Use a tape measure for accuracy. Mark the center point lightly with a pencil. Check the height for practical and aesthetic reasons. Eye level is usually best for full-length mirrors. Use a level tool to keep marks straight. Double-check measurements before drilling.
Prepare The Wall
Preparing the wall properly is key to safely mounting a mirror. A clean and stable surface ensures the mirror stays secure and looks great. Take time to ready the wall before hanging the mirror.
Clean The Surface
Remove dust, dirt, and grease from the wall. Use a mild cleaner or soapy water with a soft cloth. Let the wall dry completely before proceeding. A clean surface helps the mounting hardware stick better and prevents damage.
Locate Studs Or Use Anchors
Find studs behind the wall to support heavy mirrors. Use a stud finder to locate them easily. Mark the stud locations with a pencil. If no studs are available, choose strong wall anchors suitable for your wall type. Anchors provide extra hold and prevent the mirror from falling.
Mounting Methods
Choosing the right mounting method can make all the difference in how secure and attractive your mirror looks on the wall. Each technique offers its own benefits depending on your wall type, mirror size, and how permanent you want the installation to be. Let’s look closely at some common ways to mount a mirror so you can pick what suits your space best.
Using Hooks And Nails
Hooks and nails are classic tools for hanging mirrors. They work well for lightweight to medium-sized mirrors and are easy to install. All you need is a hammer, a level, and the right size hook or nail for your mirror’s weight.
Start by marking where the mirror will hang, then gently tap the nail or hook into the wall. Make sure it’s firmly in place before hanging your mirror. Have you checked if your mirror has hanging hardware on the back? This will guide exactly where you place your hooks or nails.
Installing Wall Anchors
Wall anchors provide extra support, especially for heavier mirrors or drywall surfaces that can’t hold nails alone. They spread the weight over a larger area, reducing the risk of damage or the mirror falling.
To install, drill a small hole into the wall, insert the anchor, then screw in your hook or screw. This method feels more secure, especially if you’ve ever had a mirror fall unexpectedly. What if your wall is plaster or drywall—anchors can be a game changer here.
Adhesive Mounting Options
Adhesive strips or glue can be a clean alternative if you want to avoid holes. Many adhesives are designed to hold surprisingly heavy mirrors and won’t damage your walls when removed properly.
Make sure the wall surface is clean and dry before applying adhesive. Press the mirror firmly against the wall and hold for the recommended time. Do you want a temporary or permanent solution? Adhesives offer flexibility but may not work well for very heavy or large mirrors.
Step-by-step Installation
Mounting a mirror on your wall can transform a room, but the process needs precision to ensure safety and style. Taking time to follow clear installation steps can save you from accidental damage or a crooked hang. Here’s a straightforward guide that breaks down the task into manageable actions.
Marking Drill Points
Start by deciding exactly where you want your mirror to hang. Hold the mirror against the wall and use a pencil to lightly mark the top edge and the sides for alignment. Then, identify where the mounting brackets or hooks will attach and mark those spots clearly.
Use a level to double-check that your marks are even—uneven drill points can cause your mirror to tilt. Have you ever hung something only to realize it’s slanting? Taking a few extra minutes now prevents that hassle later.
Drilling And Fixing Hardware
Choose drill bits that match the size of your wall anchors or screws. Drill carefully at the marked points, ensuring you don’t push too hard or too fast to avoid wall damage. If you’re drilling into drywall, use anchors for extra support; wooden studs require only screws.
Insert anchors if needed, then screw in the hooks or brackets firmly but without over-tightening. Remember, your mirror’s weight determines the type of hardware; heavier mirrors need stronger support. Have you checked your mirror’s weight before picking your hardware?
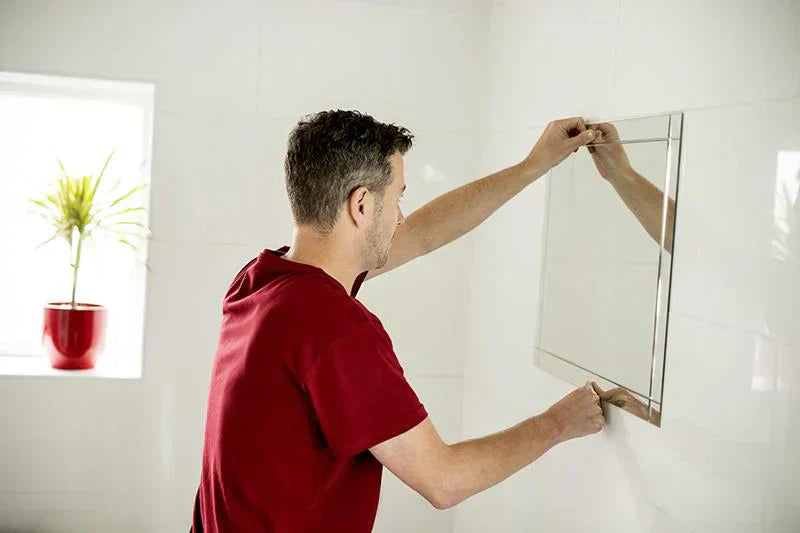
Hanging The Mirror
With hardware securely in place, carefully lift your mirror and align its hanging parts with the installed hooks or brackets. It helps to have someone assist you, especially if the mirror is large or heavy. Gently lower it onto the hardware and make sure it sits flush against the wall.
Once hung, step back and assess its alignment again with a level. Small adjustments can be made by slightly shifting the mirror. How does your reflection look now—perfectly centered or just a bit off? Adjust until it’s exactly how you want it.
Ensure Safety And Stability
Ensuring the safety and stability of your mounted mirror is crucial. A mirror that is not securely attached can fall, causing damage or injury. Taking the time to double-check every detail will give you peace of mind and keep your space safe.
Test Mirror Security
After hanging the mirror, gently press and wiggle it to check if it feels solid. If the mirror shifts or feels loose, it means the mounting hardware isn’t holding it firmly enough.
Make sure the screws or hooks are anchored properly into the wall studs or use strong wall anchors if studs aren’t available. You can also ask someone to hold the mirror while you test its stability from different angles.
Have you ever ignored a small wobble and regretted it later? Fixing a loose mirror early can save you from bigger problems down the line.
Adjust For Level And Alignment
Even a securely mounted mirror will look off if it’s not level. Use a spirit level or a smartphone level app to check the mirror’s alignment after mounting.
Small adjustments can make a huge difference in the overall look of your room. If the mirror isn’t perfectly straight, loosen the mounting slightly and adjust until it’s level.
Keep in mind that a crooked mirror can distract from the beauty of your space and even affect your mood. Ask yourself: is your mirror helping your room feel balanced and inviting?

Credit: www.framedisplays.com
Maintenance Tips
Proper maintenance keeps your wall mirror safe and looking great. Small efforts extend its life and prevent damage. Follow these simple tips to care for your mounted mirror every day.
Cleaning And Care
Use a soft, dry cloth to clean the mirror regularly. Avoid harsh chemicals that can damage the glass or frame. A mix of water and mild soap works well for stubborn spots. Gently wipe in circular motions to prevent streaks.
Keep the mirror away from direct sunlight to stop fading. Dust the frame often to maintain its shine. Check the edges for any signs of moisture or mold.
Inspecting Mounts Regularly
Check the mounts every few months to ensure they are secure. Look for loose screws or hooks that may cause the mirror to fall. Tighten any parts that feel unstable.
Notice any cracks or wall damage near the mounts. Fix these quickly to avoid bigger problems. Regular inspections prevent accidents and keep your mirror steady on the wall.

Credit: www.ebay.com
Frequently Asked Questions
How Do I Choose The Right Wall For Mounting A Mirror?
Select a sturdy, flat wall free from moisture. Avoid drywall without studs for heavy mirrors. Use a stud finder to locate secure spots. This ensures safety and prevents damage.
What Tools Are Needed To Mount A Mirror Properly?
You’ll need a drill, screws, anchors, a level, measuring tape, and a pencil. These tools help ensure the mirror is mounted securely and straight.
Can I Mount A Mirror On Drywall Without Studs?
Yes, but use strong wall anchors designed for drywall. They provide necessary support, preventing the mirror from falling or damaging the wall.
How High Should I Mount A Mirror On The Wall?
Mount the mirror at eye level, typically 57 to 65 inches from the floor. Adjust based on the average height of users for best visibility.
Conclusion
Mounting a mirror on the wall is simple with the right steps. Choose the right spot and tools before starting. Measure carefully to keep the mirror straight and safe. Use strong anchors for heavy mirrors to avoid accidents. Take your time and check your work often.
A well-mounted mirror brightens the room and adds style. Enjoy your new wall mirror and the fresh look it brings.


