
Have you ever wanted to add a personal touch to your space with a beautiful wall mirror? Making your own mirror is easier than you think, and it lets you create something truly unique for your home.
Imagine looking into a mirror that reflects your style and creativity every day. You’ll discover simple steps to craft a stunning wall mirror that fits your taste and budget. Ready to transform your walls and impress your guests? Let’s get started!
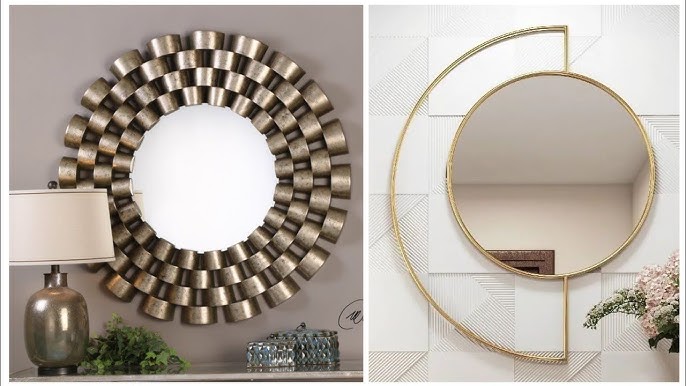
Choosing The Right Mirror
Choosing the right mirror is the foundation of creating a wall mirror that truly fits your space and style. It’s not just about picking any reflective surface; it’s about understanding what will enhance your room’s light, depth, and personality. Think about where the mirror will hang and what role it will play—decoration, functionality, or both.
Types Of Mirrors
Mirrors come in various types, each serving a different purpose and aesthetic.
- Standard glass mirrors:These are the most common and affordable, offering clear reflection for daily use.
- Beveled mirrors:Edges are cut at an angle, adding a subtle decorative touch without a frame.
- Tinted mirrors:These come in shades like bronze, gray, or green, perfect if you want a softer or moodier reflection.
- Antique and distressed mirrors:They bring character and a vintage feel, ideal for rustic or eclectic interiors.
Ask yourself what effect you want. Should the mirror brighten the room or add a design statement?
Size And Shape Considerations
Size matters more than you might think. A mirror too small can feel lost on a large wall, while one too big might overwhelm the space.
Measure the wall area first. Leave some breathing room around the mirror for a balanced look.
- Square and rectangular mirrors:Great for classic and modern spaces; they create clean lines.
- Round mirrors:Soften sharp corners and add a trendy vibe.
- Oval and irregular shapes:Bring an artistic or whimsical touch.
Consider what shape will complement your room’s architecture and furniture. Have you ever noticed how an oddly shaped mirror can become a conversation starter?
Selecting A Frame Style
The frame sets the tone for your mirror—whether it’s sleek, bold, subtle, or ornate.
Material choices are vast: wood, metal, plastic, or even rope for a coastal feel.
| Frame Material | Style | Best For |
|---|---|---|
| Wood | Rustic, traditional, or modern | Warmth and texture in living rooms or bedrooms |
| Metal | Industrial, minimalist, vintage | Urban lofts or contemporary spaces |
| Plastic or Resin | Colorful, playful, or budget-friendly | Kitchens, kids’ rooms, or casual areas |
Think about your existing décor. Will a heavy frame clash or complement your style? Sometimes, less frame is more if you want the mirror itself to shine.
Credit: uniquecreationsbyanita.com
Gathering Materials And Tools
Before you start making a wall mirror, gathering the right materials and tools is crucial. Having everything ready saves time and keeps your project running smoothly. It also helps you avoid frustrating trips to the store halfway through your work.
Essential Supplies
Start with a quality mirror glass cut to your desired size. Choose between a plain mirror or one with a beveled edge for a more polished look.
- Mirror glass (cut to size)
- Wood or metal frame (optional, depending on your design)
- Strong adhesive or mirror glue
- Backing board or plywood for support
- Hanging hardware like D-rings or wire
- Decorative elements such as paint, stain, or trim
Think about where your mirror will hang. Will it need extra support or moisture protection? This affects your choice of backing and frame materials.
Tools Needed
Having the right tools makes the process easier and safer. You don’t need an extensive toolkit, but some essentials are non-negotiable.
- Measuring tape or ruler
- Glass cutter (if cutting your own mirror)
- Utility knife
- Sandpaper (for smoothing edges)
- Clamps (to hold pieces while glue dries)
- Drill and screwdriver (for hanging hardware)
- Protective gloves
I once underestimated the value of clamps and ended up with a crooked frame. Having the right tool can save you from simple mistakes.
Safety Precautions
Working with glass and sharp tools can be risky. Protect yourself to avoid cuts or other injuries.
- Always wear safety gloves and goggles.
- Work on a flat, stable surface to prevent slipping.
- Handle glass edges carefully—they can be razor-sharp.
- Keep a first aid kit nearby just in case.
Do you have a well-lit workspace where you can focus without distractions? Safety starts with your environment as much as with your gear.
Preparing The Workspace
Preparing your workspace is a crucial step in crafting a wall mirror that looks professional and polished. A well-organized area not only boosts your efficiency but also ensures safety. Let’s dive into how you can transform your space into a mirror-making haven.
Clearing The Area
Start by removing any clutter from the area where you’ll be working. This not only reduces distractions but also minimizes the risk of accidents. Have you ever tripped over a stray object while focusing on a project? It’s not fun. Ensure there’s enough room to move around comfortably, allowing you to focus solely on your masterpiece.
Protecting Surfaces
Spread a drop cloth or old sheet over your work surface to shield it from glue, paint, or any other materials you might use. This simple step can save you from unwanted stains and scratches. It’s a little like wearing an apron while cooking—keeps things tidy and stress-free.
Setting Up Proper Lighting
Adequate lighting can make or break your workspace. Position a lamp or work light to illuminate your area, reducing the chances of errors. Have you noticed how much easier it is to read under good lighting? The same principle applies here, ensuring precision in your project.
Cutting And Shaping The Mirror
Cutting and shaping a mirror is a delicate task that requires precision and patience. Getting this step right ensures your wall mirror fits perfectly and looks professional. Let’s dive into the key parts of cutting and shaping your mirror safely and accurately.
Measuring And Marking
Start by measuring the exact size you want your mirror to be. Use a tape measure or ruler for accuracy and double-check your numbers. Mark the cutting lines clearly on the mirror’s surface with a fine-tip permanent marker or a grease pencil.
Remember, a small mistake in measurement can ruin the entire mirror. So, take your time and measure twice before marking once. Do you have a level handy? It helps to keep your lines perfectly straight and avoids any crooked cuts.
Using A Glass Cutter
A glass cutter is essential for scoring the mirror along your marked lines. Hold the cutter firmly and apply consistent pressure as you draw the tool across the glass. You should hear a faint scratching sound — that means you’re doing it right.
Don’t rush this step; a slow, steady motion prevents uneven scoring. After scoring, gently tap the back of the mirror along the score line or use running pliers to snap the glass cleanly. Have you practiced on a scrap piece? It can boost your confidence before working on the final mirror.
Smoothing Edges Safely
Once your mirror is cut, the edges will be sharp and potentially dangerous. Use fine-grit sandpaper or a diamond sanding pad to smooth the edges carefully. Wear gloves and eye protection to avoid injury during this process.
Take your time with this step—it not only makes your mirror safer to handle but also gives it a polished, finished look. How smooth are your edges? Run your fingers gently along them to check for any rough spots before mounting your mirror on the wall.
Creating Or Assembling The Frame
Creating or assembling the frame is a key part of making a wall mirror. The frame holds the mirror securely and adds style. Choosing the right materials and joining the pieces properly ensures the frame looks good and lasts long.
Focus on selecting materials that fit your style and skills. Accurate cuts and strong joints keep the frame sturdy. Finishing the frame with paint or varnish gives a polished look and protects the wood or other materials.
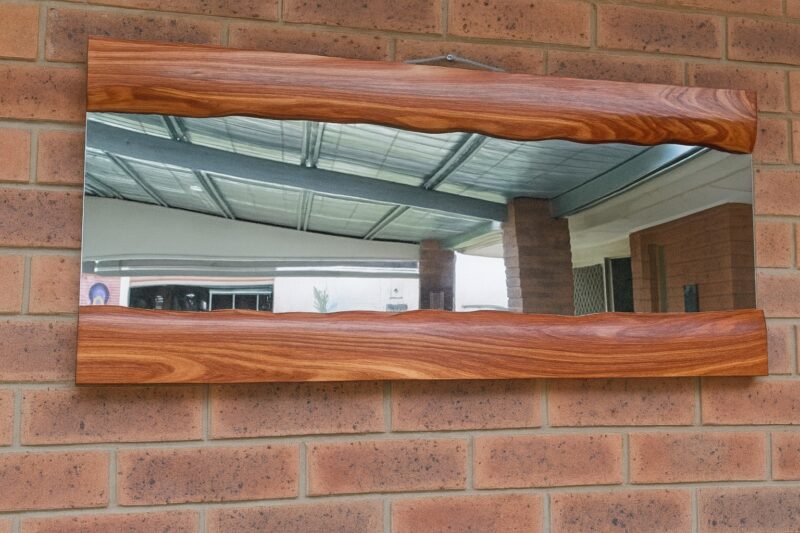
Frame Materials Options
- Wood: Classic, easy to work with, and can be painted or stained.
- Metal: Offers a modern look but needs special tools for cutting and joining.
- Plastic or acrylic: Lightweight and often ready-made, great for simple frames.
- Reclaimed materials: Eco-friendly and unique, adds character to the mirror.
Cutting And Joining Frame Pieces
Measure the mirror size carefully before cutting frame pieces. Cut wood or other materials at 45-degree angles for neat corners. Use a miter box or saw for accurate cuts.
Join frame pieces with wood glue and nails or screws for strength. Clamps help hold the frame together while glue dries. Check corners to keep them square and even.
Finishing The Frame
Sand the frame surface to smooth any rough edges. Apply primer if painting, or stain for a natural wood look. Use a clear varnish or sealant to protect the frame from damage.
Let each coat dry fully before adding another. This step improves durability and enhances the frame’s appearance. Attach hanging hardware after finishing for easy wall mounting.

Credit: www.youtube.com
Mounting The Mirror Into The Frame
Mounting the mirror into the frame is a key part of creating a beautiful wall mirror. This step makes sure the mirror stays in place and looks great. Proper mounting protects the mirror from damage and keeps it safe on the wall.
Careful attention to each detail helps achieve a sturdy and polished finish. Use the right tools and materials for the best results. Follow simple tips to secure the mirror firmly inside the frame.
Attaching Mirror Securely
Place the mirror gently inside the frame. Use mirror clips or strong adhesive to hold it in place. Press evenly around the edges to avoid gaps. Check that the mirror fits snugly without moving.
Adding Backing Support
Cut a piece of sturdy backing board to fit the frame. Attach the backing with small nails or strong tape. This adds extra support behind the mirror. It keeps the mirror stable and protects it from breaking.
Ensuring Stability
Test the mirror by gently pressing on the glass. It should not wobble or shift inside the frame. Add extra clips or cushioning if needed. Make sure the frame hangs flat and balanced on the wall.
Adding Decorative Touches
Adding decorative touches to your wall mirror can transform a simple piece into a stunning focal point. These details allow you to express your style and make the mirror truly yours. Whether you prefer bold colors or subtle accents, the right choices can elevate your mirror’s look and fit perfectly in your space.
Painting And Staining
Choosing the right paint or stain can completely change the mood of your mirror frame. Bright colors add energy, while muted tones create a calm, sophisticated vibe.
Try experimenting with different finishes like matte, glossy, or chalk paint. I once painted a mirror frame with metallic gold paint, and it instantly brightened up my living room.
Staining wood brings out natural grain patterns and adds warmth. Don’t forget to test your paint or stain on a small area first to see how it looks when dry.
Embellishments And Accents
Adding small decorative elements can make your mirror stand out. Think about attaching beads, shells, or tiny mosaic tiles around the edges.
Use glue or small nails to secure these accents firmly. I found that adding a row of brass nailheads gave my mirror a chic, modern look without much effort.
Consider using fabric or rope to wrap parts of the frame for texture. These details invite closer inspection and add personality to your mirror.
Customizing For Your Space
How will your mirror fit into your room’s style and size? Tailoring your design to complement your space ensures it won’t feel out of place.
If your room is small, keep decorations minimal to avoid overwhelming the area. In larger rooms, you can be bolder with size and detail.
Think about the mirror’s purpose, too. A mirror in a hallway might benefit from brighter colors to reflect light, while one in a bedroom might call for softer, calming hues.
Installing The Wall Mirror
Installing a wall mirror might seem straightforward, but the right approach ensures safety and style. The process begins with picking the perfect spot and ends with a secure hang that lasts. Pay attention to details, and your mirror will not only look great but also stay put for years.
Choosing The Location
Where you place your mirror changes the entire room’s feel. Think about natural light—mirrors near windows reflect light and brighten space. But avoid spots where the mirror can catch direct sun all day, which might cause fading or glare.
Also, consider what the mirror will reflect. Do you want it to show a beautiful view or make a small room seem larger? Your mirror’s placement should enhance the room, not create awkward reflections.
Using Proper Wall Anchors
Wall anchors are your mirror’s best friend, especially if you can’t find studs behind the wall. Using the right anchors prevents damage and keeps the mirror secure. Plastic anchors work for lightweight mirrors, but heavier ones need metal or toggle anchors.
I once hung a large mirror with just nails and had it fall after a few days. Using proper anchors prevents this and gives you peace of mind. Always check the weight rating on the anchors before buying.
Hanging Techniques
There are several ways to hang a mirror, but choosing the right one depends on the mirror’s size and frame. D-rings with wire allow some adjustment and are great for heavier mirrors. For smaller, lighter mirrors, sawtooth hangers or adhesive hooks might work.
Use a level to make sure your mirror is perfectly straight. Even a slight tilt can be distracting. If you’re hanging a heavy mirror, get help to hold it while you mark and drill holes.
Maintaining Your Mirror
Keeping your wall mirror in good condition extends its life and keeps it beautiful. Regular care helps avoid dullness and damage. Small efforts protect your investment and maintain its shine.
Cleaning Tips
Use a soft, lint-free cloth for cleaning. Avoid abrasive materials that scratch the surface. Spray glass cleaner on the cloth, not directly on the mirror. Wipe gently in a circular motion to remove spots. For stubborn marks, use a mixture of water and vinegar. Dry the mirror with a clean cloth to prevent streaks.
Preventing Damage
Hang the mirror securely to avoid falls. Choose a spot away from direct sunlight to prevent discoloration. Keep the mirror away from moisture and humidity to stop mold growth. Avoid using harsh chemicals that can damage the frame or glass. Check the frame regularly for loose parts or cracks. Tighten screws and fix small issues promptly.
Refreshing The Look
Update the frame with a fresh coat of paint or stain. Add decorative elements like stickers or decals for a new style. Replace old or worn-out parts to maintain a clean look. Rotate the mirror occasionally to expose different lighting and angles. Use a gentle polish on wooden frames to restore shine.

Credit: ehomemart.com
Frequently Asked Questions
What Materials Do I Need To Make A Wall Mirror?
To make a wall mirror, you need glass or acrylic mirror, frame material, adhesive, hanging hardware, and measuring tools. Choose materials based on your design and budget. Ensure the frame complements your room decor for a stylish finish.
How Do I Safely Cut A Mirror For My Project?
Use a glass cutter and a straight edge to score the mirror surface. Apply gentle pressure and snap the mirror along the scored line. Always wear safety gloves and goggles to protect yourself during cutting.
What Type Of Frame Works Best For Wall Mirrors?
Wood frames offer a classic look, while metal frames add modern style. Choose frames that suit your room’s theme and mirror size. Lightweight frames are easier to hang and handle safely.
How Can I Securely Hang A Diy Wall Mirror?
Use sturdy wall anchors or screws suitable for your wall type. Attach hanging hardware firmly to the mirror frame. Always check the mirror’s weight and choose hangers that support it safely.
Conclusion
Making a wall mirror is simple and fun. You only need a few tools and some patience. The steps are clear and easy to follow. A handmade mirror adds charm to any room. It also shows your creativity and effort.
Try making one yourself to enjoy the process. You will feel proud of your work. A wall mirror can brighten up your space nicely. Start your project today and see the difference it makes.


