
Have you ever faced the frustrating challenge of removing a mirror glued to your wall? It’s tricky, isn’t it?
You want to take it down without damaging your wall or the mirror itself. You might be worried about how to do it safely and effectively. In this guide, you’ll discover simple, step-by-step methods that anyone can follow. By the end, you’ll have the confidence to remove that stubborn mirror with ease.
Keep reading to learn the secrets to a smooth, damage-free removal.
Tools Needed
Removing a mirror glued to a wall requires the right set of tools. Proper tools make the job safer and easier. Without them, you risk damage or injury. Prepare your workspace with these essential items before starting.
Protective Gear
- Safety goggles to protect your eyes from glass shards.
- Heavy-duty gloves to shield your hands from cuts.
- Long sleeves and pants to protect your skin from adhesive and sharp edges.
- A dust mask to avoid inhaling any dust or fumes from adhesive removers.
Cutting Tools
- Utility knife with a sharp blade for scoring the adhesive line.
- Putty knife or scraper to gently pry the mirror away from the wall.
- Wire or dental floss to slide behind the mirror and cut through the glue.
- Heat gun or hairdryer to soften the adhesive for easier removal.
Adhesive Removers
- Commercial adhesive remover suitable for wall surfaces.
- Rubbing alcohol or acetone for small adhesive spots.
- Soft cloths or sponges to apply and wipe off adhesive remover.
- Warm soapy water to clean the wall after removing adhesive.
Credit: bfymirror.com
Preparing The Area
Clear the area around the mirror to avoid damage and give yourself room to work. Lay down a drop cloth to protect the floor from debris and tools. Gather all necessary tools before starting to make the process smoother.
Removing a mirror glued to a wall can seem daunting, but with the right preparation, you’ll set yourself up for a smooth process. Before you start prying that mirror off, it’s crucial to prepare the area to ensure safety and minimize potential damage. With a few simple steps, you can create a workspace that makes the task much easier.Clear Surroundings
Begin by clearing the area around the mirror. Remove any furniture, decorations, or other objects that could be in your way or at risk of damage. This not only provides you with a clutter-free space to work but also ensures that you have enough room to maneuver tools and the mirror itself. Consider the last time you tackled a home project and had to constantly move things out of the way—frustrating, right? Avoid this by taking a few minutes to create a clean, open area.Protect Floor And Walls
Next, focus on protecting your floor and walls. Lay down a heavy-duty drop cloth or old blanket beneath the mirror. This will catch any glass shards if the mirror breaks and protect the floor from scratches. Securely tape cardboard or foam padding to the wall around the mirror. This precaution helps prevent unintentional gouges or scrapes. Imagine the relief of not having to repair a scratched floor or wall after removing the mirror. With these protective measures in place, you can proceed confidently, knowing your surroundings are shielded from potential mishaps.Assessing The Mirror Attachment
Before you start removing a mirror glued to your wall, take time to assess how it’s attached. This step is crucial to avoid damage to both the mirror and your wall. Knowing what you’re dealing with will help you choose the safest and most effective removal method.
Type Of Adhesive
Different adhesives require different approaches. Some mirrors are attached with strong construction glue, while others use double-sided tape or silicone sealant.
Look closely at the edges of the mirror. Is there any visible seal or residue? This can give clues about the adhesive type.
Have you ever struggled to remove something sticky only to find it tears the surface underneath? Identifying the adhesive helps you plan how to soften or break it down without causing damage.
Mirror Size And Weight
The size and weight of your mirror play a big role in how you handle it. Larger mirrors are heavier and require more care during removal to avoid cracking or injury.
Ask yourself: Can you safely support the mirror’s weight alone, or do you need a helper? Also, consider the tools you might need to support or lift the mirror once the adhesive is loosened.
Remember, a small mirror might come off easily with gentle prying, but a large one glued firmly to the wall demands patience and extra caution.
Removing The Mirror Safely
Removing a mirror glued to a wall demands care and patience. The goal is to avoid damage to the wall and the mirror itself. Using the right techniques can make this task safer and easier. Always prepare the area and protect yourself before starting.
Loosening With Heat
Heat softens the adhesive behind the mirror. Use a hairdryer or heat gun on low setting. Move the heat source slowly across the edges of the mirror. Keep the heat steady but not too hot to avoid cracking the glass. After heating, test if the mirror feels less stuck. Repeat as needed until the glue softens.
Using A Wire Or String
A thin wire or strong string can cut through the glue. Slide the wire gently behind the mirror at the bottom edge. Hold both ends and saw back and forth slowly. This action helps break the glue bond without force. Work carefully to prevent scratches or breaks. Wear gloves to protect your hands from sharp edges.
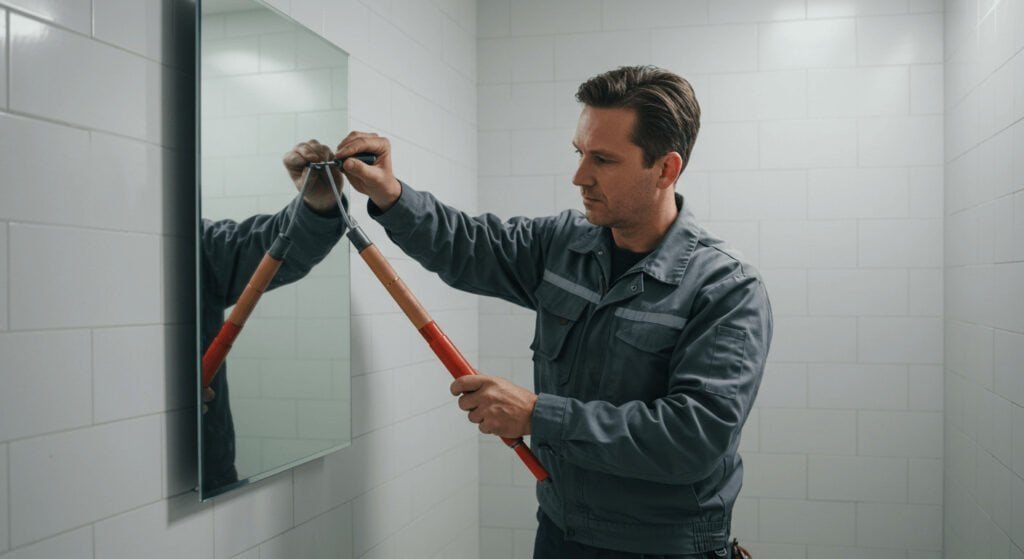
Prying Gently
Use a flat tool like a putty knife or plastic spatula. Insert it carefully between the mirror and the wall. Apply gentle pressure to create a small gap. Avoid using metal tools that may damage the mirror. Work around the edges, easing the mirror away step by step. Stop if the mirror resists too much and try heating or wiring again.
Handling Adhesive Residue
After removing a mirror glued to your wall, you’re often left with stubborn adhesive residue that can be tricky to clear. Handling this residue carefully is key to protecting your wall’s surface while restoring a clean look. You’ll need a mix of patience, the right tools, and some hands-on techniques to get the job done effectively.
Softening With Heat
Heat can make adhesive soft and pliable, making it easier to remove. Use a hairdryer on medium heat and hold it a few inches from the residue. Heat the area evenly for a minute or two, then try wiping away the softened glue with a cloth.
Be cautious not to overheat the wall, especially if it’s painted or wallpapered. Too much heat can cause damage or discoloration. Have you noticed how gentle warmth can transform something hard into something easily handled? That’s the power of softening adhesive with heat.
Using Solvents
Solvents like rubbing alcohol, acetone, or commercial adhesive removers can break down glue bonds. Apply a small amount to a clean cloth and dab it on the residue. Let it sit for a few minutes to work its magic before gently rubbing the area.
Always test the solvent on a hidden spot first to avoid damage. Some walls react differently to chemicals, so a quick patch test saves frustration later. What if a simple liquid could dissolve the stubborn glue without scrubbing endlessly? It’s worth trying.
Scraping Carefully
Sometimes, scraping is necessary to remove thick adhesive patches. Use a plastic scraper or an old credit card to avoid scratching the wall. Work slowly and gently, lifting the glue bit by bit instead of forcing it all at once.
If you rush, you risk damaging your wall’s surface, which means more work down the line. Have you ever found that a careful touch beats brute force every time? That applies perfectly here when scraping adhesive residue.
Repairing The Wall
After removing a mirror glued to the wall, the surface often needs attention. Repairing the wall restores its smoothness and prepares it for repainting or new decoration. Careful repair work ensures the wall looks as good as new.
Cleaning Surface
Start by removing all glue and dust from the wall. Use a scraper to lift off large glue pieces. Then wipe the area with a damp cloth. Allow the wall to dry completely before moving on.
Filling Holes And Cracks
Inspect the wall for holes or cracks left by the mirror or glue. Use a putty knife to apply wall filler or spackle. Press the filler firmly into each hole or crack. Smooth the surface and let the filler dry as per instructions.
Sanding And Painting
Once the filler dries, sand the wall with fine-grit sandpaper. Sand until the surface feels even and smooth. Remove dust with a dry cloth. Apply primer if needed, then paint the wall to match the rest of the room.
Preventing Damage
Removing a mirror glued to the wall can be tricky, especially if you want to keep both the mirror and the wall in good condition. Preventing damage is key to a smooth removal process. Taking your time and using the right techniques can save you a lot of frustration and costly repairs.
Working Slowly
Patience is your best tool here. Rushing can cause cracks in the mirror or pull off chunks of paint and drywall. Gently easing the mirror away from the wall lets the adhesive soften gradually, reducing the risk of damage.
Try to peel back small sections at a time instead of pulling the whole mirror off at once. This approach gives you better control and helps you spot any weak spots before they get worse. Have you ever tried to peel a sticker off too fast and ended up tearing it? The same idea applies.
Avoiding Excess Force
It’s tempting to just yank the mirror off, especially if it feels stuck. But using too much force can shatter the glass and ruin your wall’s surface. Instead, apply steady, gentle pressure to loosen the adhesive.
If the mirror resists, stop and reassess rather than forcing it. Excess force often leads to chipped edges or holes in the drywall, which means extra repair work. Can you imagine dealing with broken glass and patching a wall afterward? Avoid that by keeping your hands steady and your grip firm but gentle.
Using Proper Tools
Having the right tools makes a big difference. A thin putty knife or a plastic scraper can help you slide under the mirror without scratching it. Avoid metal tools with sharp edges, as they can gouge the wall or crack the glass.
Heat guns or hair dryers can soften glue, making it easier to lift the mirror without damage. Just be careful not to overheat the glass, which could cause it to crack. Do you have a tool kit ready for this project? Gathering the right tools beforehand will save you time and headaches.

Credit: www.youtube.com

Credit: www.angi.com
Frequently Asked Questions
How Do I Safely Remove A Mirror Glued To A Wall?
To safely remove a glued mirror, use heat to soften the adhesive. Apply a heat gun or hairdryer evenly. Gently pry the mirror with a putty knife or wire. Work slowly to avoid damage or injury.
What Tools Are Needed To Remove A Glued Mirror?
You need a heat gun or hairdryer, a putty knife, safety gloves, and protective eyewear. Optional tools include dental floss or a wire saw to help cut through adhesive.
Can I Reuse A Mirror After Removing It From The Wall?
Yes, if removed carefully without cracks or chips. Clean off any leftover adhesive with a solvent. Handle the mirror gently to maintain its condition for reuse.
How Long Does It Take To Remove A Glued Mirror?
It typically takes 30 minutes to 1 hour, depending on mirror size and adhesive strength. Patience is key to avoid damage during removal.
Conclusion
Removing a mirror glued to the wall takes patience and care. Use the right tools and techniques to avoid damage. Take your time and work gently to loosen the glue. Safety matters—wear gloves and protect your eyes. Clean the wall after removal to prepare for new decor.
Small steps lead to good results. This guide helps you do the job safely and smoothly. Now, you can remove your mirror with confidence and ease.


