
Are you looking to transform your space quickly and easily? Hanging a tapestry on your wall is one of the simplest ways to add color, texture, and personality to any room.
But if you’re unsure how to do it without damaging your walls or the fabric, you’re in the right place. In this guide, you’ll discover step-by-step tips that make hanging your tapestry stress-free and stylish. Keep reading, and you’ll have your wall looking amazing in no time!
Choosing The Right Spot
Choosing the right spot to hang your tapestry can completely change the vibe of a room. It’s not just about finding an empty wall; it’s about understanding your space and how the tapestry interacts with it. The right location will highlight your tapestry’s design while enhancing the overall feel of your home.
Assessing Wall Space
Look closely at the walls you have available. Is there a large blank area that feels cold or empty? Tapestries work best on walls with enough space to let their patterns breathe.
Measure the width and height of the wall space before you hang. This helps avoid a tapestry that feels cramped or lost. Think about how the tapestry fits with other wall elements like shelves or pictures.
Considering Lighting
Lighting can make or break how your tapestry looks. Natural light brings out colors vividly, but too much direct sunlight might fade the fabric over time.
Try placing the tapestry where it gets indirect sunlight or use soft artificial lighting to highlight its details. Have you noticed how a well-lit tapestry becomes a natural focal point in the room?
Avoiding High-traffic Areas
High-traffic zones might seem convenient but can cause wear and tear on your tapestry. Think about how often people pass by or if furniture might brush against the fabric.
Hanging your tapestry away from doorways, hallways, or spots where kids and pets play keeps it looking fresh longer. Protecting your tapestry means fewer repairs and more enjoyment.

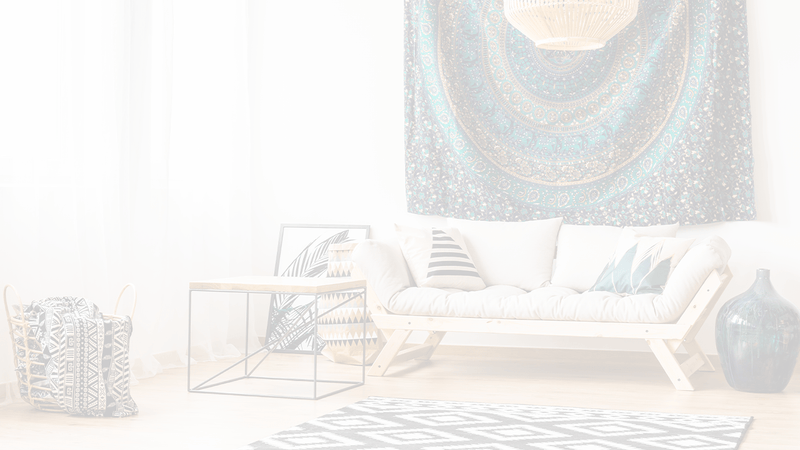
Credit: www.amazon.com
Selecting Hanging Methods
Selecting the right hanging method for your tapestry depends on the wall type and the tapestry’s weight. Each method offers different benefits. Some are better for heavy fabrics, while others protect delicate walls. Choosing the right option helps keep your tapestry secure and your wall undamaged.
Using Nails And Hooks
Nails and hooks provide a strong hold for heavier tapestries. Use small nails or picture hooks to avoid wall damage. Space the nails evenly for balanced support. This method works well on drywall and wooden walls. It offers a classic, reliable way to display your tapestry.
Applying Adhesive Strips
Adhesive strips are perfect for renters or delicate walls. They stick firmly without nails or holes. Choose strips rated for the tapestry’s weight. Clean the wall surface before applying. Remove strips gently to avoid paint damage. This method is quick and leaves no marks.
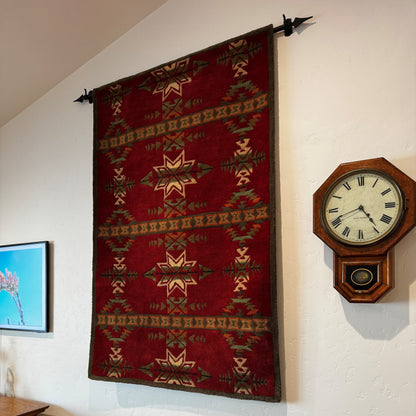
Employing A Rod Or Dowel
A rod or dowel adds a decorative touch and keeps the tapestry flat. Slide the fabric over the rod or sew a pocket for it. Hang the rod using brackets or hooks attached to the wall. This method suits large tapestries and creates a polished look.
Exploring Velcro Options
Velcro strips offer flexibility for hanging and removal. Attach one side to the tapestry and the other to the wall. Press firmly to secure. This method works well for lightweight fabrics. Velcro allows easy repositioning without wall damage.
Preparing The Tapestry
Choose a clean, smooth wall free of dust or nails. Lay your tapestry flat to check for wrinkles or damage before hanging. Gather needed tools like nails, hooks, or adhesive strips for easy installation.
Preparing the Tapestry Before you can transform your plain wall with a striking tapestry, you must ensure it is well-prepared. This step is crucial for achieving a seamless, polished look. By paying attention to the details, you ensure your tapestry hangs perfectly and remains in great condition.Measuring And Marking
Begin by measuring your tapestry to understand its dimensions. Use a measuring tape to get the height and width. Once you have these, decide where you want it on your wall. Mark the desired location using a pencil. Ensure these marks are level by using a spirit level. This prevents a crooked display, which can detract from the beauty of your tapestry.Adding A Sleeve Or Rod Pocket
Consider adding a sleeve or rod pocket to the back of your tapestry. This can make hanging easier and provides a sturdy base. If your tapestry doesn’t have one, you can sew a fabric strip along the top edge. Ensure the sleeve is wide enough to accommodate your hanging rod. This step not only simplifies the hanging process but also enhances the tapestry’s overall appearance.Reinforcing Edges
Check the edges of your tapestry for any signs of fraying or wear. Reinforcing these edges can prevent future damage. You can use fabric glue or a sewing machine to strengthen them. This is particularly important if your tapestry is vintage or delicate. Reinforcing the edges ensures longevity, allowing you to enjoy your beautiful wall art for years to come.
Credit: americanartdecor.com
Step-by-step Hanging Process
Hanging a tapestry can instantly transform your space, but getting it right requires more than just a quick nail in the wall. Paying attention to each step makes sure your tapestry stays secure and looks amazing. Let’s break down the process into clear, manageable actions so you feel confident tackling this project.
Gathering Tools And Materials
Before you start, collect all the necessary tools and materials. You’ll need:
- A measuring tape or ruler
- A pencil for marking
- Wall hooks, nails, or adhesive strips (choose based on your wall type and tapestry weight)
- A hammer or drill
- A level to keep your tapestry straight
Having everything at hand prevents interruptions and keeps you focused. Ever started a project only to realize you’re missing that one essential tool? Avoid that frustration by preparing upfront.
Marking Wall Points
Decide exactly where your tapestry will hang. Use the measuring tape to find the center point on the wall and mark it lightly with a pencil. This helps you visualize the tapestry’s placement and ensures it’s balanced.
Next, mark the spots where the hardware will go. If your tapestry has loops or a rod pocket, measure their distance and mark accordingly. Using a level here prevents crooked hanging, which can ruin the look.
Installing Hardware
Choose the right hardware based on your wall and tapestry weight. For heavy tapestries, anchors or wall hooks provide better support than nails. If your tapestry is light, adhesive strips can work without damaging your walls.
Carefully install the hardware at your marked points. Take your time to make sure everything is secure. Remember, loose hooks can cause your tapestry to fall unexpectedly.
Mounting The Tapestry
Now it’s time to hang your tapestry. Align the tapestry’s loops or top edge with the installed hardware. If you’re using a rod, slide it through the tapestry’s pocket and rest it on the hooks.
Step back and check if the tapestry hangs evenly. Adjust as needed by slightly shifting the tapestry or hardware. A perfectly hung tapestry can become the focal point of your room, so don’t rush this step.
Maintaining Your Display
Maintaining your tapestry display goes beyond just hanging it on the wall. It’s about preserving its colors, texture, and overall beauty so it remains a striking part of your space for years. Regular care helps you avoid common issues like fading, dust buildup, and fabric damage.
Cleaning Tips
Dust your tapestry gently with a soft brush or a vacuum cleaner using a low suction setting and a brush attachment. This keeps the fabric fresh without causing wear.
If stains appear, spot clean with a mild detergent mixed with water, using a soft cloth. Avoid soaking the tapestry, as excess moisture can weaken the fibers.
Consider professional cleaning for delicate or antique tapestries to ensure proper care without risking damage.
Preventing Damage
Keep your tapestry away from direct sunlight to prevent colors from fading quickly. Does your wall face the afternoon sun? Adding UV-protective film to windows can help.
Use secure hanging methods like velcro strips, rods, or clips designed for wall art to avoid unnecessary stress on the fabric. Loose or heavy hanging can cause sagging or tears over time.
Keep pets and sharp objects at a distance. Even a curious cat or a careless brush can pull threads or leave snags.
Seasonal Adjustments
Rotate your tapestry seasonally to reduce prolonged exposure to light and dust in one spot. This simple habit can extend its lifespan.
In humid months, watch for signs of mold or mildew. Use a dehumidifier or air conditioner to maintain a dry environment.
During colder seasons, avoid hanging the tapestry near heat sources like radiators or fireplaces, which can dry out and weaken fibers.
Creative Display Ideas
Creative display ideas can transform your tapestry from a simple wall hanging into a stunning focal point. The way you present your tapestry can completely change the mood and style of your room. Let’s dive into some inventive ways to showcase your tapestry that will inspire you to rethink your walls.
Layering With Other Wall Art
Have you ever thought about mixing your tapestry with other types of wall art? Layering adds depth and personality to your space. Try hanging smaller framed photos or prints around or partially over the edges of your tapestry.
Use a mix of textures and sizes to create visual interest. For example, a sleek metal frame next to a soft fabric tapestry creates a striking contrast. This approach lets your tapestry stand out while complementing other art pieces.
Using Tapestries As Room Dividers
Why limit your tapestry to just a wall? You can use it to divide spaces in an open room. Hanging a tapestry from the ceiling or on a tension rod creates a flexible, artistic partition.
This works especially well in studio apartments or shared rooms. It provides privacy without the permanence of walls and adds warmth to the space. Have you tried using a tapestry this way to define different zones in your home?
Incorporating Lighting Effects
Lighting can make your tapestry pop in ways you might not expect. Try placing soft LED strip lights behind your tapestry to create a glowing halo effect. This adds drama and highlights the colors and patterns.
Spotlights or picture lights focused on your tapestry can also enhance its texture and details. Play with warm and cool light tones to see which brings out the best in your tapestry’s design. How could different lighting change the atmosphere in your room?
Credit: ironhardware.com
Frequently Asked Questions
How Do I Choose The Right Wall For Hanging A Tapestry?
Select a smooth, clean wall free of moisture and direct sunlight. This helps prevent damage and fading. Ensure the wall is sturdy enough to hold the tapestry’s weight safely.
What Tools Do I Need To Hang A Tapestry Properly?
You will need nails, hooks, or adhesive strips depending on your wall type. A measuring tape and level ensure even placement. Use pins or a rod pocket for lightweight tapestries.
Can I Hang A Tapestry Without Damaging The Wall?
Yes, use removable adhesive strips or hooks designed for tapestries. These options cause minimal to no wall damage. Avoid heavy nails if you want to protect your wall surface.
How High Should I Hang A Tapestry On The Wall?
Hang the tapestry at eye level for best visibility and impact. Typically, the center should be about 57 to 60 inches from the floor. Adjust based on wall space and furniture placement.
Conclusion
Hanging a tapestry can change your room’s look fast. Choose the right spot and tools for best results. Take your time to measure and place it well. Keep your wall safe by using gentle hooks or nails. Enjoy the new style and cozy feel it brings.
This simple step adds color and warmth to any space. Try different ways until you find what fits you. Your wall can become a beautiful, personal art piece.


