
Are you ready to transform a plain large tapestry into a stunning work of art? Creating patterns in large tapestries might seem tricky at first, but with the right steps, you can design something truly unique and eye-catching.
This guide will show you simple ways to plan and make patterns that fit perfectly on big fabrics. By the end, you’ll have the confidence to bring your creative ideas to life and impress everyone with your skills. Keep reading, and let’s make your tapestry stand out like never before!
Choosing The Right Materials
Choosing the right materials is key to creating a beautiful large tapestry. The materials affect the look, feel, and durability of your work. Good choices make the crafting process smoother and the final product more impressive.
Start by understanding the types of yarn, needles, and fabric. Each plays a special role in the tapestry’s texture and strength. Proper selection saves time and helps avoid frustration during weaving or knitting.
Selecting Yarn Types
Yarn comes in many varieties. Wool is warm and strong, perfect for large tapestries. Cotton is soft and easy to handle, good for beginners. Acrylic is affordable and comes in many colors. Consider the yarn thickness; thicker yarns create bold patterns but use more material. Thin yarns give delicate details but take longer.
Picking Suitable Needles
Needles must match your yarn weight. Large tapestries need strong, sturdy needles. Metal needles last longer and slide yarn smoothly. Bamboo needles feel warm and reduce slipping. Circular needles work well for big projects because they hold many stitches. Choose needle length to fit the width of your tapestry.
Fabric Choices For Large Tapestries
The fabric acts as the base of the tapestry. Canvas is a popular choice for its strength and even weave. Linen fabric offers a natural texture and durability. Cotton fabric is soft and easy to work with but less durable. Check fabric thickness; thick fabric supports heavy yarns better. Ensure the fabric size fits your project plan.

Credit: littlelooms.com
Designing Your Pattern
Designing your pattern for a large tapestry is where your creativity truly takes shape. This stage sets the foundation for the entire project, so it’s important to approach it with clarity and purpose. You want your design to be both visually appealing and manageable, especially given the scale of a large tapestry.
Sketching Basic Shapes
Start by drawing simple shapes that represent the main elements of your design. Circles, squares, triangles, and lines can form the skeleton of your pattern. Don’t worry about details yet; focus on balance and composition.
Try sketching multiple versions with different arrangements. You might find that moving a shape slightly changes the entire feel of the design. This experimentation helps you discover what works best before committing to complex details.
Incorporating Color Schemes
Choosing colors early on saves you from costly changes later. Pick a palette of 3 to 5 colors that complement each other well. Think about how colors will look when woven together and how they affect the mood of the tapestry.
Test your chosen colors on small swatches or digital mock-ups. Does the contrast highlight key shapes? Are the tones harmonious or intentionally bold? These questions guide your decisions and prevent surprises during weaving.
Using Graph Paper For Precision
Graph paper is your best tool for translating a sketch into a woven pattern. Each square can represent a stitch or a small group of stitches, helping you plan size and detail accurately. It keeps your design aligned and consistent across the large surface.
Mark your color changes and shapes directly on the grid. This way, you can count stitches and rows easily, avoiding confusion as you work. Have you tried this approach? Many find it turns a daunting large tapestry project into manageable steps.
Scaling Patterns For Large Projects
Scaling patterns for large tapestry projects can be challenging but rewarding. You need to keep the design clear and balanced across a bigger surface. Getting this right ensures your tapestry looks professional and visually appealing, no matter the size.
Enlarging Small Designs
Start by breaking your small design into a grid. Each square on the grid corresponds to a section of your tapestry. This technique helps you enlarge the design accurately without losing detail.
Use graph paper or digital tools to redraw the pattern on a larger scale. For example, if your original grid is 1×1 inch, make the new grid 3×3 inches. This simple multiplication keeps everything in place.
Maintaining Proportions
Keeping proportions correct is crucial. Stretching one part of the pattern more than another can ruin the overall look. Always measure and compare different parts of your design as you scale.
Keep asking yourself: Does the enlarged section look balanced compared to the rest? This check avoids awkward shapes and distorted motifs. Use rulers or software guides to stay precise.
Adapting Patterns For Different Sizes
Not all designs work well when simply enlarged. Sometimes, you need to tweak elements to fit the new size. Consider adding or removing details to maintain harmony.
For instance, small intricate patterns might become too busy on a large tapestry. You could simplify these areas or spread them out to give the design space to breathe. What parts of your pattern can you adjust without losing its essence?
Techniques For Efficient Weaving
Efficient weaving is key to creating stunning patterns in a large tapestry without getting overwhelmed. The right techniques help you save time, reduce mistakes, and keep your design crisp and clear. Let’s dig into some essential practices that make weaving smoother and more enjoyable for you.
Setting Up The Loom
Start by choosing a sturdy loom that fits your tapestry size. A well-tensioned warp is the foundation of any good tapestry. Make sure the warp threads are evenly spaced and tight enough to hold the yarn but not so tight that they snap under pressure.
Take your time here—rushing can cause uneven tension, which will show in your pattern later. Think about arranging your warp threads in sections if your pattern is complex; it helps you focus on smaller parts and avoid mistakes. Have you ever tried dividing your work into manageable chunks to keep your motivation high?
Weaving Consistent Stitches
Consistency in stitch size keeps your pattern looking clean. Use a shuttle or needle that fits well in the warp’s width to avoid pulling too tight or leaving gaps. When you weave, aim to push the weft yarn down evenly after each row to maintain a uniform texture.
Keep your hands steady and check your progress often. If your stitches vary too much, the pattern can distort and lose its sharp lines. What tricks do you use to maintain steady hands during detailed work?
Managing Thread Tension
Thread tension is a balancing act. Too loose, and your tapestry will sag; too tight, and the fabric will pucker. Adjust your tension gradually, especially when switching colors or yarn types to keep the surface smooth.
If you notice puckering or loose spots, don’t hesitate to pull back a few rows and fix it early. It’s easier to correct tension problems as you go rather than after finishing a big section. How often do you pause to assess tension during your weaving sessions?
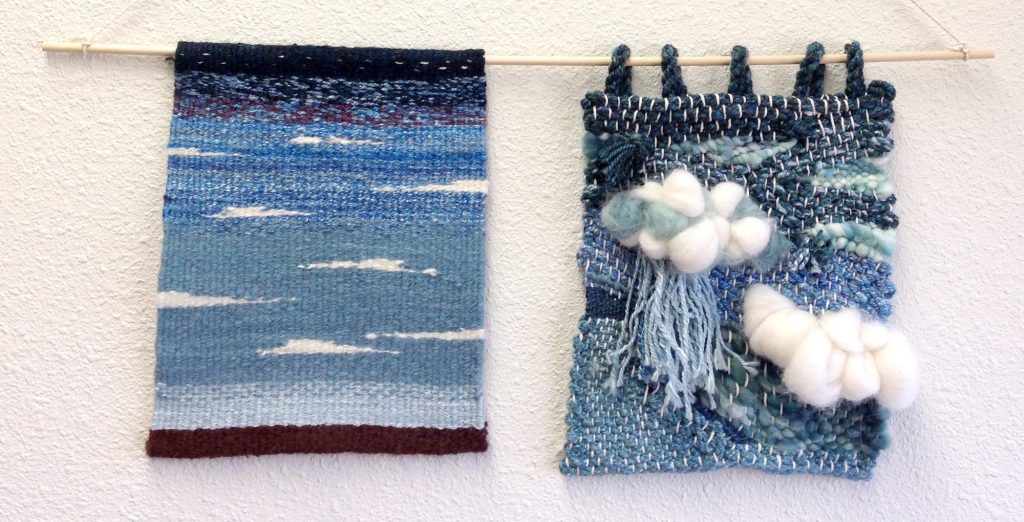
Adding Texture And Depth
Using different yarn thicknesses creates a rich texture in large tapestries. Layering stitches adds depth and makes patterns stand out clearly. Mixing smooth and rough threads brings a tactile feel to the design.
Adding texture and depth to a large tapestry can bring it to life. It transforms a flat design into a dynamic masterpiece. By using different techniques, your tapestry will stand out. Let’s explore some ways to add more character and dimension.Using Different Stitch Styles
Different stitches create unique textures. Try using a combination of stitches. The satin stitch gives a smooth look. The cross-stitch adds a classic touch. The French knot can introduce a playful element. Experiment with stitches to create interesting patterns. This variety adds visual interest and engages the viewer.Layering Threads
Layering threads enhances depth. Use threads of various thicknesses. Thicker threads can create raised surfaces. Finer threads fill in details. Mixing colors can also add vibrancy. This layered approach creates a rich tapestry. The play of light on layers adds a unique visual effect.Incorporating 3d Elements
3D elements make your tapestry pop. Consider adding beads or sequins. They catch light and draw attention. Fabric strips or yarn tufts can add texture. These elements create shadows and highlights. They make the tapestry interactive. Viewers are invited to touch and explore.
Credit: www.reddit.com
Troubleshooting Common Issues
Creating a large tapestry involves careful attention to detail. Small errors can affect the overall look and feel. Troubleshooting common issues quickly saves time and keeps your project on track. Below are practical tips to handle some frequent problems.
Fixing Pattern Mistakes
Spotting pattern mistakes early is crucial. Compare your work with the pattern often. Unravel only the rows with errors to avoid waste. Use a tapestry needle to carefully remove wrong stitches. Rework the section slowly to maintain accuracy. Keep a copy of the pattern close for quick checks.
Handling Yarn Breakage
Yarn breaks happen due to tension or weak spots. Gently tie a small knot to join broken ends. Hide the knot inside the tapestry layers for neatness. Use a needle to weave in loose ends securely. Replace yarn if it frequently breaks in the same spot. Store yarn properly to avoid damage.
Correcting Tension Problems
Uneven tension can warp your tapestry shape. Check your tension regularly as you work. Relax your hands if stitches feel too tight. Use consistent force when pulling yarn through. Practice on small samples to find your ideal tension. Adjust your loom settings if needed for even tension.
Finishing Touches
Finishing touches give your large tapestry a polished, professional look. They protect your work and prepare it for display. Taking time on these steps enhances durability and appearance. Each detail matters to make your tapestry stand out.
Trimming And Securing Edges
Trim excess threads carefully to clean the edges. Use sharp scissors to avoid fraying. Secure loose ends by weaving them back into the tapestry. Knotting or using a fabric glue helps keep threads in place. This step prevents unraveling and keeps your tapestry neat.
Blocking And Stretching
Blocking shapes and flattens your tapestry evenly. Dampen the fabric slightly before stretching. Stretch it gently on a flat surface or frame. Pin edges carefully to hold the shape while drying. This process smooths wrinkles and sets the pattern firmly.
Mounting And Display Tips
Choose a mounting method that suits your space and style. Use a wooden rod or canvas stretcher bars for support. Attach hanging loops or wire securely at the back. Display in a spot with good light but away from direct sunlight. Rotate your tapestry occasionally to avoid fading.

Credit: www.youtube.com
Frequently Asked Questions
How Do I Start A Pattern In A Large Tapestry?
Begin by choosing a clear design and sketching it on graph paper. Transfer the pattern onto the fabric using a washable marker for accuracy before weaving or stitching.
What Materials Are Best For Large Tapestry Patterns?
Use sturdy, high-quality yarns like wool or cotton. Choose a strong, even-weave fabric to support detailed patterns and ensure durability in large tapestries.
How Can I Maintain Pattern Consistency In Large Tapestries?
Work in small sections and frequently compare to your pattern guide. Use stitch markers or grid lines on the fabric to stay aligned and consistent.
What Tools Help Create Precise Tapestry Patterns?
Use tapestry needles, a loom, and a pattern chart. A good light source and magnifier can also improve detail accuracy in large tapestry work.
Conclusion
Creating patterns in large tapestries takes patience and practice. Choose simple shapes and repeat them for balance. Use colors that stand out but also blend well. Keep your design clear and easy to follow. Work slowly, checking your progress often.
Small steps lead to beautiful results. Enjoy the process as much as the finished tapestry. Your creativity brings life to every thread. Keep experimenting and have fun with each new project.


