
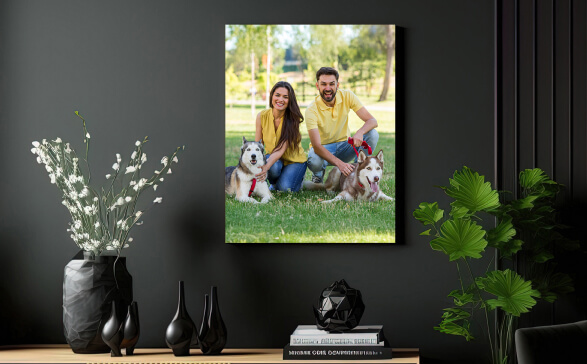
Have you ever looked at a favorite photo and wished it could become a stunning piece of art on your wall? Turning your photo into a canvas print is easier than you might think.
Imagine your special memories or beautiful shots transformed into a vibrant, lasting decoration that catches everyone’s eye. You’ll discover exactly how you can make a canvas print from your photo, what to consider for the best results, and tips to make your walls truly come alive.
Ready to bring your images to life? Keep reading to find out how simple it really is.
Credit: www.canvaspop.com
Choosing The Right Photo
Choosing a clear, high-resolution photo ensures the best canvas print quality. Focus on images with good lighting and sharp details for vivid results.
Choosing the right photo for a canvas print can make a significant difference in the final product. It’s about more than just selecting a favorite image; it involves considering technical aspects and artistic elements. Let’s dive into key areas to focus on for the best results.Resolution And Quality
Resolution is crucial. Higher resolution photos result in sharper and more detailed canvas prints. Aim for at least 300 DPI (dots per inch) for clear, vibrant images. Quality matters as well. Avoid photos that are pixelated or blurry. Even if the subject is perfect, poor quality can ruin the print.Subject And Composition
The subject of your photo should be meaningful and engaging. Consider what emotions or memories you want to convey through the print. Composition plays a vital role. Use the rule of thirds to create balance and interest. A well-composed photo can transform a simple image into a captivating piece of art.Color And Lighting
Colors should be vivid and true to life. Think about how the colors will look in your space. Bold, striking colors can create a focal point in a room. Lighting affects the mood and tone of your photo. Natural lighting often works best, providing a warm and inviting feel. Consider how shadows and highlights play in the image.
Credit: digital-photography-school.com
Selecting Canvas Materials
Choosing the right canvas materials affects the final look of your print. The texture, size, and frame shape all play roles in showcasing your photo beautifully. Understanding these options helps you create a lasting piece of art.
Types Of Canvas
Canvas comes in different textures and materials. Cotton canvas offers a natural feel and good color absorption. Polyester canvas is smoother and more durable. Linen canvas is premium, with a fine texture for detailed prints. Each type changes how your photo appears.
Canvas Sizes
Canvas prints come in many sizes. Small sizes suit desks or shelves. Medium sizes fit most walls in homes or offices. Large sizes create bold statements in living rooms or galleries. Choose a size that matches your space and photo detail.
Frame Options
Frames protect your canvas and enhance its look. Gallery wraps stretch the canvas around thick wooden bars for a modern style. Traditional frames add a classic border around the edges. Floating frames create a gap between the canvas and frame for depth. Pick a frame that matches your decor and photo mood.
Preparing The Photo For Printing
Preparing a photo for printing on canvas involves several important steps. These steps ensure the final print looks clear and vibrant. Proper preparation helps avoid blurry or pixelated images. It also makes sure the photo fits well on the canvas size you want.
Focus on editing the photo, adjusting its size, and choosing the right file format. Each part plays a key role in getting a beautiful canvas print. Let’s explore these steps in detail.
Editing And Enhancing
Begin by adjusting brightness, contrast, and colors. Make the photo look lively and balanced. Remove any spots or unwanted marks. Use simple editing tools to sharpen the image. Avoid heavy filters that hide the original photo’s beauty. Keep the changes natural and clear.
Cropping And Sizing
Crop the photo to fit your canvas shape. Square, rectangular, or panoramic – choose what suits your space. Pay attention to important parts of the image. Don’t cut out key details. Check the resolution to keep the print sharp. Low resolution causes blurriness on large canvases.
File Formats
Save the photo in a high-quality file format. JPEG and PNG are common choices. JPEG is good for photos with many colors. PNG works well for images with transparency. TIFF files offer the best quality but can be large. Use formats that keep details crisp and clear.
Printing Techniques
Printing techniques play a key role in creating a beautiful canvas print from a photo. The right method can bring out vivid colors and sharp details. Understanding different printing styles helps in choosing the best option for your artwork. This section breaks down popular printing techniques and offers tips to ensure great results.
Inkjet Vs. Giclée Printing
Inkjet printers spray tiny droplets of ink onto the canvas. They are common and affordable. Giclée printing is a type of inkjet printing but with higher quality. It uses more ink colors and finer droplets. This creates smoother gradients and sharper images. Giclée prints last longer and resist fading better than standard inkjet prints.
For photo canvas prints, giclée is often the preferred choice. It offers richer colors and better detail. Regular inkjet prints work well for casual or budget projects. Both methods require good quality inks and papers to look their best.
Color Accuracy Tips
Color accuracy means the printed colors match the original photo. To achieve this, use a calibrated monitor. This ensures you see true colors on screen. Save your photo in a color profile like Adobe RGB or sRGB. These profiles help printers read colors correctly.
Before printing, check your photo for brightness and contrast. Avoid overly dark or bright images. Adjust colors slightly if they look off. Test prints can help you spot color issues early. Choose inks and canvas materials designed for color fidelity.
Choosing A Printer
Select a printer that suits your needs and budget. For occasional prints, a home inkjet printer may be enough. Look for models with high resolution and multiple ink cartridges.
Professional printing services offer giclée printing and wide-format printers. They handle larger canvases and complex color profiles. Compare prices, reviews, and sample prints before deciding. Make sure the printer supports the canvas material you want to use.
Remember, the printer’s quality directly impacts your final canvas print. Investing in a good printer or service results in stunning photos on canvas.
Stretching And Mounting Canvas
Stretching and mounting your canvas print transforms a simple photo into a stunning piece of art ready to display. The process gives your image a professional look and ensures it stays taut and wrinkle-free over time. If you want to bring your photo to life, mastering this step is essential.
Tools Needed
- Canvas stretcher bars:These wooden frames come in different sizes and form the base for your canvas.
- Staple gun and staples:Used to secure the canvas tightly around the frame.
- Canvas pliers:These help grip and pull the canvas evenly for a smooth stretch.
- Scissors or utility knife:To trim excess canvas after stretching.
- Measuring tape:Ensures you cut and stretch the canvas to the right size.
Step-by-step Stretching
Start by assembling the stretcher bars into a solid frame. Make sure the corners are square for the best fit.
Lay your printed canvas face down on a clean surface. Position the frame on top, centering the image carefully.
Using canvas pliers, pull the canvas tight on one side and staple it to the frame. Move to the opposite side, pull tight again, and staple. Repeat this process for the remaining sides, always working from the center outwards to avoid wrinkles.
Securing The Canvas
Once stretched, add additional staples along each side to secure the canvas firmly. Space staples about 1 to 2 inches apart for even tension.
Trim any extra canvas close to the staples but leave enough so it doesn’t unravel.
Check the front to confirm the canvas is smooth and tight. If you notice any sagging, you can gently pull and add more staples.
Have you ever wondered how much tension is too much? Pull just enough to make the canvas flat without distorting the image. This balance is key to a professional-looking print that lasts.
Sealing And Finishing Touches
Sealing and finishing touches are crucial steps in turning your photo into a stunning canvas print. They protect your artwork and give it the perfect final look. Paying attention to these details ensures your canvas print lasts long and looks professional.
Protective Coatings
A protective coating shields your canvas from dust, moisture, and fading. You can choose between spray varnishes or brush-on finishes, depending on your comfort level. I once skipped this step, and my print quickly lost its vibrancy—don’t make the same mistake.
Look for UV-resistant coatings if your canvas will hang in sunlight. These coatings keep colors bright and sharp for years. Applying two thin layers usually works best, letting each dry completely before the next.
Matte Vs. Glossy Finish
The finish you choose affects how your photo looks and feels. Matte finishes reduce glare and give a soft, muted look—great for portraits or vintage-style photos. Glossy finishes make colors pop and add shine, perfect if you want a vibrant, modern feel.
Think about where you’ll display the canvas. A glossy finish might reflect light in bright rooms, making it harder to see. Which finish matches your photo’s mood and your room’s lighting best?
Hanging Hardware
Don’t forget the hardware—it’s what makes your canvas easy to hang and display. Many canvas prints come with built-in hooks or wire, but you can add your own for extra security. I once used simple D-rings and picture wire, and it held perfectly for years without slipping.
Consider the weight and size of your canvas when choosing hardware. Heavy canvases need stronger support like wall anchors or heavy-duty hooks. Installing the right hardware ensures your artwork stays safely on your wall.
Diy Tips And Common Mistakes
Creating a canvas print from a photo can be rewarding. DIY projects save money and add a personal touch. Mistakes often happen but are easy to fix. Simple tips help avoid common problems and keep prints looking great.
Avoiding Warping
Warping happens when canvas stretches unevenly. Keep the frame dry and avoid humidity. Use a sturdy wooden frame to hold tension. Stretch the canvas evenly on all sides. Store prints flat or hang them right away. Avoid touching the canvas edges during stretching.
Maintaining Color Vibrancy
Bright colors make your print stand out. Use high-resolution photos for sharp images. Choose quality ink and canvas material. Avoid direct sunlight to prevent fading. Apply a protective spray to keep colors fresh. Store prints in cool, dry places when not displayed.
Troubleshooting
- Blurry images? Check photo resolution before printing.
- Wrinkles on canvas? Stretch again or use a heat gun carefully.
- Colors look dull? Clean printer heads or switch ink brand.
- Uneven edges? Adjust frame size or re-stretch canvas.
Credit: www.canvaspeople.com
Frequently Asked Questions
Can Any Photo Be Used For Canvas Prints?
Yes, most digital photos can be printed on canvas. High-resolution images work best for clear, sharp results. Avoid low-quality or heavily pixelated photos to ensure the print looks professional and vibrant.
What File Format Is Best For Canvas Printing?
JPEG and PNG files are the most common and widely accepted formats for canvas printing. Make sure your image resolution is at least 300 DPI to guarantee crisp and detailed prints on canvas material.
How Long Does Canvas Printing Take?
Canvas printing typically takes 2 to 7 business days, depending on the service provider. Some companies offer expedited options for faster delivery if you need prints urgently.
Can I Customize The Size Of My Canvas Print?
Yes, most printing services allow you to customize canvas size. You can choose dimensions that best fit your space or design preferences, from small portraits to large wall art.
Conclusion
Creating a canvas print from a photo is simple and fun. Choose a clear, high-quality image for best results. Many services offer easy steps to upload and customize your print. A canvas print turns your photo into beautiful wall art.
It makes a great gift or a special keepsake. With the right photo and service, you get lasting memories on display. Try it yourself and see how your pictures come alive on canvas.


