
Have you ever stared at a mirror stuck to your wall and wondered, “How do I remove this without causing damage?” Removing a mirror glued to the wall can feel tricky and even risky.
You want to get it off cleanly, without ruining your paint or drywall. The good news is, with the right steps and a little patience, you can do it yourself safely. You’ll discover simple, effective techniques to remove that glued mirror without stress or mess.
Keep reading—your walls will thank you!
Tools Needed
Removing a mirror glued to the wall requires the right tools. Using proper equipment makes the job safer and easier. Prepare your tools before starting to avoid delays.
Essential Equipment
- Utility knife – to cut through glue and caulk
- Putty knife or thin pry bar – to gently separate the mirror from the wall
- Wire or fishing line – to saw through adhesive behind the mirror
- Adhesive remover – to clean leftover glue on the wall
- Soft cloth or sponge – for wiping surfaces after removal
- Bucket of warm water – helps soften adhesive
- Plastic scraper – to avoid damaging the wall
Safety Gear
- Safety goggles – to protect your eyes from glass shards
- Work gloves – to protect your hands from cuts
- Dust mask – to avoid inhaling dust or adhesive fumes
- Long sleeves and pants – to protect your skin
- Non-slip shoes – for steady footing during work
Prepare The Area
Removing a mirror glued to the wall can be tricky. Proper preparation ensures a smooth and safe process. Before starting, take steps to protect the area. This helps prevent damage and makes cleanup easier.
Clear The Space
Remove all items near the mirror. This includes furniture, decor, and accessories. Create a clear path for easy access. This reduces the risk of accidents and ensures safety. Having enough space will allow you to move freely.
Protect Surrounding Surfaces
Cover floors with drop cloths or old sheets. This protects them from scratches or glue residue. Use painter’s tape to secure covers on the floor. Protect walls with cardboard or foam boards. This guards against accidental damage during removal.
Assess The Mirror Attachment
Before you start removing a mirror glued to your wall, it’s crucial to assess how it’s attached. This step helps you choose the safest and most effective removal method. Taking a moment to understand the mirror’s attachment can save you from damaging the wall or the mirror itself.
Check Adhesive Type
Look closely at the edges of the mirror. Can you see any thick glue lines or residue? Adhesives like construction glue or mirror mastic are common for wall mirrors. These types of glue create a strong bond, making removal trickier.
Sometimes, you might notice dried caulk or double-sided tape instead. These adhesives are usually easier to soften or cut through. Knowing the adhesive type helps you decide if you need special solvents or just a gentle prying tool.
Look For Mounting Hardware
Not all mirrors are glued only—some have hidden mounting hardware. Check for small clips, brackets, or screws around the frame or under the mirror edges. These can hold the mirror in place alongside the glue.
Removing hardware first can make detaching the mirror much safer. It also reduces the chance of cracking the glass when you start pulling it off. Have you noticed any unusual gaps or metal pieces? These might be your clues to hidden supports beneath the glue.

Credit: www.youtube.com
Loosen The Adhesive
Removing a mirror glued to the wall starts with loosening the adhesive. This step helps to reduce the strength of the glue. It makes the mirror easier to remove without damage. Patience and care are key during this process. Two main ways to loosen the adhesive are using heat and applying solvents.
Use Heat For Softening Glue
Heat can soften many types of glue. Use a hairdryer or heat gun on a low setting. Hold it a few inches from the mirror edge. Move the heat source slowly around the mirror. Warm the adhesive evenly for about 5 to 10 minutes.
Heat loosens the glue’s grip on the wall. It makes the mirror easier to lift or slide off. Avoid overheating to prevent damage to the mirror or wall. Test a small area first to see how the glue reacts.
Apply Solvents Safely
Certain solvents break down adhesive bonds. Common choices include rubbing alcohol, acetone, or commercial adhesive removers. Use a cotton ball or soft cloth to apply the solvent. Dab gently along the mirror edges where glue is present.
Allow the solvent to sit for several minutes. This softens the adhesive without hard scraping. Work slowly and carefully to avoid damaging the wall surface. Use gloves and ensure good ventilation while handling solvents.
Both heat and solvents help weaken the glue. Choose the option best suited for your mirror and wall type. Loosening the adhesive makes mirror removal cleaner and safer.
Remove The Mirror
Removing a mirror glued to the wall requires care and patience. The goal is to avoid damage to the wall and the mirror itself. Start by loosening the edges without force. This step prepares the mirror to come off smoothly. Handle the mirror gently throughout the process to keep it intact.
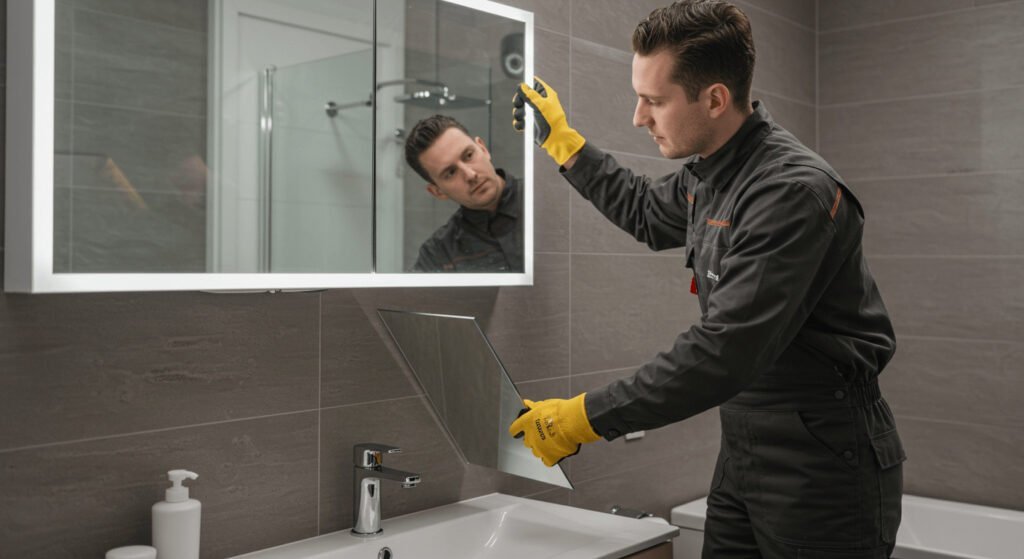
Gently Pry The Edges
Use a thin, flat tool like a putty knife or a plastic scraper. Slide it carefully under the mirror’s edge. Move the tool slowly around the corners and sides. Avoid using metal tools that can scratch or crack the mirror. Work steadily to loosen the glue bond.
Lift The Mirror Carefully
Once the edges are loose, place your hands behind the mirror. Lift it slowly and evenly. Support the mirror from the bottom and sides. Avoid bending or twisting it to prevent breaking. Set the mirror down on a soft surface immediately after removal.

Credit: www.reddit.com
Clean The Wall
Cleaning the wall after removing a mirror glued to it is crucial for a smooth finish. Leftover glue can cause problems if you plan to repaint or install a new mirror. Taking the time to clean thoroughly helps you avoid future headaches.
Remove Residual Glue
Start by scraping off as much glue as possible with a plastic scraper or putty knife. Avoid metal tools that could damage the wall surface.
If the glue is stubborn, soften it using a hairdryer on low heat. The warmth makes the adhesive easier to peel away without tearing the paint.
Once loosened, wipe the area with a cloth soaked in warm, soapy water to remove remaining sticky bits. For tougher residue, rubbing alcohol or a commercial adhesive remover works well—just test it on a small spot first.
Prepare Surface For Repair Or Reinstallation
After removing the glue, inspect the wall for any damage like scratches or paint peeling. These need fixing before you repaint or hang anything new.
Fill small holes or cracks with spackling paste and sand smooth once dry. This step ensures a clean, even surface that looks professional.
Finally, clean the area with a damp cloth to remove dust and debris. Your wall is now ready for repair, repainting, or installing a new mirror.
Repair Wall Damage
After removing a mirror glued to your wall, the surface might look rough or damaged. Repairing wall damage is essential to restore a smooth, clean look. It also prepares the wall for repainting or hanging something new without any visible flaws.
Fill Holes And Cracks
Start by inspecting the wall closely for any holes, cracks, or leftover adhesive spots. Use a putty knife to apply spackling compound or wall filler directly into these imperfections. Make sure you press the filler firmly to fill the gaps completely.
Allow the filler to dry according to the product instructions—usually a few hours. If the damage is deep, you might need to apply a second layer. Sand the area gently with fine-grit sandpaper once dry to ensure an even surface.
Smooth And Paint
Sanding creates a smooth base that’s ready for painting. Wipe the wall with a damp cloth to remove dust and debris. This step prevents bumps or rough patches from showing through your paint.
Choose a paint that matches your existing wall color for a seamless finish. Apply primer first if the damage was extensive or if you spot bare drywall. Then, use a roller or brush to paint over the repaired area, blending it carefully with the surrounding wall.
Have you ever noticed how a small patch of paint can make a big difference in a room’s look? Taking the time to smooth and paint properly ensures your wall looks fresh and flawless.
Safety Tips
Removing a mirror glued to the wall needs care and attention. Safety should be the top priority during this task. Taking proper precautions protects both you and your wall. Follow these tips to ensure a safe and smooth removal process.
Handle Glass With Care
- Wear thick gloves to protect your hands from sharp edges.
- Use safety goggles to shield your eyes from glass shards.
- Work slowly to avoid sudden breaks or cracks in the mirror.
- Keep children and pets away from the work area.
- Place a soft blanket or towel under the mirror while removing it.
Avoid Damage To Walls
- Use a plastic scraper or putty knife to gently loosen the glue.
- Apply heat with a hairdryer to soften the adhesive before removal.
- Do not force the mirror off quickly to prevent wall damage.
- Work in small sections to control the removal process better.
- After removal, clean any leftover glue carefully using mild solvents.

Credit: www.reddit.com
Frequently Asked Questions
How Can I Safely Remove A Mirror Glued To The Wall?
Use a utility knife to cut the adhesive around the mirror edges. Slowly pry the mirror with a putty knife, applying gentle pressure to avoid damage.
What Tools Do I Need To Remove A Glued Mirror?
Gather a utility knife, putty knife, adhesive remover, gloves, safety goggles, and a drop cloth before starting the removal process.
How To Prevent Wall Damage When Removing A Glued Mirror?
Cut adhesive carefully and pry gently. Use adhesive remover to soften glue, minimizing wall damage during mirror removal.
Can Heat Help In Removing A Glued Mirror?
Yes, apply a heat gun or hairdryer to soften the adhesive. Heat loosens glue, making the mirror easier to remove.
Conclusion
Removing a mirror glued to the wall can seem tough. Take your time and work carefully. Use the right tools and gentle methods. Avoid rushing to prevent wall damage. Small cracks or marks may happen but can be fixed. Patience helps you finish the job well.
Now, you can update your space with ease. This simple guide makes the process clear and safe.


