
Are you looking to add a sleek, modern touch to your space without cluttering it? Hanging a floating shelf might be just what you need.
But you might be wondering, how do you hang a floating shelf so it looks great and stays secure? Don’t worry—this guide will walk you through every step, making the process simple and stress-free. By the end, you’ll have the confidence to install your own floating shelf and transform your room instantly.
Keep reading to discover the easy tricks and expert tips that will make your shelf installation a success!
Choosing The Right Shelf
Choosing the right floating shelf is key to a stylish and sturdy display. The shelf should fit your space and hold your items safely. Think about the style, material, size, and weight capacity before buying. This helps avoid damage and keeps your wall looking neat.
Types Of Floating Shelves
Floating shelves come in many shapes and styles. Some have hidden brackets for a clean look. Others show metal or wooden supports for a rustic feel. Narrow shelves work well for small spaces. Wide shelves fit bigger rooms and hold more items. Pick a style that matches your room’s design.
Material Considerations
Materials affect how strong and long-lasting a shelf will be. Wood shelves offer warmth and natural beauty. Metal shelves add a modern or industrial touch. Glass shelves create a light and open feel but need careful handling. Choose a material that fits your room’s style and your maintenance preference.
Weight Capacity And Size
Check the shelf’s weight limit before buying. Heavy items need shelves with strong support. Look for shelves with a weight rating on the label. Size matters too. Larger shelves hold more but need more wall space. Measure your wall and think about what you want to place on the shelf.

Credit: www.create-enjoy.com
Gathering Tools And Materials
Before hanging a floating shelf, gather all necessary tools and materials. Having everything ready saves time and avoids interruptions. It also helps ensure a safe and secure installation. Understanding the tools and hardware needed makes the process smoother and more efficient.
Essential Tools List
- Drill with drill bits
- Level
- Measuring tape
- Pencil for marking
- Screwdriver
- Stud finder
- Hammer
Safety Gear
- Safety goggles to protect eyes
- Work gloves for hand protection
- Dust mask if drilling into drywall
Mounting Hardware Options
Choose the right hardware based on your wall type and shelf weight. Common options include:
- Wall anchors for drywall installation
- Toggle bolts for heavier shelves
- Wood screws for studs or wooden walls
- Bracket kits designed for floating shelves
Preparing The Wall
Begin by cleaning the wall surface to remove dust and dirt. Use a stud finder to locate wall studs for strong support. Mark the spots clearly before drilling holes for the shelf brackets.
Preparing the wall is crucial for hanging a floating shelf. A well-prepared wall ensures the shelf stays secure and level. It prevents unnecessary damage and keeps your room looking tidy. Follow these steps for a successful installation.Finding Studs
Locate wall studs for secure mounting. Use a stud finder to detect them. Studs are usually spaced 16 to 24 inches apart. Mark their position with a pencil.Marking Placement
Decide on the exact spot for your shelf. Use a level to ensure it’s straight. Mark the points where the brackets will go. This step is vital for alignment.Checking For Obstacles
Ensure the wall is free of hidden obstacles. Avoid pipes and electrical wires. Use a wire detector for safety. Mark any problem areas to avoid them.Installing The Bracket
Installing the bracket is a key part of hanging a floating shelf. The bracket holds the shelf securely on the wall. Proper installation ensures the shelf stays level and supports weight well. This section explains how to position, drill, and secure the bracket correctly.
Leveling The Bracket
Place the bracket against the wall at the desired height. Use a spirit level to check if it is straight. Adjust the bracket until the bubble in the level is centered. Mark the bracket’s holes with a pencil for drilling. Accurate leveling prevents a crooked shelf.
Drilling Pilot Holes
Choose a drill bit slightly smaller than the screws. Drill pilot holes at the marked spots on the wall. This step helps the screws go in smoothly. It also reduces the risk of cracking the wall. Make sure the holes match the bracket’s holes exactly.
Securing The Bracket
Align the bracket with the pilot holes. Insert screws through the bracket into the wall. Use a screwdriver or drill to tighten the screws firmly. Check that the bracket feels secure and does not move. A solid bracket keeps the floating shelf stable and safe.
Mounting The Shelf
Mounting the floating shelf is a crucial part of the process. This step ensures the shelf is secure and looks clean on your wall. A properly mounted shelf can hold weight and stay level for years.
Aligning The Shelf
Start by marking where the shelf will sit on the wall. Use a level to make sure the marks are straight. Check twice before drilling or attaching brackets. Proper alignment makes the shelf look neat and balanced.
Securing To The Bracket
Next, slide the shelf onto the wall bracket firmly. Check that the shelf fits snugly and flush against the wall. Use screws or bolts to lock the shelf to the bracket. Tighten all fasteners to avoid any movement.
Ensuring Stability
Test the shelf by gently pressing down on it. Confirm it does not wobble or tilt. Add wall anchors or extra support if needed. A stable shelf protects your items and gives peace of mind.

Credit: shelfology.com
Finishing Touches
Finishing touches are what transform your floating shelf from a simple installation into a stylish and cohesive part of your room. Paying attention to small details can make a big difference in how polished and intentional your shelf looks. Let’s dive into some practical ways to perfect your shelf’s appearance and keep it looking great over time.
Hiding Hardware
Visible brackets or screws can take away from the clean look of a floating shelf. To keep things sleek, try using hardware that’s designed to be concealed behind the shelf. If you’ve already installed visible screws, cover them with matching wood filler or decorative caps that blend with the shelf color.
Another tip is to paint the hardware the same color as the wall or shelf. This simple step camouflages the mounts and makes the shelf appear to float effortlessly. Have you ever noticed how a tiny detail like a screw can distract your eye? Fixing this is easier than you think.
Adding Decorative Elements
Once your shelf is installed, it’s time to personalize it with decorative elements. Choose items that complement your room’s style, such as small plants, framed photos, or unique collectibles. Mixing different textures and heights creates visual interest and keeps the display dynamic.
Think about how you can balance practicality with beauty. For example, adding a small lamp can brighten the area while enhancing the shelf’s appeal. What items do you have around your home that could add personality without clutter?
Maintenance Tips
Keeping your floating shelf looking fresh requires some simple maintenance. Regularly dust the surface to prevent buildup, which can dull the finish. Use a soft cloth and mild cleaner to avoid damaging the shelf’s material.
Check the hardware occasionally to ensure the shelf remains secure. If you notice any wobbling or looseness, tighten the screws promptly. Remember, a well-maintained shelf not only looks better but also lasts longer and stays safe for your items.

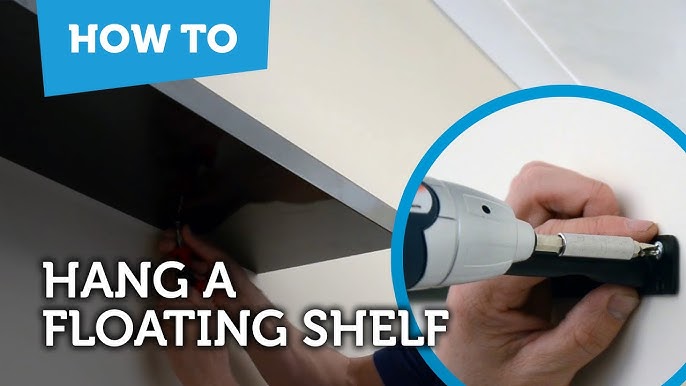
Credit: www.youtube.com
Frequently Asked Questions
What Tools Do I Need To Hang A Floating Shelf?
You need a drill, level, stud finder, screws, anchors, and a screwdriver. These tools ensure secure and level installation of your floating shelf.
How Do I Find Studs For Floating Shelf Installation?
Use a stud finder to locate wooden studs behind the wall. Mark the studs with a pencil to securely anchor the shelf brackets.
Can I Hang A Floating Shelf On Drywall Alone?
Drywall alone may not support heavy shelves. Use proper anchors or mount into studs for stability and safety.
What Weight Can A Floating Shelf Hold Safely?
Weight capacity depends on bracket strength and wall type. Typically, floating shelves hold 20-50 pounds when properly installed.
Conclusion
Hanging a floating shelf is easier than it seems. With the right tools and steps, anyone can do it. Start by finding the studs in your wall. Use a level to keep the shelf straight. Secure the brackets tightly for strong support.
Take your time and double-check measurements. A well-hung shelf adds style and storage to your space. Try it yourself and enjoy the neat, modern look it brings. Simple, smart, and useful. Ready to hang your first floating shelf?


