
Looking to add style and storage to your space without bulky furniture? A floating shelf might be the perfect solution for you.
It’s sleek, modern, and surprisingly easy to install—even if you’re not a DIY expert. Imagine having a clean, clutter-free wall where you can proudly display your favorite books, plants, or photos. In this guide, you’ll discover simple, step-by-step instructions to help you put up a floating shelf with confidence.
Ready to transform your room and impress your guests? Let’s get started!

Credit: www.youtube.com
Choosing The Right Shelf
Choosing the right floating shelf can make all the difference in your space. It’s not just about picking something that looks good; it’s about finding a shelf that fits your needs and holds up well over time. Let’s break down what you should consider before making your choice.
Material Options
Your shelf’s material affects both its durability and style. Wood is a classic pick—solid wood offers strength and warmth, while plywood or MDF can be more budget-friendly but less sturdy.
Metal shelves bring a modern, industrial vibe and can support heavier items. Glass shelves look sleek but require careful placement to avoid accidents. Think about what you plan to put on the shelf and where it will live.
Size And Weight Considerations
How much weight will your shelf need to hold? A small shelf for lightweight decor needs less support than one meant for books or kitchen supplies. Measure your wall space carefully to avoid overcrowding or awkward gaps.
Don’t forget to check the shelf’s depth and width—too narrow, and your items might fall off; too wide, and the shelf could sag without proper brackets. What’s the heaviest item you plan to place on your shelf?
Style And Design Choices
Your shelf should complement your room’s look. Floating shelves come in minimalist, rustic, and even ornate styles. Consider the finish—matte, glossy, or natural—to match your existing decor.
Think about the edges too: rounded edges feel softer, while sharp edges create a modern, clean line. What feeling do you want your shelf to add to the room?

Credit: www.create-enjoy.com
Gathering Tools And Materials
Before installing a floating shelf, gather all necessary tools and materials. Having everything ready saves time and prevents interruptions. It also helps you work more safely and efficiently.
Essential Tools
- Power drill with drill bits
- Level
- Measuring tape
- Pencil for marking
- Screwdriver
- Stud finder
- Hammer
Mounting Hardware
- Wall anchors suitable for your wall type
- Heavy-duty screws
- Floating shelf brackets or mounting kits
- Wood screws (if attaching to wooden studs)
Safety Equipment
- Safety goggles to protect your eyes
- Work gloves to protect your hands
- Dust mask if drilling into drywall
Preparing The Wall
Clean and smooth walls help shelves stay strong and steady. Remove nails, dust, and dirt before starting. Find studs to hold the shelf securely.
Preparing the wall is a crucial step in ensuring your floating shelf not only looks great but is also sturdy and secure. A little time spent in preparation can save you from potential mishaps down the road. You’ll want to ensure the wall can support your shelf and its contents, which involves a few simple yet essential tasks.Finding Wall Studs
To start, you need to find the wall studs, as these are the strongest points to anchor your shelf. Use a stud finder, which is a handy tool that can detect the wooden beams behind your drywall. If you’ve ever had a shelf sag or fall, it might be because it wasn’t anchored into a stud. Move the stud finder slowly across the wall until it signals the presence of a stud. Mark the spot lightly with a pencil so you know exactly where to drill. This step is crucial if you plan to place heavier items on your shelf.Marking Shelf Placement
Once you’ve found your studs, it’s time to decide exactly where you want your shelf to hang. Use a level to ensure your shelf will be straight. A crooked shelf not only looks off but can also cause items to slide off. Mark the top edge of where you want the shelf to sit. Measure twice to ensure everything is aligned perfectly. This simple step can save you from re-drilling and patching unnecessary holes later.Checking For Obstacles
Before drilling, check for any hidden obstacles within the wall. This includes electrical wires or plumbing that could be lurking behind the drywall. A digital inspection tool can help you detect these without having to cut into the wall. Think about what’s behind the wall, especially in kitchens or bathrooms where pipes are common. Avoiding these obstacles ensures you won’t accidentally cause damage or create a safety hazard. By taking these steps, you ensure a smoother installation process and a shelf that stands the test of time. What’s the heaviest thing you plan to place on your new floating shelf?Installing The Brackets
Installing the brackets is a crucial step in putting up a floating shelf. It ensures your shelf stays strong and secure while holding your items safely. Paying close attention here can save you from future hassles like sagging or falling shelves.
Drilling Pilot Holes
Start by marking the exact spots where the brackets will go. Use a pencil and a level to ensure the marks are aligned perfectly. Drilling pilot holes makes it easier to insert screws and prevents the wall from cracking.
Choose a drill bit slightly smaller than your screws for the pilot holes. If you hit a stud, drill directly into it for extra strength. For drywall without studs, use wall anchors to keep the brackets steady.
Securing Brackets To Wall
Once the pilot holes are ready, position your brackets and start screwing them into place. Use a screwdriver or a drill with the correct bit to avoid stripping the screws. Tighten the screws firmly but don’t overdo it; overtightening can damage the wall or bracket.
Check each bracket’s stability by gently shaking it. If it feels loose, you might need a bigger anchor or to find a stud. Remember, well-secured brackets are the backbone of a floating shelf.
Leveling Tips
Before hanging the shelf, double-check the bracket level with a spirit level. Even a slight tilt can make your shelf look off and cause items to slide. Adjust the brackets as needed by loosening screws, repositioning, and retightening.
Try placing a level on the brackets after installing each one to catch any misalignment early. Have you ever noticed a shelf that looked off-kilter and wondered why? This step avoids that common mistake.
Mounting The Shelf
Mounting the floating shelf securely is key for safety and style. Start with careful positioning to ensure balance. Follow clear steps for attaching brackets and making final tweaks. Each action builds a sturdy, neat shelf that lasts.
Aligning The Shelf
Place the shelf against the wall at the desired height. Use a level tool to check it is straight. Mark the wall where the brackets will go. Double-check marks before drilling holes.
Attaching To Brackets
Fix the brackets into the wall using screws and anchors. Make sure brackets are firmly secured to support weight. Slide the shelf onto the brackets carefully. Confirm it fits tightly without gaps.
Final Adjustments
Check the shelf again with a level to confirm it is even. Tighten any loose screws on brackets or shelf. Clean the surface of the shelf to remove dust. Test the shelf by placing light items first.
Styling And Maintenance
Styling and maintaining a floating shelf keeps it looking great and lasting longer. Proper care ensures the shelf stays sturdy and beautiful over time. Simple decorating tips and regular cleaning help your shelf shine. Safety checks protect your wall and belongings from damage. Follow these easy ideas for a stylish and safe floating shelf.
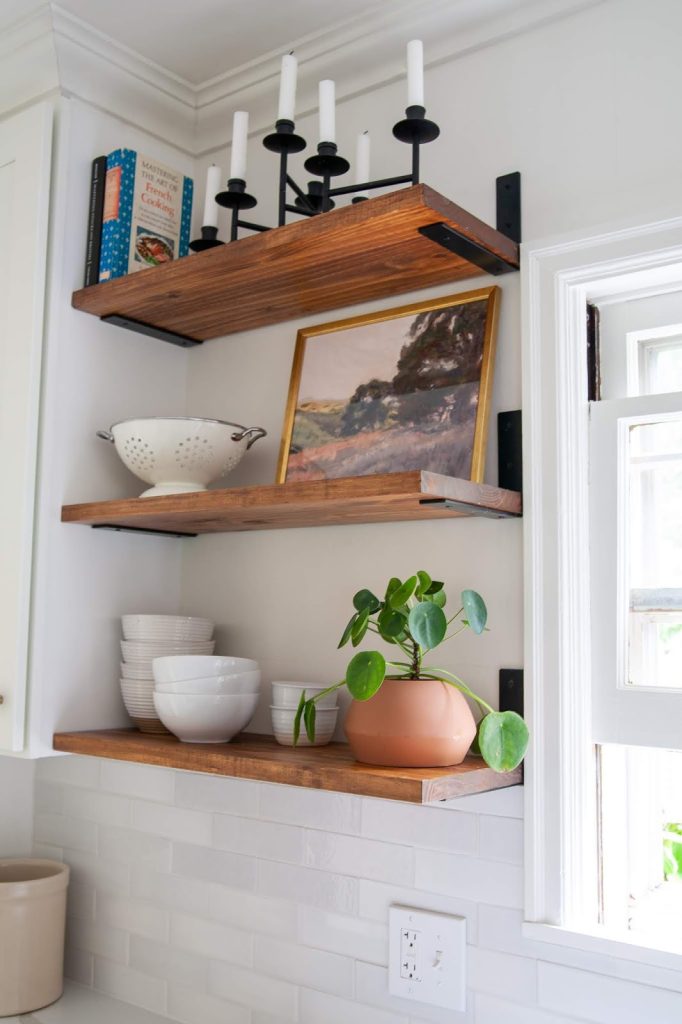
Decorating Ideas
- Place small plants for a fresh, natural look.
- Display framed photos to personalize your space.
- Use books with colorful covers for visual interest.
- Add candles or small sculptures for texture and style.
- Mix vertical and horizontal items to create balance.
Cleaning Tips
- Dust the shelf weekly with a soft cloth.
- Use mild soap and water for sticky spots.
- Avoid harsh chemicals that can damage the finish.
- Dry the surface immediately to prevent water marks.
- Clean items on the shelf regularly to reduce dust buildup.
Safety Checks
- Check screws and brackets every few months.
- Ensure the shelf holds only the recommended weight.
- Look for signs of wall damage or looseness.
- Tighten any loose hardware promptly.
- Keep heavy items close to the wall for stability.

Credit: www.youtube.com
Frequently Asked Questions
How Do I Install A Floating Shelf Securely?
To install a floating shelf securely, locate wall studs and use appropriate anchors. Drill pilot holes, attach the bracket, and mount the shelf firmly. Ensure the shelf is level and can hold the intended weight safely.
What Tools Are Needed For Floating Shelf Installation?
You need a drill, level, stud finder, screwdriver, measuring tape, pencil, and wall anchors. These tools help you mark, drill, and secure the shelf properly for a safe and level installation.
Can I Put Heavy Items On Floating Shelves?
Floating shelves can hold heavy items if mounted on studs with strong brackets. Use appropriate anchors and avoid overloading to prevent damage. Always check the shelf’s weight capacity before placing heavy objects.
How Do I Find Studs For Floating Shelf Mounting?
Use a stud finder to locate studs behind the wall surface. Mark the stud positions with a pencil for accurate drilling. Mounting brackets into studs ensures the shelf is stable and can support weight safely.
Conclusion
Putting up a floating shelf can be simple and quick. Follow each step with care and use the right tools. Check your wall type before drilling to avoid damage. A well-installed shelf adds style and space to any room. Take your time and enjoy the process.
Soon, you will have a neat place to display your favorite items. Try this project and see how much it can improve your home.


