
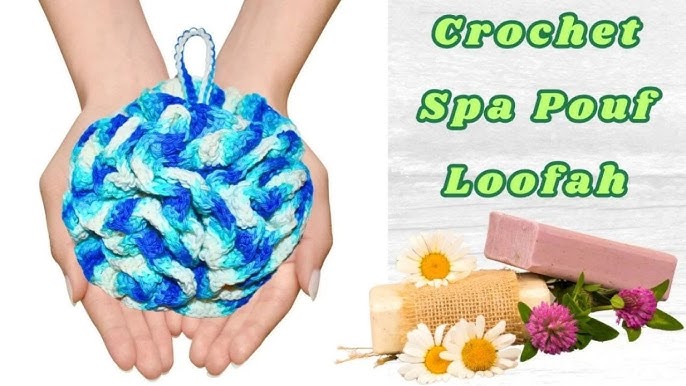
Have you ever wondered how to make a shower pouf that feels soft and lasts long? Making your own shower pouf is easier than you think.
Not only can you customize the color and size, but you’ll also save money and avoid harsh chemicals found in store-bought ones. Keep reading, and you’ll discover simple steps to create your perfect shower accessory right at home. Your skin and your shower routine will thank you!
Materials Needed
Gathering the right materials is key to making a good shower pouf. The main part is the mesh fabric, which creates the fluffy texture. This fabric comes in various types, each with a different feel and durability. Besides the fabric, some extra supplies make the pouf easy to use and last longer.
Types Of Mesh Fabric
- Nylon mesh: Strong and quick-drying, perfect for shower poufs.
- Polyester mesh: Soft texture and resistant to wear and tear.
- Tulle fabric: Lightweight and delicate, gives a fine look.
- Organza mesh: Sheer and smooth, adds an elegant touch.
Additional Supplies
- Scissors: To cut the mesh fabric into strips.
- Elastic band or strong thread: To tie the pouf tightly.
- Sewing needle: Handy for securing the pouf parts.
- Measuring tape: For cutting equal-sized fabric pieces.
- Ribbon or string: To create a hanging loop for the pouf.
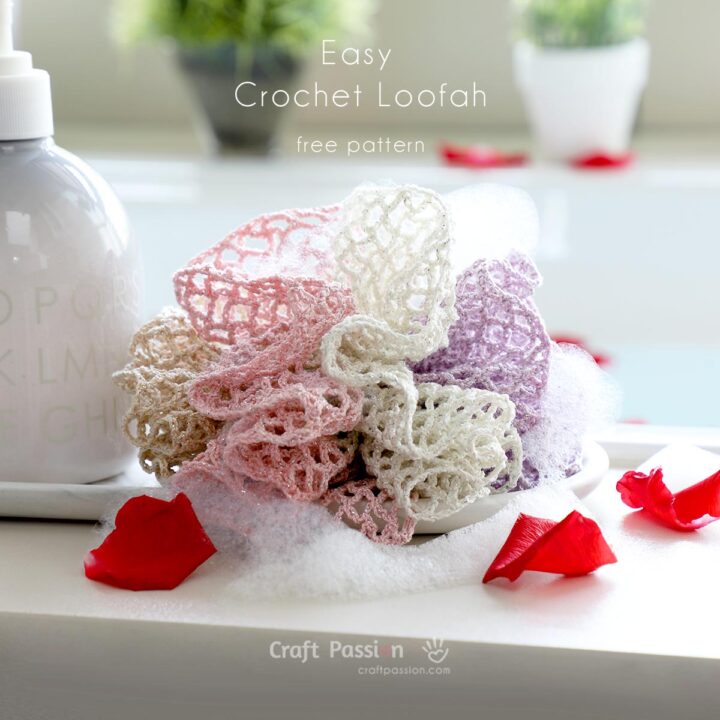
Credit: www.craftpassion.com
Preparing The Mesh
Preparing the mesh is a crucial step in making a shower pouf. The mesh fabric you choose and how you cut it will affect the pouf’s fluffiness and durability. Taking your time here ensures your final product feels soft and looks full.
Cutting The Fabric
Start with a roll of nylon mesh, often used for laundry bags or gift wrapping. Use sharp scissors to cut strips carefully, avoiding jagged edges that can fray. Cutting clean strips helps the mesh layers hold together better once tied.
I once rushed this step and ended up with uneven edges that made my pouf look sloppy. A simple pair of fabric scissors made a big difference in precision. Do you have scissors dedicated just for crafts? It’s worth it.
Choosing The Length
The length of each mesh strip determines how puffy your pouf will be. Typically, strips between 20 and 30 inches work well. Longer strips create a fuller pouf but can be harder to manage when tying.
Think about your hand size and how big you want the pouf to feel in your shower. I prefer a 24-inch strip because it balances volume and ease of handling. What size feels comfortable for you when you hold it?
Creating The Pouf Shape
Cut a piece of mesh fabric into a long strip. Fold and gather it tightly at the center to form a round shape. Tie securely with a ribbon or string to keep the pouf puffed and ready to use.
Creating the perfect pouf shape is essential for a fluffy shower experience. With the right technique, you can craft a pouf that enhances lather and exfoliation. Let’s explore how to achieve that ideal shape.Folding Techniques
Start with a large, soft mesh material. Fold the mesh in half. Ensure the edges align perfectly. Fold it again, creating a neat, layered rectangle. This technique adds volume to your pouf. The folds help maintain a sturdy shape.Gathering The Layers
Once folded, gather the layers tightly. Hold the center firmly. Use a strong string or ribbon. Wrap it around the center several times. Knot it securely to prevent unraveling. This ensures the pouf retains its fluffy shape. Trim any excess string for a clean finish.Securing The Pouf
Securing your shower pouf properly is key to making it last longer and keeping its shape. If it’s tied too loosely, the layers might fall apart during use. But if it’s too tight, you might damage the mesh, reducing its softness and durability.
Tying The Center
Start by gathering the center of your mesh layers tightly. Pinching the middle ensures the pouf will puff out evenly on all sides.
Use a strong knot to hold the layers together. A double knot or a bow knot works well here because it keeps everything snug without slipping.
Have you tried tying a regular knot only to have your pouf fall apart later? I did, and switching to a double knot made a huge difference in how long it lasted.
Using Elastic Bands Or Twine
If you want extra security, wrap an elastic band or twine around the tied center. Elastic bands stretch and hold the mesh tighter, preventing loosening over time.
Twine offers a sturdier hold but requires you to tie it firmly without cutting into the fabric. Try wrapping it twice before knotting for better grip.
Keep in mind, elastic bands can wear out faster in water, so check yours regularly. Twine might feel tougher, but it can be gentler on the mesh if tied right.
Adding A Hanging Loop
Adding a hanging loop to your shower pouf is a small detail that makes a big difference. It keeps your pouf within easy reach and allows it to dry properly between uses, preventing mildew. This simple addition also helps you keep your bathroom organized and tidy.
Selecting The Right Material
Choosing the right material for your hanging loop is essential. You want something strong but flexible, like nylon cord, ribbon, or elastic bands. These materials hold up well in wet conditions and won’t stretch out or break easily.
Think about the look and feel too. A soft ribbon adds a nice touch of style, while a sturdy nylon cord ensures durability. If you want a natural option, consider cotton twine, but remember it might wear out faster with frequent water exposure.
Attaching The Loop
Attaching the loop securely is key to making your pouf last. Fold your chosen material into a loop of about 4-6 inches. Insert the ends through the center of your pouf where the mesh gathers.
Use a strong knot or sew the ends together tightly to prevent slipping. If you sew it, a few stitches through the mesh and loop ends will hold everything firmly. You can also tie the loop around the pouf’s core for extra security.
Does your bathroom setup allow for easy hanging? If not, consider adding a suction cup hook or small wall hook to keep your pouf accessible and dry.
Customizing Your Pouf
Customizing your shower pouf makes it unique and personal. It adds style and comfort to your daily routine. Simple changes can brighten your bathroom and enhance your shower experience.
Color Options
Choose colors that match your bathroom decor. Bright colors make the pouf stand out. Soft pastels create a calm, relaxing vibe. Mixing two or three colors adds fun and creativity.
- Solid colors for a clean look
- Stripes or patterns for variety
- Seasonal colors to change with the year
Use colored tulle or netting to make your pouf. This material is easy to work with and dries quickly.
Adding Scents Or Essential Oils
Add a few drops of essential oils to your pouf. It releases a fresh scent while you shower. Lavender, eucalyptus, and peppermint are popular choices.
- Apply oils on the pouf before use
- Use a cotton ball to hold the scent
- Replace the cotton ball regularly for freshness
Scents make shower time more relaxing and enjoyable. Avoid strong smells that can irritate your skin or nose.
Care And Maintenance
Proper care and maintenance keep your shower pouf fresh and lasting longer. This small effort prevents mold and bacteria buildup. It also helps maintain the pouf’s softness and cleaning power. Regular cleaning and timely replacement are key to good hygiene in your shower routine.
Cleaning Tips
- Rinse the pouf thoroughly after each use with warm water.
- Squeeze out excess water to avoid moisture buildup.
- Hang it in a well-ventilated area to dry completely.
- Once a week, soak the pouf in a mixture of water and white vinegar for 5 minutes.
- Rinse well after soaking to remove any vinegar smell.
- Allow it to air dry fully before the next use.
- Avoid using harsh detergents that can damage the material.
Replacing Your Pouf
Replace your shower pouf every 3 to 4 weeks. Over time, it collects bacteria and dead skin cells. A worn-out pouf loses its scrubbing ability and may cause skin irritation. Always choose a new pouf made from soft, durable materials. Keep your skin healthy by changing your pouf regularly.

Credit: offthebeatenhook.com
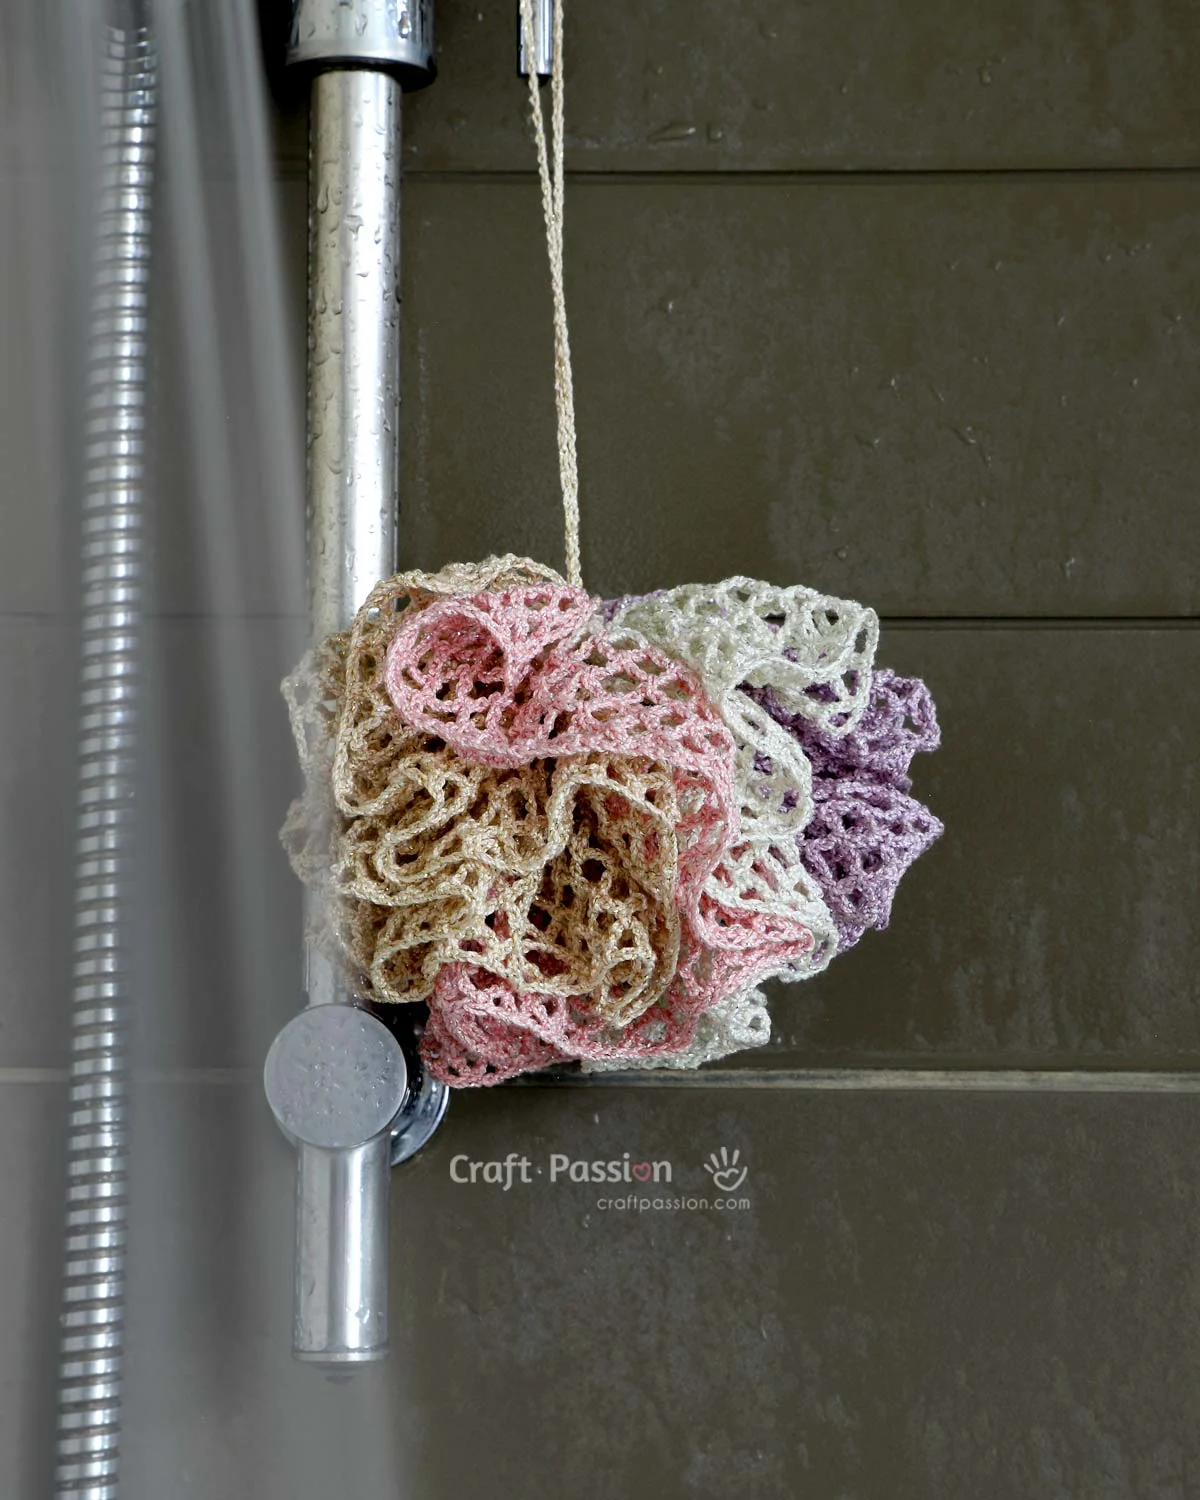
Credit: www.craftpassion.com
Frequently Asked Questions
How Do You Make A Shower Pouf At Home?
To make a shower pouf, cut nylon mesh into strips. Tie and bunch them tightly around a looped string. Fluff the mesh layers evenly to form a pouf shape. This DIY pouf is cost-effective and customizable in size and color.
What Materials Do I Need For A Shower Pouf?
You need nylon mesh fabric, scissors, and a strong string or elastic band. The mesh should be soft and durable. These simple materials help you create a gentle and effective exfoliating pouf for daily shower use.
How Long Does A Homemade Shower Pouf Last?
A homemade pouf lasts about 3 to 4 weeks with proper care. Rinse it after use and let it dry fully. Replace it regularly to avoid bacteria buildup and maintain skin health during showers.
Can I Customize The Size Of My Shower Pouf?
Yes, you can customize your shower pouf’s size by adjusting mesh strip length and quantity. More layers create a fuller, larger pouf. Tailor it to your preference for exfoliation and handling comfort in the shower.
Conclusion
Making a shower pouf at home is simple and fun. You only need a few easy materials. It saves money and lets you customize colors and size. Using your own pouf feels special every day. Try making one yourself to enjoy a soft, gentle scrub in the shower.
Small projects like this bring joy and creativity to daily routines. Give it a try—you might enjoy the process more than you expect.


