
Are you ready to transform your outdoor space into a magical wonderland? Stringing lights on a tree can instantly add warmth and charm to your yard, making it the perfect spot for evenings with friends and family.
But where do you start? How do you get those lights to look just right without a tangled mess? In this guide, you’ll discover simple, step-by-step tips that make hanging lights easy and stress-free. By the end, your tree will be glowing beautifully, and you’ll feel proud of the stunning atmosphere you created.
Let’s get started and light up your nights!

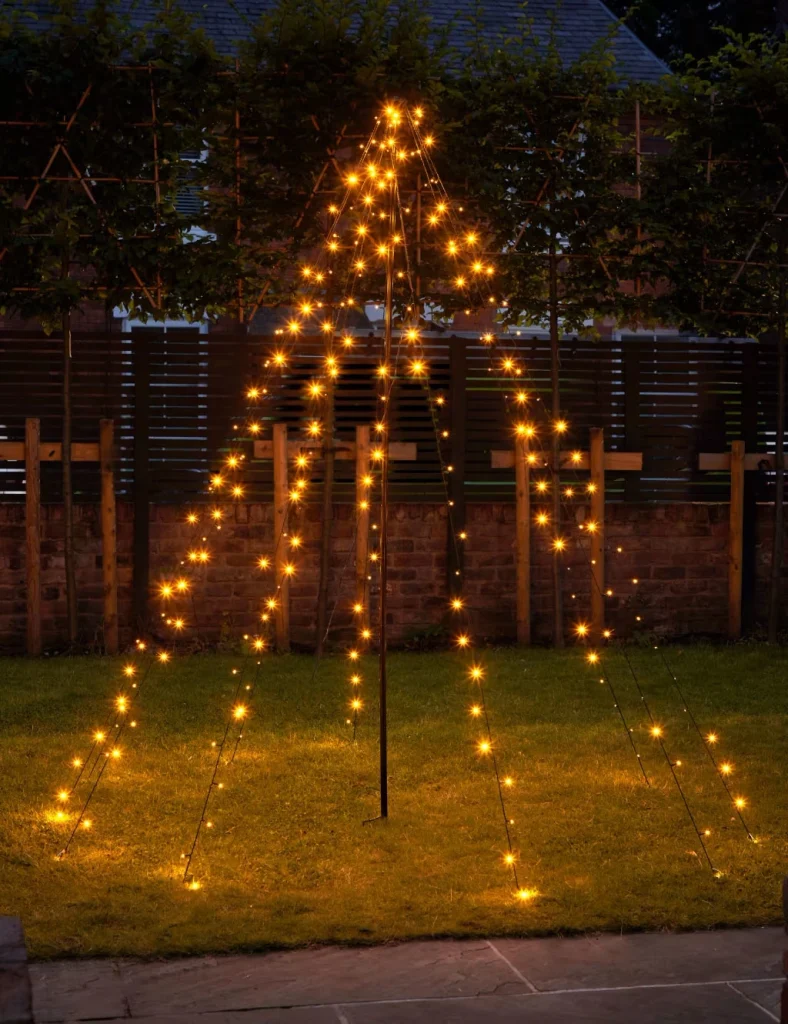
Credit: mkillumination.co.uk
Choosing The Right Lights
Choosing the right lights for stringing on a tree can make all the difference between a dazzling display and a disappointing one. The right lights highlight your tree’s natural beauty and create the atmosphere you want. Think about where you’ll place the tree and how the lights will look both up close and from a distance.
Types Of String Lights
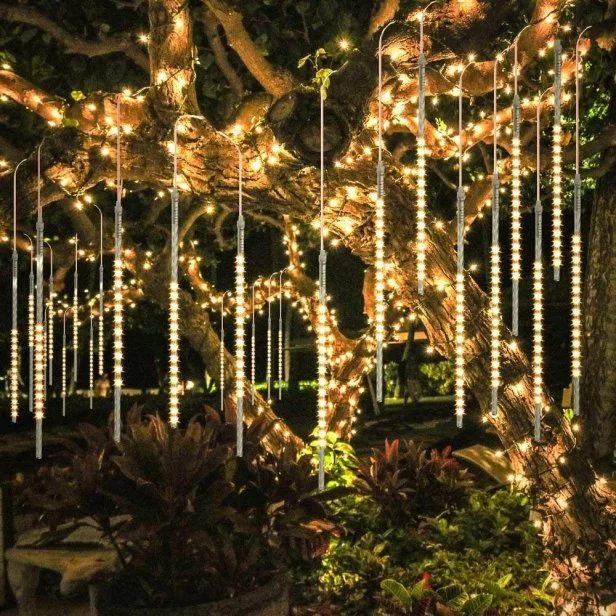
There are several types of string lights, each with its own look and benefits. LED lights are energy-efficient and last longer, making them ideal for outdoor use. Incandescent lights offer a warm glow but use more power and can get hot, which might be a safety concern around dry trees.
Fairy lights provide a delicate, twinkling effect that’s perfect for smaller branches or a subtle shimmer. Rope lights are thicker and brighter, suitable for outlining larger tree trunks or creating bold shapes. Consider what effect you want before choosing the type.
Selecting Light Color And Brightness
Color sets the mood. Warm white lights create a cozy, inviting feel, while cool white or blue lights offer a crisp, modern look. Multicolor lights add fun and vibrancy, but they may not suit every setting.
Brightness matters too. Too dim, and your tree might go unnoticed; too bright, and it can be overwhelming. Look for lights with adjustable brightness or consider layering different types for depth. Ask yourself—do you want your tree to be a soft glow in the background or the star of the show?
Considering Weather Resistance
Your tree’s location determines how tough the lights need to be. Outdoor-rated lights have protective coatings and seals to withstand rain, snow, and wind. Using indoor lights outside risks short circuits and damage.
Check the packaging for terms like “waterproof” or “weather-resistant.” If your area experiences harsh winters or heavy rain, look for lights with a higher IP rating. Remember, investing in durable lights saves you from frequent replacements and safety hazards.
Credit: www.hgtv.com
Preparing The Tree
Preparing the tree before you start stringing lights is key to a beautiful and safe decoration. Taking time to get the branches clean, check for any hazards, and plan your design will save you frustration later. This prep work also helps your lights shine their best and last longer through the season.
Cleaning Branches
Remove any dead leaves, twigs, or debris from the branches. Dust and dirt can dull the glow of your lights and make them harder to attach securely. Use a soft brush or a gentle spray of water to clear off grime without damaging the tree.
Have you noticed how much brighter lights look on freshly cleaned branches? This simple step can make your tree look professionally decorated with minimal effort.
Checking For Safety Hazards
Look closely for broken branches, loose bark, or any sharp points that could damage your light cords. Also, check for exposed wires or damaged plugs on your lights before hanging them. Safety is not just about avoiding shocks but preventing fire risks too.
It’s surprising how often unsafe conditions hide in plain sight. Taking a few minutes to inspect can protect you, your family, and your home during the festive season.
Planning Your Design
Think about the overall look you want to achieve. Do you prefer a dense wrap of lights on every branch or a more minimalist, spaced-out style? Planning now helps you estimate how many light strands you need and where to start.
Sketch a rough outline or take a picture of your tree and mark spots where you want clusters or trails of lights. This way, you avoid running out of lights halfway through or ending up with uneven coverage.
Gathering Tools And Materials
Before you start stringing lights on your tree, gathering the right tools and materials can save you time and frustration. Having everything ready means you can focus on creating a beautiful display without unexpected interruptions. Let’s look at what you need to make the process smooth and safe.
Essential Tools
Having the right tools is key to an efficient setup. Start with a sturdy ladder to reach high branches safely. A pair of wire cutters or scissors is helpful for trimming excess wire or removing damaged bulbs.
You’ll also want some twist ties or small zip ties to secure lights neatly along branches. If your lights don’t have clips, lightweight hooks can help attach them without damaging the tree. Don’t forget a flashlight or headlamp if you plan to work in dim light or after sunset.
Extension Cords And Timers
Extension cords extend your reach and prevent overloading outlets. Choose outdoor-rated cords to handle weather conditions and avoid safety hazards. Measure the distance from your power source to the tree to pick the right cord length—too short means a risky stretch; too long can cause clutter.
Timers add convenience and energy savings by automatically turning your lights on and off. This means no more running outside to flip switches in the cold or dark. Look for timers with multiple settings so you can customize when your lights shine brightest.
Safety Gear
Safety can’t be overlooked when working with electricity and heights. Wear gloves to protect your hands from sharp branches and electrical contacts. Non-slip shoes will keep you steady on ladders and uneven ground.
Consider safety glasses if you’re dealing with tight spaces or trimming branches. And always check your lights and cords for frayed wires or broken bulbs before plugging in. What safety checks do you make before starting your decorating projects?

Credit: www.temu.com
Wrapping Lights Around The Tree
Wrapping lights around a tree transforms it into a glowing centerpiece that catches every eye. The key is to approach the task with a clear plan that ensures the lights are evenly spaced and securely fastened. This not only enhances the tree’s beauty but also keeps your display safe and long-lasting.
Starting Point Selection
Choose a starting point that gives you easy access to a power source. The base of the trunk near an outlet works well for most trees. Starting low also allows you to wrap upwards smoothly without tangling the string.
Consider the tree’s shape and size before you begin. A wide trunk might require beginning at the thickest part to anchor the lights firmly. Have extra extension cords ready in case the distance is longer than expected.
Techniques For Even Coverage
Wrap the lights by spiraling them around the trunk and branches, keeping equal spacing between each loop. This creates a balanced glow and avoids dark spots. If your tree has many branches, weave the lights gently around them to highlight the natural structure.
Try to maintain consistent tension on the string to prevent sagging. If you want extra brightness, go over certain areas twice rather than clustering lights in one spot. Have you noticed how evenly spaced lights make a tree look professionally decorated?
Securing Lights Safely
Use twist ties, zip ties, or soft garden wire to fasten the lights without damaging the bark. Avoid using metal fasteners that can cut into the tree or create safety hazards. Secure ties loosely enough to allow for tree growth and movement in the wind.
Check for any frayed wires or broken bulbs before wrapping. Plug the lights in periodically to ensure everything works as you go. This way, you avoid the frustration of unraveling the whole setup to fix a single problem later.
Powering And Testing The Lights
Test the lights before hanging to ensure all bulbs work properly. Plug them in and check for any outages. Powering the lights safely helps avoid issues once they are on the tree.
Powering and testing the lights on your tree can make the difference between a dazzling display and a dim disappointment. Ensuring you have a reliable power source and that your lights work as intended is crucial. Imagine the frustration of completing your masterpiece only to find half the lights flickering or, worse, not working at all. Here’s how you can avoid these pitfalls and keep your tree shining bright.Connecting To Power Source
First, identify a convenient power outlet close to your tree. This will minimize the need for long extension cords that could become a tripping hazard. If the outlet is far, consider using a heavy-duty extension cord designed for outdoor use to handle the load safely. Test each string of lights by plugging them into the power outlet before hanging them on the tree. This ensures that any defective strings are caught early, saving you time and effort. Once you’re satisfied they’re working, you can confidently start arranging them on your tree.Using Timers And Controllers
Timers can be a lifesaver, automatically turning your lights on and off at scheduled times. This not only saves energy but also ensures your tree is always beautifully lit when you want it to be. Digital timers offer more flexibility, allowing you to set multiple on/off times throughout the day. For an added layer of convenience, consider using smart controllers that can be operated via smartphone apps. These devices can adjust brightness, colors, and even create light patterns. Imagine the delight of customizing your tree’s appearance without having to leave your couch!Troubleshooting Common Issues
If a string of lights doesn’t work after installation, start by checking the connections at both ends. Ensure they are securely plugged in and free of any debris. If a section of the string is out, try replacing the fuse or bulbs in that section. Sometimes, a single faulty bulb can cause a whole string to malfunction. Test each bulb in the problematic section to find the culprit. Remember, patience is key; resolving these issues might take a bit of time but will lead to a perfectly lit tree. Isn’t it worth the effort to see your tree aglow, lighting up the room and your spirits?Maintaining Your Light Display
Maintaining your light display keeps it bright and safe for a long time. Regular care helps avoid problems and saves effort later. Check your lights often to spot issues early.
Regular Inspections
Look over your lights at least once a week. Check for loose wires, burnt-out bulbs, or signs of wear. Make sure the lights are still firmly attached to the tree. Inspect plugs and sockets for any damage. Catching problems early prevents bigger troubles.
Replacing Damaged Bulbs
Swap out broken or burnt bulbs quickly. Use bulbs that match the original size and voltage. Replace bulbs one at a time to avoid damaging other lights. Turn off the power before changing bulbs. This keeps your display looking even and glowing bright.
Safe Storage Tips
Store your lights properly after use to keep them safe. Coil the string lights loosely to avoid tangles and breaks. Use a sturdy container to protect them from moisture and dust. Keep storage in a dry, cool place away from sunlight. Proper storage makes your lights last longer and stay ready for next time.
Frequently Asked Questions
How Do You Start Stringing Lights On A Tree?
Begin at the tree’s base near the power source. Secure the plug end first. Wrap the lights around the trunk tightly, then move outward along branches. This method ensures even coverage and easy connection to power.
What Type Of Lights Work Best On Trees?
LED string lights are ideal for trees. They are energy-efficient, durable, and emit less heat. Waterproof outdoor-rated lights ensure safety and longevity. Choose warm white or multicolor bulbs depending on your desired look.
How Do You Avoid Tangling String Lights On Trees?
Use a systematic wrapping method, starting from the base. Keep lights taut but gentle to prevent damage. Avoid overlapping wires excessively. Store lights properly after use by winding them on a spool or cardboard.
Can You String Lights On Any Tree Type?
Yes, string lights can be used on most trees. Consider tree size and branch strength for safety. Lightweight lights suit delicate branches. Always use outdoor-rated lights for trees exposed to weather.
Conclusion
Stringing lights on a tree adds a warm, magical touch. Start at the trunk and wrap lights evenly around branches. Check that all bulbs work before hanging. Use clips or ties to keep lights secure. Remember to plug lights into a safe power source.
Take your time for a neat, beautiful look. Bright lights create a cozy, festive mood outside. Enjoy the glow and share the joy with friends. Simple steps make your tree shine bright all night.


