
Are you looking to add a magical glow to your room? Hanging fairy lights on the ceiling can instantly transform any space into a cozy, enchanting retreat.
But if you’re unsure where to start or worried about making mistakes, you’re not alone. In this guide, you’ll discover simple, step-by-step tips to hang your fairy lights safely and beautifully. By the end, you’ll have the confidence to light up your ceiling just the way you imagined—without stress or hassle.
Ready to bring that warm, twinkling charm into your home? Let’s dive in!
Choosing The Right Fairy Lights
Choosing the right fairy lights is key to creating the perfect ambiance on your ceiling. The variety available can be overwhelming, but focusing on a few important factors helps you pick lights that match your style and space. Think about where you’ll hang them, how much light you want, and what power options suit your setup best.
Types Of Fairy Lights
There are several types of fairy lights, each with its own charm and function. Classic string lights with tiny bulbs offer a timeless look. LED fairy lights are energy-efficient and stay cool, making them safer for indoor use.
Battery-operated lights give you flexibility without worrying about outlets. Solar-powered lights work well near windows or outdoor spaces but need enough sunlight to stay bright. Consider whether you want globe-shaped bulbs, star designs, or simple wire lights for a minimalist touch.
Length And Power Source
Measure your ceiling area before buying to avoid lights that are too short or excessively long. A 10 to 20-foot string usually fits average rooms, but larger spaces might need longer strands or multiple sets.
Power sources matter for convenience. Plug-in lights provide consistent brightness but limit placement to outlets. Battery-powered lights offer freedom but require regular battery changes. USB-powered fairy lights can plug into power banks for flexible use.
Color And Brightness Options
Fairy lights come in a spectrum of colors, from warm white to multicolor. Warm white creates a cozy feel, while cool white adds a modern vibe. Colored lights bring festive energy and can match your room’s theme.
Brightness levels vary too. Some lights have adjustable settings, allowing you to dim or brighten depending on the mood. Would you prefer soft twinkling or steady illumination? Choosing the right brightness can completely change your room’s atmosphere.
Preparing Your Ceiling
Preparing your ceiling is a key step before hanging fairy lights. It ensures the lights stay secure and look beautiful. Taking time to prepare helps avoid damage and keeps the installation safe. The surface must be clean, and the layout planned carefully. Knowing where the power outlets are saves effort later. Let’s explore how to get your ceiling ready for fairy lights.
Cleaning The Surface
Start by removing dust and dirt from the ceiling. Use a soft cloth or a duster to wipe the area. Avoid wetting the ceiling too much, as moisture can damage it. A clean surface helps adhesive hooks or tape stick better. This step prevents lights from falling down after installation.
Measuring And Planning Layout
Measure the ceiling space where you want to hang lights. Use a tape measure for accuracy. Plan the shape and pattern of your lights before hanging. Sketching the layout on paper helps visualize the design. Keep in mind the length of your fairy light string. Mark points on the ceiling to guide hanging spots.
Identifying Power Outlets
Find the closest power outlet to your planned light area. Check the outlet’s location and accessibility. Make sure the light string can reach the outlet without stretching. Consider using extension cords if needed. Avoid placing cords where people walk to prevent tripping. Safety first. Knowing outlet spots keeps your setup tidy and functional.
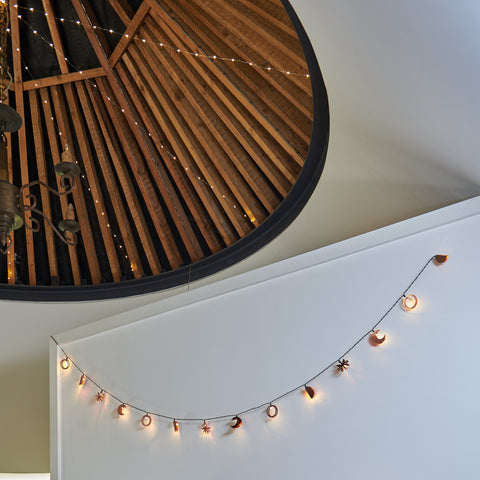
Selecting Hanging Materials
Choosing the right hanging materials ensures your fairy lights stay secure and damage-free. Lightweight hooks, adhesive strips, or clear tape work well on most ceilings. Always pick options that won’t leave marks or harm the surface.
Selecting the right hanging materials is crucial for safely installing fairy lights on your ceiling. The materials you choose will influence the ease of installation and the overall look. Consider the weight of the lights and the type of ceiling. This ensures the lights stay in place without causing damage. Below, explore some effective options for hanging materials.Adhesive Hooks And Clips
Adhesive hooks and clips are a popular choice. They provide a secure hold without damaging the surface. These are easy to use and remove. Ideal for renters or temporary setups. Choose hooks that support the weight of your fairy lights. Space them evenly for a neat appearance.Command Strips And Tape
Command strips and tape offer a simple solution. They work well on smooth surfaces. Ensure the surface is clean before applying. This enhances the grip. Command strips are easy to remove without leaving marks. Tape is flexible and can adapt to various shapes.Alternative Hanging Tools
Consider alternative tools for unique ceilings. Use small nails or tacks on wooden surfaces. Fishing wire can suspend lights invisibly. Curtain rods can support heavier lights. Each tool offers a different aesthetic and level of support. Choose based on your ceiling type and decor style.
Credit: sparkle.lighting
Step-by-step Hanging Process
Hanging fairy lights on the ceiling can transform your space with a warm, magical glow. The process may seem tricky at first, but breaking it down into clear steps makes it manageable and even fun. Let’s walk through how to mark attachment points, install hooks or clips, and secure your fairy lights properly.
Marking Attachment Points
Start by deciding the pattern or shape you want for your lights. Use a pencil or painter’s tape to mark small spots where each hook or clip will go. Spacing is key—too far apart and the lights might sag; too close and it could look cluttered.
Think about the areas where the lights will hang naturally without pulling or stretching. If you’re creating a zigzag or wave pattern, mark points along the path to keep it even. Have you ever noticed how uneven string lights can ruin the whole look? Taking time here saves frustration later.
Installing Hooks Or Clips
Choose hooks or clips designed for ceiling use, such as adhesive hooks or small screw-in hooks, depending on your ceiling type. If you rent, adhesive hooks are friendly to landlords and easy to remove. For drywall or wood ceilings, small screws provide extra security.
Press or screw each hook right on the marks you made. Make sure they’re firmly attached before moving on. A loose hook can cause your whole setup to fall, which nobody wants. If you’re using adhesive hooks, give them time to set before hanging the lights.
Securing Fairy Lights
Now it’s time to hang your lights. Start at the plug end and gently drape the string from hook to hook. Use twist ties or small zip ties to fasten the lights to the hooks if needed. This keeps them from slipping or moving out of place.
Check the tension as you go—lights should be taut but not stretched. If you find some areas sagging, adjust the spacing or add more hooks. Have you ever had fairy lights droop too low and get tangled? Securing them well prevents that hassle and keeps your display looking crisp.
Safety Tips And Precautions
Hanging fairy lights on the ceiling can instantly transform any space into a cozy, magical retreat. However, safety should always be your top priority. Ignoring basic precautions could lead to electrical hazards or even fires. Let’s look at some key safety tips to keep your decorating experience fun and worry-free.
Avoiding Overloading Circuits
It’s easy to get excited and plug in multiple strands of fairy lights, but too many can overload your circuit. Each outlet can only handle a certain amount of electrical load safely.
- Check the wattage on your lights and compare it to your outlet’s capacity.
- Use power strips with built-in circuit breakers to prevent overloads.
- Spread your lights across different outlets if possible.
I once plugged three sets of fairy lights into one outlet and tripped a breaker. That quick lesson made me double-check the load every time since.
Handling Electrical Components
Always inspect your fairy lights before hanging. Look for damaged wires, frayed cords, or broken bulbs. Using faulty lights increases the risk of electric shock or short circuits.
- Unplug lights before you handle or adjust them.
- Keep plugs and connectors dry and away from water sources.
- Consider LED lights—they run cooler and last longer.
Don’t ignore the labels. If your lights are rated for indoor use only, don’t use them outdoors or in damp areas. Your safety depends on respecting these guidelines.
Fire Safety Measures
Fairy lights can get warm after hours of use, especially traditional incandescent types. Make sure they don’t touch flammable materials like curtains, paper, or dry plants.
- Use clips or hooks to keep lights securely fastened and away from fabric.
- Turn off your lights when you leave the house or go to bed.
- Have a smoke detector installed nearby to alert you early in case of fire.
One night, I forgot to turn off a strand of lights resting on a curtain. Thankfully, I noticed the faint smell of burning and turned them off immediately. It made me realize how small precautions can prevent disasters.

Credit: www.threads.com
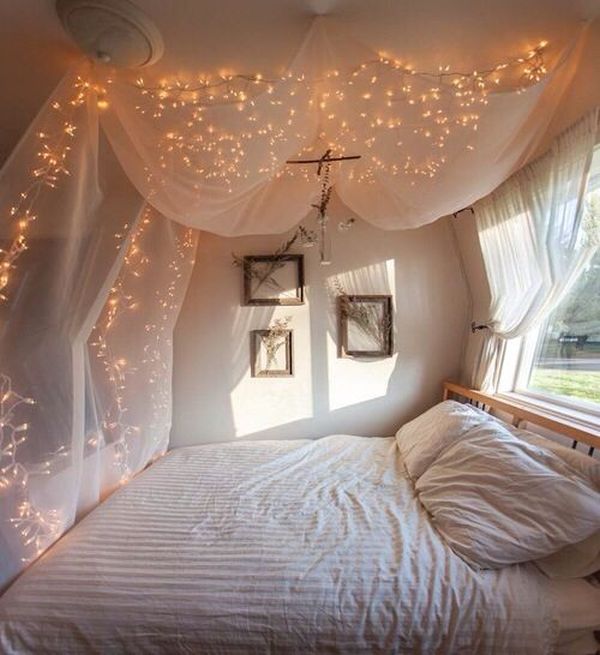
Creative Arrangements For Magic Glow
Creating a magical glow with fairy lights starts with how you arrange them. The right layout changes the entire room’s mood. It brings warmth and charm to your space. Use simple ideas to make your ceiling sparkle uniquely. Play with light shapes, patterns, and combinations. Let your creativity shine through the glow.
Draping Patterns
Drape fairy lights loosely across the ceiling for a soft, flowing look. Create gentle waves or zigzags to add movement. Use hooks or adhesive clips to hold the lights in place. For a cozy vibe, hang strands close together. Spread them out for a more open feel.
Creating Shapes And Designs
Design shapes such as stars, hearts, or circles with your lights. Attach the string carefully to form clear outlines. Try geometric patterns like triangles or diamonds for a modern touch. Use clear tape or small hooks to secure each bend. This adds an artistic, playful glow above.
Combining With Other Decorations
Mix fairy lights with greenery, paper lanterns, or fabric for extra charm. Wrap lights around artificial vines or branches for nature-inspired decor. Hang lightweight ornaments or photos along the string for personal flair. Use soft fabrics like tulle to diffuse the light gently. Blending elements creates layers and depth in your ceiling display.
Maintaining And Storing Fairy Lights
Maintaining and storing fairy lights properly keeps them bright and safe for a long time. Careful handling prevents damage and helps avoid electrical issues. Clean lights shine better and last longer. Storing them right stops tangles and breakage. Follow simple steps to keep your fairy lights in top shape for every use.
Regular Cleaning
Dust and dirt reduce the shine of fairy lights. Wipe bulbs gently with a soft, dry cloth. Avoid water or harsh cleaners that can damage wires. For stubborn dirt, use a slightly damp cloth and dry immediately. Clean the lights before and after use to maintain brightness and safety.
Troubleshooting Common Issues
Lights not working? Check for loose bulbs or connections first. Replace burnt-out bulbs with the exact type recommended. Inspect wires for damage or fraying. Use a bulb tester to find faulty bulbs quickly. Avoid overloading the power source to prevent outages or shorts.
Proper Storage Techniques
Store fairy lights carefully to avoid tangling and breaking. Coil the lights loosely around a piece of cardboard or a spool. Keep them in a dry, cool place away from direct sunlight. Use a plastic container or a zip bag to protect from dust and moisture. Label the storage container for easy finding next time.
Credit: www.digsdigs.com
Frequently Asked Questions
How Do I Hang Fairy Lights Without Damaging The Ceiling?
Use adhesive hooks or removable clips designed for walls and ceilings. Avoid nails or screws to prevent damage. Choose lightweight lights to reduce strain. Clean the surface before applying hooks to ensure strong adhesion. This method keeps your ceiling safe and lights secure.
What Is The Best Pattern For Hanging Fairy Lights On Ceiling?
Popular patterns include zigzag, straight lines, or a canopy style. Choose based on room size and desired ambiance. Canopy style creates a cozy, starry effect. Zigzag is simple and evenly distributes light. Select a pattern that complements your space and style.
Can I Hang Fairy Lights On A Textured Ceiling?
Yes, use strong adhesive hooks or ceiling clips for textured ceilings. Avoid nails, as they may cause damage or fall out. Clean the surface well for better adhesion. Lightweight fairy lights work best on textured surfaces to ensure they stay in place.
How Do I Safely Hang Fairy Lights On The Ceiling?
Ensure lights are rated for indoor use and check for damage. Use proper hooks or clips to avoid falling hazards. Keep wires away from heat sources or water. Turn off lights when unattended. Safety precautions prevent accidents and prolong light lifespan.
Conclusion
Hanging fairy lights on the ceiling adds charm and warmth to any room. It creates a cozy and magical atmosphere easily. Using simple tools and careful planning makes the process smooth. Take your time to arrange the lights evenly for the best look.
Enjoy the soft glow that brightens your space beautifully. This small change can make your room feel special every day. Try different patterns to find what suits your style. Let your creativity shine with these easy steps.


