
You’ve just finished painting your walls, and now you’re eager to add those eye-catching wall stickers to complete your space. But how long should you wait before sticking them on?
Applying stickers too soon can ruin your fresh paint job, while waiting too long might delay your decorating plans. You’ll discover the perfect timing to apply wall stickers after painting, ensuring your walls look flawless and your stickers stick perfectly.
Keep reading to find out exactly when to make your move and avoid common mistakes that could cost you time and effort.
Drying Time For Different Paints
Knowing how long to wait after painting before applying wall stickers depends heavily on the type of paint you used. Different paints dry at different speeds and have various curing times, which can affect how well stickers stick to the surface. Understanding these differences helps you avoid peeling or damaging your fresh paint.
Latex Paint
Latex paint is popular for its quick drying time and easy cleanup. Typically, it feels dry to the touch within an hour, but it can take up to 30 days to fully cure. Applying stickers after 48 hours is usually safe, but waiting a full week ensures the paint is firm enough to hold the adhesive without peeling.
Have you ever noticed your stickers lifting shortly after application? That’s often because the latex paint beneath wasn’t fully cured.
Oil-based Paint
Oil-based paint dries slower than latex. It may feel dry after 6 to 8 hours, but the full curing process can take up to 7 days or more. Because of this, it’s best to wait at least a week before applying wall stickers to avoid ruining both the paint and the sticker.
If you want a durable, long-lasting finish, patience with oil-based paint is key. Rushing to add stickers too soon can lead to sticky messes and peeling edges.
Acrylic Paint
Acrylic paint dries quickly, often within 30 minutes to an hour, depending on the thickness and ventilation. However, like latex, it needs a longer curing period—usually about 2 weeks—for best results. Applying stickers after 3 to 5 days might work, but giving acrylic paint a full two weeks will ensure your wall stickers stay put without damaging the paint.
Think about the last time you painted with acrylic. Did you rush to decorate right away? Waiting a bit longer can make a big difference in the final look and durability.
Factors Affecting Paint Drying
Paint drying time varies due to several factors. These factors influence how long the surface stays wet or tacky. Understanding them helps decide when to apply wall stickers safely. The paint must be fully dry to ensure stickers stick well without peeling.
Humidity Levels
High humidity slows paint drying. Moist air stops water or solvents from evaporating quickly. In damp rooms, paint can remain wet for days. Low humidity speeds drying by allowing faster evaporation. Use a dehumidifier in moist spaces to help paint dry faster.
Temperature
Warm temperatures make paint dry quicker. Cold air slows down the drying process. Ideal drying happens between 50°F and 85°F (10°C to 29°C). Avoid painting in very cold or very hot weather. Extreme temperatures cause uneven drying and poor sticker adhesion.
Number Of Coats
More paint layers mean longer drying times. Each coat adds thickness and moisture. Thin coats dry faster than thick ones. Allow each coat to dry fully before adding another. Patience ensures the wall surface is ready for stickers.
Preparing Walls For Stickers
Allow paint to dry completely, usually for at least 24 to 48 hours, before applying wall stickers. Ensure the surface is smooth and free of dust or grease for better sticker adhesion. Patience helps stickers stick well and last longer on freshly painted walls.
Preparing your walls for stickers is a crucial step to ensure they adhere properly and last long. You wouldn’t want to see your beautiful wall sticker peeling off after just a few days, right? Here’s how you can set the stage for your wall stickers to shine.Cleaning The Surface
Start by cleaning the wall thoroughly. Dust, dirt, and grease can prevent stickers from sticking well. Use a damp cloth with a mild detergent to wipe down the walls, then let them dry completely.Ensuring Smoothness
A smooth surface is key for a flawless sticker application. Check your walls for any bumps or rough patches. Sand them down gently to create an even surface that welcomes your stickers with open arms.Avoiding Residue
Be mindful of any residue from cleaning agents. Sticky residues can interfere with the adhesive of your wall stickers. Rinse the walls with clean water after using any cleaning product, and ensure they’re completely dry before proceeding. By preparing your walls meticulously, you’re setting the foundation for a successful sticker application. Have you ever skipped a prep step and regretted it later? Don’t let that happen with your wall stickers!
Credit: www.designcafe.com
Best Practices For Applying Wall Stickers
Applying wall stickers after painting can refresh any room quickly. Following best practices ensures the stickers stick well and look great. Proper preparation and careful application help avoid peeling or bubbling. These tips guide you through choosing, positioning, and applying wall stickers for the best results.
Choosing The Right Stickers
Select stickers made for indoor use and smooth surfaces. Vinyl stickers work well on freshly painted walls. Avoid stickers with weak adhesive or paper material. Check the sticker size to fit your wall space. Pick designs that match your room’s style and color.
Positioning Tips
Plan your sticker layout before peeling the backing. Use a pencil to mark the exact spot lightly. Step back and view the placement from different angles. Align stickers evenly using a level or ruler. Leave small gaps between multiple stickers for neatness.
Application Techniques
Wait at least 7 days after painting before applying stickers. Ensure the paint is fully dry and cured. Clean the wall surface with a damp cloth and let dry. Peel the sticker backing slowly to avoid tearing. Press the sticker firmly from the center outwards to remove air bubbles. Use a credit card or squeegee for smooth application. Avoid stretching the sticker during placement to keep the design intact.
Common Mistakes To Avoid
Applying wall stickers too soon after painting is a common pitfall that can ruin your hard work. Patience is key to ensure the paint is fully dry and cured. If you rush, the sticker may not stick properly or worse, peel the paint off when removed.
Applying Too Soon
Many people assume that once the paint feels dry to touch, it’s ready for stickers. But surface dryness and full curing are different. Paint can take up to two weeks to cure completely, depending on the type and room conditions.
Have you ever peeled off a sticker only to see paint come off with it? That’s a sign you applied it too early. Waiting longer avoids this hassle and keeps your walls looking flawless.
Ignoring Surface Prep
Skipping surface preparation is a mistake that affects sticker adhesion. Even fresh paint can have dust, grease, or tiny bumps that prevent stickers from sticking well. Clean your wall gently with a damp cloth and let it dry before applying stickers.
Think of it this way: Would you stick a label on a dusty box and expect it to stay? The same logic applies to walls. Taking a few extra minutes to prep saves you time and frustration later.
Using Low-quality Stickers
Not all wall stickers are created equal. Cheap stickers often use weak adhesives that don’t last or damage the paint when removed. Investing in good quality stickers designed specifically for walls makes a huge difference.
Have you noticed some stickers leave behind sticky residue or tear easily? That’s a sign of poor quality. Choose brands with positive reviews and clear instructions for best results.
Troubleshooting Sticker Issues
Applying wall stickers can instantly brighten your space, but sometimes issues like peeling edges or air bubbles can spoil the look. Troubleshooting these problems quickly helps you keep your walls looking perfect. Let’s dive into some practical ways to tackle common sticker troubles and ensure your decor stays flawless.
Peeling Edges
Peeling edges often happen when the paint beneath hasn’t fully dried or cured. If you notice corners lifting, gently press them back down with a clean cloth or your fingers. Applying a little heat with a hairdryer can reactivate the adhesive, helping the sticker stick better.
Also, check if the wall surface is too rough or dusty. Cleaning the area before applying stickers makes a big difference. Have you ever applied a sticker only to see it lift after a day? That’s usually the paint’s fault, not the sticker.
Air Bubbles
Air bubbles trapped under stickers are annoying but easy to fix. Use a pin or needle to poke tiny holes in the bubbles, then press the air out gently with a flat tool like a credit card. This simple trick smooths out the surface fast.
Prevent bubbles by applying stickers slowly, smoothing from the center outward. Taking your time during application can save you from frustrating bubble fixes later. Have you tried using a squeegee or similar tool to apply stickers evenly?
Sticker Removal Tips
Removing wall stickers without damaging paint is possible with the right approach. Slowly peel the sticker from one edge, pulling it back at a sharp angle. If it resists, warm it up with a hairdryer to soften the adhesive.
For stubborn residue, use a mixture of warm water and mild soap or a dedicated adhesive remover. Always test your chosen cleaner on a small hidden spot first. What’s your biggest challenge when removing stickers from painted walls?
Maintaining Wall Stickers Over Time
Maintaining wall stickers over time helps keep your walls fresh and attractive. Proper care extends their life and appearance. Small efforts prevent peeling and fading. Follow simple tips to enjoy your wall stickers longer.
Cleaning Methods
Use a soft, dry cloth to wipe dust gently. Avoid harsh chemicals or abrasive cleaners that damage stickers. For stubborn spots, slightly dampen a cloth with water. Pat the area gently without rubbing hard. Let the stickers dry naturally after cleaning.
Avoiding Damage
Keep stickers away from direct sunlight to prevent fading. Avoid placing them in humid areas like bathrooms. Don’t scratch or peel the edges. Keep sharp objects and pets away from the wall stickers. Handle walls with care during moving or cleaning.
When To Replace Stickers
Replace stickers if they start peeling or losing color. Cracks or bubbles under the sticker signal time for change. When the design no longer fits your style, change it. Fresh stickers brighten up your space instantly. Regular checks help spot when to update your wall art.

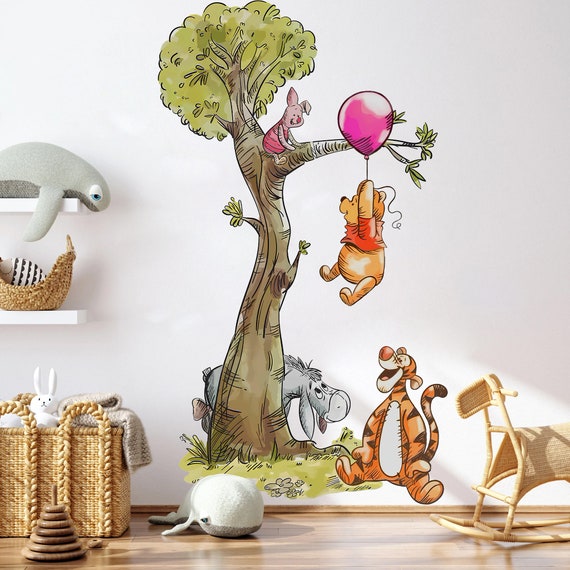
Credit: aboutmurals.ca
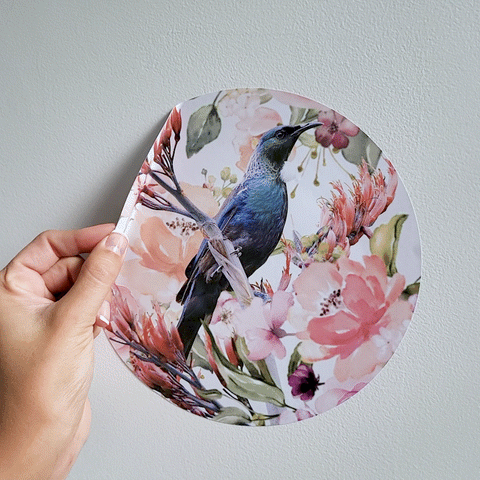
Credit: www.etsy.com
Frequently Asked Questions
How Long Should Paint Dry Before Applying Wall Stickers?
Wait at least 2 weeks for paint to fully dry before applying stickers. This ensures the paint is cured and prevents peeling or damage when stickers are applied.
Can I Apply Wall Stickers On Freshly Painted Walls?
Avoid applying wall stickers on freshly painted walls. Fresh paint can be soft, causing stickers to stick unevenly or peel off when removed.
What Affects Drying Time Before Applying Wall Decals?
Drying time depends on paint type, humidity, and temperature. Latex paint usually dries in 2 weeks, while oil-based paints take longer to cure completely.
Will Applying Stickers Too Soon Damage The Paint?
Yes, applying stickers too soon can peel or damage soft, uncured paint layers. Always wait for paint to dry fully for a smooth, lasting finish.
Conclusion
Wait at least one to two weeks after painting before applying wall stickers. This time allows the paint to fully dry and cure. Applying stickers too soon may cause peeling or bubbles. Clean the wall surface gently before sticking. Choose stickers that suit your wall type for best results.
Taking these steps helps your stickers stay smooth and last longer. Patience ensures a neat and lasting decoration. Enjoy your refreshed space with confidence.


