
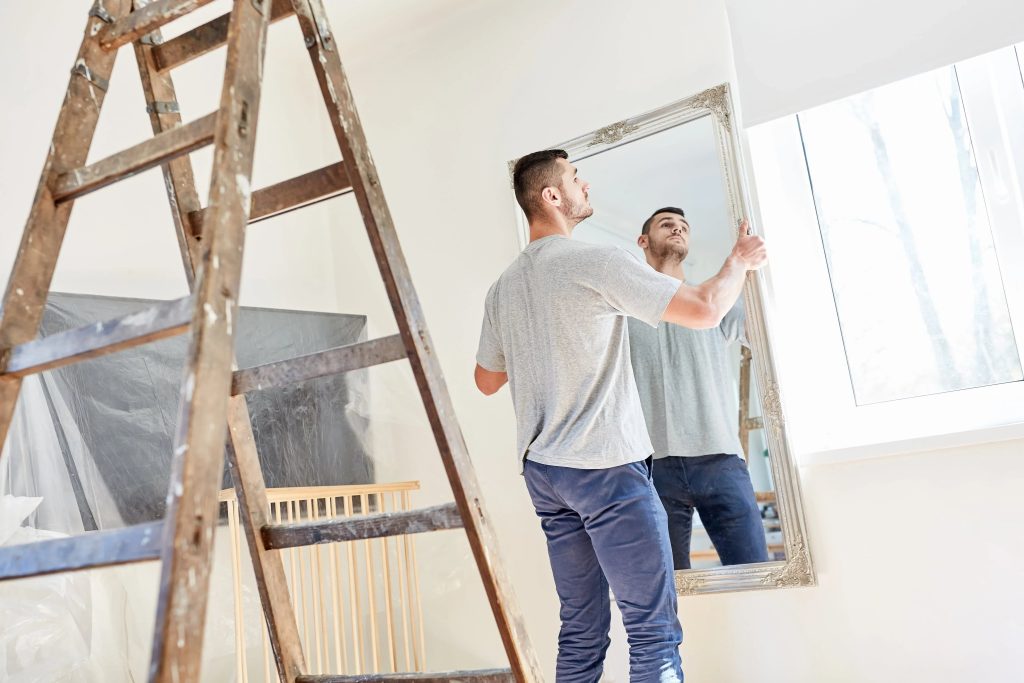
Have you ever wanted to add a mirror to your wall but felt unsure about how to do it safely and securely? Whether you’re updating your bathroom, bedroom, or hallway, knowing the right way to adhere a mirror can save you time, effort, and frustration.
In this guide, you’ll discover simple, effective steps to attach your mirror without damaging your walls or risking it falling down. By the end, you’ll feel confident tackling this project yourself and enjoy the fresh look a mirror brings to your space.
Keep reading to learn the secrets that professionals use to get perfect results every time.
Credit: mirrormate.com
Choosing The Right Mirror
Choosing the right mirror is key to making your space look great and ensuring safe installation. The mirror must fit the room’s size and style. It should also be compatible with the wall and the type of adhesive or support you plan to use.
Consider the mirror’s weight and thickness carefully. These factors affect how you attach the mirror and which tools or materials you need. A well-chosen mirror blends with your decor and stays firmly on the wall for years.
Selecting Mirror Size And Style
Pick a mirror size that suits your wall space. A small mirror can get lost on a big wall. A large mirror may overwhelm a tiny room. Measure the wall area before buying.
Match the style of the mirror to the room’s design. Simple frames fit modern spaces. Ornate frames suit classic interiors. The mirror should complement furniture and colors.
- Consider round, square, or rectangular shapes.
- Choose frames in wood, metal, or plastic.
- Think about the mirror’s function: decorative or practical.
Considering Weight And Thickness
Heavier mirrors need stronger mounting solutions. Thin mirrors are lighter but can be fragile. Know the mirror’s weight before buying adhesive or hooks.
Check the thickness of the glass and frame. Thick mirrors may not stick well with basic adhesives. Thin mirrors may require special support to avoid cracks.
| Mirror Type | Weight | Recommended Mounting |
|---|---|---|
| Thin glass, lightweight frame | Light | Double-sided tape, adhesive strips |
| Thick glass, metal frame | Heavy | Wall anchors, screws, strong adhesive |
| Frameless glass | Varies | Special clips, silicone adhesive |

Credit: www.rjliving.com.au
Preparing The Wall Surface
Clean the wall thoroughly to remove dust, grease, and dirt. Ensure the surface is dry and smooth for better mirror adhesion. Patch any holes or cracks to create an even surface.
Preparing the wall surface is crucial for securely adhering a mirror. A well-prepared surface ensures the mirror stays in place. It also prevents potential damage to walls or mirrors. Proper preparation involves cleaning, drying, and checking the wall’s stability.Cleaning And Drying The Wall
Start by removing dirt and dust from the wall. Use a soft cloth and mild detergent. Gently wipe the wall to remove grime. Rinse with clean water. Dry the wall thoroughly with a towel. Ensure no moisture remains. A clean, dry surface helps adhesives bond better.Checking For Flatness And Stability
Inspect the wall for flatness. Use a spirit level to check evenness. Uneven surfaces may cause mirrors to fall. Ensure the wall is stable and strong. Avoid hollow or weak spots. Tap the wall lightly to detect hollow areas. Reinforce weak spots if necessary. A flat, stable surface supports the mirror’s weight.Gathering Necessary Tools And Materials
Before attaching a mirror to a wall, gather all the necessary tools and materials. This step ensures a smooth installation process and avoids interruptions. Having everything ready saves time and helps achieve a secure and clean finish.
Choosing the right adhesive is crucial for safety and durability. Along with adhesive, other supplies will make the task easier and more precise.
Adhesive Options For Mirrors
- Mirror mastic: Specially made for mirrors, provides strong hold without damage.
- Construction adhesive: Works well on many surfaces, offers durable bonding.
- Double-sided mirror tape: Good for small or lightweight mirrors, easy to apply.
- Silicone adhesive: Flexible and waterproof, suitable for bathrooms.
Additional Supplies Needed
- Measuring tape: To find the perfect position on the wall.
- Level: Ensures the mirror hangs straight and looks professional.
- Cleaning materials: Use rubbing alcohol and a cloth to clean surfaces.
- Protective gloves: Keep hands safe from glue and sharp edges.
- Painter’s tape: Helps mark the spot without damaging the wall.
- Caulking gun: Needed if using tube adhesives like silicone or mastic.
Measuring And Marking Placement
Measuring and marking the placement of a mirror is a key step to ensure it hangs perfectly. Precise measurement avoids crooked or uneven positioning. Taking time to mark the exact spot saves effort during installation.
Accurate placement enhances the room’s look and functionality. It ensures the mirror reflects light and space as intended. This part of the process requires simple tools and careful attention.
Finding The Ideal Height
Choose a height that fits the room and mirror size. Consider the average eye level, around 57 to 60 inches from the floor. For vanity mirrors, measure above the sink or countertop.
Mark the center point where the mirror will hang. Think about furniture or fixtures nearby. Leave enough space for easy viewing and cleaning.
Using Level And Tape Measure
Use a tape measure to confirm distances from the floor and walls. Mark points lightly with a pencil. Check the marks with a level to ensure they are straight.
A level keeps the mirror perfectly horizontal. Adjust marks until the bubble is centered. This prevents the mirror from tilting after hanging.
Double-check all measurements before drilling or fixing hardware. Accurate marking makes the installation smooth and secure.
Applying Adhesive To The Mirror
Applying adhesive to the mirror is a critical step for secure mounting. The right technique ensures the mirror stays firmly attached without damage. It also helps the adhesive spread evenly, creating a strong bond between the mirror and the wall.
Take time to prepare the mirror’s back surface before applying any glue. This preparation improves adhesion and prevents future issues like slipping or falling. Choosing the correct type of adhesive for your mirror and wall surface is also important.
Best Techniques For Adhesive Application
- Clean the mirror’s back with rubbing alcohol to remove dust and grease.
- Use a high-quality mirror adhesive or silicone sealant designed for glass.
- Apply adhesive in small, even dots or beads around the edges and center.
- Avoid using a continuous line to prevent air pockets that weaken the bond.
- Press the mirror gently against the wall, holding it steady for several minutes.
- Use painter’s tape or supports to keep the mirror in place while the adhesive cures.
Avoiding Common Mistakes
- Do not apply too much adhesive; excess glue can squeeze out and cause mess.
- Avoid applying adhesive on the mirror’s edges only; this reduces contact area.
- Never skip cleaning the mirror’s back; dirt prevents proper adhesion.
- Do not rush the curing time; removing supports too early risks falling.
- Avoid using adhesives not meant for mirrors; they may damage the glass or wall.
- Do not press the mirror too hard; this can cause cracks or uneven bonding.

Credit: www.rjliving.com.au
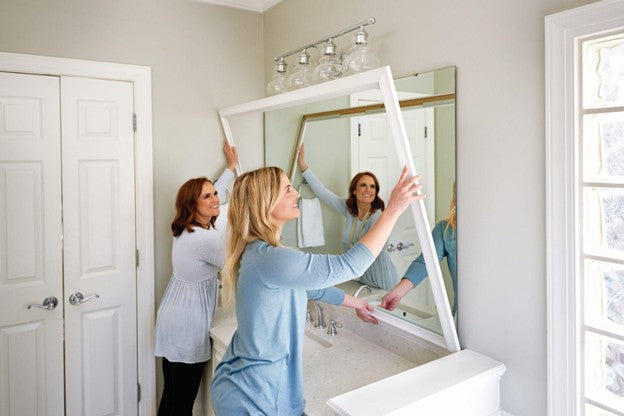
Attaching The Mirror To The Wall
Attaching a mirror to the wall requires care and precision to ensure it stays secure and looks flawless. The key is to position it correctly and apply the right pressure so the adhesive bonds well. Taking your time during this step can save you from future mishaps, like a crooked mirror or one that falls unexpectedly.
Aligning And Pressing Firmly
Start by holding the mirror close to the wall and checking its alignment. Use a level or simply step back to see if it’s straight from different angles. Getting this right before you press down is crucial because once the adhesive sticks, adjustments become difficult.
Once you’re confident about the placement, press the mirror firmly against the wall. Apply even pressure across the entire surface, focusing on the edges and corners where the mirror is most likely to peel away. I found that pressing for at least 30 seconds helps the adhesive bond stronger, which can prevent future slipping.
Securing The Mirror Temporarily
After pressing the mirror, it’s a good idea to secure it temporarily until the adhesive cures fully. You can use painter’s tape or small brackets to hold the mirror in place. This extra step reduces the chance of the mirror sliding down during the drying period.
Think about the wall’s texture and the adhesive type you used. For example, smooth walls and strong adhesive might need less temporary support than textured walls. Don’t skip this step just because the mirror feels stuck initially; drying times vary, and temporary support is cheap insurance against damage.
Allowing Adhesive To Cure
Allowing adhesive to cure is crucial for a secure mirror attachment. This process lets the glue harden and bond the mirror firmly to the wall. Rushing this step can cause the mirror to fall or shift. Patience ensures a long-lasting hold and safety.
Recommended Drying Times
Different adhesives need different drying times. Check the product label for exact times. Most mirror adhesives require 24 to 48 hours to cure fully. Some fast-dry adhesives may set in just a few hours. Give the adhesive enough time to reach full strength before touching the mirror.
Avoiding Disturbance During Curing
Keep the mirror and wall still while the adhesive cures. Avoid moving, tapping, or applying weight on the mirror. Even slight disturbances can weaken the bond. Mark the area as a caution zone to prevent accidental bumps. Waiting quietly is key for strong adhesion.
Additional Tips For Safety And Durability
Ensuring your mirror stays secure and lasts long requires more than just the right adhesive. Paying attention to safety and durability can save you from accidents and extra costs. A few smart choices can make a big difference in how your mirror performs over time.
Using Mirror Clips Or Supports
Adding mirror clips or supports provides extra stability beyond the adhesive. These small brackets hold the edges firmly, reducing the risk of the mirror slipping or falling. They are especially useful for heavier or larger mirrors where glue alone might not be enough.
You don’t need special tools to install clips; a basic drill and screwdriver usually do the job. Make sure you measure carefully so the clips sit evenly and don’t create pressure points on the glass. Have you ever experienced a mirror shifting after installation? Clips can help prevent that problem.
Maintenance And Cleaning Advice
Maintaining your mirror properly keeps it looking great and extends its life on the wall. Avoid harsh chemicals that can damage the reflective backing—stick to mild soap and water or glass cleaner sprayed on a cloth. Wipe gently to prevent scratches.
Check the adhesive and clips periodically for any signs of loosening or damage. A quick inspection every few months can catch small issues before they become big problems. How often do you inspect the fixtures around your home? Mirrors deserve that same attention to stay safe and durable.
Frequently Asked Questions
What Materials Do I Need To Adhere A Mirror To A Wall?
You need mirror adhesive or glue, a level, measuring tape, cleaning supplies, and mounting clips or brackets. Use a strong, mirror-specific adhesive for safety and durability. Prepare the wall and mirror surface by cleaning them thoroughly before application for the best bond.
How Do I Prepare The Wall Before Attaching A Mirror?
Clean the wall surface with a damp cloth to remove dust and dirt. Ensure the wall is dry and smooth. Repair any holes or cracks. A clean, flat surface helps the adhesive stick firmly and prevents the mirror from falling.
Can I Use Regular Glue To Stick A Mirror To The Wall?
No, regular glue is not recommended. Use mirror-specific adhesive designed to hold the mirror’s weight and resist moisture. Regular glue may fail, causing the mirror to fall and break, risking injury and damage.
How Long Should I Wait For The Adhesive To Dry?
Wait at least 24 hours for the adhesive to fully cure. Avoid touching or repositioning the mirror during this time. Proper curing ensures the mirror stays securely attached and prevents future accidents.
Conclusion
Attaching a mirror to a wall can brighten any room. Choose the right tools and follow simple steps. Measure carefully to keep the mirror straight and safe. Use strong adhesive or hooks to hold the mirror firmly. Take your time and check the mirror’s position often.
This task can be easy with patience and care. Enjoy the new look and extra light in your space. A well-placed mirror adds style and function to your home.


