
Are you ready to add a stunning centerpiece to your room that combines style and function? Assembling a decorative mirror wall clock might sound tricky, but it’s easier than you think—and the result will amaze you.
Imagine a sleek, shiny clock reflecting light and making your space feel bigger and brighter. In this guide, you’ll discover simple, step-by-step instructions to put it together quickly and confidently. By the end, you’ll have a beautiful piece that not only tells time but also elevates your home’s décor.
Keep reading—you’re just moments away from transforming your wall!
Tools And Materials Needed
Gathering the right tools and materials is the first step in assembling a decorative mirror wall clock. Having everything ready makes the process smooth and enjoyable. It helps avoid interruptions and ensures a neat, professional look.
Below is a clear list of what you need before starting. Keep these items close at hand for easy access throughout the assembly.
Essential Tools
- Screwdriver – to tighten screws securely
- Measuring tape – for accurate placement
- Level – to keep the clock straight
- Drill – for making wall holes if needed
- Hammer – useful for nails or anchors
- Adhesive tape or glue – for attaching mirror pieces
- Pencil – to mark spots on the wall
- Protective gloves – to handle mirrors safely
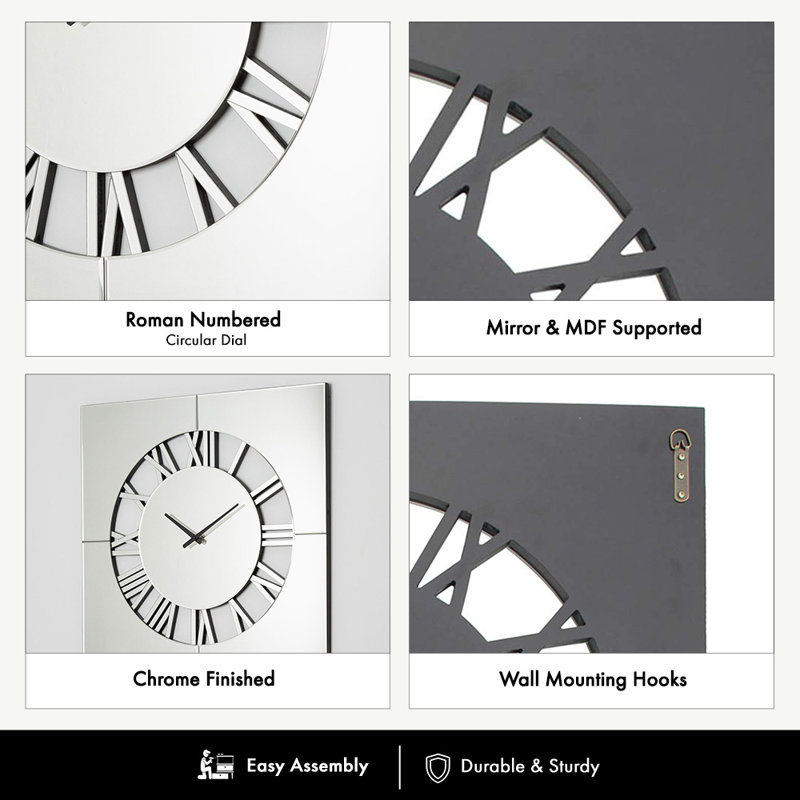
Mirror Wall Clock Components
- Clock mechanism with hands
- Battery (usually AA) for the clock
- Decorative mirror pieces in various shapes
- Backing board or frame to hold parts
- Mounting hardware like screws or hooks
Preparing The Workspace
Preparing the workspace is a crucial step before assembling your decorative mirror wall clock. A clean, well-organized area helps prevent mistakes and speeds up the process. It also ensures safety while handling delicate mirror parts.
Choosing The Right Location
Select a spacious area with good lighting. Natural light is best to see small details clearly. Avoid places with heavy foot traffic to reduce distractions and accidents. A flat, stable surface like a large table or countertop works well. Keep the space free from dust and moisture to protect the clock components.
Organizing Your Tools
Gather all necessary tools before starting. Common tools include a screwdriver, adhesive, measuring tape, and level. Arrange tools within easy reach to save time. Use small containers or trays to hold tiny screws and parts. This prevents losing important pieces and keeps the workspace tidy.
Assembling The Clock Frame
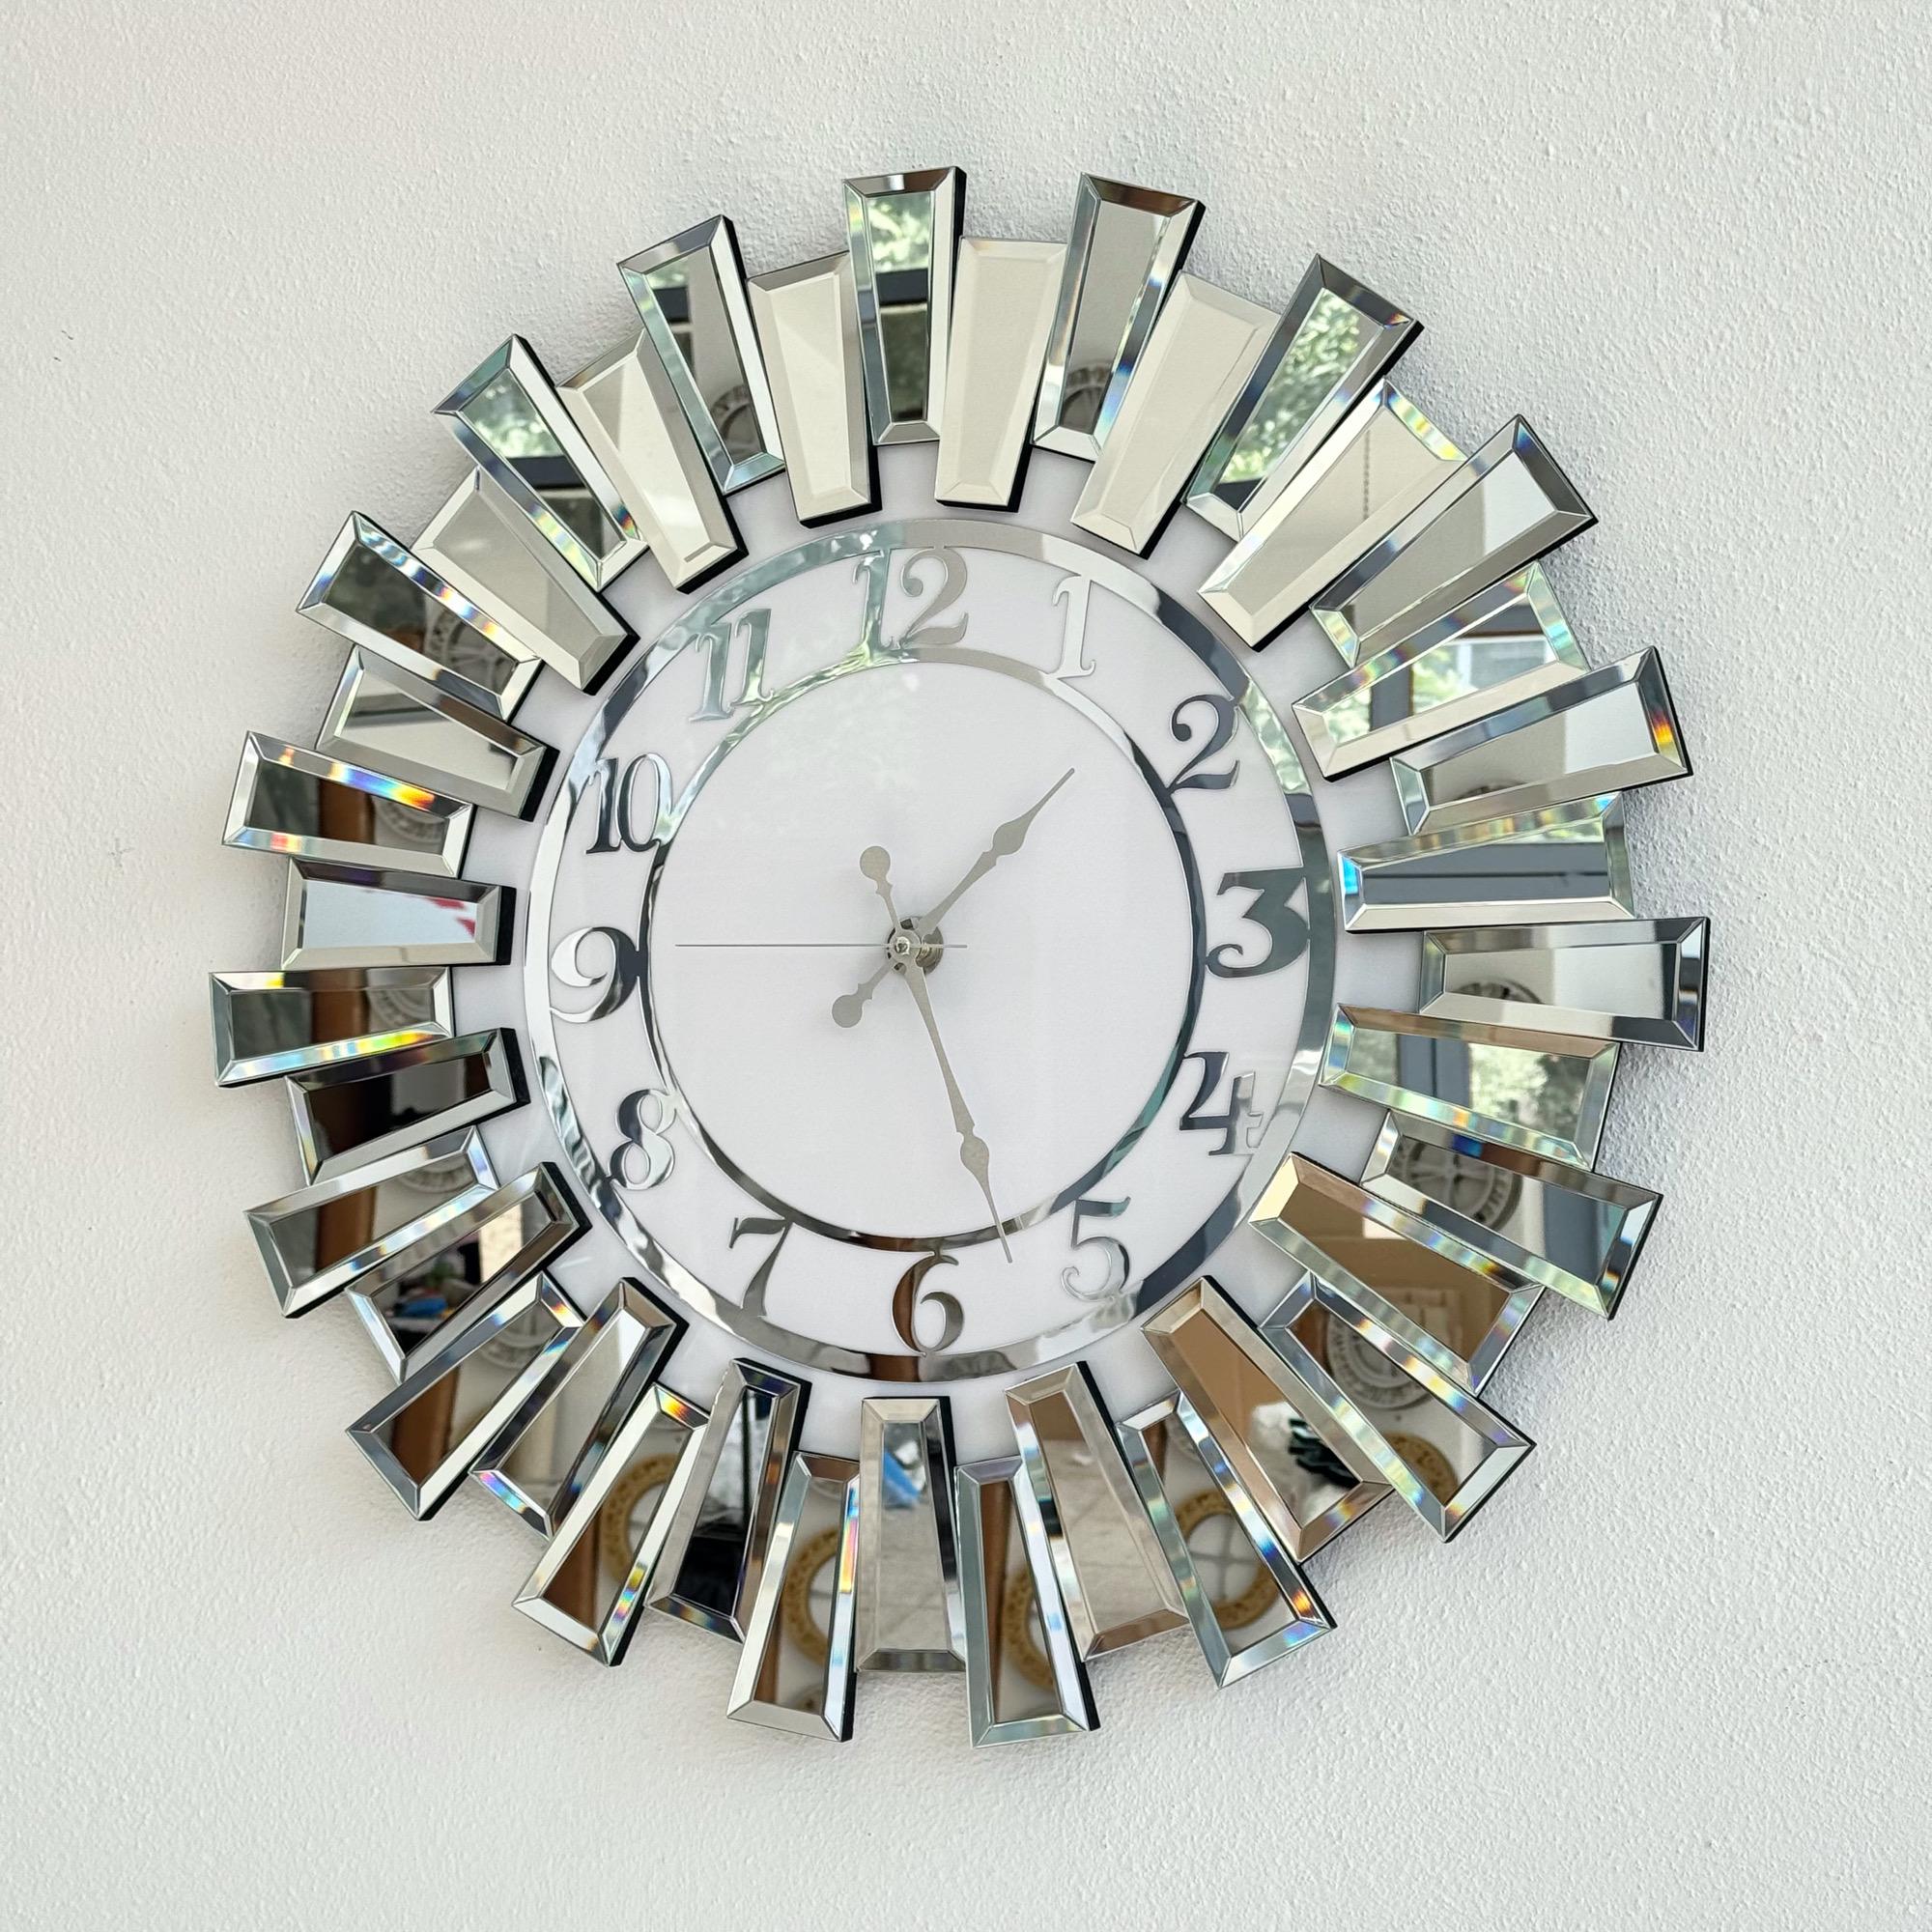
Begin by aligning the clock frame parts carefully on a flat surface. Attach each piece firmly using the provided screws or clips. Ensure all sections fit snugly to create a stable and attractive decorative mirror wall clock.
Assembling the clock frame of a decorative mirror wall clock can feel like piecing together a work of art. With each component, you are not just building a functional timepiece but also an eye-catching focal point for your space. It’s an opportunity to showcase your creativity and attention to detail. Before you start, ensure you have all the necessary tools and materials laid out. Remember, patience and precision are your best friends in this process.Attaching Mirror Pieces
Begin by arranging the mirror pieces around the clock mechanism. This step is crucial as it determines the overall look of your clock. Use a strong adhesive that is suitable for mirrors to ensure they hold firmly. Ensure each piece is evenly spaced to maintain a harmonious design. You might want to use a measuring tape or a level to keep everything aligned. If something doesn’t look right, don’t hesitate to adjust. Imagine how the light will reflect off each piece throughout the day. This can add a dynamic element to your decor, making the clock not just a timekeeper but a piece of art.Securing The Frame Structure
Once your mirrors are in place, it’s time to secure the frame structure. This step involves reinforcing the entire setup so it remains sturdy on your wall. Use brackets or screws that are appropriate for your wall type. Check the weight capacity of your wall anchors to avoid any mishaps. A secure frame ensures longevity and safety for your clock. Consider adding felt pads or a protective layer behind the frame to prevent any scratches on your wall. This is a small step but can make a big difference in maintaining your wall’s appearance. As you tighten each screw, think about the satisfaction of seeing your project come to life. Is there a better feeling than creating something beautiful with your own hands?
Credit: www.amazon.com
Installing The Clock Mechanism
Installing the clock mechanism is a crucial part of assembling your decorative mirror wall clock. This step ensures your clock runs smoothly and tells time accurately. Pay close attention to how each piece fits together. A well-installed mechanism keeps your clock functional and stylish.
Positioning The Clock Motor
Start by placing the clock motor in the center hole of the mirror base. Make sure it fits snugly without any wobble. Align the motor so the spindle sticks out evenly on the front side. Tighten the fixing nut to secure the motor firmly. Avoid over-tightening to prevent damage to the mirror.
Attaching Clock Hands
Attach the clock hands carefully to the motor spindle. Begin with the hour hand by pressing it gently onto the spindle. Next, place the minute hand in the same way, above the hour hand. Finally, attach the second hand if your clock has one. Check that all hands move freely without touching each other. Adjust slightly if needed to avoid any friction.
Mounting The Wall Clock
Mounting the decorative mirror wall clock is the final step to showcase its charm. Proper placement ensures the clock looks great and stays secure. Take time to prepare the wall for a flawless setup. Safety and alignment matter most.
Marking The Wall Spot
Choose a spot at eye level for easy time reading. Use a pencil to mark where the clock’s hanger will go. Measure the clock’s back hook distance to get this right. Double-check the marks with a level tool for straightness. This simple step prevents crooked hanging and uneven display.
Hanging The Clock Safely
Pick a strong nail or wall anchor for support. Use anchors on drywall to hold the clock’s weight firmly. Hammer the nail or install the anchor at the marked point carefully. Hang the clock and test its stability by gentle movement. Adjust if it feels loose to avoid falls. Secure hanging protects both your wall and clock.
Credit: www.etsy.com
Finishing Touches
Finishing touches bring your decorative mirror wall clock to life. They ensure the clock works well and looks stunning. These small steps improve both function and style. Careful attention here makes a big difference.
Adjusting Time Settings
Set the correct time by gently turning the adjustment knob. Move the hands slowly to avoid damage. Check the clock’s battery before setting time to ensure smooth operation. Make sure the hour and minute hands do not touch or overlap incorrectly. Adjust until the time is clear and precise.
Cleaning And Polishing
Remove dust and fingerprints from the mirror and clock surface. Use a soft, lint-free cloth for cleaning. Lightly dampen the cloth with water or a gentle glass cleaner. Avoid harsh chemicals that can damage the mirror or clock face. Polish the frame carefully to restore shine without scratching. Keep the cleaning process gentle to maintain the clock’s beauty.
Troubleshooting Common Issues
Building your decorative mirror wall clock can be a fun and rewarding project, but sometimes small issues pop up that can slow you down. Troubleshooting these common problems early helps you enjoy your finished piece without frustration. Let’s look at how to keep your clock steady and ticking perfectly.
Fixing Loose Parts
Loose parts can make your clock look messy and affect its function. Check each mirror piece and the clock face for any wobbling or movement. Tighten screws or adhesive points carefully, but avoid over-tightening to prevent damage.
If a mirror segment feels unstable, try adding a tiny drop of strong glue behind it. Hold it firmly in place for a few minutes until it sets. Have you noticed some pieces shifting after mounting? This quick fix often solves that problem.
Also, inspect the clock hands. If they spin loosely or catch on each other, gently bend them to create a slight gap. This simple adjustment can improve accuracy and prevent them from stopping unexpectedly.
Battery And Mechanism Tips
Your clock’s mechanism depends entirely on a fresh, well-installed battery. Always start with a new battery, even if the old one looks okay. Avoid mixing old and new batteries as this can cause erratic behavior.
Make sure the battery is inserted with the correct polarity—check the + and – marks inside the compartment. A common mistake is placing the battery backward, which stops the clock from working.
If the clock hands don’t move after installing the battery, try resetting the mechanism. Remove the battery, wait 30 seconds, and reinsert it. This often jump-starts the motor and fixes minor glitches.
Have you ever had your clock stop suddenly? Dust or debris inside the mechanism could be the culprit. Use a soft brush or compressed air to clean around the moving parts carefully. This keeps everything running smoothly and extends the life of your clock.

Credit: www.amazon.com
Frequently Asked Questions
How Do I Start Assembling A Decorative Mirror Wall Clock?
Begin by unboxing all parts and checking the instructions. Arrange the mirror pieces and clock mechanism on a flat surface. Follow the guide step-by-step for precise placement. Ensure you have the necessary tools ready before you start.
What Tools Are Needed For Mirror Clock Assembly?
Common tools include a screwdriver, adhesive, measuring tape, and level. Some kits may require a hammer or drill. Always check the instruction manual for specific tool recommendations. Using the right tools ensures a secure and accurate assembly.
How Do I Properly Mount The Assembled Clock On The Wall?
Use a sturdy wall anchor or hook suitable for the clock’s weight. Measure and mark the desired height carefully. Hang the clock gently to avoid damage. Double-check the level to keep the clock straight and balanced.
Can I Customize The Design Of The Mirror Wall Clock?
Yes, you can arrange mirror pieces in different patterns. Choose various shapes or sizes for a unique look. Customize the clock hands or numbers to match your decor. Personalizing adds style and makes your clock stand out.
Conclusion
Assembling a decorative mirror wall clock can brighten any room. Follow each step carefully for the best results. Take your time and enjoy the process. A well-made clock adds charm and style to your space. Keep your tools ready and work safely.
Soon, you will have a unique piece to admire daily. This project suits beginners and experts alike. Try different designs to match your home’s look. Remember, patience and care make a big difference. Now, you are ready to create your own beautiful clock.


