

Are you looking to add a unique touch to your workspace? Building your own wooden desk lamp is easier than you think, and it gives you a chance to create something truly personal.
In this guide, you’ll find simple, step-by-step instructions that anyone can follow—even if you don’t have much experience with woodworking. Imagine the satisfaction of lighting up your desk with a lamp you made yourself. Keep reading, and you’ll discover how to turn basic materials into a stylish, functional piece that brightens your room and sparks your creativity.
Materials Needed
Gathering the right materials is the first step to building a wooden desk lamp that not only looks great but functions perfectly. Having quality components on hand saves time and avoids frustration during the build. Think about what you want your lamp to look like and how it will fit into your workspace before choosing your materials.
Wood Types
Choosing the right wood affects both the appearance and durability of your lamp. Hardwoods like oak, maple, or walnut offer strength and a beautiful grain pattern that can make your lamp stand out. If you prefer something lighter, pine or cedar can be easier to work with and still look great with a simple finish.
Have you considered how the wood color and texture will match your desk or room? Picking a wood that complements your surroundings can make your lamp feel like a natural part of your setup.
Lighting Components
The heart of your desk lamp is the lighting itself. You’ll need a light bulb, a lamp holder (socket), and a power cord with a switch for easy operation. LED bulbs are a smart choice because they use less energy and last longer than traditional bulbs.
Don’t forget to check the bulb size and wattage to make sure they fit safely within your wooden frame. A good quality switch can add convenience and improve the overall user experience.
Tools Required
Having the right tools makes building your lamp easier and more precise. Essential tools include a saw for cutting wood, a drill for making holes, sandpaper for smoothing surfaces, and a screwdriver for assembling parts. A clamp will help hold pieces steady while you work, which can save a lot of hassle.
If you have access to a jigsaw or a rotary tool, they can help create more detailed shapes or openings. What tools do you already have that can speed up this project?
Credit: www.instructables.com
Preparing The Wood
Preparing the wood is a crucial step that sets the foundation for your wooden desk lamp project. Taking the time to measure, cut, and smooth your wood pieces ensures a professional finish and a durable product. This stage might seem simple, but it demands accuracy and care to avoid mistakes that could affect the entire build.
Measuring And Cutting
Start by measuring the wood precisely based on your lamp design. Use a ruler or tape measure to mark where each cut will go. Double-check your measurements before making any cuts—accuracy here saves you from wasting wood or ending up with parts that don’t fit.
When cutting, use a fine-toothed saw for cleaner edges. If you don’t have a saw, a handsaw or even a jigsaw can work well for straight and angled cuts. Keep your cuts steady and slow to avoid splintering the wood.
Sanding And Smoothing
After cutting, sanding is essential to remove rough edges and splinters. Start with a coarser grit sandpaper (around 80-100 grit) to smooth out any uneven surfaces. Then move to finer grit (220 or higher) for a polished finish.
Don’t rush this process—smooth wood not only looks better but also prevents injury from sharp edges. Running your fingers over the surface helps you feel any rough spots you might have missed. Have you noticed how a smooth touch instantly makes a project feel more complete?
Assembling The Base
Creating a sturdy base is crucial for your wooden desk lamp. It provides stability and enhances the lamp’s aesthetic appeal. A well-crafted base ensures your lamp stands firm and complements your workspace. Let’s dive into the steps involved in assembling the base.
Designing The Support
The support design sets the foundation for the lamp’s balance. Choose a shape that distributes weight evenly. Common shapes include squares, circles, or rectangles. Ensure the base’s dimensions match your lamp’s overall height. This balance prevents tipping.
Consider the material’s thickness for added durability. A thicker base provides more stability. Sketch your design on paper before cutting. This ensures precision and reduces errors. Use a ruler for accurate measurements.
Joining Techniques
Effective joining techniques ensure a secure base. Wood glue is a popular choice for strong bonds. Apply evenly to the connecting surfaces. Clamp the pieces until the glue dries fully. This prevents movement during drying.
Dovetail joints are another option for robust connections. They interlock pieces without additional hardware. These joints add both strength and visual appeal. Use a saw to cut precise angles for a perfect fit.
Screws provide extra reinforcement if needed. Choose screws that match the wood type to avoid splitting. Drill pilot holes before inserting screws to maintain wood integrity.
Credit: medium.com
Installing The Lighting
Installing the lighting is a key part of building your wooden desk lamp. This step brings your project to life by adding light. It requires careful handling of electrical parts to ensure safety and functionality. Follow clear, simple instructions to wire and attach the bulb holder correctly. This will help your lamp work well and look great.
Wiring Basics
Start with the power cord and lamp socket wires. Identify the live (brown or black) and neutral (blue or white) wires. Use wire strippers to remove about half an inch of insulation from each wire end. Twist the exposed wires tightly to prevent fraying.
Connect the live wire to the brass screw and the neutral wire to the silver screw on the bulb holder. Tighten screws firmly but do not over-tighten. Use electrical tape to cover exposed wire ends and connections. This prevents short circuits and ensures safety.
Attaching The Bulb Holder
Place the bulb holder securely in the lamp base or arm. Use screws or clamps that come with the holder to fix it in place. Make sure it does not move or wobble after installation. Check that the bulb fits easily without obstruction.
Route the wire neatly along the wooden frame. Use small clips or cable ties to hold the wire in place. Avoid tight bends or pinching the wire. This keeps the wiring safe and neat. Finally, insert the bulb and test the lamp to confirm it works properly.
Finishing Touches
Finishing touches are what transform your wooden desk lamp from a simple project to a polished piece ready to brighten your workspace. These final steps protect your work and enhance its appearance. Taking time here ensures your lamp not only looks great but lasts long.
Applying Stain Or Paint
Choosing between stain and paint depends on the look you want and the wood type. Stain highlights the natural grain and adds warmth, while paint lets you add vibrant colors or match your décor perfectly.
Before applying, sand your lamp smoothly to avoid rough spots. Use a brush or cloth to apply stain evenly, wiping off excess to prevent blotches. If you prefer paint, opt for a primer first; it helps the paint stick better and last longer.
Have you considered how different finishes change the mood of your workspace? A deep walnut stain can make your lamp feel cozy, while bright white paint adds a modern vibe.
Adding Protective Coating
After staining or painting, seal your lamp with a protective coating to guard against scratches and moisture. Polyurethane is a popular choice for durability, available in gloss, satin, or matte finishes.
Apply thin, even layers with a clean brush, allowing each coat to dry fully before adding the next. Light sanding between coats can create a smoother finish. This step might seem tedious but think of it as insurance for your hard work.
Would you rather risk a scratch or spend a few extra minutes protecting your lamp? The right finish keeps it looking fresh for years and saves you from future repairs.

Credit: www.instructables.com
Safety Tips
Building your own wooden desk lamp is a rewarding project, but safety should always be your top priority. A few simple precautions can protect you from accidents and ensure your lamp works perfectly for years. Let’s look at key safety tips that will keep your workspace secure and your lamp safe to use.
Electrical Safety
Electricity can be dangerous if not handled properly. Always unplug your lamp before starting any wiring work to avoid shocks. Use insulated tools and double-check that your power source is turned off before connecting wires.
Make sure to use components rated for your lamp’s wattage. Overloading wires or sockets can cause overheating and fires. If you’re unsure about wiring, consult a professional or follow detailed guides with clear diagrams.
Test your lamp with a voltage tester before plugging it in. This simple step helps catch any faulty connections early. How confident do you feel about handling electrical parts in your projects?
Wood Handling Precautions
Working with wood means using sharp tools like saws and chisels. Keep your blades sharp and your fingers clear from cutting paths. Dull tools can slip and cause injuries.
Wear safety glasses to protect your eyes from flying wood chips. Dust masks are also important to avoid inhaling fine sawdust, which can irritate your lungs. Good ventilation in your workspace makes a big difference.
Secure your wood firmly before cutting or drilling. Unstable pieces can move unexpectedly and lead to accidents. Do you have a sturdy workbench or clamps to hold your materials steady?
Customization Ideas
Customization Ideas open up many ways to make your wooden desk lamp unique. You can change its look, feel, and function with simple tweaks. Personal touches make your lamp truly yours. Explore options that match your style and needs.
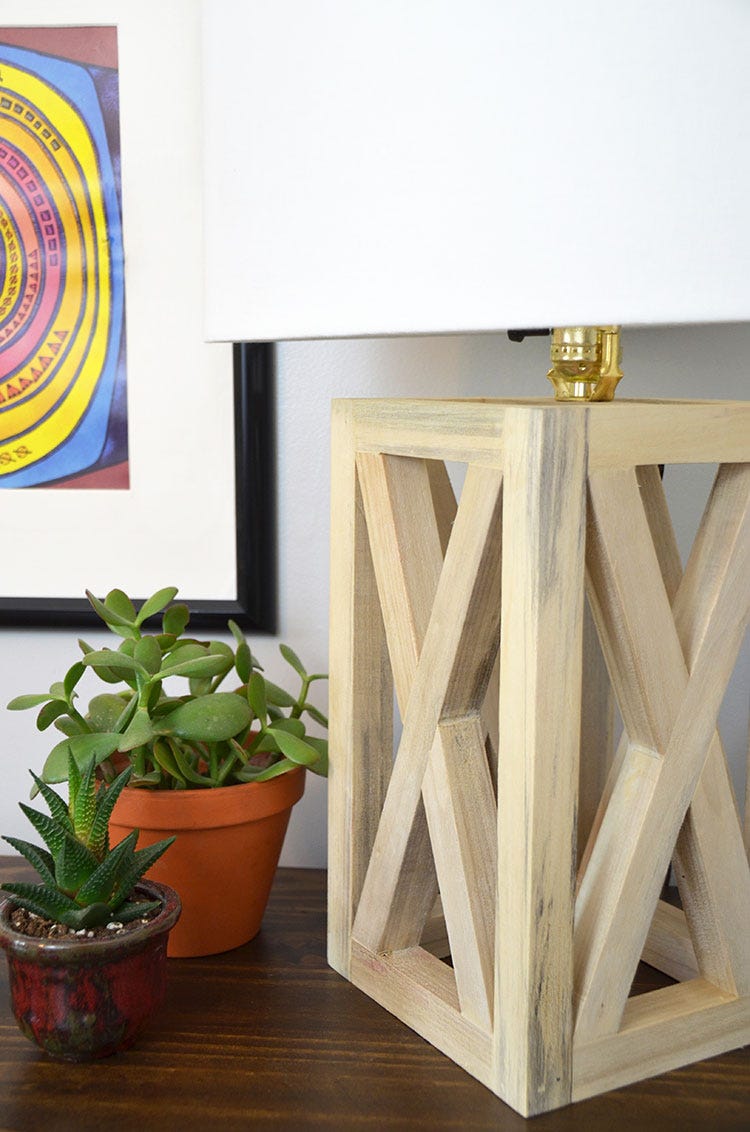
Creative Designs
Try shapes beyond the usual. Think geometric forms like hexagons or triangles. Curved edges soften the look. Mix wood grains for a pattern effect. Carve small details for a handmade feel. Paint parts with soft colors or bold shades. Use stencils to add designs or words. Combine wood with metal accents for contrast. Play with lamp height or base size to fit your space. These ideas make your lamp a stylish piece of art.
Alternative Materials
Wood is classic but other materials add flair. Use bamboo for a light, eco-friendly option. Reclaimed wood gives a rustic, worn look. Add glass panels for a modern touch. Metal parts can boost strength and style. Use fabric or leather for lamp shades. Cork adds texture and warmth. Mix materials for a layered effect. Choose eco-safe finishes to keep it green. These alternatives offer new looks and textures.
Frequently Asked Questions
What Materials Are Needed To Build A Wooden Desk Lamp?
You need wood, a light bulb, socket, wiring, a switch, and screws. Sandpaper and wood glue help with finishing and assembly. Choose durable wood for stability and aesthetics.
How Long Does It Take To Build A Wooden Desk Lamp?
Building a wooden desk lamp typically takes 3 to 5 hours. Time varies by skill level and complexity. Proper planning and preparation can speed up the process.
What Tools Are Required For This Desk Lamp Project?
Essential tools include a saw, drill, screwdriver, wire stripper, and measuring tape. Sandpaper or a sander is useful for smooth finishes. Safety gear like goggles and gloves is recommended.
Can I Customize The Design Of My Wooden Desk Lamp?
Yes, you can customize size, shape, wood type, and finish. Adding features like dimmers or different bulb types is possible. Customization makes your lamp unique and suited to your space.
Conclusion
Building a wooden desk lamp is a fun and useful project. You can create a unique lamp that fits your style. The steps are simple and easy to follow. Using basic tools and materials keeps the process smooth. This project also helps you learn woodworking skills.
Your finished lamp will brighten your room and your mood. Give it a try, and enjoy the satisfaction of making something yourself. A handmade lamp adds charm to any workspace. Start building today, and see how rewarding it feels.


