
Are you looking to add style and storage to your space without bulky furniture? Floating shelves are the perfect solution.
They make your walls look clean and modern while giving you extra room to display your favorite items. Building floating shelves on your wall might seem tricky, but with the right steps, you can do it yourself easily. In this guide, you’ll discover simple tips and clear instructions to create sturdy, beautiful shelves that fit your space perfectly.
Keep reading to transform your walls and impress your guests with your DIY skills.
Choosing Materials
Choosing the right materials is key to building strong and attractive floating shelves. Each part must match your style and hold the weight you expect. Good material choices make the project easier and the shelves last longer.
Selecting The Right Wood
Wood type affects both look and strength. Pine is light and easy to work with. Oak and maple are harder and hold more weight. Choose wood that fits your room’s style and budget. Check for smooth, straight boards without knots or cracks.
Picking The Best Brackets
Brackets support the shelf and keep it stable. Hidden brackets create a clean, floating look. Metal brackets offer strong support for heavy items. Make sure brackets match shelf size and wall type. Use brackets with screws and anchors for secure fixing.
Gathering Necessary Tools
Tools make the build simple and safe. You need a drill, level, screwdriver, tape measure, and stud finder. Sandpaper smooths wood edges. A pencil marks measurements clearly. Having all tools ready saves time and avoids mistakes.
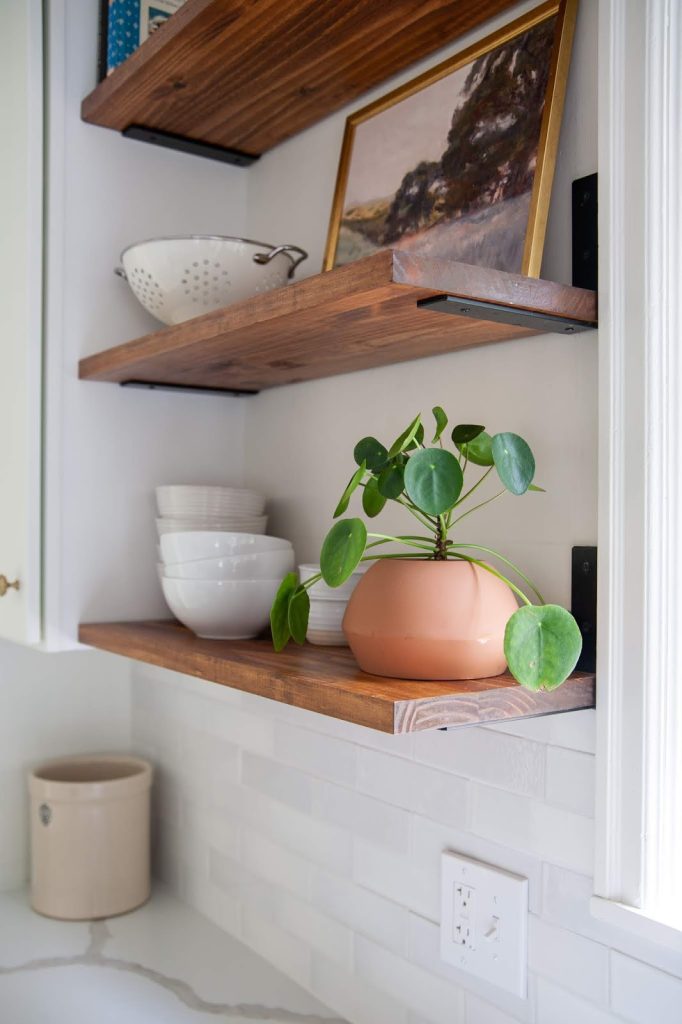
Credit: www.christeneholderhome.com
Preparing The Wall
Preparing the wall is a crucial step before installing floating shelves. It ensures the shelves are secure and level. Taking time to prepare the wall properly will help avoid damage and keep your shelves sturdy. Follow these key tasks to get your wall ready for the shelves.
Finding Studs
Studs provide the strongest support for your floating shelves. Use a stud finder to locate them behind the drywall. Move the stud finder slowly across the wall to find the edges of each stud.
Mark the center of each stud with a pencil. These marks will guide where you drill and attach the shelf brackets. Avoid attaching shelves only to drywall, as this can cause shelves to fall.
Marking Shelf Placement
Decide the height and position of your floating shelves. Use a pencil to lightly mark the wall where each shelf will go. Check that the spacing between shelves fits your needs.
Consider the items you want to place on the shelves. Plan enough space between shelves for taller objects. Mark the exact spots for brackets to keep shelves balanced and secure.
Checking Wall Level
Use a level tool to ensure your shelf marks are straight. Hold the level against the wall along your marks. Adjust the marks until the bubble is centered.
A level shelf looks better and prevents items from sliding off. Double-check all marks before drilling holes. This step helps keep your floating shelves perfectly aligned.
Cutting And Sanding
Cut wood pieces to the right size using a saw for perfect fit. Smooth edges and surfaces with sandpaper to prepare for painting or staining.
Cutting and sanding are crucial steps in the process of building floating shelves, ensuring the wood fits perfectly on your wall and has a smooth, polished finish. The precision in cutting and the finesse in sanding can significantly impact the final look and functionality of your shelves. Let’s dive into the details of these tasks to help you achieve professional-looking results.Measuring Shelf Length
Before cutting, it’s important to measure the length of your shelf accurately. Use a tape measure to determine the exact dimensions needed for your space. Consider the weight and items the shelf will hold, and ensure your measurements account for any brackets or supports. A good rule of thumb is to double-check your measurements. Mistakes at this stage can lead to wasted materials and frustration. Always mark your wood clearly with a pencil, ensuring your lines are straight and easy to follow.Cutting Wood To Size
Once you have your measurements, it’s time to cut the wood. A circular saw or a miter saw can provide clean, precise cuts. If you’re new to using power tools, practice on scrap wood first to build confidence. Ensure you cut along the marked lines. Holding the saw steady and moving slowly can prevent jagged edges. If you’re cutting multiple shelves, stack the wood pieces and cut them together for uniformity.Sanding For Smooth Finish
After cutting, sanding is essential for a smooth finish and to prepare the wood for staining or painting. Start with a coarse-grit sandpaper to remove rough edges and then progress to a finer grit for a polished look. A sanding block or an electric sander can make the job easier and faster. Pay special attention to the edges and corners, ensuring they are smooth to the touch. This step not only enhances the aesthetic appeal but also ensures safety by eliminating splinters. Have you considered the type of wood that best suits your space? Different woods can affect the ease of cutting and sanding. Choose wisely to match your skill level and the desired outcome for your floating shelves.Installing Brackets
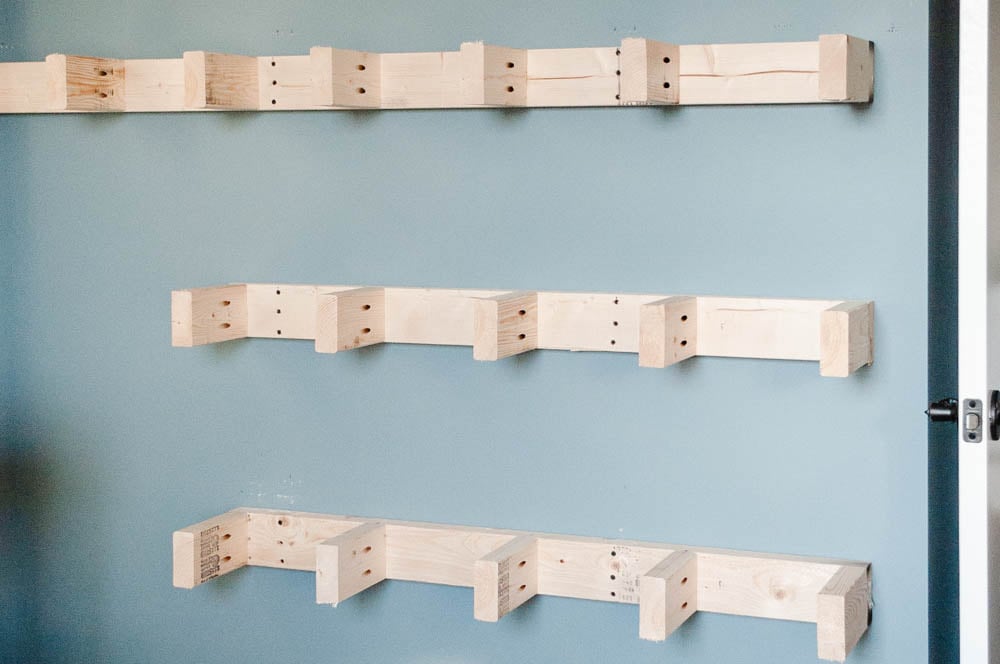
Installing brackets is a crucial part of building floating shelves that not only look great but also hold weight safely. This step sets the foundation for the entire shelf’s strength and stability. Paying attention here will save you from future shelf sagging or accidents.
Drilling Pilot Holes
Drilling pilot holes helps guide your screws and prevents the wall or brackets from splitting. Use a drill bit slightly smaller than your screws to create these holes. Mark the exact spots with a pencil to keep everything aligned perfectly.
Think about the type of wall you’re working with—drywall, plaster, or brick. Each requires a different drill bit and anchors, so choose accordingly. If you’re unsure, testing on a hidden spot can reveal the right approach without damaging the wall.
Securing Brackets To Wall
Once pilot holes are drilled, attach the brackets by driving screws firmly into the wall. Use a level to ensure brackets are straight before tightening the screws completely. This is where precision matters; even a slight tilt can throw off the shelf balance.
Consider using wall anchors if you’re not drilling into studs. They provide extra grip and prevent the bracket from pulling out under weight. Don’t underestimate this step—strong anchoring means your shelves will hold heavier items confidently.
Ensuring Stability
After securing, test the bracket’s stability by gently applying pressure. Wobbling or movement signals that screws may need tightening or repositioning. Stability here guarantees your shelves won’t shift or fall once loaded.
Ask yourself: will these brackets support the weight and size of my shelf? If you plan to place heavy books or decor, opt for heavy-duty brackets or add extra support. Remember, a stable base is the key to a shelf that lasts.
Mounting The Shelves
Mounting the shelves is a key part of building floating shelves. It ensures the shelves stay strong and look neat. Proper mounting supports the weight of items and keeps the shelf stable. Follow each step carefully to get the best results.
Placing Shelves On Brackets
Start by lifting the shelf and aligning it with the wall brackets. Make sure the shelf fits snugly over the brackets. Check that the shelf is level before moving forward. Hold the shelf firmly to avoid slipping during the next steps.
Securing Shelves In Place
Secure the shelves using screws or bolts through the brackets into the shelf. Use a screwdriver or drill to tighten the screws well. Avoid over-tightening to prevent damage to the shelf. Double-check that the shelves do not move or wobble.
Final Adjustments
Inspect the shelf from different angles to confirm it is straight. Adjust the position slightly if needed before tightening all screws fully. Clean the shelf surface from dust or fingerprints. The shelf is now ready for use and can hold your items safely.

Credit: www.youtube.com
Finishing Touches
Finishing touches can completely change the look and durability of your floating shelves. After the hard work of building and mounting, this stage lets you add personality and protect your shelves from everyday wear. It’s where your shelves stop being just functional and start becoming a part of your room’s style.
Painting Or Staining
Choosing to paint or stain your shelves depends on the look you want and the wood you used. Paint offers vibrant color options and can cover imperfections, while stain highlights the natural grain of the wood.
Try testing a small hidden area first to see how the finish reacts with your wood. If you want a modern look, consider matte or satin paints. For a rustic or classic feel, a warm stain can bring out beautiful wood tones.
Sealing For Protection
Sealing your shelves helps protect them from moisture, scratches, and daily use. A clear polyurethane or varnish is usually a good choice because it forms a hard, protective layer.
Apply thin coats with a brush and let each coat dry completely before adding the next. This step can extend the life of your shelves and keep them looking fresh for years, especially if they’re in kitchens or bathrooms.
Decorating Ideas
How you decorate your floating shelves can turn them from plain storage into eye-catching displays. Think about mixing books with plants, small art pieces, or even candles.
Try grouping items in odd numbers and varying heights to create visual interest. Don’t overcrowd the shelves; leaving some space helps each item stand out better. What kind of vibe do you want your shelves to give off? Play with different objects until you find what feels right for your space.
Troubleshooting Tips
Troubleshooting floating shelves can be frustrating, especially if things don’t look or feel right after installation. But addressing common problems early can save you time and keep your shelves sturdy and stylish. Let’s dive into some practical tips that tackle issues you might face with uneven walls, loose shelves, and weight limits.
Dealing With Uneven Walls
Uneven walls can cause floating shelves to tilt or leave gaps. Start by using a level to check your wall’s flatness before mounting. If the wall is uneven, try shimming the brackets with thin pieces of wood or cardboard to create a flush surface.
Another trick is to use a flexible mounting system or adjustable brackets that allow you to tweak the shelf’s angle. Have you noticed one side of your shelf dipping lower? Adjusting the shims or brackets can fix that without removing the entire setup.
Fixing Loose Shelves
Loose shelves usually mean the mounting hardware isn’t secure enough or the screws are too short. Double-check that you’re using the right anchors for your wall type—drywall anchors work differently than masonry anchors.
If the shelf wiggles when you apply pressure, tighten the screws but avoid overtightening, which can strip the holes. In some cases, adding extra brackets can spread the weight and increase stability. Have you tried gently pulling on the shelf to find where the looseness starts? That can help pinpoint the weak spot.
Handling Weight Limits
Floating shelves have weight limits that depend on the bracket design and wall material. Don’t guess—refer to the manufacturer’s specs and consider the objects you plan to place on the shelf.
If you want to display heavier items, reinforce the shelf with additional brackets or switch to heavy-duty hardware. Distributing weight evenly across the shelf also prevents sagging. Ask yourself: are the items balanced or clustered on one side? Reorganizing can reduce strain and extend your shelf’s life.

Credit: www.youtube.com
Frequently Asked Questions
How Do You Attach Floating Shelves To Drywall?
Use wall anchors or toggle bolts to secure shelves on drywall. Locate studs for extra support. Drill pilot holes, then mount brackets firmly. This ensures stability and prevents shelves from falling under weight.
What Tools Are Needed For Building Floating Shelves?
You’ll need a drill, level, stud finder, screws, anchors, measuring tape, and a saw. Sandpaper and wood glue can improve shelf finish and durability. These tools help you build sturdy, precise floating shelves.
How Much Weight Can Floating Shelves Hold?
Weight depends on shelf material, bracket strength, and wall type. Properly mounted shelves on studs can hold 20-50 pounds or more. Always distribute weight evenly and avoid overloading to maintain shelf safety.
Can Floating Shelves Be Installed On Plaster Walls?
Yes, but use appropriate anchors for plaster walls. Avoid drilling large holes that cause cracks. Use toggle bolts or molly bolts for secure installation. Handle walls gently to prevent damage during mounting.
Conclusion
Building floating shelves on a wall is a simple and useful project. You only need basic tools and some patience. Measure and mark your wall carefully for the best fit. Use strong brackets to hold the shelves firmly. Choose the right wood to match your room’s style.
Take your time to drill and fix everything tightly. These shelves add space and style without taking much room. Enjoy your new shelves and keep your space neat. Try this project to improve your home easily.


