
Is your motion sensor acting up or not working at all? The most common reason might be a dead battery.
Changing the battery in your motion sensor is easier than you think—and doing it yourself can save you time and money. In this guide, you’ll learn simple, step-by-step instructions to replace your motion sensor battery quickly and safely. Keep reading, and you’ll have your sensor up and running in no time.
Signs Of A Dead Motion Sensor Battery
Knowing the signs of a dead motion sensor battery can save you time and frustration. It helps you avoid false alarms or missed detections that compromise your security or convenience. Recognizing these signs early allows you to replace the battery before the sensor stops working altogether.
Common Symptoms
You might notice your motion sensor behaving oddly when its battery is dying. Typical symptoms include:
- Lights or alarms triggered without any movement.
- The sensor failing to activate when you walk by.
- Delayed response times or inconsistent detection.
- Indicator lights on the sensor flashing or turning off completely.
Have you ever experienced a sensor turning on your porch light at random times? That’s often a clear sign the battery is struggling.
Impact On Sensor Performance
A weak battery directly affects how well your motion sensor functions. It can reduce the sensor’s range, making it miss movements in its usual detection area.
This not only causes inconvenience but also weakens your security setup. You might think your sensor is broken when it’s actually just low on power.
How long has it been since you last changed your sensor’s battery? Checking this could be the key to improving its performance immediately.

Credit: guardianprotection.com
Tools Needed For Battery Replacement
Changing the battery in a motion sensor requires a few simple tools. Having the right tools makes the process quick and easy. It also prevents damage to your device. This section lists the tools you need and explains important safety tips.
Essential Tools
- Screwdriver (usually a small Phillips or flathead)
- Replacement batteries matching the sensor’s requirements
- Soft cloth to clean the sensor’s surface
- Small container to hold screws and old batteries
- Optional: A flashlight to see inside the sensor better
Safety Precautions
Turn off the power to the motion sensor before starting. This avoids electric shock or damage. Handle batteries carefully to prevent leaks or burns. Avoid touching battery terminals with bare hands. Use gloves if possible. Keep batteries away from children and pets. Dispose of old batteries following local regulations.
Locating The Motion Sensor Battery
Locate the motion sensor on your wall or ceiling to find the battery compartment. Usually, the cover slides or snaps off, revealing the battery inside. Check for small screws or clips that may hold the battery cover in place.
Locating the motion sensor battery is a crucial step in maintaining your home security system. Changing the battery ensures the sensor functions effectively. A well-functioning motion sensor protects your home and keeps you safe. Knowing where the battery is located can save time and prevent frustration.Accessing The Sensor
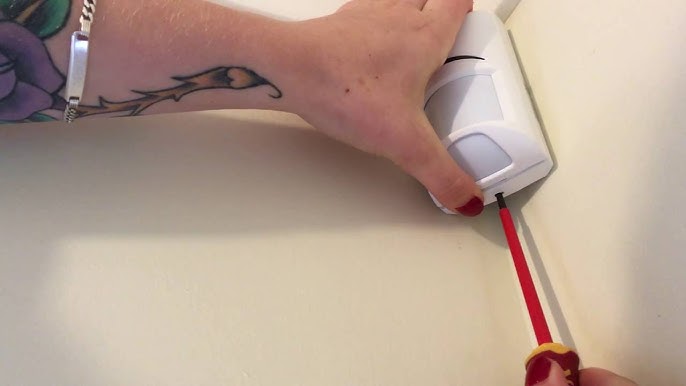
To access the motion sensor, locate it on the wall or ceiling. Most sensors are mounted in visible areas. Use a ladder or a sturdy chair to reach high places. Inspect the sensor closely for any screws or clips. Unscrew or unclip to open the sensor casing. Handle the sensor gently to avoid damage.Battery Compartment Types
There are various types of battery compartments in motion sensors. Some have a sliding cover. Others have a screw-on lid. Identify the type by examining the sensor carefully. If it’s a sliding cover, push it gently to one side. For screw-on lids, use a screwdriver to open. Always note the orientation of the battery before removal. This helps in placing the new battery correctly.
Credit: www.youtube.com
Step-by-step Battery Replacement
Changing the battery in your motion sensor doesn’t have to be a frustrating task. With clear steps, you can replace it quickly and get your sensor back to working perfectly. Let’s break down the process into simple actions that anyone can follow.
Removing The Old Battery
Start by locating the battery compartment on your motion sensor. It’s usually on the back or underside of the device and may have a small latch or cover.
Use your fingers or a small screwdriver to open the compartment gently. Be careful not to force it, as some covers can be delicate.
Once open, note how the old battery sits inside. This will help you place the new one correctly later. Remove the old battery carefully—sometimes it can be stuck slightly due to battery corrosion or adhesive.
Inserting The New Battery
Check the type and size of the battery you need before buying. Using the wrong battery can damage the sensor or cause it to malfunction.
Place the new battery in the same orientation as the old one, matching the positive (+) and negative (–) sides. Double-check the fit to ensure it sits snugly inside the compartment.
It’s a good idea to test your motion sensor at this point before closing the cover. This saves you from reopening it if something isn’t working.
Securing The Battery Compartment
After confirming the sensor powers on, close the battery compartment carefully. Make sure the cover clicks or locks into place securely.
If your sensor has a screw or latch, tighten or fasten it without overdoing it—too much pressure can break the compartment.
Finally, test the sensor’s function by walking in front of it to see if it detects motion promptly. This quick check ensures your battery replacement was successful and the sensor is ready to use.
Testing The Motion Sensor After Replacement
Testing the motion sensor after replacing the battery ensures it works correctly. This step confirms the sensor detects motion and triggers the connected device. Checking the sensor helps avoid future problems and saves time.
Functionality Check
Start by powering the sensor on. Walk slowly in front of it to see if it detects movement. The sensor’s light or connected device should activate. Wait a few seconds to check if it turns off after no motion. Repeat this test from different angles. This confirms the sensor covers the desired area.
Troubleshooting Common Issues
If the sensor does not respond, check the battery orientation. Ensure the battery fits snugly in its compartment. Clean the battery contacts gently with a dry cloth. Make sure no wires are loose or damaged. Reset the sensor by turning it off and on again. Check if the sensor’s settings need adjustment for sensitivity or range. Replace the battery with a fresh one if problems continue.
Tips For Extending Battery Life
Extending the battery life of your motion sensor saves you time and money. It also ensures your device works reliably when you need it most. Small adjustments and regular care can make a big difference in how long your sensor’s battery lasts.
Optimizing Sensor Settings
Adjusting the sensitivity and detection range of your motion sensor can reduce unnecessary battery drain. If your sensor is too sensitive, it may activate frequently from minor movements like pets or passing cars.
Try lowering the sensitivity or shortening the detection range to focus only on important areas. Also, set the sensor’s active time to the minimum needed—do you really need it to stay on for several minutes after detecting motion?
Have you checked if your sensor has a low-power or eco mode? Activating these settings can help your battery last much longer without sacrificing performance.
Regular Maintenance
Keeping your motion sensor clean and free of dust can improve its efficiency and reduce battery strain. Dust buildup can cause false triggers, leading the sensor to activate unnecessarily.
Check the sensor and its battery contacts regularly. Corrosion or loose connections can waste power and reduce battery life.
Replacing batteries before they are completely drained prevents damage to the sensor and ensures consistent performance. Have you noticed your sensor’s response slowing down? It might be time for a quick battery check.

Credit: www.amazon.com
Frequently Asked Questions
How Do I Open The Motion Sensor To Replace The Battery?
Most motion sensors have a removable cover or back panel. Use a screwdriver or press tabs to open it gently. This exposes the battery compartment for easy replacement.
What Type Of Battery Does A Motion Sensor Use?
Motion sensors commonly use AA, AAA, or coin cell batteries. Check your device’s manual or battery compartment label to find the exact battery type needed.
How Often Should I Change The Motion Sensor Battery?
Typically, change batteries every 6 to 12 months. Battery life depends on usage and sensor model. Replace sooner if the sensor shows weak signals or malfunctions.
Can I Use Rechargeable Batteries In Motion Sensors?
Yes, rechargeable batteries can work if they match the required voltage. However, their capacity may be lower, so expect shorter sensor runtime between charges.
Conclusion
Changing the battery in your motion sensor is simple and quick. Just open the cover, remove the old battery, and insert a new one. Make sure the battery fits correctly to avoid problems. Regular checks keep your sensor working well.
A fresh battery helps your device detect motion accurately. This small task saves you from bigger issues later. Stay safe and keep your motion sensor active with fresh power. Now, you are ready to change the battery anytime it runs low.


